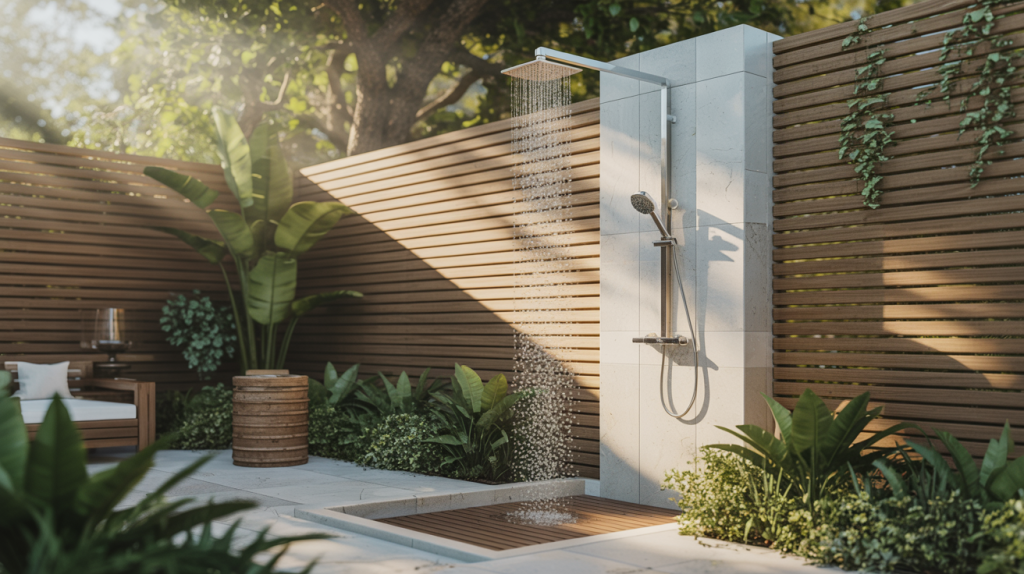
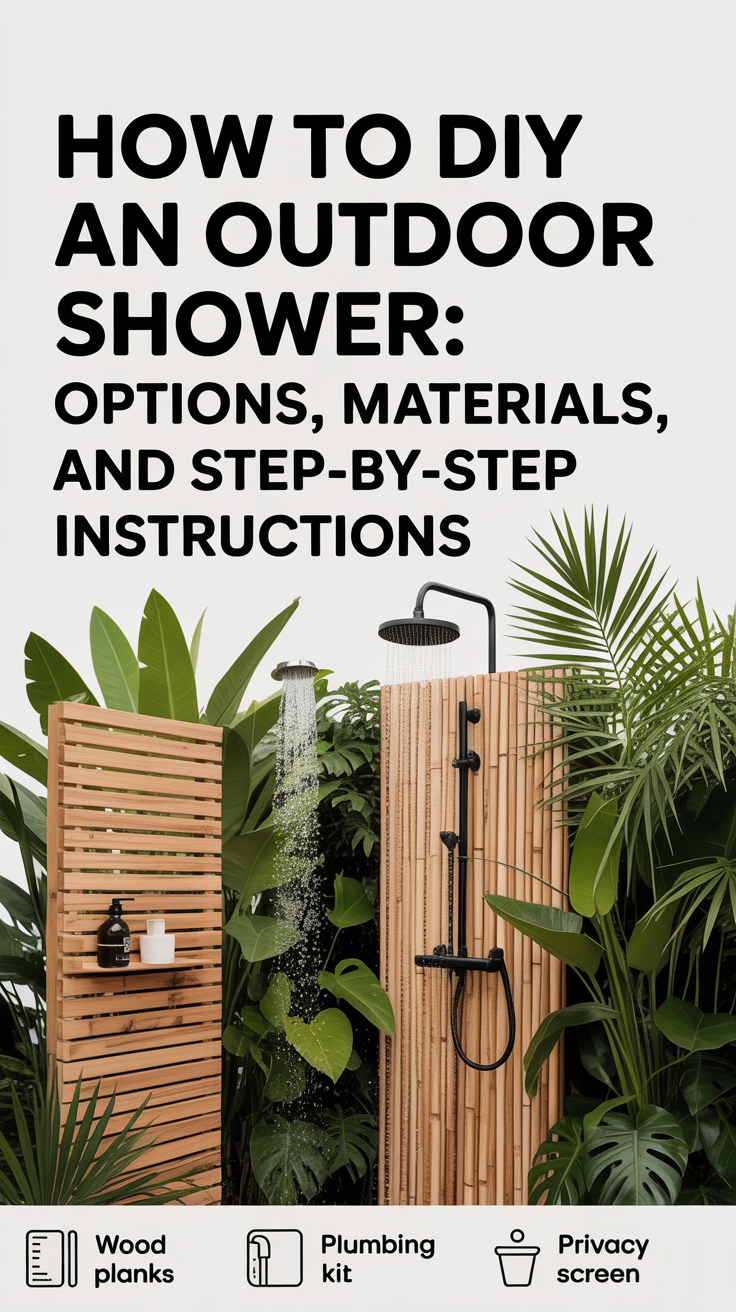
There is something undeniably luxurious about taking a shower outdoors. Whether you are rinsing off the salt and sand after a long day at the beach, washing away the dirt from an afternoon of gardening, or simply enjoying the refreshing sensation of warm water under an open sky, an outdoor shower can transform your backyard into a personal oasis. Building a do-it-yourself outdoor shower is a rewarding project that not only enhances your outdoor living space but also adds practical value to your home. It keeps muddy footprints out of the house, provides a convenient spot to bathe pets, and offers a unique way to connect with nature.
While the idea of constructing an outdoor shower might seem daunting at first, it is entirely achievable for the average homeowner with basic DIY skills. The beauty of this project lies in its versatility. You can build a simple, budget-friendly setup using a garden hose and a privacy screen, or you can invest in a permanent, plumbed structure with hot and cold water, custom tile work, and high-end fixtures. The choices are virtually limitless, allowing you to tailor the design to your specific needs, aesthetic preferences, and budget.
In this comprehensive guide, we will explore everything you need to know to successfully plan and build your own outdoor shower. We will cover the essential considerations, from choosing the right location and ensuring proper drainage to navigating plumbing options and selecting durable materials. Furthermore, we will delve into several distinct build options, providing detailed overviews of how to construct a rustic cedar enclosure, a modern corrugated metal shower, a simple solar-heated setup, and a luxurious stone and tile oasis. By the end of this article, you will be equipped with the knowledge and inspiration to turn your outdoor shower dreams into reality.
Essential Planning Considerations
Before you purchase materials or start digging holes, careful planning is crucial to ensure the success and longevity of your outdoor shower. Taking the time to evaluate your site, understand your plumbing needs, and plan for proper drainage will save you time, money, and frustration in the long run.
Choosing the Perfect Location
The location of your outdoor shower will dictate many of the subsequent design and construction decisions. When selecting a spot, consider privacy, accessibility, and the natural elements. Ideally, you want a location that offers a degree of natural seclusion, perhaps shielded by existing trees, shrubs, or the architecture of your home. However, you must also balance privacy with the desire for sunlight, as a sunny spot will help keep the shower area warm and dry out the enclosure between uses, preventing mold and mildew growth.
Accessibility is another key factor. If the primary purpose of the shower is to rinse off after swimming in a pool, locating it near the pool deck makes the most sense. If it is intended for post-gardening cleanup, placing it near the garden or a mudroom entrance is practical. Additionally, consider the proximity to your home’s existing plumbing. Tapping into indoor water lines is significantly easier and less expensive if the outdoor shower is located on an exterior wall that shares plumbing with an indoor bathroom, kitchen, or laundry room.
Navigating Plumbing Options
The plumbing setup you choose will heavily influence the complexity and cost of your project. There are three main approaches to plumbing an outdoor shower, ranging from simple and temporary to complex and permanent.
The simplest and most budget-friendly option is the garden hose connection. This setup involves attaching a showerhead fixture directly to a standard garden hose, which is then connected to an outdoor spigot. While this method is incredibly easy to install and requires no permanent plumbing alterations, it typically only provides cold water. Some homeowners mitigate this by using a long, dark-colored hose left in the sun to passively heat the water, but the supply of warm water is limited.
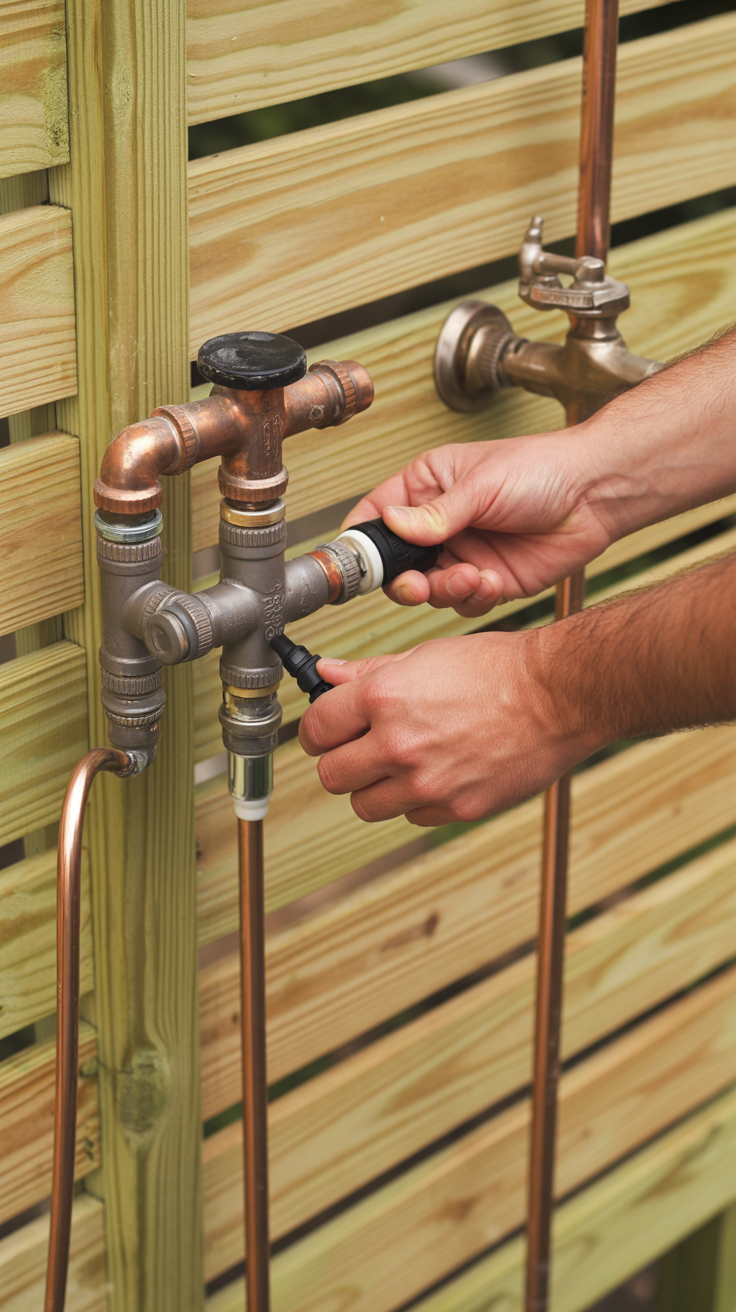
For a more comfortable experience, you can install dedicated hot and cold water lines. This requires tapping into your home’s existing water supply and running pipes through the exterior wall to the shower location. This method provides the same temperature control and water pressure as an indoor shower. However, it is more labor-intensive and may require the expertise of a licensed plumber, especially if you need to navigate complex indoor pipe routing or ensure compliance with local building codes.
A third option, which bridges the gap between simplicity and comfort, is the solar-heated shower. These systems typically consist of a dark-colored reservoir or a coil of tubing that absorbs heat from the sun to warm the water. Solar showers can be standalone units or integrated into a custom build. They are an excellent eco-friendly choice and are particularly well-suited for off-grid locations or areas where running hot water lines is impractical.
The Importance of Proper Drainage
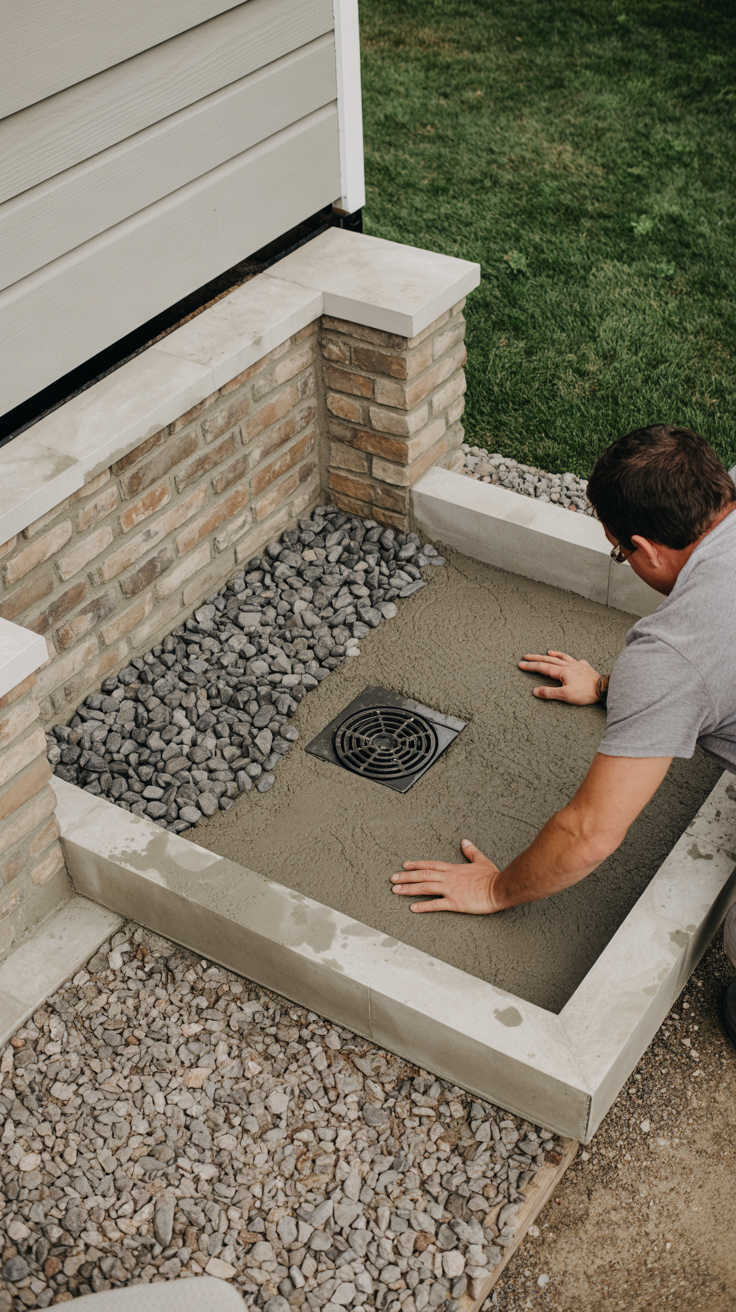
Effective drainage is arguably the most critical aspect of an outdoor shower build. Without a proper way for wastewater to escape, you risk creating a muddy, slippery mess, damaging your home’s foundation, and violating local environmental regulations. The type of drainage system you need depends on your soil type, the volume of water you anticipate using, and local building codes.
The most common and eco-friendly drainage method is natural percolation, often facilitated by a French drain or a dry well. A French drain involves digging a trench, lining it with landscaping fabric, laying a perforated pipe, and filling the trench with gravel. This system directs water away from the shower area and allows it to slowly seep into the surrounding soil. A dry well operates on a similar principle but consists of a deeper pit filled with gravel or a specialized plastic basin that collects and disperses the water.
If your soil has poor drainage (such as heavy clay) or if you plan to use the shower frequently with soaps and shampoos, you may need to connect the shower drain to your home’s wastewater system or a dedicated greywater system. Connecting to the municipal sewer or a septic tank ensures that all wastewater is properly treated, but it is the most complex and expensive option, often requiring professional installation and permits. Always check with your local municipality regarding regulations for outdoor shower drainage, as rules vary significantly by region.
Selecting Durable Materials
An outdoor shower is exposed to the elements year-round, so selecting materials that can withstand moisture, sunlight, and temperature fluctuations is paramount. The materials you choose will also define the aesthetic of your shower, whether you prefer a rustic, natural look or a sleek, modern design.
For the structural framing and enclosure, naturally rot-resistant woods like cedar, redwood, or teak are excellent choices. These woods contain natural oils that protect them from decay and insect damage. Pressure-treated lumber is a more budget-friendly alternative for framing, but it should be properly sealed or painted to extend its lifespan. Composite decking materials, made from a blend of wood fibers and recycled plastic, offer exceptional durability and require minimal maintenance, making them an increasingly popular choice for both flooring and privacy walls.
When it comes to hardware and fixtures, opt for materials that resist corrosion. Stainless steel, brass, and galvanized galvanized pipe are all robust options. Avoid cheap plastic fixtures that can easily crack or degrade under UV exposure. For the flooring, materials that provide slip resistance and facilitate drainage are ideal. Crushed stone, river rock, composite decking with spacing between the boards, or textured outdoor tiles are all suitable choices.
Option 1: The Rustic Cedar Enclosure
A cedar enclosure is a classic choice for an outdoor shower, offering a timeless, natural aesthetic that blends seamlessly into almost any backyard landscape. Cedar is naturally resistant to rot, decay, and insects, making it an ideal material for wet environments. This build option focuses on creating a freestanding or house-mounted privacy enclosure with a slatted floor for drainage.
Materials and Tools Required
To build a standard cedar enclosure, you will need pressure-treated 4×4 posts for the structural supports, cedar 2x4s for the framing rails, and cedar 1×4 or 1×6 boards for the privacy slats and flooring. You will also need concrete mix for setting the posts, crushed gravel for the drainage base, and exterior-grade stainless steel or coated deck screws. Essential tools include a post-hole digger, a circular saw or miter saw, a drill/driver, a level, a tape measure, and a shovel.
Step-by-Step Construction
The first step is to prepare the site and establish the drainage base. Excavate the shower area to a depth of about 8 to 12 inches. Fill the excavated area with crushed gravel or river rock to create a permeable base that allows water to drain away quickly. If you are installing a French drain or a plumbed drain, this must be done before adding the gravel base.
Next, lay out the locations for your corner posts. A typical outdoor shower is roughly 3 feet by 3 feet or 4 feet by 4 feet. Use a post-hole digger to dig holes at least 24 to 30 inches deep, depending on your local frost line. Insert the pressure-treated 4×4 posts into the holes, ensuring they are perfectly plumb (vertical) using a level. Fill the holes with concrete mix, following the manufacturer’s instructions, and allow the concrete to cure completely.
Once the posts are set, you can begin framing the enclosure. Measure and cut the cedar 2x4s to create horizontal rails between the posts. You will typically need a bottom rail, a middle rail, and a top rail for each wall section. Attach the rails to the posts using exterior-grade screws, ensuring they are level.
With the framing in place, it is time to attach the cedar privacy slats. Cut the cedar 1×4 or 1×6 boards to your desired height. Starting from one corner, attach the slats vertically to the horizontal rails. To ensure consistent spacing and allow for airflow, use a spacer block (such as a piece of scrap wood or a large nail) between each slat. This slatted design provides privacy while preventing the enclosure from feeling claustrophobic and allowing the wood to dry out.
For the flooring, you can build a removable cedar duckboard. Construct a simple frame using cedar 2x4s and attach cedar slats across the top, leaving a small gap between each board for water to pass through. This duckboard can rest directly on the gravel base, providing a comfortable, slip-resistant surface that is easy to remove for cleaning or maintenance.
Finally, install your chosen plumbing fixtures. If you are using a simple hose connection, mount the showerhead and valve assembly to one of the posts or a dedicated mounting block. If you are running permanent plumbing, ensure the pipes are securely strapped to the framing and that all connections are watertight before turning on the supply.
Option 2: The Modern Corrugated Metal Shower
For a more contemporary, industrial, or rustic-chic look, corrugated metal is an excellent material for an outdoor shower enclosure. It is incredibly durable, relatively inexpensive, and provides complete visual privacy. When paired with warm wood accents, corrugated metal creates a striking visual contrast that elevates the design of your outdoor space.
Materials and Tools Required
This build requires pressure-treated 4×4 posts for the main supports, pressure-treated 2x4s for the framing, and panels of corrugated galvanized steel or Galvalume. You will also need specialized roofing screws with rubber washers to attach the metal panels, concrete mix for the posts, and materials for your chosen drainage base. The necessary tools include a post-hole digger, a drill/driver, a level, a circular saw (for the wood), and tin snips or a metal-cutting blade for your saw to cut the corrugated panels.
Step-by-Step Construction
Begin by preparing the site and installing the drainage system, just as you would for the cedar enclosure. Excavate the area and fill it with a deep layer of crushed gravel to facilitate natural percolation.
Set the pressure-treated 4×4 posts in concrete, ensuring they are plumb and properly spaced. The spacing of the posts will depend on the width of your corrugated metal panels. It is often easiest to design the dimensions of the shower around the standard width of the panels (typically 24 to 36 inches) to minimize the need for cutting the metal.
Construct the horizontal framing using pressure-treated 2x4s. You will need horizontal rails at the top, bottom, and middle of the posts to provide adequate support for the metal panels. Ensure the framing is square and level.
Cutting corrugated metal requires care and the right tools. If you need to trim the panels to size, use tin snips for small cuts or a circular saw equipped with a metal-cutting blade for longer, straighter cuts. Always wear heavy-duty gloves and safety glasses when handling and cutting sheet metal, as the edges are extremely sharp.
Attach the corrugated metal panels to the wooden framing using roofing screws with rubber washers. The rubber washers are crucial as they seal the hole created by the screw, preventing water from seeping into the wood framing and causing rot. Drive the screws through the “valleys” (the flat parts) of the corrugation where the metal meets the wood rails. Overlap the edges of the panels by at least one corrugation to ensure complete privacy and a seamless look.
To soften the industrial appearance of the metal, consider adding wood accents. You can cap the top of the metal panels with a cedar or redwood rail, or build a wooden duckboard floor. The combination of the cool metal and warm wood creates a balanced and visually appealing design. Install your plumbing fixtures, ensuring that any pipes passing through the metal panels are properly sealed with silicone caulk to prevent leaks and sharp edges from damaging the pipes.

Option 3: The Eco-Friendly Solar-Heated Setup
If you want the luxury of warm water without the expense and hassle of running permanent hot water lines from your house, a DIY solar-heated shower is the perfect solution. This option harnesses the power of the sun to heat water stored in a reservoir or a coil of tubing, making it an environmentally friendly and cost-effective choice, particularly for sunny climates or off-grid cabins.
Materials and Tools Required
The core component of a DIY solar shower is the heating element. A popular and inexpensive method is to use a coil of black polyethylene (poly) tubing or PEX pipe. You will also need a sturdy wooden or metal frame to support the tubing, a water source (like a garden hose), a showerhead, a mixing valve (optional but recommended to prevent scalding), and various plumbing fittings and adapters. Tools required include a drill, a saw for building the frame, and wrenches for tightening plumbing connections.
Step-by-Step Construction
The first step is to construct the solar collector. The most straightforward approach is to build a shallow wooden box and paint the inside flat black to maximize heat absorption. Coil 50 to 100 feet of black poly tubing or PEX pipe tightly inside the box. The longer the tubing, the more water it will hold and heat. Secure the coiled tubing to the back of the box using pipe straps or zip ties. For increased efficiency, you can cover the front of the box with a sheet of clear acrylic or glass, creating a greenhouse effect that traps the heat.
Mount the solar collector in a location that receives direct sunlight for the majority of the day. This could be on the roof of the shower enclosure, on a nearby fence, or on a dedicated stand. The collector must be positioned higher than the showerhead to utilize gravity feed, or you will need to rely on the pressure from your garden hose to push the water through the system.
Connect the plumbing. Attach one end of the black tubing coil to your cold water source (e.g., a garden hose connected to an outdoor spigot). Attach the other end of the coil to the showerhead assembly. As water flows from the hose into the black tubing, it sits in the sun and absorbs heat. When you turn on the shower, the solar-heated water is pushed out.
Because solar-heated water can reach dangerously high temperatures on a hot day, it is highly recommended to install a mixing valve. A mixing valve allows you to blend the hot water from the solar coil with cold water directly from the hose, giving you control over the final shower temperature. This requires plumbing a bypass line that runs cold water directly to the valve, alongside the hot water line coming from the solar collector.
Build a simple privacy enclosure around the shower area using materials like bamboo screens, lattice panels, or repurposed pallets. Ensure the base has adequate drainage, using a gravel pit or a simple wooden duckboard over permeable soil. This setup provides a surprisingly effective and entirely off-grid warm shower experience.
Option 4: The Luxurious Stone and Tile Oasis
For those who view the outdoor shower as an extension of their home’s architecture and a true luxury amenity, a custom stone and tile build is the ultimate choice. This option requires more advanced masonry and tiling skills, as well as a larger budget, but the result is a permanent, spa-like retreat that significantly enhances the value and appeal of your property.
Materials and Tools Required
This complex build requires materials for a solid foundation, such as concrete blocks or a poured concrete slab. You will need cement backer board, waterproofing membrane (like Schluter-Kerdi), thin-set mortar, natural stone veneer or outdoor-rated porcelain tiles, and exterior-grade grout. For the plumbing, you will need copper or PEX piping, a high-quality shower valve, and a premium showerhead. Essential tools include a wet saw for cutting tile and stone, a masonry trowel, a grout float, a level, and standard plumbing tools.
Step-by-Step Construction
A stone and tile shower requires a rigid, unyielding foundation to prevent the mortar and grout from cracking. Begin by excavating the area and pouring a reinforced concrete slab, ensuring it is sloped slightly (about 1/4 inch per foot) toward the drain location. If you are building walls, construct them using concrete blocks or sturdy wood framing covered with exterior-grade plywood.
Install the plumbing rough-in before proceeding with the walls. Run the hot and cold water lines to the desired valve location and install the shower valve body. Ensure all connections are pressure-tested and leak-free. If you are installing a plumbed drain, set the drain assembly into the concrete slab.
Next, prepare the surfaces for tiling. Attach cement backer board to the walls using specialized screws. Tape the seams with fiberglass mesh tape and cover them with thin-set mortar. To ensure the shower is completely waterproof and to protect the underlying structure, apply a waterproofing membrane over the backer board and the concrete floor, following the manufacturer’s precise instructions.
Once the waterproofing is complete, you can begin the tiling process. Mix the thin-set mortar and apply it to the walls using a notched trowel. Press your chosen natural stone veneer or porcelain tiles into the mortar, using spacers to maintain even grout lines. Tiling an outdoor shower is similar to tiling an indoor bathroom, but it is crucial to use materials specifically rated for exterior use and freeze-thaw conditions if you live in a colder climate.
After the thin-set has cured (usually 24 to 48 hours), apply the exterior-grade grout to the joints using a grout float. Wipe away the excess grout with a damp sponge and allow it to dry. Finally, apply a high-quality penetrating sealer to the stone and grout to protect them from moisture, stains, and efflorescence.
Install the final plumbing trim, including the showerhead, handle, and escutcheon plate. Add luxurious finishing touches, such as a built-in stone bench, recessed niches for toiletries, and ambient outdoor lighting, to complete your backyard spa.
Winterization and Maintenance
To protect your investment and ensure your outdoor shower functions flawlessly year after year, proper maintenance and winterization are essential, especially in regions that experience freezing temperatures.
If you live in a climate where temperatures drop below freezing, you must winterize your plumbed outdoor shower to prevent pipes from bursting. The most critical step is to shut off the water supply to the outdoor lines from inside the house. Once the supply is off, open the outdoor shower valves to allow any remaining water to drain out. To be absolutely certain the lines are clear, use an air compressor to blow compressed air through the pipes, forcing out any residual moisture. Remove the showerhead and store it indoors to prevent the internal components from freezing and cracking.
For the enclosure, regular maintenance depends on the materials used. Cedar and other woods should be cleaned annually with a mild wood cleaner and a soft brush to remove dirt and mildew. Applying a fresh coat of water-repellent sealer or wood stain every few years will help maintain the wood’s color and protect it from UV damage. Corrugated metal requires very little maintenance, but you should periodically check the rubber washers on the screws to ensure they have not degraded and replace them if necessary. For stone and tile showers, clean the surfaces regularly with a non-abrasive cleaner and reapply the penetrating sealer as recommended by the manufacturer to keep the grout and stone looking pristine.
Building a DIY outdoor shower is a project that offers immense satisfaction and tangible rewards. Whether you opt for the rustic charm of a cedar enclosure, the industrial edge of corrugated metal, the eco-conscious ingenuity of a solar setup, or the opulent beauty of custom stone and tile, the key to success lies in careful planning, selecting the right materials, and executing the construction with patience and attention to detail. By following the guidelines and exploring the options outlined in this comprehensive guide, you can create a stunning and functional outdoor shower that will serve as a refreshing retreat in your own backyard for years to come.