
Do you also flip through interior magazines and find yourself drooling over perfectly styled, floor-to-ceiling built-ins? Ahem, you’re not alone. Those clean lines, symmetrical shelves, and tucked-away storage always make a home feel elevated and intentional. The good news? You don’t need a custom carpenter or a massive renovation budget to get that designer look.
With a little creativity, IKEA cabinetry, and some molding magic, you can create your own stunning “built-ins” that look fully custom—but at a fraction of the price. The secret lies in combining ready-made IKEA pieces with smart trim work and a little DIY effort. It’s approachable, budget-friendly, and totally weekend doable for even beginner DIYers.
Today I want to walk through everything you need to know to fake the built-in look—from planning and product selection to painting and styling. Whether you’re transforming a blank living room wall, upgrading a home office, or adding storage to your dining area, this project will help you achieve that high-end, designer feel without blowing your budget.
Why Built-Ins Are Worth the Hype
There’s a reason built-ins are a staple in nearly every professionally designed home. They do more than just hold books or hide clutter. Built-ins bring architectural structure to a space. They frame walls, add balance, and give every item in your room a designated home.
A true custom built-in project, though, can cost thousands of dollars. Between cabinetry, millwork, and labor, even a small wall of shelving can easily exceed $4,000 to $6,000. For most homeowners—especially those in their 30s balancing budgets, kids, and weekend schedules—that’s just not realistic. That’s where IKEA hacks come in.
IKEA cabinets and shelving offer the perfect foundation: clean lines, modular sizing, and endless combinations. With the right trim, paint, and finishing touches, they can mimic the look of a bespoke installation that looks like it’s always been there.
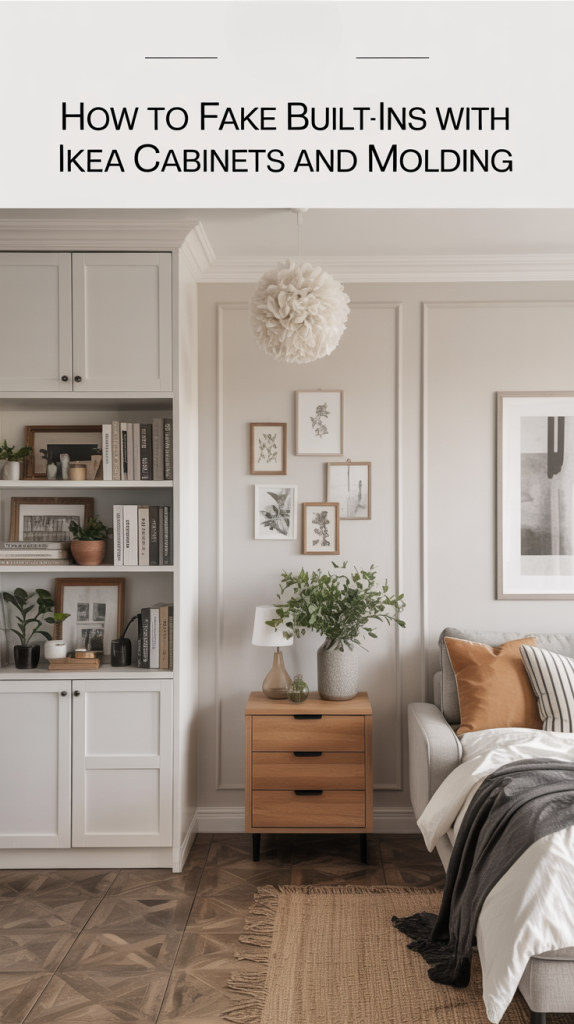
Imagine transforming that awkward empty wall in your living room into a sleek media unit with hidden storage. Or turning your home office into a magazine-worthy workspace surrounded by cabinetry that fits like a glove. The result is a functional, beautiful statement piece that looks far more expensive than it really is.
Step 1: Choose Your IKEA Base
Start by selecting the right IKEA pieces for your project. Think about the function of your built-ins. Do you need closed storage to hide clutter, or open shelving for decor and books?
Here are some of the best IKEA lines for built-in hacks:
Besta: Ideal for low-profile media units or sleek, modern storage under a TV. The clean fronts and modular shapes make them easy to customize.
Sektion: These kitchen cabinets are incredibly versatile. Their depth options, adjustable shelving, and durable frames make them perfect for living rooms, offices, or dining rooms.
Billy: The cult-favorite bookcase that’s practically made for built-in transformations. With extension units and glass doors available, Billy can stretch all the way to your ceiling.
Pax: Best for wardrobes or storage walls in bedrooms. Once framed out with trim, they look completely custom-made.
Mix and match pieces depending on your needs. For instance, use Sektion base cabinets for closed storage below, and stack Billy bookcases above for open shelving. The contrast of solid and airy adds dimension and practicality.
Before you buy, take measurements of your wall. Don’t forget to factor in space for molding, baseboards, or trim that you’ll add later.
Step 2: Plan and Visualize Your Layout
Once you know which IKEA pieces you’ll use, it’s time to plan your layout. Measure your wall width and height, and sketch a rough drawing on paper. If you’re more visual, use painter’s tape on the wall to mark where your cabinets will go.
Ask yourself:
Do you want your built-ins to span the full wall or stop partway?
Will they reach the ceiling or sit below crown molding?
Is there a window, fireplace, or TV you want to frame?
For a symmetrical, designer look, make sure your layout feels balanced. If your space isn’t perfectly square (and most aren’t), leave a small gap between the cabinets and the walls. You can fill those later with MDF strips or molding to give a flawless, fitted finish.
If you’re unsure about the proportions, browse inspiration photos online or use IKEA’s online planning tools. Visualizing your space before you start building will save you time and frustration later.
Step 3: Assemble Your Cabinets
Assemble your IKEA units following the instructions, but don’t secure them to the wall yet. It’s easier to make small adjustments to your layout once everything is built.
Position the cabinets along your wall, making sure they’re evenly spaced and centered. Use a level to check alignment, and slide shims underneath if your floors aren’t perfectly flat. (Uneven floors are the rule, not the exception!)
If you’re joining multiple cabinets together, clamp them side by side and screw through the side panels to connect them. This ensures the fronts align perfectly and creates the appearance of one seamless piece.
At this stage, step back and look at the setup. Imagine it with trim, paint, and hardware. Does it feel balanced? If not, make small spacing adjustments before moving on.
Step 4: Build the Base Platform
Professional built-ins rarely sit directly on the floor. Instead, they’re raised slightly on a base or toe kick, which makes the piece feel more integrated into the room’s architecture.
To build your base:
Cut 2x4s to the width and depth of your cabinet footprint.
Screw them together into a rectangular frame.
Secure the base to the wall, making sure it’s level and anchored into studs.
Place your cabinets on top and check again for level.
This small step makes a huge difference. Not only does it elevate the look, but it also allows you to add baseboards later that blend seamlessly with the rest of the room.

Step 5: Secure the Cabinets and Create Stability
Once you’re happy with the placement, it’s time to make things permanent. Use long screws through the cabinet backs into wall studs to anchor them securely. If you’re building a tall unit, like a floor-to-ceiling bookcase, secure it at the top as well for safety.
To make multiple cabinets feel like one cohesive piece, attach them together through the side panels. Check for alignment at every step. It’s worth taking your time here — this is what creates that professional, built-in look.
If your design includes open shelving above base cabinets, use L-brackets or wood supports at the joints to keep everything aligned and strong.
Step 6: Add Filler Panels and Trim
This is where the transformation really starts. Trim and molding take your project from “IKEA assembly” to “custom carpentry.”
Start by cutting filler panels (using MDF, plywood, or trim boards) to fill any gaps between the cabinets and the wall. Attach them with finishing nails and construction adhesive. Once those gaps are filled, it’s time to add decorative trim.
For the bottom, attach baseboard molding that matches your existing room trim. For the top, add crown molding or a simple flat board to connect the cabinetry to the ceiling. If you’re using bookcases, you can even add an extra shelf or molding strip to close any remaining gaps.
Caulk every seam where the cabinets meet the trim or wall. This step can’t be skipped — caulking is what gives your project that smooth, continuous look that screams “custom.” Use a paintable caulk and smooth it with a damp finger or a caulk tool.
Step 7: Prime and Paint
Now comes the most satisfying part — painting everything to match. This step is what visually ties the IKEA units, filler panels, and trim together into one unified structure.
Lightly sand the surfaces, especially any laminate finishes, and wipe away dust. Apply a bonding primer, like Zinsser BIN or Sherwin Williams Extreme Bond, to help the paint adhere to IKEA’s slick surfaces.
Once the primer dries, paint everything — cabinets, trim, filler panels — in a single color. Satin or semi-gloss finishes work best for durability and easy cleaning.
For a built-in that blends beautifully with your walls, paint the cabinetry the same color as your room. This creates an uninterrupted, architectural feel. If you want more drama, opt for a contrasting color — think deep green, navy, or charcoal. These moody hues add instant sophistication.
Step 8: Add Countertops, Hardware, and Finishing Touches
If your design includes a row of lower cabinets, consider topping them with a counter. You can use a wood slab, butcher block, or even MDF painted to match. This gives your unit a polished, finished look.
Add hardware that suits your design style — brass knobs for a modern-traditional look, matte black pulls for something more contemporary, or mixed metals for a layered, designer vibe.
At this stage, you can also add lighting. Small puck lights, LED strips, or even mounted sconces take your faux built-ins to another level. Lighting not only makes your shelves glow but also adds that boutique-style warmth you see in high-end interiors.
Step 9: Style Your Shelves Like a Designer
Once everything is dry and installed, it’s time to style your built-ins. This step turns your project from purely functional to magazine-worthy.
The key is balance. Mix books with decorative objects, framed photos, vases, and baskets. Use a combination of heights, shapes, and textures. For example, layer a stack of coffee table books, top it with a ceramic vase, and place a small piece of art behind it.
Add greenery or trailing plants for softness. A touch of life instantly breaks up the structure and keeps the space from feeling too stiff.
And remember — less is more. Leave negative space for the eye to rest. A curated shelf always looks more intentional than one stuffed to the brim.
Step 10: Budget Breakdown and Real Cost Comparison
The beauty of this project is how affordable it is compared to true custom cabinetry. Here’s a general idea of what you might spend:
IKEA Cabinets or Bookcases: $400–$700
Trim, Molding, and Lumber: $150–$200
Paint and Primer: $75–$100
Hardware and Accessories: $25–$50
Miscellaneous Supplies (caulk, screws, filler): $25
Total Estimated Cost: $700–$1,100
A custom carpenter could easily quote you $4,000–$8,000 for the same look. That’s a massive savings, and you’ll get the pride of having done it yourself.
To save even more, check IKEA’s “As-Is” section for discounted pieces, or repurpose old cabinets with a fresh coat of paint.

Step 11: Try These Built-In Variations
Once you’ve mastered the technique, you can apply it anywhere in your home. Some ideas include:
Living Room Media Wall: Use Besta units under a mounted TV, flanked by tall Billy bookcases.
Home Office: Combine Sektion cabinets with open shelving for a custom desk setup.
Dining Room Buffet: Create a built-in sideboard for serving and storage.
Bedroom Wardrobe: Transform Pax units into a seamless wall of storage.
Hallway Drop Zone: Add trim and hooks above shallow cabinets for a mudroom feel.
Each space can have its own twist while still using the same basic IKEA + molding strategy.
Step 12: Common Mistakes to Avoid
Even simple projects can go sideways if you rush the details. Here are some pitfalls to watch for:
Skipping primer before painting IKEA laminate — the paint will peel.
Forgetting to level the base — your cabinet doors won’t align.
Neglecting caulk — visible gaps will give away the “DIY” look.
Using cheap trim that warps — MDF or pine works best.
Not planning for outlets — if your wall has plugs, cut access holes before securing cabinets.
Patience during the planning and finishing stages pays off in a flawless final result.
The Final Reveal
When you step back and look at your finished built-ins, you’ll be amazed at the transformation. What started as a few flat-pack cabinets now looks like a custom, high-end feature that belongs in a designer home.
It’s not just about looks, though. You’ve added valuable storage, reduced clutter, and given your space a sense of permanence. Even better, you’ve done it affordably and with your own two hands.
That’s the beauty of this kind of project — it’s creative, empowering, and incredibly satisfying. You don’t need to spend thousands or hire a crew. With a few tools, some patience, and a weekend or two, you can create something that feels like it’s always been a part of your home.
Built-ins instantly make any room feel finished. And now, you know how to fake it—beautifully.


One Comment
Built in