We’ve all been there—scrolling Pinterest or Instagram, saving dreamy living rooms, minimalist kitchens, or moody bedrooms with every intention of recreating the vibe in our own home. But when it comes time to actually put a room together, it can feel overwhelming. Suddenly, you’re drowning in swatches, screenshots, and second-guessing every furniture decision.
The truth is, turning a beautiful mood board into a real-life space takes more than a few good pins—it requires planning, patience, and a clear step-by-step process.
This guide walks you through exactly how to go from inspiration to installation—from collecting ideas to laying out furniture to actually making it all come together. Whether you’re starting with a blank canvas or trying to rework an existing room, this is your blueprint for designing a cohesive space from start to finish.
Step 1: Define the Room’s Purpose and Vibe
Before you buy a single pillow or open Pinterest, ask yourself: How do I want this space to function and feel?
Ask Yourself:
Who uses this room and for what?
Do I need it to be multifunctional?
Do I want it to feel cozy, elegant, playful, serene, or bold?
Example:
A guest bedroom might need to double as a home office, so you’ll want to balance comfort with function. A living room for a family of five should be durable and kid-friendly, not just aesthetic.
This helps narrow your vision before you go chasing trends that won’t work for your actual life.
Step 2: Gather Inspiration (The Right Way)
Now it’s time to go pin-crazy—but with intention.
Where to Look:
Pinterest: Create a dedicated board for your room.
Instagram: Use hashtags like #ModernFarmhouseLivingRoom or #JapandiBedroom.
Design blogs or YouTube tours
Retailer lookbooks (McGee & Co., West Elm, CB2, Article, etc.)
What to Save:
Entire rooms you love
Individual pieces (furniture, rugs, lighting)
Color schemes or wall treatments
Textures and materials you’re drawn to
💡 Pro Tip: Look for patterns in what you’re saving. Are you always drawn to boucle? Light wood tones? Black window frames? These trends will form your style foundation.
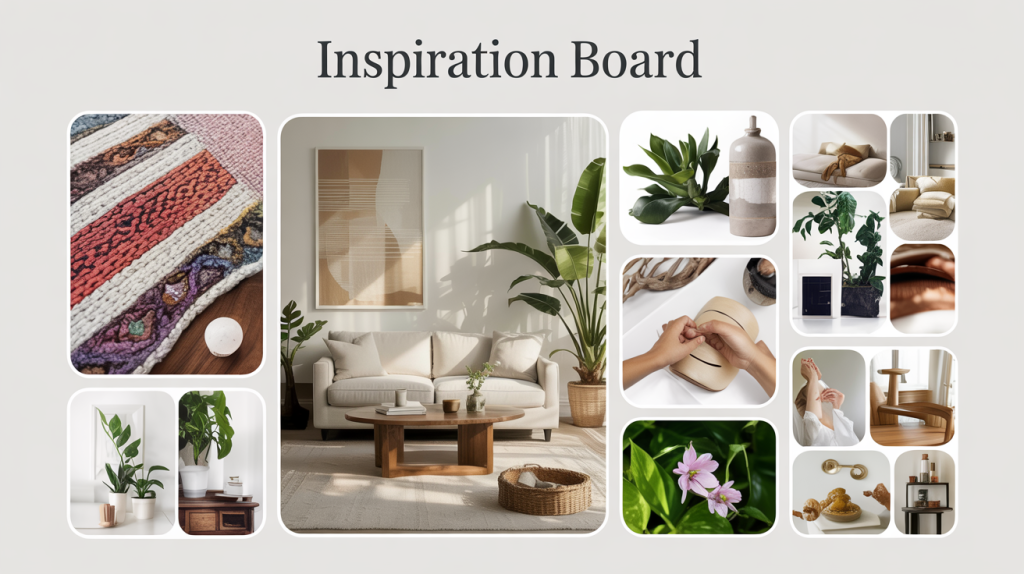
Step 3: Create a Mood Board
A mood board pulls your vision into one place—and keeps you from getting distracted at the store or online.
Tools You Can Use:
Canva: Use a free template to drag in photos and arrange your palette.
Milanote: A creative-friendly visual board perfect for organizing room ideas.
Pinterest Sections: You can subdivide your board by “Rugs,” “Lighting,” etc.
Good old-fashioned corkboard: Print photos, pin fabric samples, attach paint swatches.
What to Include:
2–3 main colors + 1–2 accents
Key furniture pieces
A mix of materials (wood, metal, textile, etc.)
Lighting inspiration
Decorative accents
Any architectural or wall design elements
Think of your mood board as a style contract with yourself. If something doesn’t fit the overall look, it doesn’t go in the room.
Step 4: Measure and Map Out the Room
This is where many DIY designers go wrong—buying things before knowing if they’ll actually fit.
What to Do:
Measure all walls, ceiling height, window and door placements, and any architectural quirks (like radiators or wall vents).
Draw the layout on graph paper or use a room planner app.
Layout Planning Tools:
Room Planner by Planner 5D
MagicPlan (uses your phone camera to generate layouts)
IKEA Home Planner
Spoak (paid but very beginner-friendly and design-focused)
Don’t forget to measure:
Walkways (aim for 30–36 inches minimum)
Distance between furniture and walls (at least 18 inches)
Rug sizing (should at least touch front legs of furniture)
💡 Pro Tip: Use painter’s tape on the floor to mock out furniture footprints before you buy.
Step 5: Choose a Color Palette and Stick to It
Color is one of the fastest ways to create a cohesive look—but it’s also one of the easiest places to go off-track.
Start With:
1 Neutral Base Color: White, beige, greige, soft gray
1–2 Main Colors: These dominate walls or furniture (ex: sage green, navy)
1–2 Accent Colors: Used in pillows, art, or accessories (ex: brass, blush, rust)
Keep undertones consistent. If you’re going with warm tones, keep your whites creamy, not blue-based. Use paint swatches and fabric samples to compare in natural light before committing.
Useful Color Tools:
Sherwin-Williams ColorSnap®
Benjamin Moore Personal Color Viewer
Coolors.co (for building palettes)
Step 6: Start With Big Pieces First
Now that you’ve mapped your layout and solidified your palette, it’s time to start selecting pieces—but do it in order.
Your Design “Hierarchy”:
Sofa, Bed, or Dining Table (Anchor furniture)
Rugs
Storage/Side Furniture (Media consoles, nightstands, bookcases)
Lighting
Textiles (Curtains, throw blankets)
Decor + Art
Why start with anchor pieces? Because they take up the most visual space—and often cost the most—so you want to build around them, not try to squeeze them in after the fact.
💡 Pro Tip: Don’t impulse-buy small decor until the major pieces are in place. Otherwise, you’ll end up with mismatched “filler” items that don’t serve the final look.
Step 7: Layer in Texture and Materials
Texture is what takes a room from good to designer-level. Without it, your space can fall flat.
Try to Mix:
Wood tones (avoid using only one type)
Metals (brass, matte black, chrome—just be consistent with finish)
Textiles (linen, leather, velvet, jute)
Glass, stone, or ceramics
You can have a neutral color palette and still have tons of visual interest if you layer materials well.
Step 8: Lighting Makes or Breaks It
Lighting isn’t just functional—it’s foundational to the mood and feel of the room.
Use the 3-Layer Rule:
Ambient: Overhead lighting (flush mount, chandelier, recessed)
Task: Table lamps, sconces, reading lamps
Accent: Picture lights, string lights, backlighting
You’ll want at least 3–5 light sources per room. Use dimmers wherever possible, and vary the height of your lights to create depth.
Lighting Favorites:
Article, CB2, West Elm, Etsy (for unique options)
Don’t forget warm light bulbs (2700K) for cozy glow
Step 9: Add Personality (Without Losing Cohesion)
A room should feel like you, not like a showroom. Once the basics are in, it’s time to add:
Art (skip generic prints—go for vintage, family photos, or framed textiles)
Books and coffee table stacks
Plants or greenery
Meaningful objects (souvenirs, heirlooms, ceramics, handmade items)
The key is to keep your color and material palette consistent, so even if you add quirky pieces, they still look intentional.
💡 Pro Tip: Group small items in 3s and use trays to avoid clutter.
Step 10: Final Styling and Room Reveal
Once your furniture is in and styled, step back and ask:
Is the space balanced (visually and functionally)?
Is there flow from one zone to another?
Are all the colors/materials/textures playing nicely together?
Does it feel like you?
If something feels off, go back to your mood board. You may have veered away from the original vibe—and that’s okay! Just tweak until it aligns again.
Last-Minute Styling Tips:
Fluff pillows, steam curtains, and roll rugs flat
Hang art at eye level (around 57–60″ from the floor to center)
Add fresh flowers or greenery before your “reveal”
Take before and after photos—they’ll surprise you!
Bonus: Tools That Make It Easier
Here’s a quick roundup of apps and tools that simplify the design process:
Mood Board & Visual Tools:
Canva
Milanote
Spoak (for mood boards, layouts, and shopping)
Layout & Measurements:
MagicPlan
Room Planner 3D
IKEA Home Planner
Paint & Color:
Sherwin-Williams ColorSnap
Benjamin Moore Color Portfolio
Coolors.co
Project Management:
Notion or Trello (for keeping track of your budget and to-do lists)
Google Sheets for shopping lists and expenses
Creating a beautifully designed room isn’t about copying someone else’s look—it’s about translating inspiration into your real life. When you approach design with a plan, from mood board to layout to finishing touches, you’ll not only create a room that looks good—but one that feels just right for you.
So go ahead, revisit your Pinterest board, build that mood board, and take it one step at a time. By the end, you won’t just have a room—you’ll have a space that reflects your story, your style, and your personality.
And that’s design done right.