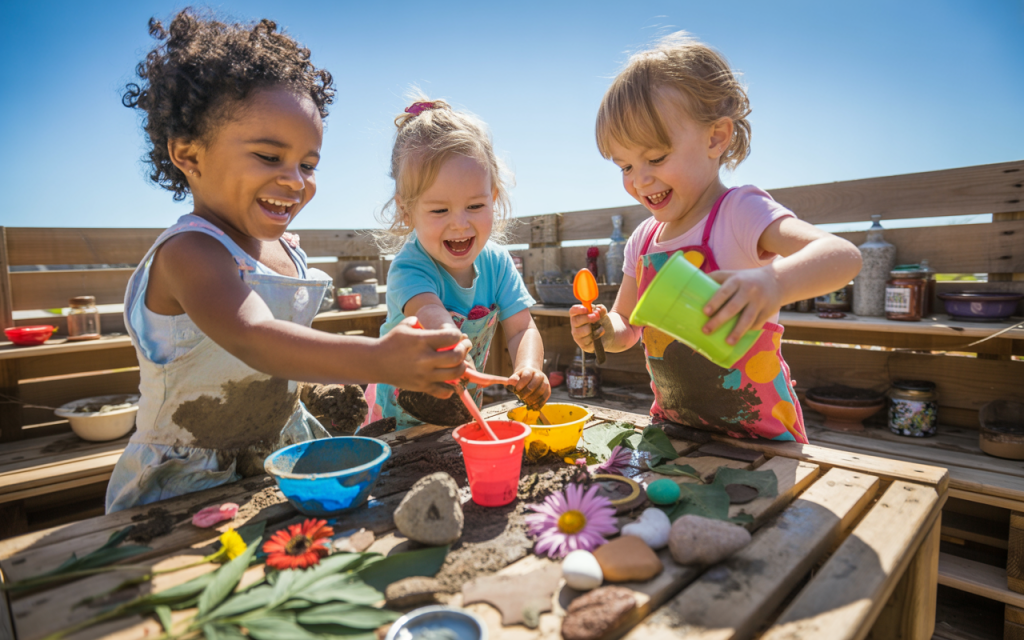
Creating the Ultimate Mud Kitchen: Where Imagination Meets Nature

Why Every Backyard Needs a Mud Kitchen
Before we dig into the setup, let’s talk about why mud kitchens are more than just a messy trend.
1. Sensory Development: Mixing mud, splashing water, and squishing natural materials supports sensory exploration and development.
2. Imaginative Play: Kids create elaborate pretend recipes, run “mud restaurants,” and invent their own worlds—all while learning through play.
3. Outdoor Engagement: Mud kitchens provide a reason to stay outdoors longer, helping kids connect with nature instead of screens.
4. Independence & Confidence: Mud kitchens encourage problem-solving, decision-making, and independent play. Plus, kids love having a space of their own.
Step-by-Step: How to Set Up an Outdoor Mud Kitchen
Step 1: Choose Your Location
Pick a spot in your backyard that checks these boxes:
Close to a water source or hose
Has partial shade for comfort
Can get dirty without worry
Has decent drainage (you don’t want a swamp)
If your yard doesn’t have grass, don’t worry—gravel, mulch, or even a patch of patio can still work with some creative setup.
Step 2: Choose Your Mud Kitchen Base
You don’t need to buy a pricey play kitchen to get started. Here are a few easy, budget-friendly ideas:
Old wooden pallets (stack and secure)
Upcycled tables or potting benches
Repurposed cabinets from a thrift store
Cinder blocks and wood planks (a great DIY base)
Make sure the structure is kid-height and stable. You can paint or seal the wood with outdoor-safe paint to make it weatherproof and colorful.
I will say if you’re not up for the project of building a mud kitchen, we purchased this kitchen at one point and have really enjoyed it. It has so many nice touches like the spiget, so fun!
Step 3: Add a Sink or Basin
For an authentic kitchen feel (and easy mud mixing), include at least one of the following:
An old metal or plastic bowl
A salvaged sink from a renovation
A large plastic tub for “dishwashing” or water play
If you want to go all out, you can connect a hose to a basic spout or use a camping water jug with a spigot for running water.

Step 4: Gather “Cooking” Supplies
Stock your mud kitchen with a mix of real and pretend kitchen tools. You’ll want a variety of textures and materials to spark creativity.
Here’s a checklist of favorite mud kitchen supplies:
Metal pots and pans
Wooden spoons and spatulas
Old muffin tins or baking trays
Measuring cups and plastic bowls
Funnels, whisks, and ladles
Empty spice jars or squeeze bottles
Mini colanders or strainers
Toy dishes and plastic teacups
Spray bottles or watering cans
Don’t use anything breakable—stick to thrift store finds or items you won’t miss if they get dirty.
Step 5: Add the Mud
You can let kids dig up a patch of yard, but for cleaner and safer play, consider creating a mud mixing bin:
Use a plastic tote or sandbox
Mix topsoil with a little water to create a scoopable, moldable mud
Store dry dirt nearby and let kids add water to their liking
Tip: Use peat-free soil or basic garden soil, and avoid anything with added fertilizers or chemicals.
Step 6: Decorate and Personalize
Make the kitchen feel like a real workspace with fun details:
Hang a chalkboard or sign (“Chef Lily’s Kitchen”)
Use hooks or nails for hanging utensils
Add small shelves for “spices” (fill jars with herbs or colored rice)
Include a garden area for growing edible herbs like mint or basil
Paint the counter or walls in bright colors
Add a toy oven, microwave, or shelf for pretend food storage
Personal touches make the mud kitchen feel special—and can encourage longer, deeper play.

Pro Tips for a Low-Maintenance Mud Kitchen
Rotate supplies weekly to keep things fresh.
Add a storage bin or basket for quick cleanup.
Create a “mud rules” sign (e.g., no real food, mud stays outside).
Use a plastic drop cloth or rubber mat underneath if your lawn is sensitive.
Set up a clean-up station nearby with a towel and bucket of clean water.
Best Mud Kitchen Tools & Supplies (Kid-Tested Favorites)
Want to skip the guesswork? Here’s a list of parent-approved and kid-loved supplies that take mud kitchens to the next level:
1. IKEA FLISAT Table
A short wooden table that’s perfect for little ones and easily modified into a sensory station.
2. Melissa & Doug Cooking Utentils
A durable metal set perfect for muddy dessert creation. Get it for $11 here.
3. Watering Can
Lightweight, colorful, and easy to refill for watering “recipes.” Get it for $13 here.
4. Pots and Pans
Again, opt for the metal pots for greater durability. Get this set for $17.
5. Sensory Sand Tools
Grab scoops, rakes, and sifters—ideal for digging and layering materials. Just $14 for the set here.
6. Recycled Squeeze Bottles
Perfect for pretend sauces or mixing in color with watered-down food coloring. Get them for $8 here.
7. Camp Jug with Spigot
Let your kids feel like kitchen pros with their own running water setup. Get it for $21 here.
8. Dollar Store Funnels, Trays, and Jars
Cheap and surprisingly durable! These are perfect for organizing materials.
9. Sensory Bin Tray
Can be used as a sandbox, or fill it with dry rice, macaroni, water beads, shaving cream–anything to prompt new play and keep things exciting! Get your trays for $26.

Creative Mud Kitchen Play Themes
Once the mud kitchen is set up, you can suggest new ideas every week to keep things exciting:
Mud Café
Kids create a menu, set up a counter, and take “orders” from family members.
Nature Baking
Collect leaves, pinecones, and petals to make pies, cakes, or stews.
Potion Lab
Add water beads, flower petals, or colored water to “brew” magic potions.
Color Mixing Station
Offer food coloring or natural dyes (beets, turmeric, spinach water) for some safe and colorful experiments.
Garden Kitchen
Let kids harvest mint, basil, rosemary, or edible flowers and add them to their creations.
What Age Is Best for a Mud Kitchen?
Mud kitchens are ideal for ages 2–10, but can be adjusted depending on the age group:
Toddlers (2–4): Keep tools simple and supervision close. Focus on sensory play.
Preschoolers (4–6): Introduce pretend cooking and basic tools like measuring cups.
Big kids (7–10): Add themed challenges or competitions (“Bake-Off,” “Mud MasterChef”).
Older siblings often get involved helping build or manage the kitchen too, making this a great family activity.
Safety Tips for Mud Kitchen Play
Mud kitchens are generally safe, but a few precautions will help everything run smoothly:
Always use clean, chemical-free soil
Teach kids not to eat mud or any natural material
Watch out for sharp tools or broken containers
Keep the area dry overnight to avoid mold
Encourage handwashing after every play session
Cleanup and Maintenance
Worried about the mess? Here’s how to keep things manageable:
Keep a plastic bin with towels near the mud kitchen
Use a shoe tray or doormat for dirty shoes
Wash tools in a separate “dishwashing” tub
Hose off everything once a week
Store lightweight supplies in a weatherproof bin or basket
And remember: mud washes off, but childhood memories don’t!
Why It’s Worth the Mud
Setting up a mud kitchen may take a weekend afternoon, but the benefits last for years. It encourages outdoor play, builds creativity, and gives your kids a healthy way to interact with nature. Plus, it’s one of the few activities where “messy” is a good thing.
Whether you go full DIY with upcycled materials or start small with just a bucket and spoon, your mud kitchen will quickly become your kids’ favorite part of the yard.
Quick Checklist: Mud Kitchen Must-Haves
Outdoor table or pallet base
Bowl or tub for mixing/sink
Assortment of cooking tools
Pots, pans, cups, trays
Water access (hose, jug, watering can)
Clean topsoil or mud bin
Decor and hooks for storage
Nearby clean-up station
Pin-Worthy Add-Ons:
Herb garden next to the kitchen
Wooden crates for “mud pantry” storage
Outdoor chalkboard menu
Painted signs (“Chef’s Specials,” “Open for Mudness”)
Fairy lights or bunting for extra charm
If you’re dreaming of happy, muddy kids and quiet moments while they “cook” outside, now’s the perfect time to get started. Set it up once, and you’ll have a go-to play area that sparks joy (and maybe a little dirt) all season long.