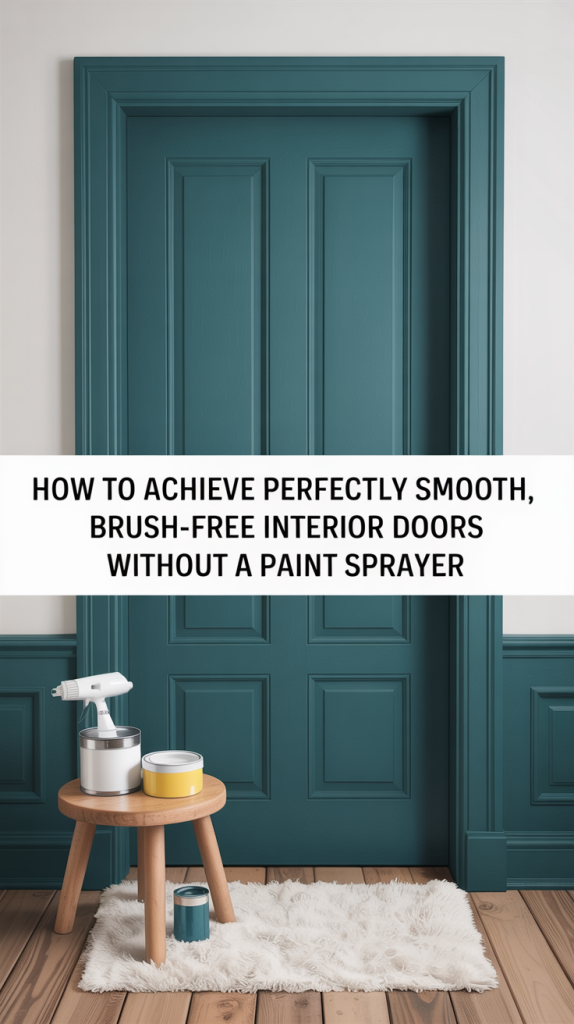
The Quest for a Flawless Finish
Painting doors, whether interior or exterior, is a home improvement task that often evokes a mix of anticipation and apprehension. On one hand, a freshly painted door can dramatically transform the aesthetic of a room or the curb appeal of a home, offering a crisp, clean, and renewed look. On the other hand, the fear of unsightly brush marks, roller stipple, or an uneven finish can deter even the most enthusiastic DIYer. The professional, factory-smooth finish often associated with newly installed doors or those painted by experts typically involves the use of specialized equipment like paint sprayers. These tools atomize paint into a fine mist, ensuring an incredibly even and seamless coat without the tell-tale signs of manual application.
However, not everyone has access to a paint sprayer, nor the space, ventilation, or expertise required to operate one effectively. The cost of renting or purchasing a high-quality sprayer, coupled with the learning curve and extensive masking needed, can make it an impractical option for many homeowners. This often leaves DIY enthusiasts wondering: is it truly possible to achieve that coveted perfectly smooth, brush-free finish on doors using only traditional hand-painting methods? The resounding answer is yes, absolutely. With the right techniques, tools, and a meticulous approach, you can indeed paint your doors to a near-sprayed quality, eliminating brush strokes and roller textures, and achieving a durable, beautiful result that rivals professional work.
This comprehensive guide is dedicated to demystifying the process of hand-painting doors for a flawless, brush-free finish. We will delve into every critical aspect, from the foundational principles of surface preparation and selecting the ideal materials, to mastering advanced application techniques that minimize imperfections. Whether you are tackling a worn-out interior door that needs a refresh or an exterior door exposed to the elements, the strategies outlined here will equip you with the knowledge and confidence to achieve a professional-grade finish without ever touching a paint sprayer. Prepare to transform your doors from ordinary to extraordinary, proving that precision and patience can triumph over specialized machinery.
Understanding the Core Principles of a Smooth Finish
Before diving into the practical steps, it’s essential to grasp the fundamental principles that underpin a truly smooth, brush-free paint finish. These concepts are universal to all painting projects but are particularly critical when aiming for perfection on a highly visible surface like a door. Understanding these elements will not only guide your technique but also help you troubleshoot any issues that may arise.
The Importance of Surface Preparation: The Foundation of Flawlessness
Think of painting as building a house: a strong, stable foundation is paramount. For painting, this foundation is the surface itself. Any imperfection on the door – dust, grime, old paint chips, dents, or scratches – will be magnified once paint is applied. Paint does not hide flaws; it often highlights them. Therefore, thorough and meticulous surface preparation is the single most important step in achieving a smooth finish. This involves cleaning, sanding, filling, and priming, each contributing to a perfectly uniform canvas for your paint.
- Cleaning: Dust, grease, and grime prevent paint from adhering properly, leading to an uneven finish or premature peeling. A clean surface ensures optimal adhesion.
- Sanding: Sanding serves multiple purposes. It smooths out existing imperfections, dulls glossy surfaces to create a better profile for paint adhesion, and removes any raised grain from previous paint jobs. A systematic approach to sanding, using progressively finer grits, is key to creating a glass-like surface.
- Filling: Dents, dings, and deep scratches must be filled to create a level surface. Using a high-quality wood filler or body filler and sanding it perfectly flush is non-negotiable for a flawless result.
- Priming: Primer is the bridge between the prepared surface and the topcoat. It seals the surface, prevents stains from bleeding through, and provides a uniform base that promotes even paint absorption and adhesion. A high-quality primer is essential for achieving a consistent and durable finish.
The Role of Paint Properties: Self-Leveling is Your Best Friend
Not all paints are created equal. When aiming for a brush-free finish without a sprayer, the properties of the paint itself play a crucial role. The most important characteristic to look for is self-leveling. Self-leveling paints are formulated to flow out and flatten as they dry, naturally minimizing the appearance of brush strokes and roller marks. They have a longer “open time,” which means they stay wet longer, giving the paint more time to settle and level out before it begins to cure. Alkyd-based paints (oil-based) and modern water-based alkyd hybrids are renowned for their excellent self-leveling properties. While traditional latex paints have improved, they tend to dry faster, making it more challenging to achieve a perfectly smooth finish without careful technique and the use of paint conditioners.
The Right Tools for the Job: Beyond the Basic Brush
While technique is vital, the quality and type of your tools can make or break your project. Achieving a smooth finish requires more than just a standard paintbrush.
- High-Quality Brushes: A premium-quality synthetic brush (for latex/water-based paints) or a natural bristle brush (for oil-based paints) with soft, densely packed bristles is essential for minimizing brush marks. Cheap brushes with coarse bristles will leave noticeable streaks.
- Foam Rollers: A high-density foam roller is a secret weapon for achieving a smooth, spray-like finish. Unlike traditional nap rollers, which can leave a stippled texture, foam rollers apply a thin, even coat of paint with minimal texture. They are perfect for flat surfaces.
- Paint Conditioners/Extenders: These additives, such as Floetrol for water-based paints and Penetrol for oil-based paints, are game-changers. They extend the open time of the paint, improve its flow and leveling properties, and reduce the appearance of brush and roller marks. They make the paint behave more like a professional-grade product, even for a DIYer.
Technique and Environment: The Final Pieces of the Puzzle
Even with the best preparation and materials, your application technique and the environment in which you paint are critical.
- Thin Coats are Key: Applying multiple thin coats is always superior to one or two thick coats. Thick coats are more prone to sagging, dripping, and retaining brush marks. Thin coats dry faster, cure harder, and allow the self-leveling properties of the paint to work their magic.
- Consistent Direction and Wet Edge: Maintaining a consistent painting direction (e.g., vertically on stiles, horizontally on rails) and always working from a “wet edge” (overlapping each new stroke onto the previous wet one) are crucial for a seamless finish. This prevents lap marks where different sections of paint have dried at different rates.
- Controlled Environment: Temperature, humidity, and airflow can all affect how paint dries. Avoid painting in direct sunlight, extreme temperatures, or high humidity, as these conditions can cause the paint to dry too quickly, preventing it from leveling properly. A clean, dust-free environment is also essential to prevent particles from settling on your wet paint and marring the finish.
By understanding and respecting these core principles, you set the stage for a successful and rewarding painting project. The rest of the process is about putting these principles into practice with precision and care.
Per Usual, Preparation is Key
As established, impeccable surface preparation is not merely a step in the painting process; it is the bedrock upon which a perfectly smooth, brush-free finish is built. Skimping on preparation is the most common mistake DIY painters make, leading to frustrating results that fall far short of professional quality. This phase demands patience, attention to detail, and a thorough understanding of each sub-step. Whether you are painting a brand-new, pre-primed door or rejuvenating an old, heavily painted one, the principles remain the same: clean, repair, sand, and prime.
Removing the Door and Hardware: The Optimal Approach
While it might seem like an extra effort, removing the door from its hinges and all hardware (knobs, hinges, strike plates, peep holes, etc.) is highly recommended for achieving the best possible finish. Painting a door vertically while it’s still hanging is fraught with challenges: drips are more likely, edges are harder to paint cleanly, and achieving an even coat is significantly more difficult.
- Disassembly: Carefully remove the hinge pins to take the door off its frame. Place the door horizontally on sawhorses or a sturdy workbench in a well-ventilated area. This flat orientation allows gravity to work in your favor, helping the paint to self-level and minimizing drips and runs.
- Hardware Removal: Unscrew and remove all door knobs, backplates, hinges, and any other fixtures. Store them safely in a labeled bag or container to ensure no pieces are lost and you know where they belong during reassembly. If you plan to reuse old hardware, this is an excellent time to clean or polish it. If you’re replacing hardware, ensure the new pieces are on hand before you start painting.
- Masking (If Not Removing): If, for any reason, removing the door or hardware is not feasible, meticulous masking is absolutely critical. Use high-quality painter’s tape (e.g., FrogTape or ScotchBlue) to meticulously tape off hinges, door knobs, and any glass panels. Press the tape down firmly to prevent paint bleed. However, be aware that even with the best masking, the finish around these areas may not be as crisp as if the hardware were removed.

Thorough Cleaning: Eliminating Contaminants
Even if a door appears clean, it likely harbors invisible layers of grease, grime, and dust that will compromise paint adhesion. This step is non-negotiable.
- Initial Dusting/Vacuuming: Begin by wiping down the entire door with a dry cloth or using a vacuum cleaner with a brush attachment to remove loose dust, cobwebs, and debris. Pay special attention to recessed panels and edges
- Degreasing and Washing: Prepare a solution of warm water and a mild degreaser, such as TSP (trisodium phosphate) substitute, or a dedicated paint prep cleaner. For interior doors, a mixture of dish soap and water can suffice for light grime. Wipe down the entire door surface thoroughly, ensuring all grease, fingerprints, and accumulated dirt are removed. For exterior doors, which face harsher conditions, a more robust cleaner is often necessary.
- Rinsing: After cleaning, rinse the door thoroughly with clean water and a fresh cloth to remove all traces of the cleaning solution. Any residue left behind can interfere with paint adhesion.
- Drying: Allow the door to dry completely. You can use clean towels to speed up the process, but ensure no lint is left behind. A fan can also aid in drying.
Repairing Imperfections: Creating a Smooth Canvas
This is where you address any physical flaws on the door surface. Remember, paint won’t hide these; it will highlight them.
- Filling Dents and Holes: For small nail holes, minor dents, or shallow scratches, use a high-quality spackle or wood filler. Apply the filler with a putty knife, pressing it firmly into the imperfection and slightly overfilling it. For larger holes or deeper gouges, a two-part epoxy wood filler might be necessary for exterior doors due to its durability. Allow the filler to dry completely according to the manufacturer’s instructions.
- Sanding Filled Areas: Once dry, sand the filled areas smooth and flush with the surrounding door surface. Start with a medium-grit sandpaper (e.g., 120-grit) to quickly remove excess filler, then follow with a finer grit (e.g., 180-220 grit) for a seamless transition. Ensure there are no bumps or depressions.
- Addressing Peeling or Chipping Paint: If the existing paint is peeling or chipping, it must be removed. Use a paint scraper or sandpaper to remove all loose paint. Feather the edges of the remaining paint so there’s no noticeable ridge. If the paint is extensively damaged, you might consider stripping the entire door, though this is a more labor-intensive process.
Sanding for Adhesion and Smoothness: The Key to a Professional Look
Sanding is crucial for both adhesion and achieving that coveted smooth finish. It creates a microscopic profile for the new paint to grip onto and eliminates any remaining surface imperfections.
- Dull Glossy Surfaces: If your door has a glossy finish, it must be dulled to allow the new paint to adhere. Use a fine-grit sandpaper (220-grit) or a liquid deglosser/sander. Sand the entire surface lightly but thoroughly, ensuring no shiny spots remain. This process is called etching or scuffing.
- Removing Imperfections: Even if your door isn’t glossy, light sanding with 220-grit sandpaper will smooth out any minor imperfections, remove dust nibs from previous coats, and create a perfectly smooth tactile surface. Sand in the direction of the grain for wood doors.
- Clean After Sanding: After each sanding step, it is absolutely critical to thoroughly clean the door to remove all sanding dust. Use a shop vacuum with a brush attachment, followed by a tack cloth. Tack cloths are specially treated cloths that pick up fine dust particles. Do not skip this step, as even tiny dust particles will create bumps in your final paint finish.
Priming for a Uniform Base: The Bridge to Perfection
Priming is often overlooked or rushed, but it is a vital step in achieving a professional, smooth finish, especially when painting over a different color, a porous surface, or a surface with stains.
Why Prime?
- Adhesion: Primer creates an ideal surface for the topcoat to adhere to, preventing peeling and ensuring durability.
- Sealing: It seals porous surfaces (like bare wood or patched areas), preventing the topcoat from soaking in unevenly, which can lead to a blotchy finish.
- Blocking Stains: High-quality primers can block stains (e.g., water stains, knots in wood) from bleeding through the new paint color.
- Uniform Color Base: Primer provides a consistent, uniform color base, which is especially important when changing from a dark color to a light one, or vice versa. This allows the true color of your topcoat to shine through with fewer coats.
- Smoother Finish: Many primers are designed to sand easily, allowing you to achieve an even smoother surface before the final paint coats.
- Choosing the Right Primer:
- Interior Doors: For most interior doors, a high-quality water-based (latex) primer is suitable. Look for primers labeled as “stain-blocking” or “high-hide” if you’re covering a dark color or stains. For very glossy surfaces or tricky materials, a bonding primer is an excellent choice.
- Exterior Doors: Exterior doors require primers with enhanced durability and weather resistance. An oil-based or exterior-grade acrylic latex primer is recommended. If painting over bare wood, an oil-based primer will seal the wood effectively and prevent tannin bleed.
- Application: Apply primer in thin, even coats using the same techniques you will use for your topcoat (a high-quality brush for cutting in and a foam roller for flat surfaces). Allow each coat to dry completely according to manufacturer instructions.
- Sanding Primer: For the ultimate smooth finish, lightly sand the dried primer coat with very fine-grit sandpaper (320-400 grit). This removes any minor imperfections or dust nibs that may have settled in the primer. After sanding, thoroughly clean the surface with a tack cloth to remove all dust. This step creates an incredibly smooth foundation for your final paint coats.
By diligently following these preparation steps, you lay the groundwork for a paint job that not only looks professional but also lasts for years to come. This meticulous attention to detail in the preparatory phase is what truly distinguishes a brush-free, smooth finish from a mediocre one.
Choosing the Right Tools and Paint: Your Arsenal for a Flawless Finish
Achieving a perfectly smooth, brush-free finish on your doors without a sprayer hinges significantly on the quality and type of tools and paint you select. This is not an area to cut corners. Investing in high-quality materials specifically designed for fine finishes will pay dividends in the final result, making the application process smoother and the outcome far more professional. The right combination of paint, brushes, rollers, and additives forms your essential arsenal for success.
Selecting the Ideal Paint: Self-Leveling is Non-Negotiable
The paint itself is perhaps the most critical component in achieving a smooth, brush-free finish. Not all paints are created equal, and their inherent properties directly impact how they lay down and dry.
- Prioritize Self-Leveling Formulas: As discussed in the core principles, self-leveling paint is paramount. These paints are engineered to flow out and flatten as they cure, effectively minimizing or eliminating brush strokes and roller stipple. Look for terms like “self-leveling,” “flow and leveling,” or “enamel” on the paint can. Modern paint technology has made significant strides in this area.
- Water-Based Alkyd Hybrids (Urethanes): These are often the best choice for DIYers aiming for a spray-like finish without a sprayer. They offer the easy cleanup of water-based paints but possess the superior hardness, durability, and self-leveling properties traditionally associated with oil-based enamels. They have a longer open time than standard latex paints, giving you more time to work before the paint sets. Brands like Benjamin Moore Advance, Sherwin-Williams Emerald Urethane Trim Enamel, and Behr Urethane Alkyd Enamel are popular choices known for their excellent flow and leveling.
- Oil-Based (Alkyd) Paints: Traditional oil-based enamels offer exceptional durability and self-leveling capabilities, often yielding the smoothest finish. However, they come with drawbacks: longer drying times, strong odors, and difficult cleanup (requiring mineral spirits). They are still a viable option, especially for exterior doors where extreme durability is needed, but water-based alkyd hybrids often provide a comparable finish with greater user-friendliness.
- Avoid Standard Latex Paints (Unless Conditioned): While convenient, standard acrylic latex paints dry very quickly and tend to hold brush and roller marks more readily. If you must use a standard latex paint, it is absolutely essential to use a paint conditioner (like Floetrol) to extend its open time and improve flow. Even then, achieving a truly brush-free finish will be more challenging than with a dedicated self-leveling enamel.
- Sheen Selection: For doors, a satin, semi-gloss, or high-gloss finish is typically preferred. Higher sheens are more durable, easier to clean, and reflect light beautifully, which can enhance the perception of a smooth surface. However, higher sheens also tend to highlight imperfections more, so impeccable surface preparation is even more critical.
The Essential Brushes: Precision and Smoothness
Even when aiming for a “brush-free” look, brushes are indispensable for cutting in edges, painting recessed panels, and applying paint to intricate areas. The right brush will minimize marks and facilitate a smooth transition.
- High-Quality Synthetic Brushes: For water-based alkyd hybrids and latex paints, invest in premium synthetic brushes with soft, tapered bristles. Look for brushes designed for “smooth finishes” or “trim and doors.” Brands like Purdy, Wooster, and Corona offer excellent options. A 2-inch or 2.5-inch angled sash brush is versatile for most door details.
- Natural Bristle Brushes: If you opt for traditional oil-based paints, a natural bristle brush is the appropriate choice. The natural fibers absorb and release oil-based paints more effectively, leading to a smoother application.
- Keep Them Clean: Always clean your brushes thoroughly immediately after use. Dried paint in the bristles will ruin a brush and lead to streaks in future projects.
The Magic of Foam Rollers: Your Secret Weapon
This is where the “brush-free” part of the equation truly comes into play for flat surfaces. High-density foam rollers are crucial for achieving a factory-smooth finish without a sprayer.
- High-Density Foam Rollers: Forget fuzzy nap rollers for doors; they leave a texture called “stipple” or “orange peel.” Instead, use high-density, closed-cell foam rollers. These rollers apply paint very thinly and evenly, and their smooth surface helps the paint to self-level beautifully. Look for rollers specifically labeled for “smooth surfaces,” “cabinets,” or “doors and trim.” A 4-inch or 6-inch mini-roller is ideal for most door panels and flat sections.
- Flocking (Optional): Some foam rollers come with a very thin flocking. These can also work well, but ensure the nap is extremely short to avoid texture.
- Avoid Lint: Before using a new foam roller, wrap it with painter’s tape and then pull the tape off to remove any loose fibers or lint. This prevents tiny imperfections from being transferred to your paint.
Paint Conditioners and Extenders: Enhancing Flow and Open Time
These additives are invaluable for making paint easier to work with and promoting a smoother finish, especially when hand-painting.
- Floetrol (for Water-Based Paints): Floetrol is a latex paint additive that improves paint flow and extends its open time. It allows the paint to level out more effectively, reducing brush and roller marks. It’s particularly useful when working in warmer, drier conditions where paint tends to dry quickly.
- Penetrol (for Oil-Based Paints): Similar to Floetrol but for oil-based paints, Penetrol improves flow, extends open time, and enhances adhesion. It helps oil paints achieve an even smoother, more durable finish.
- Mixing Ratios: Always follow the manufacturer’s recommendations for mixing ratios. Adding too much conditioner can thin the paint excessively, compromising its coverage and durability.
Auxiliary Tools for a Professional Process
Beyond the primary application tools, several other items will contribute to a cleaner, more efficient, and ultimately smoother painting experience.
- Paint Pails/Buckets: Use small, clean paint pails with liners for easier cleanup and to prevent contaminating your main paint can. A grid or roller screen in the pail helps load the roller evenly.
- Drop Cloths/Plastic Sheeting: Protect your work area from drips and spills. Use canvas drop cloths for floors and plastic sheeting for furniture or walls.
- Painter’s Tape: High-quality painter’s tape (e.g., FrogTape, ScotchBlue) is essential for masking off areas you don’t want to paint, such as hinges (if not removed), door frames, or adjacent walls. Ensure it’s applied firmly and removed before the paint is fully cured to prevent tearing.
- Sandpaper and Sanding Sponges: A variety of grits (120, 180, 220, 320, 400) will be needed for preparation and between coats. Sanding sponges are excellent for contoured surfaces.
- Tack Cloths: These sticky cloths are indispensable for picking up fine dust particles after sanding and before painting. Use them gently to avoid leaving residue.
- Putty Knives/Scrapers: For filling imperfections and scraping off loose paint.
- Clean Rags: For wiping up spills and cleaning tools.
- Respirator/Mask: Especially important when sanding or using oil-based paints, or in poorly ventilated areas.
- Gloves: Protect your hands from paint and chemicals.
By carefully selecting and preparing this array of tools and the right type of paint, you empower yourself to tackle the door painting project with confidence, knowing you have the best possible equipment to achieve that coveted perfectly smooth, brush-free finish.
Application Techniques for a Smooth Finish: The Art of Precision
With your door impeccably prepared and your arsenal of high-quality tools and paint at the ready, you have arrived at the most crucial and skill-dependent phase of the project: the application. This is where your technique will directly translate into the quality of the finish. The goal is to apply the paint in a systematic, efficient, and precise manner that allows its self-leveling properties to work their magic, resulting in a smooth, brush-free surface. This section will detail the professional techniques for painting both paneled and flat doors to achieve that coveted spray-like finish.
The “Wet Edge” Principle: Your Guiding Star
The single most important concept to master during application is maintaining a “wet edge.” This means that you should always be applying new paint onto an area that is still wet from the previous stroke or roller pass. Overlapping wet paint onto wet paint allows the two areas to meld together seamlessly, preventing lap marks, which are visible lines or ridges that form when wet paint is applied over a partially dried section. Working quickly but methodically is key to maintaining a wet edge, especially with faster-drying paints.
Painting a Paneled Door: A Systematic Approach
Paneled doors, with their combination of stiles, rails, and recessed panels, require a specific order of operations to ensure a clean, professional finish. Painting the sections in the correct sequence minimizes the risk of smudging already-painted areas and helps maintain a wet edge.
The Correct Order of Painting:
- Recessed Panels: Begin by painting the recessed panels. Use your high-quality angled sash brush to carefully paint the detailed mouldings around the panels first. Then, use the brush or a small foam roller to fill in the flat part of the panel. Work on one panel at a time.
- Horizontal Rails: Next, paint the horizontal rails, starting with the top rail and working your way down. Use your brush for any detailed edges and the foam roller for the flat surfaces. Be careful not to get paint on the vertical stiles you haven’t painted yet.
- Vertical Stiles: Finally, paint the vertical stiles, including the two outer stiles and any central mullions. Use long, smooth strokes with your foam roller, from top to bottom. Overlap slightly onto the already-painted rails.
- Door Edges: Don’t forget the edges of the door! Paint the hinge edge and the latch edge. A common convention is to paint the hinge edge the same color as the side of the door that is visible when the door is open.
Technique for Paneled Doors:
- Brush and Roll Combo: A highly effective technique is to use your brush to apply paint to the detailed mouldings and corners of the panels, and then immediately follow up with a small foam roller to smooth out the flat areas. This combination gives you the precision of a brush and the smooth finish of a roller.
- Feathering: When using a brush, use light pressure and “feather” your strokes by lifting the brush gently at the end of each stroke. This helps to blend the paint and minimize brush marks.
- Thin Coats: Apply thin, even coats. It is far better to apply two or three thin coats than one thick one. A thick coat will obscure details, sag, and fail to level out properly.
Painting a Flat (Flush) Door: The Art of the Roll and Tip
Flat doors may seem simpler, but achieving a perfectly uniform, texture-free finish across a large, unbroken surface presents its own challenges. The key here is a technique known as “roll and tip,” which combines the speed of a roller with the smoothing action of a brush.
The Roll and Tip Technique:
- Load Your Roller: Lightly dampen your foam roller with water (for water-based paint) or mineral spirits (for oil-based paint) and then blot it dry. This prevents the roller from absorbing too much paint initially. Load the roller evenly with paint, using a roller grid in your paint pail to remove excess.
- Roll on the Paint: Working in sections (about 12×12 inches), roll the paint onto the door in a vertical direction. Apply light, even pressure. Don’t try to cover the entire section in one go; the goal is to get a thin, even layer of paint onto the surface.
- Tip Off with a Brush: Immediately after rolling a section, take a high-quality, clean, and slightly dampened brush (again, water for water-based, mineral spirits for oil-based). Holding the brush at a low angle, lightly drag the tips of the bristles across the freshly rolled paint in one continuous, top-to-bottom stroke. This is called “tipping off.” The purpose is not to apply more paint, but to gently knock down any stipple left by the roller and create a uniform, brush-stroke-free surface. Overlap each tipping stroke slightly.
- Maintain a Wet Edge: Continue this roll-and-tip process across the entire door, always working from the wet edge of the previously painted section. This ensures a seamless blend.
- Do Not Overwork: Once you have tipped off a section, leave it alone. Over-brushing or going back over a partially dried area will introduce marks and ruin the self-leveling process. Trust the paint and the technique.
General Application Best Practices
- •Stir, Don’t Shake: Before you begin, stir your paint thoroughly with a paint stick. Shaking the can can introduce air bubbles, which can dry into tiny craters on your door’s surface.
- Use a Paint Conditioner: As mentioned before, adding a paint conditioner like Floetrol or Penetrol will significantly improve the paint’s flow and leveling, making it much easier to achieve a smooth finish.
- Work in Good Lighting: Proper lighting is crucial for spotting any missed spots, drips, or imperfections as you work. Use a combination of overhead lighting and a portable work light to illuminate the door from different angles.
- Apply Thin Coats: This cannot be overstated. Two or three thin coats will always produce a smoother, more durable, and more professional-looking finish than one thick coat. Allow each coat to dry completely according to the manufacturer’s instructions before applying the next
- Sand Between Coats: For the ultimate smooth finish, lightly sand the door with very fine-grit sandpaper (320-400 grit) between each coat of paint (after it has fully dried). This removes any dust nibs or minor imperfections that may have occurred. After sanding, be absolutely sure to clean the surface thoroughly with a vacuum and a tack cloth before applying the next coat.
By following these systematic and precise application techniques, you are giving your paint the best possible chance to perform as it was designed, leveling out into a beautiful, smooth, and brush-free finish that will make your doors a standout feature of your home.
Drying, Curing, and Troubleshooting: Ensuring Longevity and Perfection
Once the final coat of paint has been meticulously applied, the work isn’t quite over. The stages of drying and curing are critical for the longevity and ultimate smoothness of your door’s finish. Understanding the difference between these two processes, and knowing how to troubleshoot common issues, will ensure your hard work results in a durable, professional-looking surface that stands the test of time.
Drying vs. Curing: Understanding the Difference
These two terms are often used interchangeably, but they refer to distinct phases in the paint’s lifecycle, each with its own implications for handling and durability.
- Drying: This is the initial phase where the solvents (water or mineral spirits) evaporate from the paint film. During drying, the paint feels dry to the touch, and you can typically apply subsequent coats. However, the paint film is still soft and vulnerable to damage. Drying times are usually listed on the paint can and can range from a few hours to overnight, depending on the paint type, humidity, and temperature.
- Curing: This is the longer, more complex process where the paint undergoes a chemical reaction, hardening and reaching its maximum durability, adhesion, and resistance to scratches and abrasion. Curing can take anywhere from a few days to several weeks, or even a month, depending on the paint’s chemistry (e.g., alkyd-based paints and water-based alkyd hybrids generally have longer cure times than standard latex). During the curing phase, the paint should be handled with care, avoiding heavy use or harsh cleaning.
Implications for Doors:
- Rehanging Doors: While you can typically rehang a door once the paint is dry to the touch, it’s advisable to wait until it has dried for at least 24 hours to minimize the risk of marring the fresh paint. Be extra gentle when handling.
- Hardware Reinstallation: Reinstall hardware carefully. If possible, wait a few days into the curing process before reattaching knobs and strike plates, as these areas experience frequent contact.
- Cleaning: Avoid washing or scrubbing the newly painted door until it has fully cured. Use only a soft, dry cloth for light dusting during this period.
Optimizing Drying and Curing Conditions
The environment plays a significant role in how quickly and effectively paint dries and cures. Controlling these factors can prevent issues and ensure a harder, smoother finish.
- Temperature and Humidity: Ideal conditions for painting and drying are typically between 60-80°F (15-27°C) with moderate humidity (around 50%). High humidity slows drying and curing, while very low humidity can cause paint to dry too quickly, preventing proper leveling. Extreme temperatures (hot or cold) can also negatively impact the paint’s performance.
- Ventilation: Good airflow is essential for solvent evaporation during drying. Open windows (if weather permits), use fans (but don’t point them directly at the wet paint, as this can cause rapid drying and skinning), or use exhaust fans. Proper ventilation also helps dissipate paint fumes.
- Dust Control: Keep the painting area as dust-free as possible during drying. Dust particles settling on wet paint will create imperfections. Avoid activities that stir up dust (e.g., vacuuming, sweeping) in the vicinity of drying doors.
Troubleshooting Common Issues for a Smooth Finish
Even with the best preparation and technique, issues can sometimes arise. Knowing how to identify and rectify them is crucial for achieving a truly flawless result.
Brush Marks/Roller Stipple:
Cause: Paint drying too quickly, paint too thick, improper brush/roller technique, using the wrong type of brush/roller, not using a paint conditioner.
Solution: For minor marks, allow the paint to fully cure, then lightly sand with 320-400 grit sandpaper until smooth. Clean thoroughly and apply another thin coat, ensuring proper technique and potentially adding a paint conditioner. For severe marks, you may need to sand down to the primer or even bare surface and restart the topcoat application.
Drips and Sags:
Cause: Applying paint too thickly, overloading the brush or roller, painting in too high humidity.
Solution: If caught while wet, gently brush or roll out the drip. If dry, allow the paint to fully cure, then carefully sand down the drip with fine-grit sandpaper (e.g., 220-320 grit) until it’s flush with the surface. Clean and reapply a thin coat of paint.
Bubbles/Blisters:
Cause: Applying paint over a dirty or greasy surface, painting in direct sunlight or on a hot surface, trapped moisture, shaking the paint can vigorously.
Solution: For small bubbles, they often pop and self-level. If they remain, or if blisters form, you’ll need to scrape or sand them down to a smooth surface, clean, and reapply. Ensure the surface is clean and dry, and avoid painting in direct sun.
Dust Nibs/Debris:
Cause: Insufficient cleaning after sanding, dusty environment, lint from roller.
Solution: For minor dust nibs, allow the paint to fully cure, then gently sand them off with very fine-grit sandpaper (400-600 grit). Clean with a tack cloth and apply another thin coat. For larger debris, you may need to carefully scrape it off, sand the area smooth, and repaint.
Poor Adhesion/Peeling:
Cause: Inadequate surface preparation (not cleaning, not sanding glossy surfaces, not priming), painting over incompatible paint types.
Solution: This is a more serious issue that usually requires sanding down to a sound surface (often bare wood or metal), re-preparing the surface meticulously, and repriming before repainting. This highlights the critical importance of thorough preparation.
By understanding the nuances of drying and curing, and by being prepared to troubleshoot common painting problems, you can safeguard your efforts and ensure that your perfectly smooth, brush-free door finish is not only beautiful but also long-lasting. Patience during these final stages is just as important as precision during application.

Advanced Tips and Conclusion: Elevating Your Door Painting Game
Having mastered the foundational principles, meticulous preparation, careful tool selection, and precise application techniques, you are well on your way to achieving a perfectly smooth, brush-free finish on your doors. However, for those who wish to push the boundaries of DIY excellence and achieve truly professional-grade results, there are several advanced tips and considerations that can further refine your technique and elevate your finished product. These insights often come from years of experience and can make a noticeable difference in the final outcome.
A. The Power of Multiple Thin Coats and Inter-Coat Sanding
While we’ve emphasized the importance of thin coats, the true secret to a glass-smooth finish lies in applying many thin coats, coupled with meticulous sanding between each. This is a technique borrowed directly from professional automotive and furniture finishing.
- More Coats, Less Thickness: Instead of two medium coats, consider three or even four very thin coats. Each thin coat contributes to the overall film build without risking drips or brush marks. The paint has more time to self-level perfectly with each application.
- Micro-Sanding Between Coats: After each coat of paint has fully dried (not just dry to the touch, but firm enough to sand without gumming up), lightly sand the entire surface with ultra-fine grit sandpaper (400-600 grit). The goal here is not to remove paint, but to knock down any microscopic dust nibs, imperfections, or slight textures that may have formed. This creates an incredibly smooth canvas for the next coat. Always clean thoroughly with a tack cloth after sanding.
The Result: This iterative process of thin coats and inter-coat sanding builds up a perfectly smooth, uniform, and incredibly durable finish that is virtually indistinguishable from a sprayed application.
Controlling the Environment: Beyond Basic Ventilation
While basic ventilation is crucial, truly controlling your painting environment can significantly impact the self-leveling process and prevent airborne contaminants.
- Temperature and Humidity Stability: Aim for a consistent temperature and humidity level throughout the entire drying and curing process. Fluctuations can cause paint to dry unevenly or stress the film. If possible, use a dehumidifier or humidifier to maintain optimal conditions.
- Creating a “Clean Room” Effect: For the absolute best results, try to create a makeshift clean room. Close off the painting area from other parts of the house. Use plastic sheeting to cover walls and floors, and consider placing a box fan in a window blowing out to create negative pressure, which helps draw dust away from your painting area. Lightly misting the floor with water can also help settle dust before you begin painting.
- Air Filters: If using a fan, consider placing an inexpensive furnace filter over the intake side to catch airborne dust before it enters your painting zone.
Advanced Application Techniques for Specific Challenges
Dealing with Grain on Wood Doors: For older wood doors with prominent grain, even after sanding, the grain can sometimes show through, especially with thinner paints. To achieve a truly glass-smooth finish, consider using a grain filler product after priming. Apply the grain filler, sand it smooth, then re-prime before your topcoats. This will completely obscure the wood grain.
Painting Louvered Doors: Louvered doors are notoriously difficult to paint smoothly due to their many angles and tight spaces. For these, a small, high-quality angled sash brush is essential. Work systematically, painting the inside edges of the louvers first, then the flat surfaces. The roll-and-tip method is not practical here; rely on careful brushwork and thin coats. A foam brush can also be useful for reaching tight spots.
Exterior Doors and UV Protection: For exterior doors, consider a paint specifically formulated with enhanced UV protection. While the application techniques remain the same, the paint’s ability to withstand sun exposure and weather elements is paramount for long-term durability and color retention. Marine-grade paints or those designed for outdoor furniture can offer superior performance.
The Final Polish: When to Reinstall and How to Maintain
Patience with Reinstallation: Resist the urge to reinstall your door and hardware too soon. While the paint may be dry to the touch in hours, the full cure can take weeks. Reinstalling hardware, especially door knobs and latches, too early can cause the paint to stick, chip, or mar. If you must reinstall, do so gently and avoid overtightening screws.
Felt Pads: For interior doors, consider adding small felt pads to the door frame where the door makes contact when closed. This prevents the paint from sticking to the frame during the curing process and reduces wear over time.
Gentle Cleaning: For the first few weeks after painting, clean the door only with a soft, damp cloth. Avoid harsh cleaners or abrasive sponges until the paint has fully cured to prevent damage to the fresh finish.
Your Doors, Transformed
The journey to achieving perfectly smooth, brush-free interior and exterior doors without a paint sprayer is one that demands patience, precision, and a commitment to quality. It is a testament to the fact that with the right knowledge and techniques, professional-level results are well within the reach of any dedicated DIY enthusiast. We’ve navigated through the critical stages, from the foundational importance of meticulous surface preparation—cleaning, repairing, sanding, and priming—to the strategic selection of self-leveling paints and specialized tools like high-density foam rollers and paint conditioners.
We’ve also explored the nuances of application, emphasizing the “wet edge” principle and the systematic approach required for both paneled and flat doors, including the effective “roll and tip” method. Understanding the distinction between drying and curing, and optimizing environmental conditions, are crucial for ensuring the longevity and durability of your flawless finish. Finally, advanced tips, such as inter-coat sanding and addressing specific challenges like wood grain or louvered doors, provide the extra edge for those seeking absolute perfection.
By diligently applying the principles and techniques outlined in this comprehensive guide, you will not only transform your doors into stunning, smooth surfaces that enhance the beauty of your home but also gain invaluable skills and confidence in your DIY capabilities. The satisfaction of stepping back and admiring a perfectly painted door, knowing you achieved that coveted brush-free finish without a sprayer, is immensely rewarding. So, gather your tools, prepare your space, and embark on this rewarding project. Your doors are waiting to be reborn, and with this guide, you have everything you need to achieve a truly impeccable, professional-grade finish.