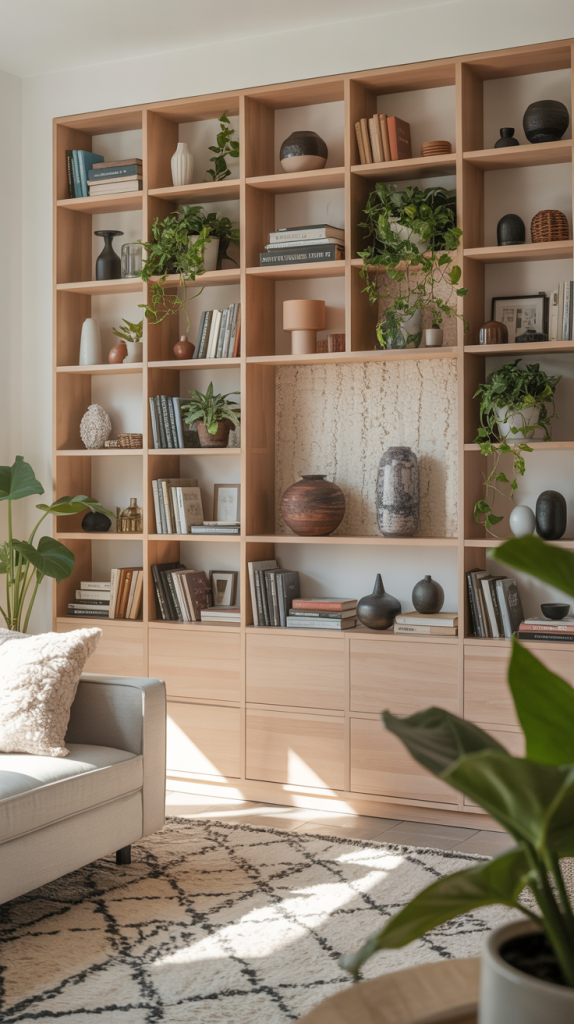
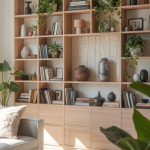
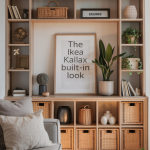
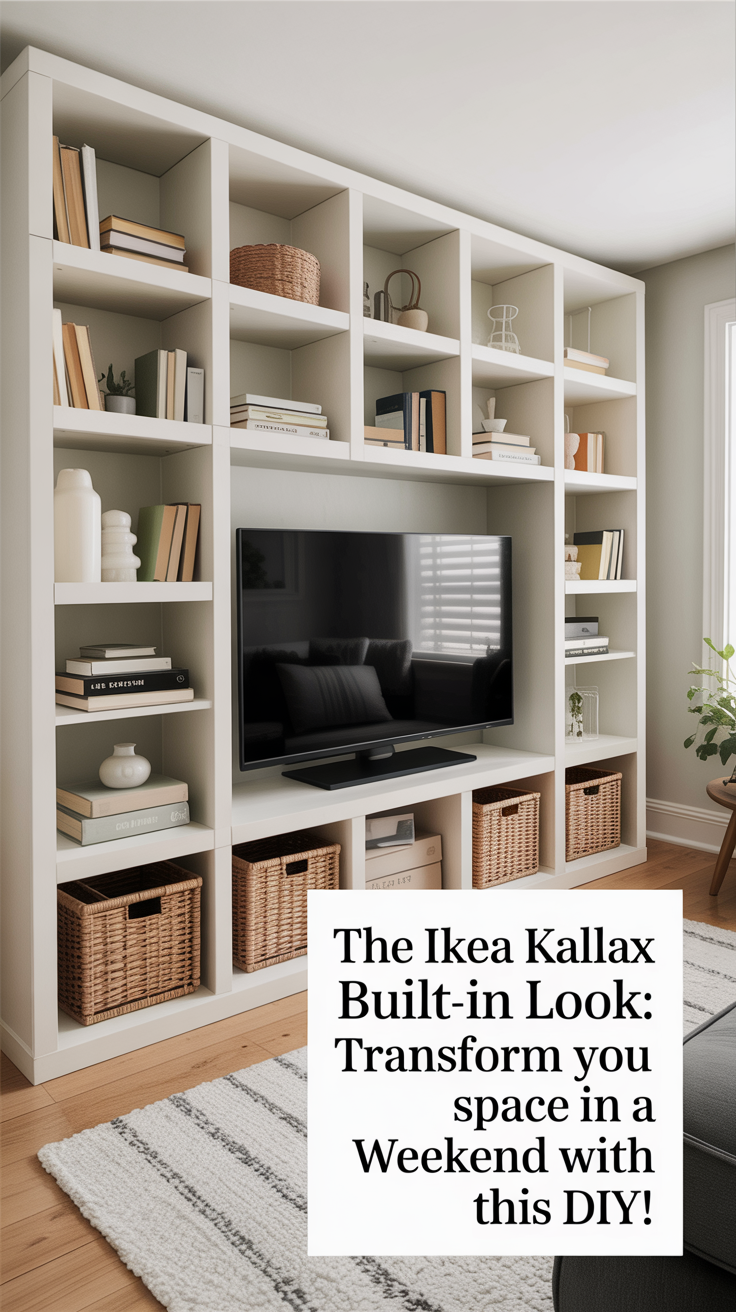
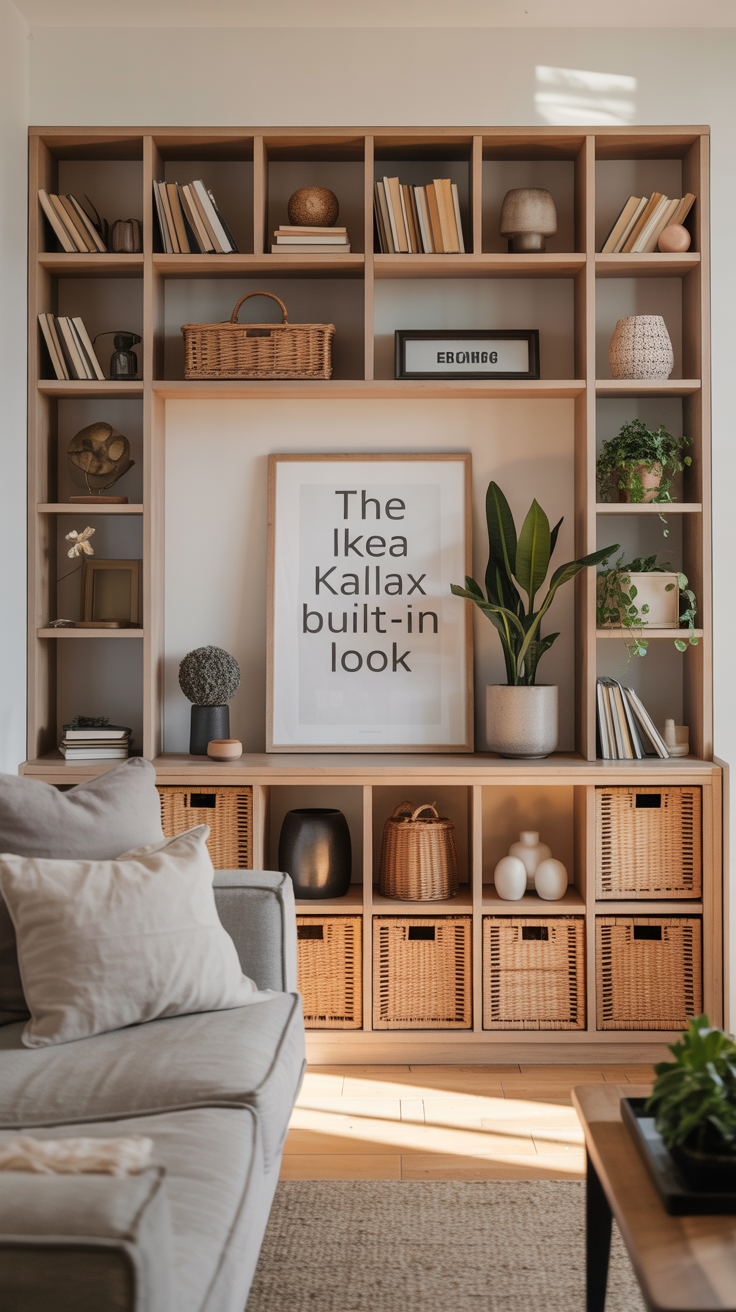
If you’ve ever scrolled through Pinterest or Instagram, admiring those stunning living rooms with seamless, built-in shelving units, and thought, “I wish I could have that,” then you’re in for a treat! Today I want to talk about one of the most popular and transformative IKEA hacks out there: turning the humble KALLAX shelf unit into a magnificent, integrated storage and display system that looks like it was always meant to be part of your home.
The IKEA KALLAX series is a true workhorse in the world of affordable furniture. Its simple, cube-based design makes it incredibly versatile, serving as everything from a basic bookshelf to a room divider. We’ve had our KALLAX shelf in our craft room for three years and haven’t looked back. It is such an awesome piece for so many applications!
But what if we told you that with a little creativity, some basic tools, and a weekend’s worth of effort, you could elevate these functional units into a sophisticated, built-in masterpiece? This hack is a game-changer for anyone looking to add significant storage, architectural interest, and a touch of bespoke elegance to their living room, home office, or even bedroom. So, get ready to roll up your sleeves, because by the end of this article, you’ll be armed with all the knowledge you need to create your very own KALLAX built-in sensation!
Why the KALLAX Built-In Hack is a Design Game-Changer
The allure of built-in shelving is undeniable. It offers a sense of permanence, maximizes space, and creates a cohesive, polished look that freestanding furniture often can’t achieve. However, custom cabinetry can be incredibly expensive and time-consuming to install. This is where the KALLAX built-in hack shines, offering a brilliant alternative that delivers on both aesthetics and practicality. Here’s just a few reasons that designers and DIYers love it!
- Affordable Luxury: The primary appeal of this hack lies in its cost-effectiveness. KALLAX units are incredibly budget-friendly, and by using them as the foundation for your built-in, you save thousands compared to hiring a carpenter for custom work. The finished product, however, looks anything but cheap, providing an illusion of high-end design at a fraction of the cost.
- Maximizing Space and Storage: Built-ins are masters of efficiency. By fitting snugly into alcoves or along entire walls, they utilize every inch of available space, providing ample storage for books, decor, media, and more. The KALLAX cubes are perfect for organizing, and with the addition of inserts (drawers, doors, baskets), you can customize your storage to suit your exact needs.
- Architectural Interest and Cohesion: This hack adds significant architectural interest to a room. By extending the shelving to the ceiling and integrating it with trim and paint, you create a seamless, intentional feature that enhances the overall design of your space. It makes the room feel more substantial, thoughtfully designed, and cohesive.
- Customization Galore: While the KALLAX units provide the structure, the customization possibilities are endless. You can choose the size and configuration of your KALLAX units, add various trim styles, select any paint color to match your decor, and even incorporate lighting. This allows you to create a truly unique piece that perfectly reflects your personal style and meets your functional requirements.
- DIY-Friendly for All Skill Levels: While it might look complex, the KALLAX built-in hack is surprisingly approachable for most DIYers. It involves basic carpentry skills like measuring, cutting, and painting, making it a rewarding project for both beginners and experienced crafters. With a weekend or two of dedicated effort, you can achieve professional-looking results.
What You’ll Need: Gathering Your KALLAX Arsenal and Beyond
Before you embark on this exciting transformation, careful planning and gathering all your materials are crucial. A well-prepared workspace and a complete shopping list will make the process smoother and more enjoyable. Here’s a comprehensive list of what you’ll need:
- IKEA KALLAX Shelf Units: The number and size of units will depend on your desired built-in dimensions. Measure your space carefully (width, height, and depth) to determine the best configuration. Common sizes include the 2×2, 2×4, 3×4, and 4×4 units. Consider how many cubes you need for storage versus display.
- Wood for Framing and Trim:
- Base/Plinth: 1×4 or 1×6 lumber for the bottom frame that the KALLAX units will sit on. This elevates the units and allows for baseboard integration.
- Side Supports: 1×2 or 1×3 lumber to create vertical supports on either side of your KALLAX units, especially if they are freestanding or not perfectly snug against a wall.
- Top Frame: 1×2 or 1×3 lumber for the top frame that will connect the KALLAX units to the ceiling.
- Face Frame/Trim: 1×2 or 1×3 lumber (or wider, depending on your desired look) to create a seamless face frame around the KALLAX units, covering the raw edges and giving it a finished, built-in appearance.
- Crown Molding/Cove Molding: For the top, to create a decorative transition to the ceiling.
- Baseboard: To match your existing baseboards, if you’re extending them around the new built-in.
- Tools:
- Measuring tape
- Pencil
- Level (essential for ensuring your built-in is straight)
- Stud finder
- Drill/Driver
- Miter saw or circular saw (for precise cuts on wood)
- Jigsaw (for any intricate cuts, like around outlets)
- Sander or sanding blocks (for smooth finishes)
- Caulk gun
- Paint brushes and rollers
- Safety glasses and dust mask
- Hardware and Adhesives:
- Wood screws (various lengths, appropriate for securing wood to studs and to KALLAX units)
- Wood glue
- Construction adhesive (e.g., Liquid Nails, for extra strong bonds)
- Wood filler or spackle
- Caulk (paintable, for filling gaps and seams)
- Painter’s tape
- Paint Supplies:
- Primer (essential for painting IKEA furniture and raw wood)
- Paint (choose a durable, washable paint in your desired color, ideally matching your wall color for a truly built-in look)
- Optional KALLAX Inserts:
- KALLAX drawers
- KALLAX doors
- KALLAX baskets or fabric boxes
- KALLAX castors (if you want to make a movable section)
Pro Tip: Before purchasing any wood, create a detailed sketch of your desired built-in, including precise measurements. This will help you calculate the exact amount of lumber and KALLAX units you’ll need, minimizing waste and extra trips to the hardware store. Also, consider renting a miter saw if you don’t own one; it will make cutting the trim much easier and more accurate.
The KALLAX Built-In Transformation: Your Step-by-Step Weekend Guide
Now that you’ve meticulously planned and gathered all your materials, it’s time to bring your KALLAX built-in vision to life! This process involves several key stages, each building upon the last to create a sturdy, seamless, and stunning piece of furniture. Remember to work carefully, measure precisely, and don’t be afraid to take breaks. The satisfaction of seeing your custom built-in take shape will be your ultimate reward.
Step 1: Prepare Your Space and Assemble KALLAX Units
Before anything else, clear the area where your built-in will reside. Remove any existing furniture, clear the walls, and lay down a drop cloth to protect your floors. This will give you ample space to work safely and efficiently.
Next, assemble your KALLAX units according to IKEA’s instructions. This is the foundation of your built-in, so ensure all connections are tight and the units are square. If you’re using multiple KALLAX units side-by-side, you can connect them to each other using small wood screws (ensure they are short enough not to protrude through the other side) or specialized KALLAX connectors if available. This will add stability to your overall structure.
Step 2: Build the Base/Plinth
The base, or plinth, is crucial for elevating your KALLAX units off the floor, allowing for the integration of your existing baseboards and giving the built-in a more substantial, furniture-like appearance. This also protects the KALLAX units from potential floor moisture.
- Measure and Cut: Measure the exact length and depth of your assembled KALLAX units. Cut your 1×4 or 1×6 lumber to create a rectangular frame that will sit directly beneath the KALLAX units. You’ll need two pieces for the front and back, and two for the sides. For added stability, you can cut additional support pieces to run perpendicular within the frame, especially for longer built-ins.
- Assemble the Frame: Use wood glue and wood screws to assemble the base frame. Ensure it’s square and sturdy. If you’re planning to run your existing baseboard along the front of the built-in, you’ll need to account for its thickness when designing your plinth. You might need to notch out sections of the plinth or create a recessed area for the baseboard to sit flush.
- Position the Base: Carefully position the assembled base frame in your desired location. Use a level to ensure it’s perfectly level. If your floor is uneven, use shims to level the base. Once level, you can secure the base to the floor using construction adhesive or by screwing into floor joists (if you know their location and are comfortable doing so).
Step 3: Position and Secure KALLAX Units to the Base and Wall
With the base in place, it’s time to set your KALLAX units onto it. This step is critical for stability and safety.
- Place KALLAX Units: Carefully lift and place your assembled KALLAX units onto the leveled base. Push them flush against the back wall.
- Secure to Base: From inside the KALLAX units, use wood screws to secure the bottom of the KALLAX units to the wooden base frame. Pre-drill pilot holes to prevent splitting the KALLAX material.
- Secure to Wall (Crucial for Safety!): This is perhaps the most important step for safety, especially if you have children or pets. Use a stud finder to locate the wall studs behind your KALLAX units. Using appropriate wall anchors (if no studs are available) or long wood screws into studs, secure the KALLAX units to the wall. IKEA typically provides anti-tip hardware with KALLAX units; use these or similar L-brackets for added security. This prevents the units from tipping forward.
Step 4: Build the Side and Top Frames
Now, you’ll start creating the “built-in” illusion by framing out the KALLAX units.
- Side Supports: If your KALLAX units don’t perfectly span wall-to-wall, or if you want to create a more robust frame, cut 1×2 or 1×3 lumber to the height of your KALLAX units (from the top of the plinth to the top of the KALLAX). Secure these vertical pieces to the side edges of your KALLAX units and, if possible, to the adjacent wall studs. Use wood glue and screws.
- Top Frame: Measure the length of your KALLAX units across the top. Cut 1×2 or 1×3 lumber to create a top frame that will sit on top of the KALLAX units and extend to the ceiling. This frame will provide a surface for attaching your crown molding. Secure this frame to the top of the KALLAX units and, if possible, to ceiling joists or wall studs.
Step 5: Add the Face Frame/Trim
This is where the magic truly happens, transforming the KALLAX units from standalone shelves into a cohesive, built-in structure.
- Measure and Cut: Measure the vertical and horizontal lengths needed for your face frame. You’ll typically want to cover the raw edges of the KALLAX units and create a consistent border around the openings. Cut your 1×2 or 1×3 lumber (or wider, if preferred) to create vertical and horizontal pieces that will form the frame. You’ll need pieces to run along the top, bottom, and sides of the entire KALLAX structure, as well as vertical pieces between each KALLAX unit if you have multiple side-by-side.
- Attach the Face Frame: Use wood glue and finish nails (or small screws) to attach the face frame pieces to the KALLAX units and the previously installed wood supports. Ensure the edges are flush and the corners are tight. This step requires precision to achieve a professional look. Use a level frequently to ensure your frame is straight.
Step 6: Install Crown Molding and Baseboards
These decorative elements will truly complete the built-in look.
- Crown Molding: Measure and cut your crown molding to fit along the top of your built-in, where it meets the ceiling. This often requires miter cuts at corners. Use finish nails to secure the crown molding to the top wood frame you installed in Step 4. If you’re new to crown molding, there are many online tutorials that can guide you through the tricky cuts.
- Baseboards: Install baseboards along the bottom of your built-in, matching your existing baseboards. This will seamlessly integrate the new structure with your room’s existing trim. Use finish nails to secure them to the plinth.
Step 7: Fill, Sand, Caulk, and Prime
Preparation is key to a flawless paint finish.
- Fill: Use wood filler or spackle to fill all nail holes, screw holes, and any small gaps or imperfections in the wood trim. Allow it to dry completely.
- Sand: Once the filler is dry, sand all the wood surfaces smooth. Pay extra attention to the filled areas and any rough edges. Use fine-grit sandpaper for a silky-smooth finish. Wipe away all dust with a tack cloth.
- Caulk: This is a crucial step for achieving a seamless, built-in look. Use paintable caulk to fill all seams and gaps where the wood trim meets the KALLAX units, where trim pieces meet each other, and where the built-in meets the wall and ceiling. Run a thin bead of caulk along all these lines and smooth it with a wet finger or a caulking tool. This will make the entire structure look like one solid piece.
- Prime: Apply a high-quality primer to all the KALLAX surfaces and new wood trim. KALLAX units have a slick, laminate finish, so a good primer (like a shellac-based or bonding primer) is essential for paint adhesion. Allow the primer to dry completely according to the manufacturer’s instructions.
Step 8: Paint!
This is the most satisfying step, as your built-in truly comes to life!
- Apply First Coat: Apply your first coat of paint. Use a brush for cutting in around edges and corners, and a roller for larger flat surfaces. For a truly built-in look, consider painting the KALLAX units and trim the same color as your walls. This creates a cohesive, integrated feel. Allow the first coat to dry completely.
- Apply Second Coat (and Third if Needed): Apply a second coat of paint, ensuring even coverage. If necessary, apply a third coat for full opacity and durability. Lightly sand between coats if there are any imperfections. Allow the final coat to cure fully before styling.
Cost and Time Commitment: A High-End Look on a DIY Budget
The KALLAX built-in hack is celebrated not just for its stunning results but also for its remarkable affordability and achievable timeline. It’s a project that delivers significant visual impact without demanding a professional’s budget or an endless commitment of time.
- Cost: The cost of your KALLAX built-in will vary depending on the number and size of KALLAX units you use, the type of wood trim you select, and the quality of paint. However, even with these variables, the total cost typically ranges from $300 to $800. Compare this to custom-built shelving, which can easily run into several thousands of dollars (often $2,000 to $5,000 or more, depending on complexity and materials). This hack offers an incredible return on investment, allowing you to achieve a luxurious, custom look for a fraction of the price.
- Time: While it involves multiple steps, the KALLAX built-in hack is genuinely a weekend-friendly project. Most DIYers can complete the construction, framing, and initial prep work in one full weekend (16-20 hours of active work). The painting process, including drying times, might extend into a second weekend or require a few evenings of dedicated work. However, the active building phase is concentrated, making it a manageable project for those with busy schedules. The key is to break it down into smaller, achievable tasks and tackle them systematically.
Beyond the Living Room: Versatile KALLAX Built-In Applications
The beauty of the KALLAX built-in hack lies in its incredible versatility. While often seen in living rooms as media centers or display shelving, its potential extends far beyond a single space. Consider these other ingenious applications for a KALLAX built-in in your home:
- Home Office Storage: Create a highly functional and organized home office by building KALLAX units around a desk. The cubes are perfect for storing files, office supplies, and books, keeping your workspace tidy and inspiring. You can even integrate a desktop directly into the built-in structure.
- Kids’ Playroom Organization: KALLAX units are a dream for toy organization. A built-in KALLAX system in a playroom can provide dedicated spots for toys, books, and craft supplies, making cleanup a breeze. Add colorful bins and labels for an extra touch of fun and functionality.
- Bedroom Storage/Headboard: In a bedroom, a KALLAX built-in can serve as a unique headboard with integrated shelving for books, lamps, and personal items. Alternatively, build a wall of KALLAX units for extensive clothing and accessory storage, especially useful in homes without large closets.
- Mudroom/Entryway Drop Zone: Create a highly efficient drop zone in your mudroom or entryway. KALLAX cubes can hold baskets for shoes, hats, and gloves, while the top surface can serve as a bench or a place to set bags. Hooks can be added to the surrounding trim for coats.
- Craft Room/Hobby Nook: For crafters and hobbyists, a KALLAX built-in can be a dream come true. Organize all your supplies in a visually appealing and easily accessible manner. The flat surfaces can even be used as additional workspace.
The Enduring Allure of the IKEA Hack: More Than Just Furniture
The phenomenon of IKEA hacking is more than just a clever way to save money; it’s a cultural movement that celebrates creativity, resourcefulness, and personalization in home design. The KALLAX built-in hack perfectly embodies this spirit, showcasing why these transformations continue to captivate and inspire homeowners worldwide.
- Empowering Personalization: In an age of mass production, IKEA hacks offer a powerful antidote. They empower individuals to take generic, affordable pieces and infuse them with their unique personality and style. This transforms a house into a home that truly reflects its inhabitants, fostering a deeper connection to one’s living space.
- Sustainable Design: By repurposing and upgrading existing furniture, IKEA hacks contribute to a more sustainable lifestyle. Instead of constantly buying new, disposable items, we’re encouraged to see the potential in what we already have or can acquire affordably, reducing waste and promoting conscious consumption.
- Community and Shared Knowledge: The vibrant online community surrounding IKEA hacks is a testament to the collaborative spirit of DIY. From detailed tutorials and inspiring before-and-after photos to troubleshooting forums, this shared knowledge base empowers everyone, from novices to experts, to tackle ambitious projects and learn new skills.
- The Thrill of the Transformation: There’s an undeniable satisfaction that comes from seeing a humble KALLAX unit evolve into a sophisticated, custom-looking built-in. The “before and after” is often dramatic, providing a tangible sense of accomplishment and boosting confidence in one’s DIY abilities. It’s a rewarding journey that culminates in a beautiful, functional addition to your home.
Your Custom Built-In Awaits: Embrace the KALLAX Challenge!
So, there you have it – the comprehensive guide to creating your very own IKEA KALLAX built-in shelving system. This hack is a fantastic opportunity to add significant value, style, and functionality to your home without the exorbitant cost of custom cabinetry.
Whether you’re a seasoned DIY veteran or just looking for your next rewarding weekend project, the KALLAX built-in is an achievable project. It’s a chance to prove that beautiful, custom design doesn’t have to come with a hefty price tag. So, measure your space, gather your tools, and get ready to transform your home with this viral IKEA hack. We can’t wait to see your stunning results!
Have you tackled a KALLAX built-in hack? Share your tips, tricks, and photos in the comments below! We love to see how our community is transforming their spaces.