I still remember the first Christmas we celebrated in our tiny apartment, with a budget so tight that store-bought decorations felt like a luxury. Determined to bring holiday cheer without emptying my wallet, I rolled up my sleeves and started crafting little treasures — homemade paper snowflakes, cinnamon stick ornaments, and garlands made from popcorn and cranberries. Not only did those simple handmade decorations fill our space with festive charm, but they also sparked laughter, stories, and moments that became some of my favorite holiday memories.
There’s something truly magical about decorating your home with creations made by hand — each piece tells a story and carries a bit of your heart. If you’re anything like me, wanting to deck the halls without breaking the bank, you’re in the right place. I’m so excited to share 20 genius, budget-friendly Christmas decorating ideas that will transform your home into a cozy winter wonderland. Whether you’re a crafting newbie or a holiday DIY pro, these ideas will inspire you to create beauty, joy, and memories this season — all while keeping your wallet happy!
1. Cozy Woodland Accent Display
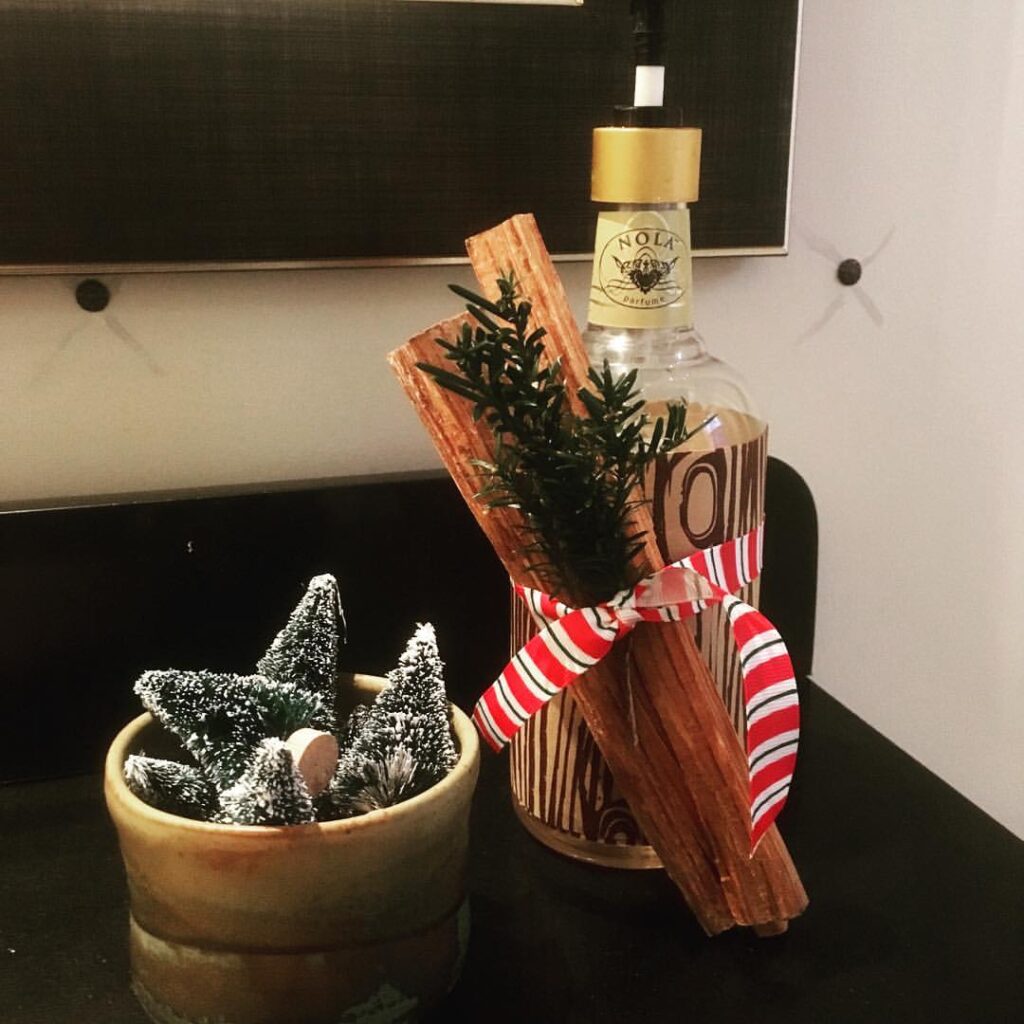
Transform a simple glass bottle into a seasonal centerpiece by bundling twigs and securing them with festive twine or ribbon. Pair it with a petite dish filled with frosted miniature evergreens to instantly evoke a serene winter forest vibe on any tabletop or mantel.
Key Design Elements
- Swap out plain twigs for cinnamon sticks to add a warm scent and rustic touch.
- Use burlap ribbon instead of satin for a more natural, earthy feel.
- Place a small battery-operated candle behind the bowl to create a soft, glowing ambiance.
Pro Tip: Lightly mist the twigs with artificial snow spray for added texture and a frosty finish.
2. Whimsical Button Garland on Mini Canvas
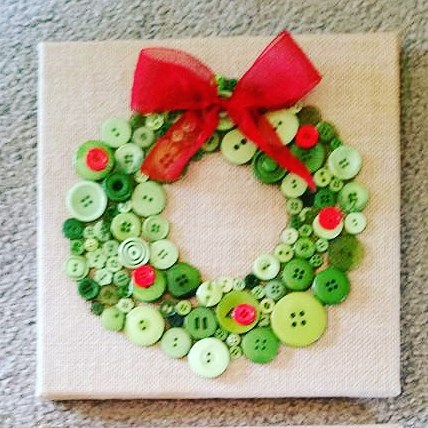
Transform a collection of assorted green buttons into a charming holiday wreath by arranging and adhering them onto a small canvas. Adding a bright red ribbon at the top instantly brings a festive, polished touch to this budget-friendly craft that repurposes materials you already have at home.
Key Design Elements
- Mix different shades and sizes of green buttons to create depth and visual interest in your wreath.
- Use a hot glue gun for a secure hold, especially if you want to hang your canvas as a decoration.
- Try adding tiny embellishments like beads or glitter to mimic holly berries for a pop of color.
Pro Tip: Paint the canvas background with metallic gold or silver before gluing buttons for an elegant holiday shimmer.
3. Frosty Fridge Fun: Transform Your Appliance into a Winter Wonder
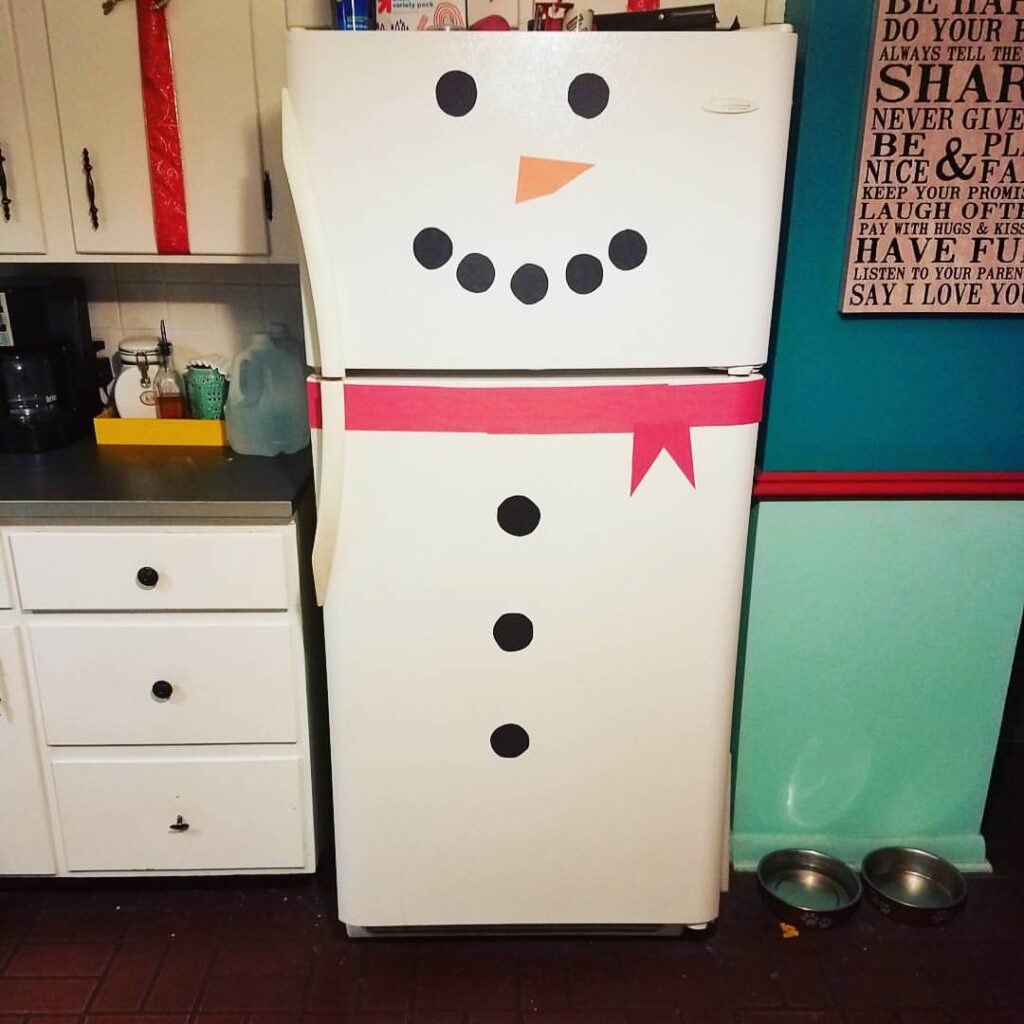
Turn your everyday refrigerator into a cheerful winter mascot using simple paper cutouts and a festive scarf. This creative twist adds a burst of holiday spirit to your kitchen without costing a dime.
Key Design Elements
- Use different sized white circles to create a dimensional snowman body on the fridge door.
- Craft a carrot nose from bright orange cardstock and attach it with removable tape for easy cleanup.
- Swap the ribbon scarf for a cozy piece of fabric or a holiday-themed bandana to personalize your snowman.
Pro Tip: Add magnetic buttons or eyes for easy repositioning and to keep your snowman looking sharp all season long.
4. Charming Paperfold Evergreens
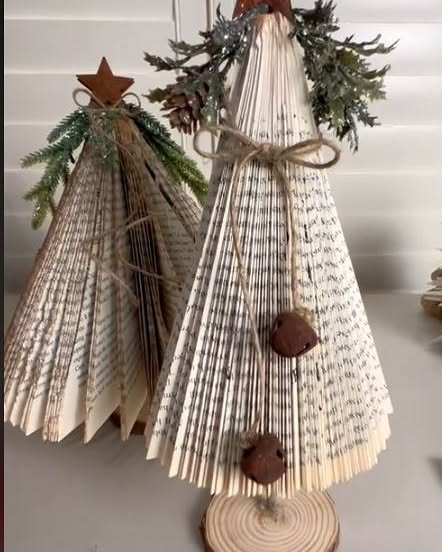
Transform outdated novels into festive treasures by intricately folding each page to create miniature Christmas tree shapes—no scissors or glue required. Adding a rustic twine bow and a touch of natural greenery completes this charming, eco-friendly holiday accent perfect for mantels or bookshelves.
Key Design Elements
- Experiment with different book sizes to craft a collection of trees in varying heights for a dynamic display.
- Enhance the look by lightly brushing the edges of the pages with metallic paint or glitter for a subtle holiday sparkle.
- Use different types of greenery like eucalyptus or pine sprigs to customize the scent and style of your decorations.
Pro Tip: To keep your paper trees looking fresh all season, store them in a dry place away from direct sunlight to prevent fading and warping.
5. Rustic Pyramid Wood Tree
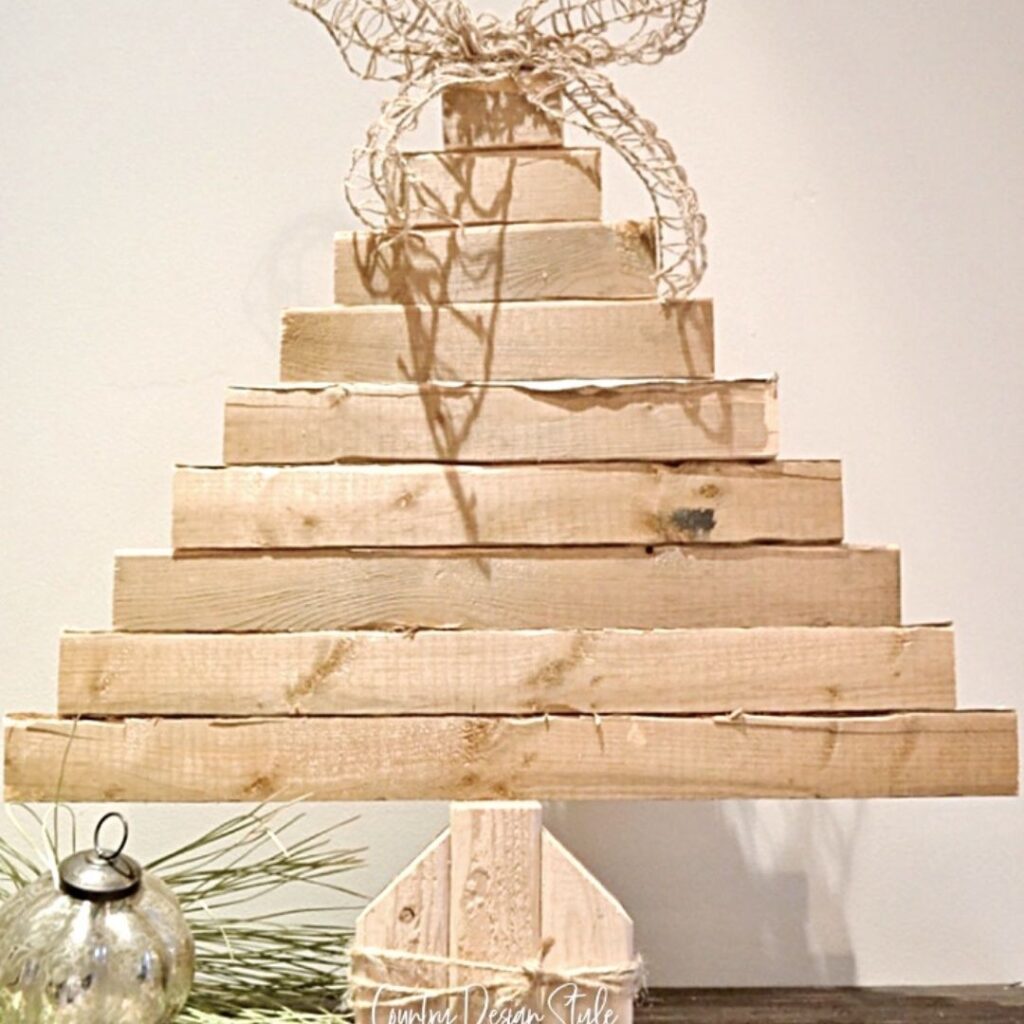
Transform leftover wood scraps into a charming pyramid-shaped Christmas tree that brings cozy farmhouse vibes to any tabletop. With just a little sanding and stacking, you can create a warm holiday centerpiece that’s both simple and stylish.
Key Design Elements
- Use varying wood types or stains to add depth and contrast to your stacked tree.
- Incorporate small LED string lights between layers for a subtle festive glow.
- Top your creation with a burlap ribbon or a miniature wooden star for added rustic flair.
Pro Tip: Lightly distress your wood pieces with sandpaper before stacking to enhance the rustic, weathered look.
6. Festive Frosty Gift Wraps
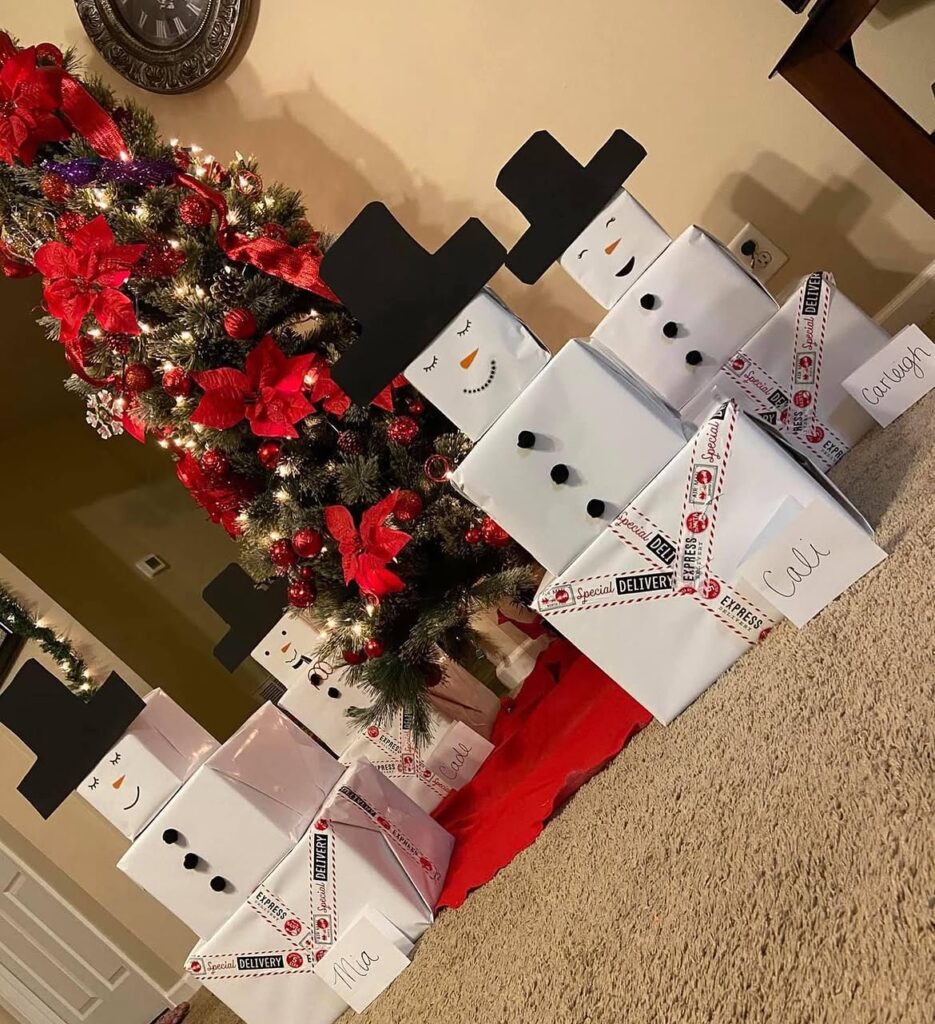
Transform your holiday gifts into a delightful lineup of frosty friends using simple materials like plain white paper and craft accents. This playful wrapping idea adds charm and whimsy beneath your tree without stretching your budget.
Key Design Elements
- Use black cardstock to craft tiny top hats and glue them to the tops of your gift boxes for a classic snowman look.
- Replace pom-poms with buttons or felt circles for the snowman’s eyes and buttons to give each gift a unique personality.
- Add a colorful ribbon or scarf made from fabric strips around the gift boxes to mimic cozy winter scarves.
Pro Tip: Lightly dust the finished gift wraps with glitter spray to give your snowmen a magical, frosty sparkle.
7. Charming Checkered Jar Vase
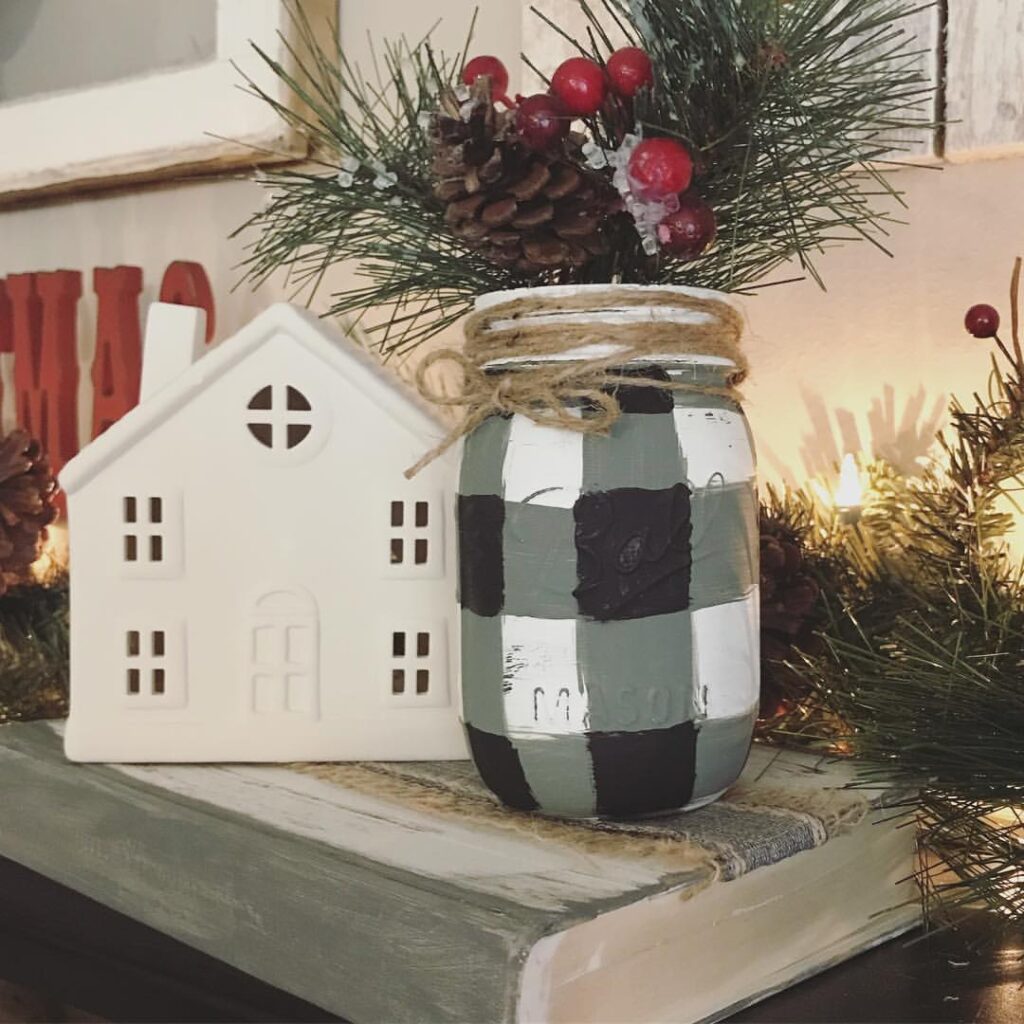
Transform an ordinary glass jar into a charming centerpiece by painting it with a soft sage and creamy white checkered motif. Add rustic twine and a fresh sprig of greenery to bring a cozy farmhouse vibe to your holiday decor effortlessly.
Key Design Elements
- Use painter’s tape to create clean, crisp lines for your checkered pattern.
- Swap out the greenery for pinecones or cinnamon sticks to enhance the seasonal feel.
- Try different color combos like deep red and cream for a traditional Christmas look.
Pro Tip: Seal your painted jar with a clear matte spray to protect the design and give it a smooth finish.
8. Cozy Plaid Pine & Reindeer Accents
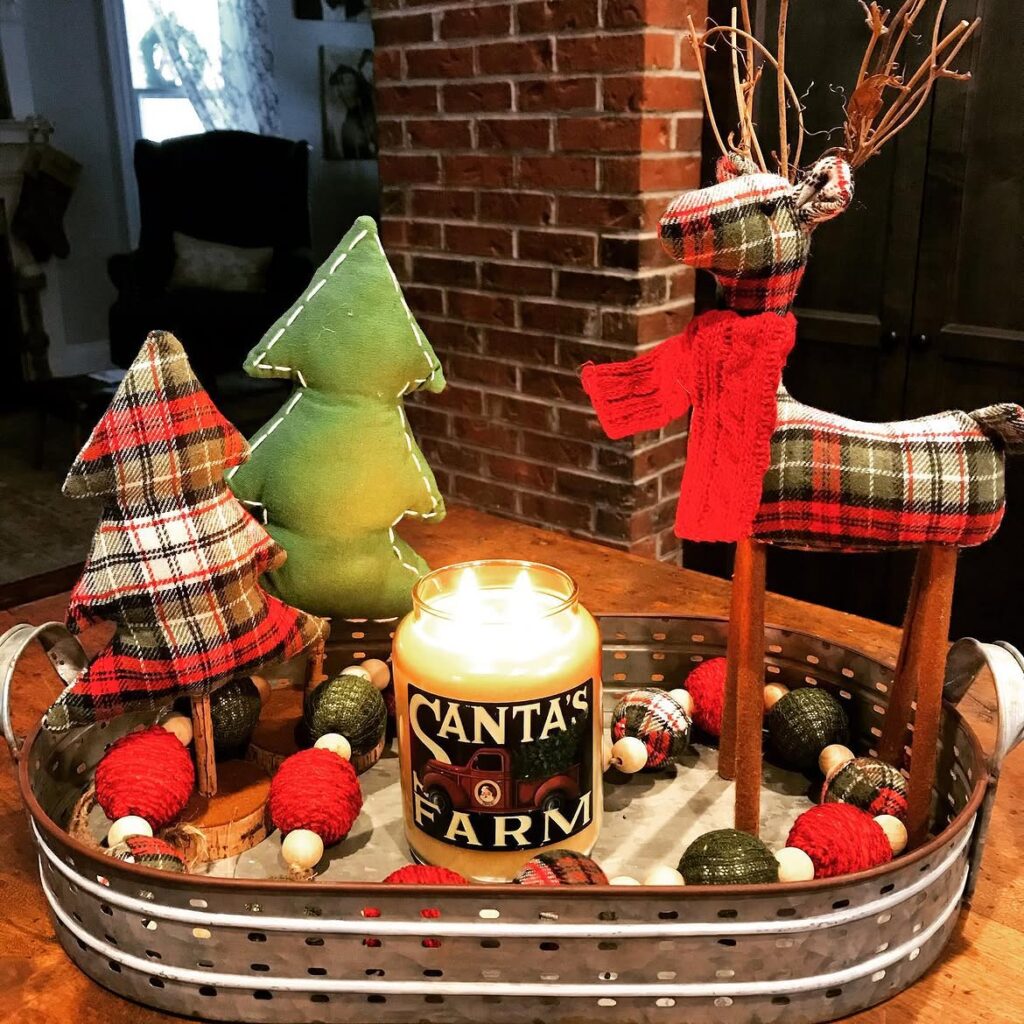
Transform small pieces of flannel fabric into charming pine tree and reindeer shapes that add warmth and rustic charm to your holiday vignette. Nestled on a wooden tray with simple accessories, these handcrafted accents create an inviting, homey feel without breaking the bank.
Key Design Elements
- Use varying shades of plaid flannel to create depth and visual interest in your fabric shapes.
- Add a touch of stuffing inside the trees and reindeer for a plush, three-dimensional look.
- Incorporate natural elements like pinecones or cinnamon sticks to enhance the cabin-inspired aesthetic.
Pro Tip: Secure your fabric shapes with hot glue onto felt backing to ensure durability and easy placement on your display tray.
9. Chic Folded Forest Accents

Transform simple sheets of colored paper into charming, three-dimensional trees that bring a fresh, artistic vibe to your holiday display. These easy-to-make decorations add a pop of color and texture without breaking the bank or creating waste.
Key Design Elements
- Experiment with different sizes and shades of paper to build a dynamic miniature forest scene.
- Use recycled or specialty papers like newspaper or metallic cardstock for unique textures and finishes.
- Arrange your paper trees on a rustic wooden tray or a mirrored surface to enhance their visual appeal.
Pro Tip: Lightly crease folds with a bone folder or the edge of a ruler for crisp, clean lines that make your trees stand out.
10. Glowing Winter Bear Window Art

Bring a touch of frosty magic to your windows with a handcrafted polar bear design that gleams like stained glass. This easy and budget-friendly project uses translucent paints or adhesive films to transform sunlight into a captivating winter display.
Key Design Elements
- Use clear contact paper as a base for easy layering and peeling of colored film pieces.
- Experiment with metallic or glitter-infused paints to add sparkle and depth to your polar bear art.
- Try cutting out additional winter elements like snowflakes or pine trees to frame your bear for a fuller scene.
Pro Tip: Apply a second layer of clear gloss medium over your finished suncatcher to enhance durability and shine.
11. Mini Evergreen Wonderland

Create a charming winter scene by grouping together a variety of small evergreen trees made from bottle brushes. These miniature evergreens bring a touch of woodland magic to any tabletop, shelf, or mantel with their festive hues and textured appeal.
Key Design Elements
- Mix different shades of green and add a few dyed trees in metallic colors for a modern twist.
- Arrange your trees on a mirrored tray or rustic wooden plank to enhance the forest effect.
- Incorporate tiny fairy lights or faux snow for added warmth and seasonal sparkle.
Pro Tip: Spray a light coat of clear glitter spray on the tips of the trees to mimic a fresh dusting of snow and catch the light beautifully.
12. Whimsical Forest Critter Ornaments

Transform ordinary pinecones into charming woodland creatures by adding hand-painted wooden details and soft faux fur touches. This budget-friendly craft captures the magic of nature and brings cozy forest friends to your holiday tree.
Key Design Elements
- Use small scraps of felt or fabric to create ears and tails for added texture and character.
- Incorporate tiny beads or buttons for eyes to give each critter a unique expression.
- Experiment with natural elements like twigs or dried moss to enhance the rustic woodland vibe.
Pro Tip: Spray pinecones with a light coat of glittery sealant to give your critters a subtle winter sparkle without overpowering their natural charm.
13. Elegantly Wrapped Mini Tinsel Tree

Transform a slender white tinsel tree into a chic centerpiece by spiraling wired ribbon from top to base and accenting it with large, eye-catching bows. Pair minimalist ornaments with a rustic wooden sign to create a stylish yet uncluttered holiday display.
Key Design Elements
- Choose ribbons with subtle patterns or metallic accents to add texture without overwhelming the tree.
- Swap oversized bows for festive floral picks or pine cones for a nature-inspired twist.
- Use coordinating colors between the ribbon and ornaments to maintain a cohesive, boutique-style look.
Pro Tip: Secure the ribbon and bows with clear floral wire to keep decorations perfectly placed throughout the season.
14. Ribbon-Hung Ornament Showcase

Transform a simple old frame by removing the glass and suspending a few festive ornaments with colorful ribbons to create a charming floating holiday display. Adding a large, vibrant bow at the top instantly elevates a basic frame into a standout seasonal decoration for any wall.
Key Design Elements
- Use different ribbon textures like velvet or satin to add depth and richness to the display.
- Cluster ornaments of varying sizes and finishes (matte, shiny, glitter) for visual interest.
- Paint the frame in metallic or holiday-themed colors to coordinate with your decor style.
Pro Tip: Secure the ribbons tightly to the frame with invisible tape or small hooks to keep ornaments perfectly aligned.
15. Festive Memories Photo Montage

Transform your collection of Santa snapshots into a charming holiday centerpiece by arranging them in a stylish multi-photo frame. This creative display not only preserves precious moments but also adds a heartfelt touch to your seasonal decor.
Key Design Elements
- Choose frames with varied sizes or shapes to add visual interest and highlight special photos.
- Incorporate small festive embellishments like mini ornaments or holly sprigs between pictures for extra holiday cheer.
- Rotate photos each year to keep the display fresh and celebrate new holiday memories alongside old ones.
Pro Tip: Use double-sided tape or photo corners to swap out pictures easily without damaging the frame or photos.
16. Chic Folding Wood Tree for Cozy Corners

Transform a pair of hinged wooden panels into a sleek, minimalist holiday centerpiece that fits perfectly in small living spaces. Painted in crisp white and adorned with delicate lights and simple embellishments, this design delivers maximum festive impact with minimal fuss.
Key Design Elements
- Use lightweight plywood to ensure easy folding and storage after the holidays.
- Add subtle touches like handmade paper ornaments or natural pine cones for an earthy vibe.
- Experiment with soft pastel paints instead of white for a modern twist on traditional decor.
Pro Tip: String battery-operated fairy lights inside the panels for a cozy glow without needing a nearby outlet.
17. Festive Frosty Jar Treats

Transform simple glass jars into adorable winter-themed gifts by filling them with your favorite candies and adding playful faces with craft supplies. These charming frosty friends are perfect for sharing holiday cheer without breaking the bank.
Key Design Elements
- Use white pom-poms and felt to create a cute snowman nose and scarf instead of a reindeer motif.
- Swap chocolate malt balls for colorful jelly beans or peppermint candies for a fun twist.
- Add twine or ribbon around the jar lid to enhance the rustic, homemade look.
Pro Tip: Secure all decorations with a hot glue gun to ensure they stay put during transport and gifting.
18. Rustic Charm Holiday Tray

Transform a simple tiered tray into a warm holiday centerpiece by layering natural elements like faux cotton branches and petite pumpkins. Incorporate a touch of vintage flair with a rustic sign to evoke a welcoming farmhouse spirit that lasts throughout the season.
Key Design Elements
- Use thrift store finds or repurpose trays you already have to keep costs low and add character.
- Mix in greenery such as eucalyptus or pine sprigs to introduce fresh color and texture.
- Swap out seasonal accents like orange pumpkins for white or sage green ones to maintain a calm, cohesive palette.
Pro Tip: Add battery-operated fairy lights around the tray edges to create a cozy, inviting glow after dark.
19. Chic Holiday Candle Stands Using Repurposed Glassware

Transform ordinary wine glasses into stunning holiday candle holders by simply flipping them over and filling the bowl with shiny ornaments or festive trinkets. This quick and stylish hack creates a glowing centerpiece that adds instant charm to any table setting.
Key Design Elements
- Use a mix of metallic and matte ornaments inside the glass to create depth and texture.
- Swap out traditional candles for battery-operated tealights to avoid wax drips and increase safety.
- Try different glassware like champagne flutes or martini glasses for varied height and style.
Pro Tip: Add a sprig of fresh greenery or a cinnamon stick under the glass base for an extra seasonal fragrance and rustic touch.
20. Rustic Wood Slat Christmas Tree for Cozy Corners

Transform spare pallet slats or old fence planks into a charming, minimalist Christmas tree that fits perfectly in snug spots. Painted with a soft whitewash and adorned with twinkling fairy lights, this rustic piece brings festive warmth without taking up precious floor space.
Key Design Elements
- Arrange the wood slats in descending lengths, stacking them horizontally to create a tiered tree shape.
- Use natural jute twine or simple wire to secure the layers together for easy disassembly after the season.
- Add small pinecones or dried citrus slices between the slats for an organic, textured look.
Pro Tip: Sand the wood lightly before whitewashing to ensure a smooth finish and better paint adhesion.
Wrapping Up
This holiday season, why not bring a little extra magic into your home by trying at least one of these budget-friendly DIY decor ideas? Handmade decorations carry a special warmth and meaning that store-bought items simply can’t match—they tell a story, reflect your personal touch, and create lasting memories with loved ones. Whether it’s crafting a simple wreath or creating festive candle holders, your creativity will shine through and brighten your celebrations. If you found inspiration here, be sure to save or share this post so others can spread the joy of handmade holiday cheer too!


