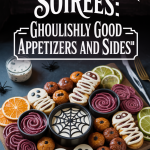
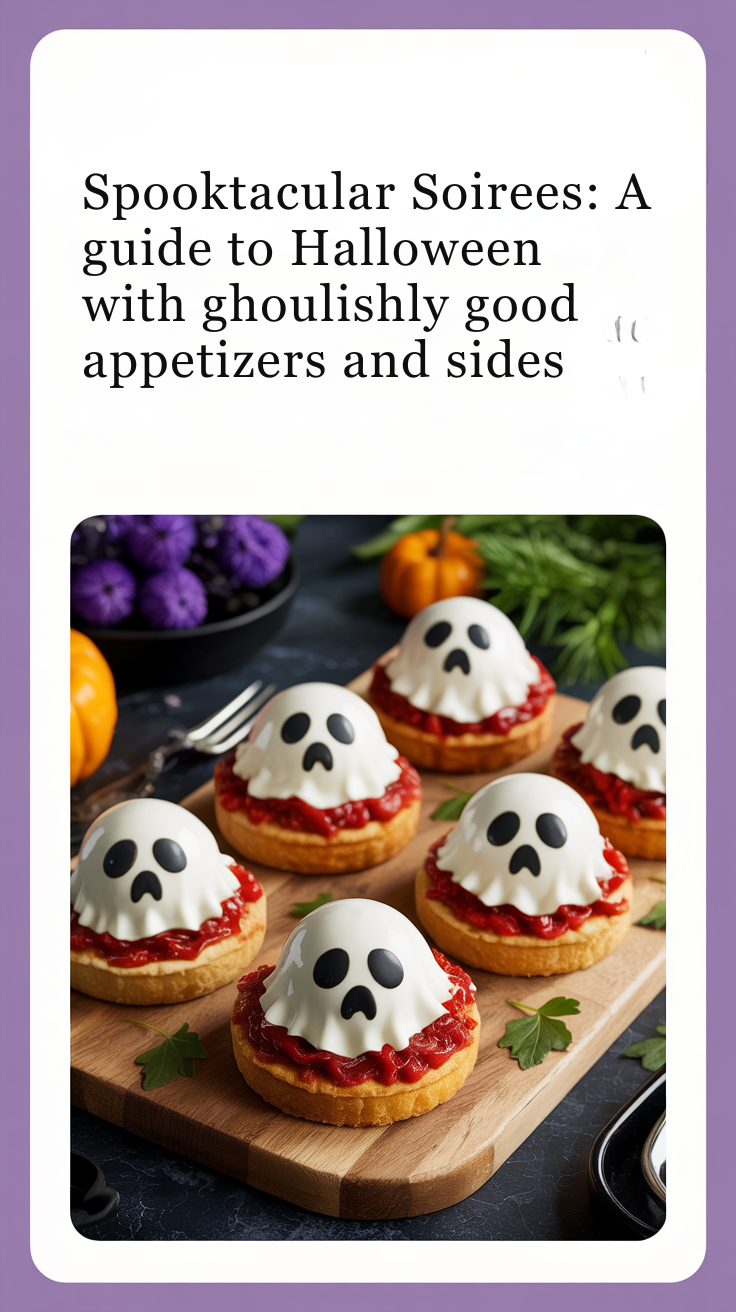
The Allure of Halloween Hosting
Halloween, a night shrouded in mystery, magic, and a touch of mischief, has evolved far beyond its ancient origins into a beloved modern holiday. It’s a time when imagination takes flight, inhibitions are shed, and the ordinary transforms into the extraordinary. For many, the true spirit of Halloween isn’t just about trick-or-treating or donning a costume; it’s about the thrill of hosting a gathering that embraces the spooky, the silly, and the spectacularly creative. From eerie decor that sends shivers down the spine to ghoulishly delightful treats that tantalize the taste buds, Halloween entertaining offers a unique canvas for hosts to unleash their inner macabre artist.
Unlike other holidays that often carry the weight of tradition and formality, Halloween revels in playful irreverence. It’s a chance to step outside the box, experiment with themes, and create an immersive experience for guests of all ages. Whether you’re planning a sophisticated adult costume party, a family-friendly monster mash, or a casual get-together with friends, the essence of Halloween hosting lies in its ability to transport everyone into a world of festive frights and fantastic fun. The joy comes from crafting an atmosphere where every detail, from the flickering candlelight to the cleverly disguised dish, contributes to the overall enchantment and playful terror.
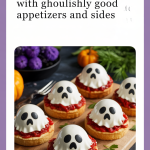
But what truly makes a Halloween party spooky, memorable, and successful? It’s a delicate balance of atmosphere, activities, and, perhaps most importantly, food that looks as thrilling as it tastes. This article will serve as your comprehensive guide to mastering the art of Halloween entertaining. We’ll delve into setting the perfect eerie scene, share essential hosting tips for a stress-free celebration, and, most excitingly, provide a roundup of “spooky” Halloween appetizers and sides. These aren’t just recipes; they’re edible works of art designed to surprise, delight, and perhaps even gross out your guests in the most delicious way possible. Get ready to conjure up a Halloween party that will be talked about long after the last ghost has vanished.
Setting the Scene: Ambiance and Atmosphere
Creating an unforgettable Halloween party begins with transforming your space into a realm of festive fright. The ambiance is paramount, dictating the mood and immersing your guests in the spirit of the holiday. Think beyond simple decorations; consider how every element—sight, sound, and even smell—contributes to a cohesive and captivating experience.
Decor: From Eerie Elegance to Gory Fun
Halloween decor offers a spectrum of styles, allowing you to tailor the atmosphere to your personal taste and guest list. Whether you prefer subtle sophistication or outright horror, consistency in your chosen theme will elevate your party.
•Eerie Elegance: For an adult-oriented gathering, consider a gothic or vintage Halloween theme. Think antique-looking lace spiderwebs, flickering candelabras, dusty old books, and ornate frames with spooky portraits. Use a muted color palette of deep purples, charcoal grays, and antique golds. Incorporate natural elements like dried branches, dark flowers, and moss. This approach creates a sophisticated yet unsettling atmosphere.
•Gory Fun: If your crowd enjoys a more visceral experience, lean into classic horror tropes. Fake blood, severed limbs (props, of course!), cobwebs galore, and plastic spiders can create a delightfully gruesome scene. Use vibrant oranges, blacks, and slime greens. Inflatable monsters, skeletons emerging from the ground, and caution tape can add to the playful horror. Remember to place these elements strategically to maximize impact without overwhelming the space.
•Family-Friendly Spooky: For parties with children, opt for friendly ghosts, smiling pumpkins, cute monsters, and whimsical witches. Focus on bright, cheerful Halloween colors like orange, purple, and green. Balloon arches, themed tablecloths, and fun cutouts can create a festive, non-threatening environment. DIY crafts like paper bats or ghost garlands can involve the kids in the decorating process.
Lighting: Shadows, Flickers, and Glows
Lighting is arguably the most crucial element in setting a Halloween mood. It can transform an ordinary room into a haunted mansion or a mystical lair.
•Dim the Lights: The first rule of Halloween lighting is to ditch bright overhead lights. Embrace darkness and use it to your advantage. Dimmers are your best friend.
•Flickering Candles: Battery-operated LED candles are a safe and effective way to create a spooky, flickering glow. Place them in lanterns, on mantels, or along pathways. Real candles can be used with extreme caution and only in safe, stable holders, away from flammable materials.
•Colored Lights: Experiment with colored light bulbs or gels. Green lights can create a sickly, swamp-like glow, while purple can evoke a mystical, witchy vibe. Red lights can simulate a bloody, eerie atmosphere. Black lights can make white and neon objects glow, adding a psychedelic touch.
•Spotlights and Shadows: Use small spotlights to highlight specific decorations, like a menacing skeleton or a creepy portrait. Position lights to cast dramatic shadows, turning everyday objects into ominous silhouettes. A strategically placed light can make a simple sheet ghost come alive.
•Fog Machines: For an extra layer of mystique, a fog machine can transform your space into a misty graveyard or a haunted swamp. Combine it with colored lights for maximum effect.
Soundscapes: Spooky Tunes and Haunting Effects
Sound is often an overlooked but incredibly powerful tool for immersion. The right audio can elevate your Halloween party from a visual spectacle to a full sensory experience.
•Spooky Playlists: Curate a playlist that includes classic Halloween movie soundtracks, eerie instrumental music, and songs with a creepy vibe. Think themes from Psycho, Halloween, or The Exorcist. Mix in some fun, upbeat Halloween pop songs for dancing, like “Monster Mash” or “Thriller.”
•Haunting Sound Effects: Incorporate sound effects like creaking doors, howling wolves, cackling witches, thunder, and ghostly whispers. These can be played subtly in the background or timed for dramatic effect as guests arrive or move through certain areas.
•Hidden Speakers: Strategically place small speakers around your party area to create an immersive sound experience. You can even hide speakers in bushes outside to greet guests with eerie sounds as they approach your home.
Activities: Games, Movies, and Costume Contests
While good food and atmosphere are essential, engaging activities keep the energy high and guests entertained. Tailor your activities to your audience, ensuring there’s something for everyone.
•Costume Contest: A classic for a reason! Offer fun prizes for categories like “Scariest,” “Most Original,” “Funniest,” or “Best Couple/Group.” This encourages guests to put effort into their costumes and provides great photo opportunities.
•Halloween Games: For family-friendly parties, traditional games like bobbing for apples, a mummy wrap race (using toilet paper), or a scavenger hunt for candy are always a hit. For adults, consider Halloween-themed trivia, a murder mystery game, or even a spooky escape room experience.
•Horror Movie Marathon: Set up a dedicated area for a horror movie marathon, playing classic scary films or family-friendly Halloween movies on a loop. This provides a chill-out zone for guests who prefer a more relaxed pace.
•Fortune Telling/Tarot Reading: Hire a fortune teller or have a friend dress up and offer mock tarot card readings. This adds an element of mystery and fun interaction.
•Photo Booth: Create a themed photo booth with spooky props, backdrops, and good lighting. Encourage guests to take photos and share them using a designated hashtag. [1]
General Tips for a Frightfully Fun Party
Hosting a Halloween party, while exciting, can also be a monstrous undertaking. To ensure your event is more treat than trick, a few general hosting tips can help you navigate the planning and execution with ease, allowing you to enjoy the festivities alongside your guests.
Plan Ahead: Menu, Decorations, Guest List
Just like any successful event, a Halloween party benefits immensely from meticulous planning. The earlier you start, the less stressed you’ll be as the big night approaches.
•Menu Planning: Decide on your food and drink menu at least two to three weeks in advance. Consider the balance of savory and sweet, hot and cold, and make sure to include options that cater to various dietary needs. Prioritize dishes that can be made ahead or require minimal last-minute assembly. Create a detailed shopping list and break it down into perishable and non-perishable items, buying non-perishables well in advance.
•Decorations Strategy: Don’t try to decorate your entire house overnight. Start gathering decorations weeks before. Decide on your theme (eerie elegance, gory fun, family-friendly spooky) and stick to it. Focus on key areas like the entryway, main party room, and food table. DIY decorations can be fun and cost-effective, but factor in the time needed to create them.
•Guest List and Invitations: Finalize your guest list early and send out invitations (digital or physical) with plenty of notice. Include important details like the start and end times, dress code (costumes encouraged!), and if guests should bring anything. Asking about dietary restrictions on the RSVP is a thoughtful touch.
Dietary Considerations: Catering to All Ghouls and Goblins
In today’s diverse culinary landscape, it’s rare to host a party without encountering various dietary preferences or restrictions. Being prepared ensures all your guests feel comfortable and included.
•Ask on RSVP: The easiest way to manage this is to include a line on your invitation asking guests to inform you of any allergies or dietary needs. This allows you to plan your menu accordingly.
•Offer Variety: Aim to have a mix of options. Include vegetarian, vegan, gluten-free, and dairy-free dishes where possible. For example, a vegetable platter with hummus (naturally vegan and gluten-free) is always a safe bet. Many of the spooky recipes can be adapted with substitutions.
•Label Dishes Clearly: Use small, festive labels next to each dish to indicate ingredients or dietary suitability (e.g., “Contains Nuts,” “Vegan,” “Gluten-Free”). This empowers guests to make informed choices and avoids awkward questions.
•Prevent Cross-Contamination: If you have guests with severe allergies, take extra precautions. Use separate serving utensils for dishes that cater to specific needs, and prepare allergy-friendly items first to avoid cross-contamination in the kitchen.
Safety First: Decorations, Candles, and Pathways
While spooky is the goal, safety should always be the priority. A few precautions can prevent any real-life scares.
•Fire Safety: If using real candles, ensure they are in sturdy holders, placed away from flammable materials (curtains, paper decorations), and never left unattended. Battery-operated LED candles are a fantastic, safe alternative that still provides a flickering glow.
•Clear Pathways: Ensure all pathways, both indoors and outdoors, are clear of tripping hazards. Costumes can be cumbersome, and dim lighting can obscure obstacles. Secure rugs, tuck away electrical cords, and make sure there’s enough space for guests to move around comfortably.
•Outdoor Lighting: If guests will be arriving or departing after dark, ensure your porch, walkway, and steps are well-lit to prevent falls. Motion-sensor lights can be particularly useful.
•Decorations Placement: Hang decorations securely so they don’t fall. Avoid placing decor where it might obstruct exits or create a hazard. If using fog machines, ensure proper ventilation and warn guests, especially those with respiratory sensitivities.
Embrace the Theme: Costumes and Character
The most successful Halloween parties are those where the host fully embraces the spirit of the holiday. Your enthusiasm is contagious!
•Wear a Costume: Lead by example! Donning a fantastic costume yourself encourages guests to do the same and immediately sets a fun, festive tone. It shows you’re committed to the theme.
•Stay in Character (Playfully): Depending on your theme, you might playfully stay in character. A cackling witch greeting guests or a mad scientist explaining his “potions” can add an extra layer of entertainment. This doesn’t mean you can’t be attentive to your hosting duties, but rather that you infuse them with Halloween charm.
•Engage with Guests: Encourage guests to talk about their costumes, share their favorite Halloween memories, or participate in themed activities. Your role as host is to facilitate fun and interaction, making everyone feel part of the spooky celebration.
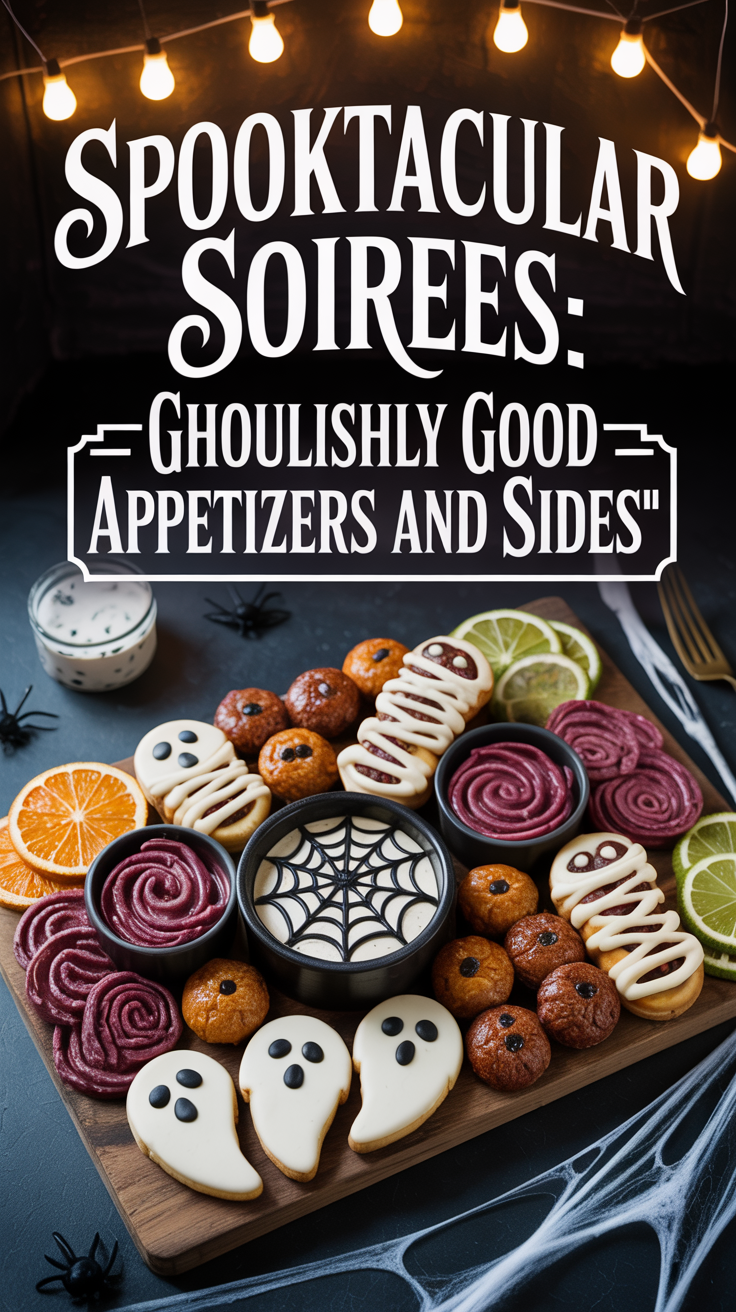
Ghoulishly Good Appetizers: The First Bite of Fright
Appetizers are the first culinary impression your guests will have, and on Halloween, this is your prime opportunity to set a deliciously spooky tone. These bite-sized delights should be visually striking, playfully gruesome, and, most importantly, incredibly tasty. The goal is to create dishes that spark conversation, elicit gasps of delight (or playful horror), and get everyone in the mood for a frightfully fun evening. The best Halloween appetizers are often those that cleverly disguise familiar flavors in unexpected, themed presentations.
The Importance of Themed Starters
Serving themed appetizers is crucial for an immersive Halloween experience. It shows attention to detail and commitment to the holiday spirit. These starters act as edible decorations, contributing to the overall ambiance and providing fantastic photo opportunities. They also serve a practical purpose, offering guests something to nibble on as they arrive and mingle, preventing them from getting too hungry before the main event (if you’re serving one).
Spooky Appetizer Recipes
Here’s a roundup of some ghoulishly good appetizer recipes that are sure to be a hit at your Halloween gathering, complete with their spooky element, ingredients, and instructions:
1. Mummy Dogs
•Description: A classic crowd-pleaser, these are hot dogs (or sausages) wrapped in strips of puff pastry or crescent roll dough to resemble mummies, then baked until golden. Ketchup or mustard dots serve as the eyes.
•Spooky Element: The bandage-wrapped appearance of the hot dogs perfectly mimics ancient mummies, making them a fun and recognizable Halloween treat.
•Ingredients:
•1 package (8 count) hot dogs or cocktail sausages
•1 can (8 oz) refrigerated crescent roll dough or 1 sheet puff pastry, thawed
•Ketchup or mustard for eyes
•Instructions:
1.Preheat oven to 375°F (190°C). Line a baking sheet with parchment paper.
2.If using crescent rolls, unroll the dough and separate it into triangles. Cut each triangle lengthwise into 2-3 thin strips. If using puff pastry, roll it out slightly and cut into thin strips.
3.Wrap 1-2 strips of dough around each hot dog, starting at one end and leaving a small gap for the “face.” Don’t worry about perfection; messy wraps look more authentic.
4.Place wrapped hot dogs on the prepared baking sheet.
5.Bake for 12-15 minutes, or until the dough is golden brown and the hot dogs are heated through.
6.Remove from oven. Let cool slightly. Use ketchup or mustard to draw two small dots for eyes in the gap you left. Serve warm.
2. Spider Web Dip (Guacamole or Hummus)
•Description: A creamy dip (guacamole or hummus works best) spread into a shallow dish, then decorated with sour cream or Greek yogurt in concentric circles, which are then dragged with a toothpick to create a spider web design. A plastic spider or olive spider can be placed in the center.
•Spooky Element: The intricate spider web design is instantly recognizable and adds a creepy-crawly touch to a beloved dip.
•Ingredients:
•2 cups prepared guacamole or hummus
•1/4 cup sour cream or plain Greek yogurt (for the web)
•Optional: Black olive for spider, or a plastic spider decoration
•Serving suggestions: Tortilla chips, pita bread, vegetable sticks
•Instructions:
1.Spread the guacamole or hummus evenly into a shallow, round serving dish.
2.Place the sour cream (or yogurt) into a small piping bag with a tiny hole cut at the tip, or use a small Ziploc bag with a corner snipped off. Alternatively, use a spoon to carefully drizzle.
3.Starting from the center of the dip, pipe or drizzle concentric circles of sour cream over the surface, spacing them about 1/2 inch apart.
4.Take a toothpick and drag it from the center of the dip outwards through the sour cream circles, creating lines that resemble a spider web. Repeat this motion around the entire dip.
5.If desired, create a spider using a black olive (cut one half for the body, slice the other half into thin strips for legs) and place it in the center of the web. Or, simply place a clean plastic spider decoration.
6.Serve immediately with your favorite dippers.
3. Bloody Eyeball Caprese Skewers
•Description: A gruesome twist on the classic Caprese skewer, featuring mozzarella balls stained with beet juice to resemble bloodshot eyeballs, threaded with cherry tomatoes and basil, and drizzled with a “bloody” balsamic glaze.
•Spooky Element: The mozzarella balls are transformed into bloodshot eyeballs, complete with a “pupil” and “veins,” making for a deliciously unsettling presentation.
•Ingredients:
•1 pint cherry or grape tomatoes
•1 package (8 oz) fresh mozzarella balls (bocconcini), drained
•1/4 cup beet juice (from canned beets or fresh juice)
•Fresh basil leaves
•Balsamic glaze (store-bought or homemade)
•Small skewers or toothpicks
•Instructions:
1.In a small bowl, soak the drained mozzarella balls in beet juice for 15-30 minutes, or until they take on a pinkish, bloodshot appearance. The longer they soak, the deeper the color.
2.While mozzarella soaks, prepare your skewers. For each skewer, thread a cherry tomato, a basil leaf, and then a beet-stained mozzarella ball. You can use a food-safe marker or a tiny dot of balsamic glaze to draw a pupil on each mozzarella “eyeball” if desired.
3.Arrange the skewers on a platter.
4.Just before serving, drizzle generously with balsamic glaze, allowing it to pool slightly at the bottom to resemble blood. [5]
4. Witch Finger Pretzels
•Description: Pretzel rods dipped in melted white chocolate (dyed green) and adorned with an almond “fingernail” and knuckle creases, creating eerily realistic witch fingers.
•Spooky Element: These treats perfectly mimic gnarled, green witch fingers, complete with a fingernail, making them both creepy and delicious.
•Ingredients:
•1 bag pretzel rods
•12 oz white chocolate melting wafers or chips
•Green food coloring (gel or oil-based)
•Sliced almonds (for fingernails)
•Instructions:
1.Melt the white chocolate wafers according to package directions (microwave or double boiler). Once melted, stir in a few drops of green food coloring until you achieve a desired witchy green hue.
2.Dip each pretzel rod about two-thirds of the way into the melted green chocolate, allowing excess to drip off. Place on a parchment-lined baking sheet.
3.While the chocolate is still wet, gently press a sliced almond onto the end of each pretzel rod to create a “fingernail.” Use a toothpick or the back of a knife to draw small lines in the chocolate below the almond to resemble knuckle creases.
4.Let the chocolate set completely at room temperature or in the refrigerator for faster setting.
5. Deviled “Spider” Eggs
•Description: Classic deviled eggs with a spooky twist: black olive halves and thin strips are arranged on top to create the body and legs of a spider.
•Spooky Element: The simple addition of black olives transforms a beloved appetizer into creepy-crawly spiders, adding a playful fright to your food spread.
•Ingredients:
•6 hard-boiled eggs, peeled
•1/4 cup mayonnaise
•1 tsp Dijon mustard
•Salt and pepper to taste
•6-8 black olives, pitted
•Instructions:
1.Slice each hard-boiled egg in half lengthwise. Carefully scoop out the yolks into a small bowl.
2.Mash the yolks with mayonnaise, Dijon mustard, salt, and pepper until smooth and creamy.
3.Spoon or pipe the yolk mixture back into the egg white halves.
4.For each spider, take one black olive and cut it in half lengthwise. Place one half in the center of a deviled egg to form the spider’s body.
5.Slice the remaining olive halves into thin strips to create the spider’s legs. Arrange 3-4 strips on each side of the olive body to form the legs.
6.Arrange on a platter and serve.
Sinister Sides: Complementing the Main Haunt
While appetizers kick off the frightful feast, and a main course (if served) anchors the meal, side dishes provide an essential layer of thematic fun and deliciousness. For Halloween, sides are an opportunity to extend the spooky creativity to every corner of the plate, offering playful twists on familiar favorites. These dishes are designed to complement your main offerings, add visual interest, and continue the ghoulish theme without being overly complicated.
Adding Thematic Flair to the Meal
Spooky side dishes demonstrate a host’s commitment to the Halloween theme, transforming ordinary vegetables or grains into something extraordinary and fun. They can range from subtly eerie to overtly grotesque, providing a balanced contrast to the appetizers and setting the stage for any main course. The best Halloween sides are often those that are easily recognizable in their original form but cleverly disguised with a creepy presentation, making them appealing to both adults and children.
Spooky Side Dish Recipes
Here’s a roundup of some sinister side dish recipes that will perfectly complement your Halloween spread, complete with their spooky element, ingredients, and instructions:
1. “Worms and Dirt” Pasta Salad
•Description: A savory pasta salad featuring dark, squid ink pasta (or regular pasta dyed with food coloring) to resemble worms, tossed with a vibrant pesto or olive oil dressing, and mixed with finely chopped olives and herbs for the “dirt.” It’s a surprisingly delicious and visually striking dish.
•Spooky Element: The dark, squiggly pasta perfectly mimics worms, creating a playfully disgusting yet tasty side dish.
•Ingredients:
•12 oz squid ink pasta (or regular pasta like rotini, fusilli, or spaghetti)
•1/2 cup pesto (store-bought or homemade) or 1/4 cup olive oil + 2 tbsp lemon juice
•1/4 cup finely chopped black olives
•1/4 cup finely chopped fresh parsley or basil
•Salt and freshly ground black pepper to taste
•Optional: Cherry tomatoes (halved), small mozzarella balls
•Instructions:
1.Cook pasta according to package directions until al dente. If using regular pasta, you can dye it black by adding a few drops of black food coloring to the boiling water (ensure it’s food-safe dye).
2.Drain the pasta and rinse with cold water to stop cooking and prevent sticking. Transfer to a large bowl.
3.Add pesto (or olive oil and lemon juice), chopped black olives, and fresh parsley/basil to the pasta. Toss gently to combine. Season with salt and pepper.
4.For extra flair, you can add halved cherry tomatoes or small mozzarella balls to represent
small “bugs” or “eyeballs.” 5. Chill for at least 30 minutes before serving. [8]
2. Roasted “Severed Finger” Carrots
•Description: Whole carrots, peeled and trimmed to resemble fingers, roasted until tender-crisp, with a blanched almond sliver pressed into one end to act as a “fingernail.” A drizzle of sriracha or ketchup can simulate blood.
•Spooky Element: These carrots are eerily realistic severed fingers, offering a healthy yet delightfully grotesque addition to your Halloween spread.
•Ingredients:
•1 lb whole carrots, peeled
•2 tbsp olive oil
•Salt and black pepper to taste
•1/4 cup blanched almond slivers (for fingernails)
•Optional: Sriracha or ketchup for “blood”
•Instructions:
1.Preheat oven to 400°F (200°C). Line a baking sheet with parchment paper.
2.Trim the carrots to varying lengths, roughly 3-5 inches, and try to make one end slightly tapered to resemble a finger. If carrots are thick, you can halve them lengthwise.
3.Toss the carrots with olive oil, salt, and pepper until evenly coated. Spread them in a single layer on the baking sheet.
4.Roast for 20-30 minutes, or until tender-crisp and slightly caramelized. Cooking time will vary based on carrot thickness.
5.Once roasted, remove from the oven. While still warm, carefully press an almond sliver into the tapered end of each carrot to create a “fingernail.” You can use a small knife to make a shallow incision first if needed.
6.Arrange on a platter. For an extra gruesome touch, drizzle a small amount of sriracha or ketchup at the base of some of the “fingernails” to simulate blood. Serve warm or at room temperature.
3. Mashed Potato Ghosts
•Description: Creamy mashed potatoes piped into ghost shapes on a baking sheet, then lightly baked or broiled until slightly golden. Small black olive pieces are used for eyes.
•Spooky Element: Fluffy, white ghosts made from mashed potatoes offer a cute and comforting spooky side that’s perfect for all ages.
•Ingredients:
•4 cups prepared mashed potatoes (creamy, not too stiff)
•Small black olive pieces (for eyes)
•Optional: 1-2 tbsp milk or cream (if potatoes are too stiff for piping)
•Instructions:
1.Preheat oven to 375°F (190°C). Line a baking sheet with parchment paper.
2.If your mashed potatoes are too stiff, warm them gently with a tablespoon or two of milk or cream until they are a good piping consistency. Transfer the mashed potatoes to a large piping bag fitted with a large round or star tip (or simply snip off a corner of a sturdy Ziploc bag).
3.Pipe ghost shapes onto the prepared baking sheet. Start with a wider base and swirl upwards to create a ghost-like peak. Make them varying sizes for visual interest.
4.Bake for 10-15 minutes, or until the tips of the ghosts are lightly golden. Alternatively, you can broil them for 2-3 minutes, watching carefully to prevent burning.
5.Remove from oven. While still warm, gently press two small black olive pieces onto each ghost to create eyes. Serve immediately.
4. “Graveyard” Taco Dip
•Description: A layered taco dip, typically featuring refried beans, sour cream, guacamole, salsa, and cheese, topped with crushed tortilla chips (for “dirt”) and decorated with tombstone-shaped tortilla chips and fresh herbs or olive pieces to resemble graves and grass.
•Spooky Element: This dip transforms a party favorite into a miniature edible graveyard, complete with “dirt,” “tombstones,” and “grass,” making it a fun and interactive centerpiece.
•Ingredients:
•1 (16 oz) can refried beans
•1 (8 oz) package cream cheese, softened
•1 (16 oz) container sour cream
•1 packet taco seasoning
•1 cup salsa
•1 cup shredded cheddar cheese
•1 cup shredded lettuce
•1/2 cup chopped tomatoes
•1/4 cup sliced black olives
•1 cup guacamole
•Tortilla chips (for dipping and for “tombstones”)
•Optional: Fresh cilantro or parsley, crushed tortilla chips (for “dirt”)
•Instructions:
1.In a medium bowl, combine softened cream cheese, sour cream, and taco seasoning. Mix until well combined.
2.In a large, shallow serving dish (a rectangular dish works well for a graveyard effect), spread the refried beans evenly as the first layer.
3.Next, spread the cream cheese mixture over the refried beans.
4.Carefully spread the guacamole over the cream cheese layer.
5.Top with salsa, then sprinkle with shredded cheddar cheese, lettuce, chopped tomatoes, and sliced black olives.
6.For the “dirt” effect, crush some tortilla chips and sprinkle them over a portion of the dip.
7.Cut some tortilla chips into tombstone shapes (you can use a knife or kitchen shears). Insert these “tombstones” into the dip. You can write “RIP” on them with a food-safe marker or a dab of sour cream.
8.Garnish with fresh cilantro or parsley to resemble grass around the tombstones. Serve immediately with extra tortilla chips for dipping.
A Hauntingly Good Time
Halloween is a holiday unlike any other, offering a unique opportunity to embrace creativity, indulge in playful frights, and gather with loved ones for a truly memorable experience. From transforming your home into a haunted haven to crafting ghoulishly good treats, the essence of Halloween entertaining lies in its ability to transport guests into a world of festive enchantment and delicious surprises. It’s a chance to step away from the ordinary and immerse yourself in the extraordinary, creating moments that will be cherished long after the last pumpkin has been carved.
Throughout this guide, we’ve explored the essential ingredients for a spooktacular soiree. We began by emphasizing the power of ambiance, detailing how strategic decor, atmospheric lighting, and haunting soundscapes can set the perfect scene for your Halloween festivities. We then delved into practical hosting tips, highlighting the importance of planning ahead, accommodating dietary needs, prioritizing safety, and, most importantly, embracing the theme with enthusiasm. These foundational elements ensure that your party runs smoothly, allowing you to enjoy the magic alongside your guests.
But the true stars of any Halloween gathering are often the themed culinary creations. Our roundup of “spooky” appetizers and sides has provided you with a collection of recipes that are not only delicious but also visually captivating. From the playful charm of Mummy Dogs and Mashed Potato Ghosts to the delightfully gruesome Bloody Eyeball Caprese Skewers and Roasted “Severed Finger” Carrots, these dishes are designed to spark conversation, elicit smiles (and perhaps a few shudders), and perfectly complement your Halloween theme. Each recipe offers a creative way to infuse your menu with the spirit of the season, proving that holiday food can be both frightful and flavorful.
As you prepare to host your next Halloween bash, remember that the most important ingredient is your own enthusiasm. Embrace the opportunity to be imaginative, to surprise and delight your guests, and to create an atmosphere where everyone feels free to revel in the magic of the night. Whether you’re a seasoned host or a first-timer, these tips and recipes will empower you to conjure up a Halloween party that is not just an event, but an unforgettable experience. So, don your most creative costume, prepare your ghoulish delights, and get ready to host a hauntingly good time that will be talked about until next Halloween!