

Wall shelves have quietly become one of the most versatile design tools in modern homes, combining practical storage with instant personality. Whether you need a tidy spot for books, a stage for curated knickknacks, or a platform for trailing plants, the right shelf can transform an empty wall into a functional focal point. Contemporary designs—from sleek floating planks to sculptural metal brackets—blur the line between furniture and wall art, letting you solve everyday clutter while reinforcing your decorating style.
For makers and decorators alike, shelves are a perfect canvas for creativity: they’re easy to customize, inexpensive to build or swap out, and endlessly adaptable to different rooms and moods. In this roundup of 27 creative wall shelf projects and ideas, Designer & the Diyer highlights ways to elevate your space with clever layouts, mixed materials, and thoughtful finishes that marry utility with aesthetic impact. Expect practical how-tos, inspirational looks, and simple tweaks that will help you maximize vertical space and make every wall count.
1. Alcove-Ready Wooden Shelves: Simple Storage with Style
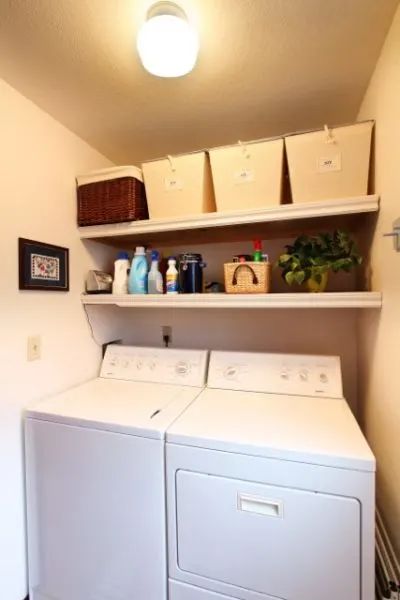
These pared-back wooden shelves are a straightforward solution for alcoves, linen nooks, or shoe closets where three walls form a natural frame. Built from basic lumber—or upgraded with furring strips for added texture—they provide sturdy, custom-fit storage without fuss. A quick sand and coat of paint or stain instantly elevates the look, keeping compact spaces tidy while leaving plenty of room to personalize hardware and finish.
Key Design Elements
- Furring strips add depth and a subtle trim detail for a finished, built-in appearance.
- Designed for three-sided alcoves—perfect for linen closets, shoe nooks, and tight spaces.
Pro Tip: Install continuous cleats screwed into studs on the back and sides for rock-solid support; finish (paint or stain) shelves before mounting to avoid touch-ups in tight alcoves.
2. Welcome-Ready Entry Shelf
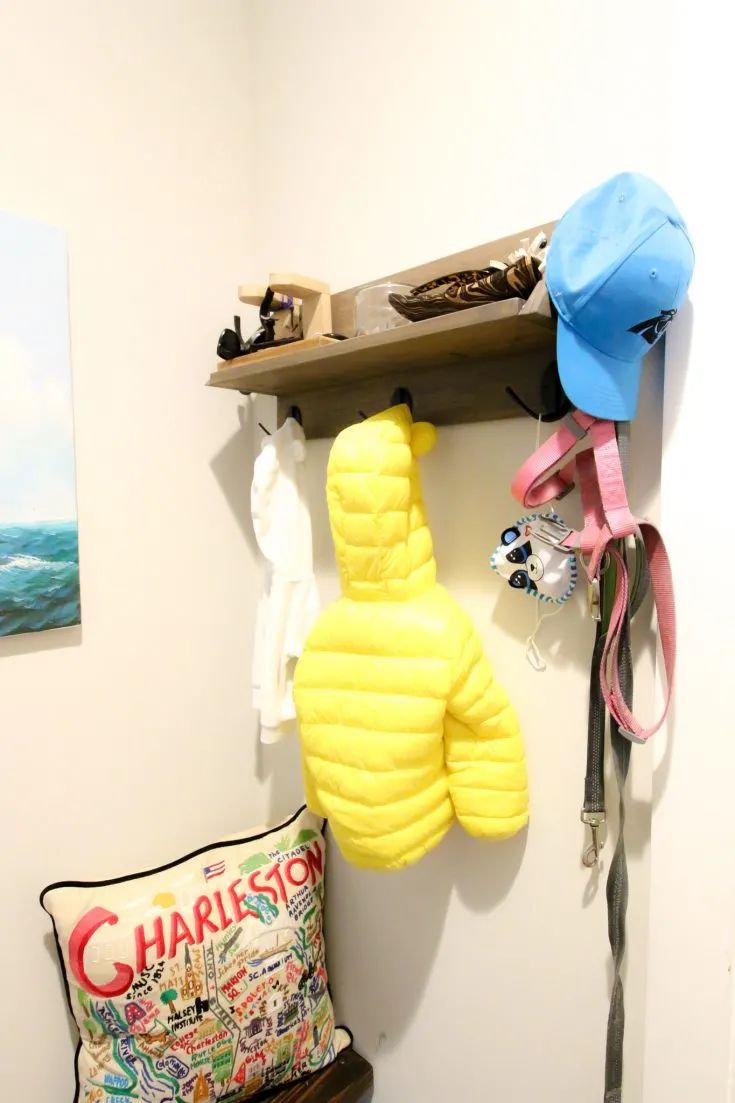
The entry shelf creates a polished first impression while taming everyday clutter. A sleek wooden ledge paired with hooks offers a spot to display decor and a practical place to hang coats, bags, and hats. Tuck baskets or small bins beneath for shoes and umbrellas, and style the top with a lamp or a couple of curated accents to make the entry both useful and inviting.
Key Design Elements
- Floating wood shelf paired with sturdy metal hooks
- Baskets or cubbies below for concealed shoe and accessory storage
Pro Tip: Mount the shelf so hooks sit about 65–70 inches from the floor for easy reach; fasten into studs or use heavy-duty anchors for weighty coats. Add a shallow tray on top to corral keys and mail for a tidy look.
3. Coastal Driftwood Display Shelf
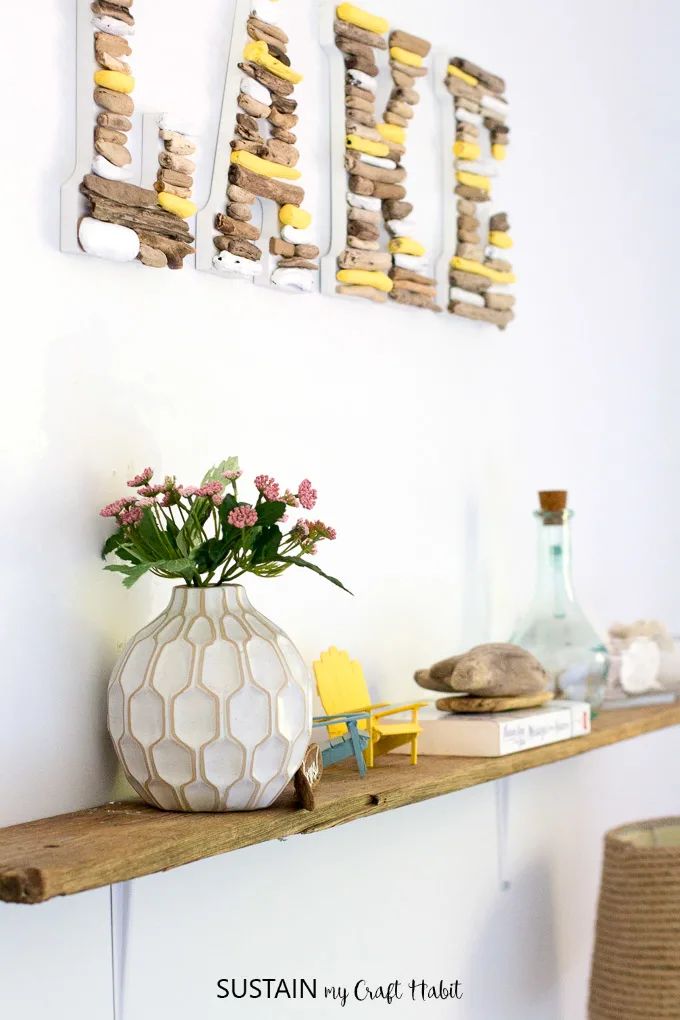
Found driftwood makes a gorgeous, low-effort shelf—just cut, sand, and mount a sturdy slab of weathered timber to bring subtle coastal charm to any room. Its irregular edges and sun-bleached patina create an artful, natural focal point perfect for framed photos, potted succulents, or small curios. For a layered look, attach two staggered boards; the organic texture contrasts beautifully with modern hardware for a relaxed, collected feel.
Key Design Elements
- Weathered texture adds instant coastal character
- Staggered levels create depth for photos and plants
Pro Tip: Pre-drill the driftwood, then secure with heavy-duty wall anchors or toggle bolts rated for the load; finish with a clear matte sealer to lock in color and prevent shedding.
4. Reclaimed Wood Shelves with an Industrial Edge
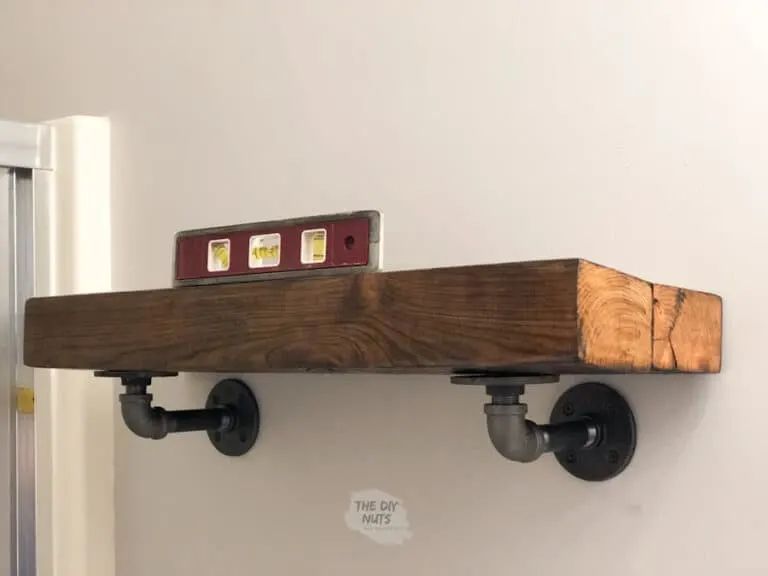
Chunky reclaimed-wood shelves bring warmth and texture to a bathroom, complementing both modern minimalism and relaxed coastal or farmhouse styles. Thick planks grounded with visible grain add an organic counterpoint to glossy tiles and chrome fixtures. Swap traditional supports for black iron pipe brackets to introduce an industrial edge, or choose brushed brass for a softer, upscale contrast. Use the wide surface to display rolled towels, potted greenery, and glass apothecary jars for a curated, lived-in look.
Key Design Elements
- Use thick, reclaimed planks for visual weight and pronounced grain.
- Choose pipe brackets for industrial contrast or brass mounts for warmth.
Pro Tip: Anchor shelves into studs with long lag bolts; if studs aren’t available use heavy-duty toggle anchors. Pre-seal the wood with a water-resistant oil or marine polyurethane to protect against humidity, and let it fully cure before styling so finishes don’t transfer to linens or decor.
5. Shuttered Shelf: Rustic Wall Rack with Hooks
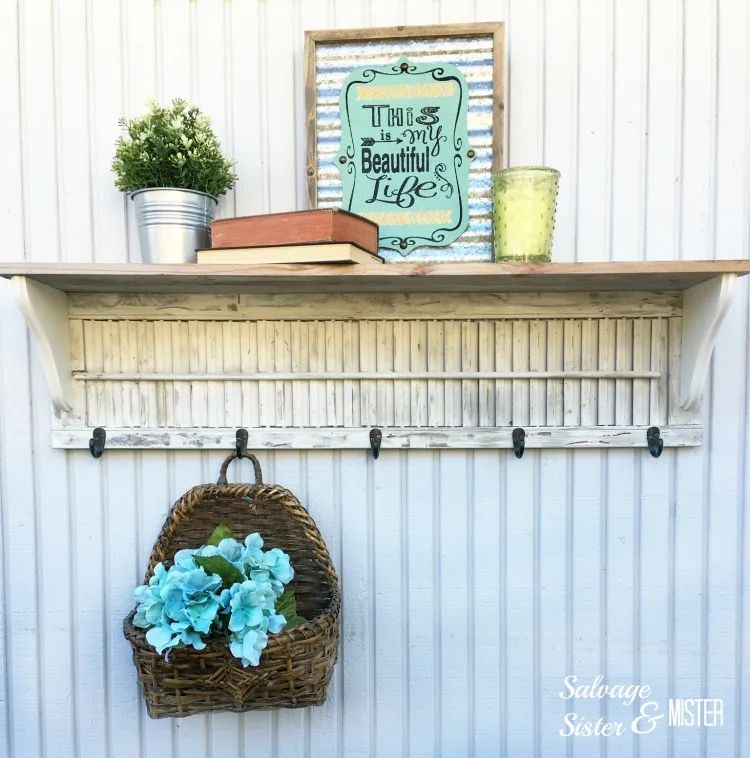
Transform an old wooden shutter into a stylish, space-saving wall shelf that mixes vintage charm with everyday function. Sand and refresh the slats, secure a narrow ledge to hold books or small plants, and orient the piece vertically or horizontally to suit your layout. Fit a row of hooks along the bottom to hang coats, bags, or hanging planters—an ideal solution for an entryway, living room, or any spot that needs both display and storage.
Key Design Elements
- Attach a slim reclaimed-wood ledge across the slats for books and greenery
- Fit heavy-duty hooks along the bottom for coats, bags, or hanging planters
Pro Tip: For a secure installation, mount the shutter using a French cleat or screw into wall studs and pre-drill holes for the hooks; if you’ll display live plants, seal the shelf with a waterproof finish to protect the wood.
6. Triangular Braces for Stylishly Sturdy Shelves
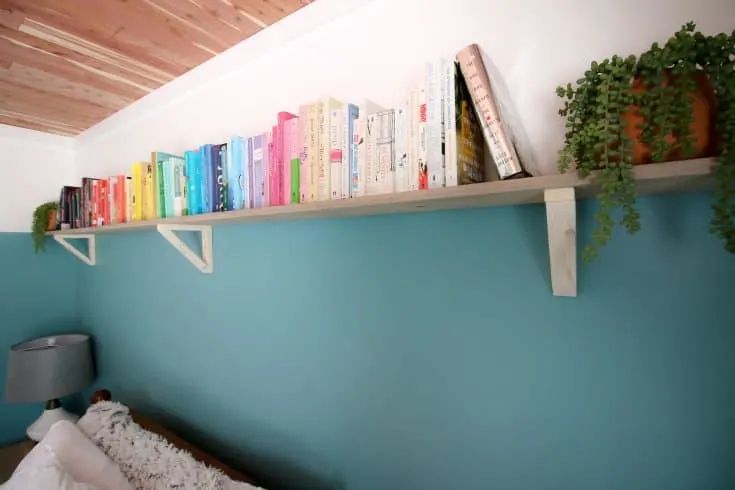
Triangle shelf brackets marry clean geometry with practical support — a smart way to reinforce floating shelves while introducing sculptural detail. Cut from leftover wood, these right-angle braces handle stacks of books and heavy plants without bulky hardware getting in the way. Sand, stain, or paint them to coordinate with your décor, or choose a contrasting color to make the angles a focal point. Quick to build, they elevate both stability and visual interest in any room.
Key Design Elements
- Geometric accent that doubles as reliable structural support
- Perfect for using wood offcuts — stain to match or paint for contrast
Pro Tip: Pre-drill and countersink holes, apply wood glue at the joint, then clamp before driving screws into wall studs. For heavy loads, use 3/4″ hardwood braces and space brackets 12–16 inches apart; finish with a clear topcoat for added durability.
7. Vintage-Inspired Triple-Tier Display
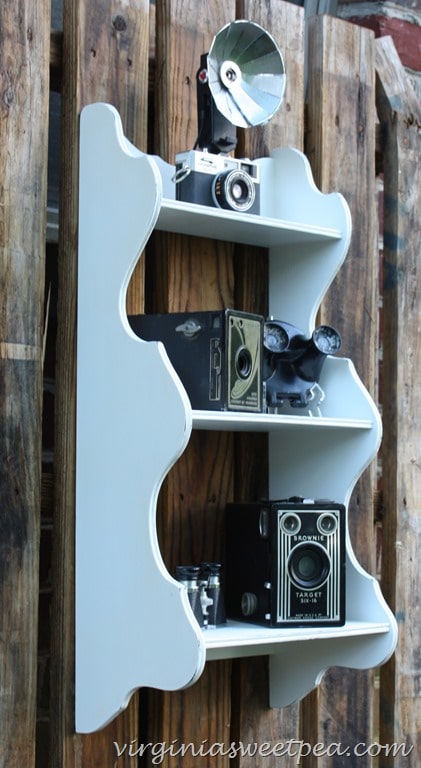
Transform a tired wall shelf into a three-tier focal point that pairs vintage charm with contemporary flair. Sand and refinish the wood or paint each shelf in contrasting hues, then personalize with stencils or subtle decals. Arrange plants, books, small ceramics and framed prints across the tiers to create depth and rhythm—mixing textures and heights turns this simple piece into a custom statement that works beautifully in entryways, kitchens, or living rooms.
Key Design Elements
- Combine natural wood stain with painted risers for layered, vintage-modern contrast.
- Layer objects of varying heights—books, plants, and sculptural pieces—for visual balance.
Pro Tip: Secure the shelf with a French cleat or heavy-duty anchors and place the bulkiest items on the lowest tier to keep the unit stable and well-balanced.
8. Built-In Closet Shelving Upgrade
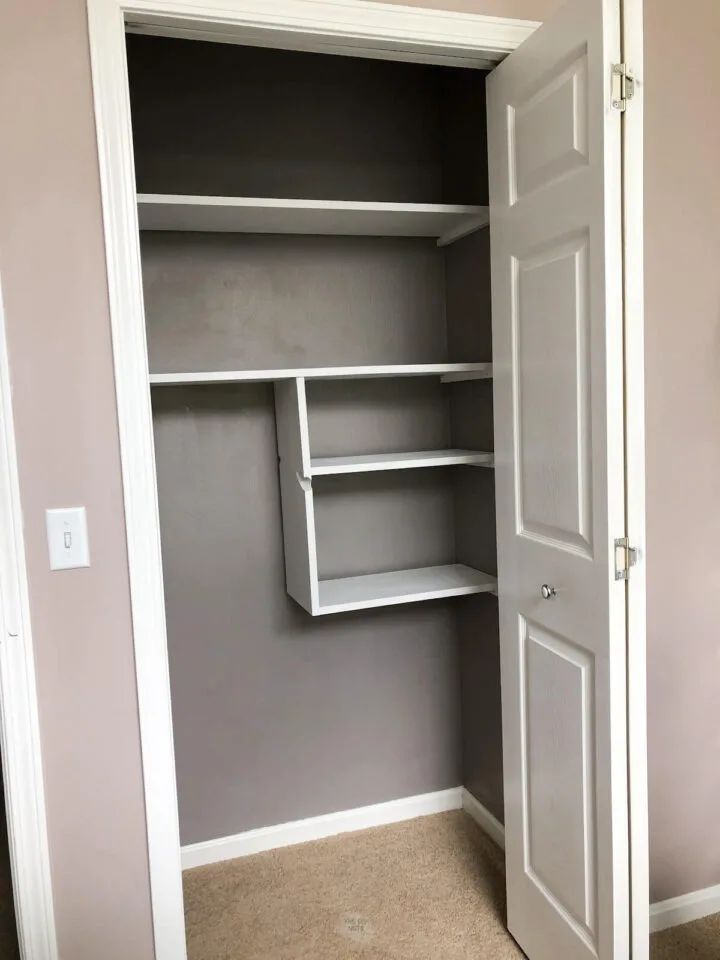
Empty closet space is an opportunity to add custom shelving that turns wasted volume into smart storage. Fit shelves to your closet’s depth and height—combine shallow tiers for shoes and deeper shelves for folded garments or bins. Open shelving keeps things visible and accessible, while baskets or labeled boxes hide excess clutter. With simple cuts, brackets, and a thoughtful layout you can craft a tailored system that adapts to awkward nooks and maximizes every inch.
Key Design Elements
- Install adjustable standards and brackets for flexible, reconfigurable shelving.
- Alternate open shelves with woven baskets to balance display and concealed storage.
Pro Tip: Before cutting, measure from floor to hanging rods and plan shelf spacing accordingly; stagger shelf heights for shoes vs. folded clothing and anchor brackets into studs or use heavy-duty anchors to prevent sagging.