Fresh flowers are beautiful, but let’s be honest — they’re also a little high-maintenance. You buy a gorgeous bouquet, enjoy it for a few days, and before you know it, the petals are dropping, the leaves are wilted, and the arrangement you spent time and money on is headed for the compost bin.
That’s where dried and preserved florals come in. They’re real flowers, but unlike fresh stems, they last for months — even years — with almost no upkeep. And when styled thoughtfully, they look just as stunning and vibrant as a freshly cut bouquet.
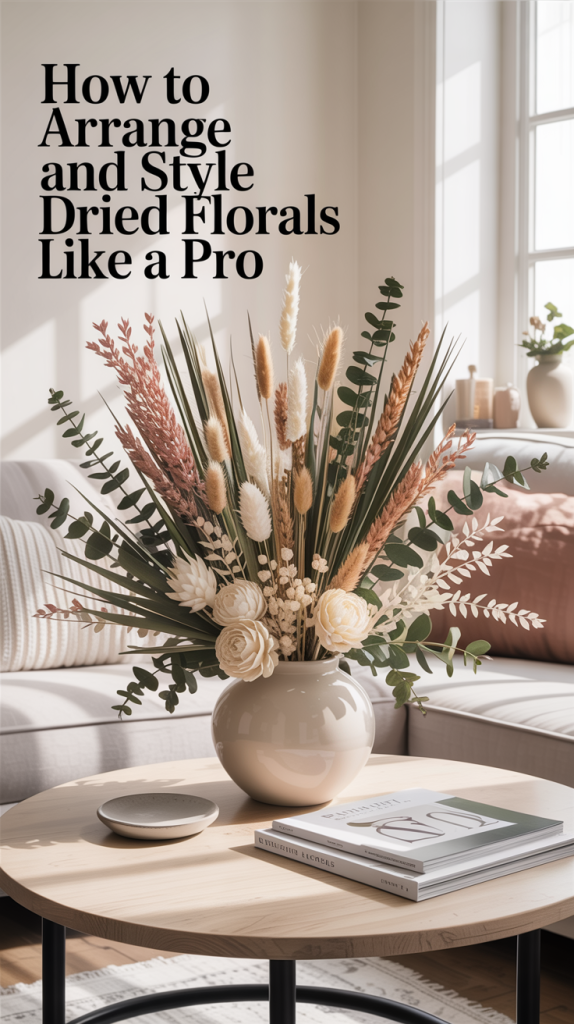
Whether you’re creating a centerpiece, sprucing up a side table, or adding timeless blooms to your shelves, dried florals can completely transform a space. In this guide, I’ll walk you through how to revive, arrange, and style dried florals so they look natural and full — plus a few extra pro tips to make your arrangements designer-worthy.
Why Dried and Preserved Florals Are So Popular
If you’ve scrolled Pinterest or Instagram lately, you’ve probably noticed that dried florals are everywhere — and for good reason.
Low maintenance: No watering, trimming, or replacing every week.
Budget-friendly: A one-time investment lasts for years.
Seasonless styling: Works year-round, no matter the weather.
Sustainable: Fewer bouquets = less waste.
Versatile: Perfect for vases, wreaths, garlands, wall installations, and even wedding décor.
Preserved hydrangeas, pampas grass, eucalyptus, and bunny tails are especially popular right now. They add texture, height, and color to a room without looking fussy or temporary.
The First Step: Reviving Flattened Stems
When dried or preserved florals arrive in the mail, they’re often flattened from packaging. The good news? A little TLC can make them look lush and freshly cut.
What You’ll Need
A handheld steamer (clothing steamers work perfectly)
A clean surface to lay out your stems
Gentle hands — dried florals are delicate
Step-by-Step Instructions
Step 1: Separate Carefully
Take each stem out one at a time, holding it close to the base as you loosen petals. Be extra gentle; dried stems can snap easily.
Step 2: Steam the Petals
Turn on your steamer and hold it 6–8 inches away from the blooms. Slowly run the steam over the petals, rotating as you go. You’ll see them relax, open up, and regain volume.
Step 3: Fluff with Fingers
Once the petals are soft, gently shape them with your fingers for a fuller look.
Step 4: Let Them Settle
Lay the stems flat or upright in a vase for a few minutes while they “set.”
Pro Tip: This works beautifully for faux florals too! I always steam faux stems and trees to make them look more realistic and less stiff.

How to Arrange Dried Florals in a Vase
Once your stems are revived, it’s time to arrange them. Here’s my tried-and-true method for creating a natural, organic look.
1. Choose the Right Vessel
Tall vases work best for dramatic, vertical arrangements.
Wide-mouthed vessels are perfect for fuller, cascading florals like hydrangeas.
Neutral tones like terracotta, glass, and white ceramic let the florals shine, while patterned vases add personality.
2. Use Floral Wire Mesh
I recommend floral wire mesh instead of foam or tape. It sits inside your vase, creating a flexible grid to hold each stem in place. Plus, it’s reusable.
3. Vary Heights and Angles
For a natural, designer-style arrangement, avoid symmetry. Place each stem at a slightly different height and angle. Layering adds movement and prevents the bouquet from looking stiff.
4. Play With Texture
Combine blooms with contrasting shapes and finishes. Pair fluffy hydrangeas with wispy pampas grass, delicate baby’s breath, or sculptural branches for visual interest.
5. Build in Layers
Start with your anchor stems — the largest blooms or branches — then work smaller filler florals around them. This creates depth and dimension.
Styling Ideas Beyond the Vase
Dried florals aren’t just for tabletops. Get creative and use them in unexpected ways:
Wall installations: Mount a cluster of pampas grass or eucalyptus for a statement piece.
Mantel styling: Mix dried florals with candles and vintage books for cozy seasonal décor.
Wreaths and garlands: Perfect for entryways or holiday styling.
Shelf displays: Add a pop of softness to built-in shelving with a single preserved bloom.
Wedding décor: Bouquets, boutonnieres, and centerpieces made from dried florals last long after the big day.
Matching Florals to Your Interior Style
Choosing the right florals makes all the difference. Here are a few suggestions based on your design aesthetic:
Modern Minimalist: White hydrangeas, dried palms, and soft pampas in a neutral ceramic vase.
Boho Chic: Bunny tails, eucalyptus, bleached ruscus, and natural textures like rattan.
Farmhouse Cozy: Dried lavender, preserved roses, and soft greenery in vintage glass jars.
Eclectic and Colorful: Mix bold tones like burnt orange, mustard yellow, and dusty rose for a playful vibe.
Scandinavian Calm: Monochrome whites, creams, and muted greens paired with simple stoneware.
How to Mix Dried, Preserved, and Faux Florals
Here’s a little secret: you don’t have to choose one or the other. Combining different types can make your arrangement look fuller and more realistic:
Use preserved blooms as the focal point.
Fill gaps with high-quality faux stems.
Add dried grasses or branches for height and texture.
Keep color palettes cohesive so the blend looks intentional.
Caring for Dried and Preserved Florals
To keep your arrangements looking beautiful year-round:
Keep them out of direct sunlight to prevent fading.
Avoid humidity — bathrooms and kitchens aren’t ideal.
Dust gently with a soft brush or a hairdryer on cool, low settings.
Handle with care — dried florals are delicate and can break easily.
With proper care, your arrangements can last for years without losing their beauty.

Where to Buy Quality Dried Florals
You can find dried and preserved blooms at plenty of online shops and craft stores. Some of my go-to options:
Etsy — amazing for unique, handmade finds
Afloral — great for curated, designer-quality stems
Amazon — lots of affordable options for bulk bundles
Local flower markets — sometimes the freshest, most unique choices
Common Mistakes to Avoid
Overstuffing your vase: Give blooms space to breathe.
Ignoring proportion: Match the size of your arrangement to the size of your vessel.
Mixing clashing colors: Stick with a cohesive palette for a polished look.
Skipping the steam step: Flattened flowers will never look full without it.
Placing them in humid spaces: Steam is good during setup, but daily moisture is a dried floral killer.
Seasonal Styling Inspiration
Spring: Soft pastels like blush, lavender, and buttercream paired with delicate fillers like baby’s breath.
Summer: Bright whites, bleached palms, and airy textures for a breezy, coastal vibe.
Fall: Rich terracottas, burnt oranges, and golden mustard tones for warmth and coziness.
Winter: Creamy whites, deep greens, and metallic accents for an elevated, holiday-ready look.
Dried and preserved florals are one of the easiest ways to bring warmth, color, and texture into your home without constant upkeep. A little steaming, thoughtful arranging, and a good eye for styling can make your florals look like they came straight out of a designer showroom.
Whether you go all-in with a bold statement arrangement or keep it simple with a single preserved bloom, these tips will help you create pieces you’ll love for years.