Most storage problems don’t need more furniture — they need better use of the space you already have. Bulky shelving units and oversized storage ottomans can solve one problem while creating another: a room that feels cramped, cluttered, or just hard to move around in. The good news is that some of the most effective storage upgrades in a home cost very little, require only basic tools, and make a space feel more open rather than more stuffed.
Here are creative, practical storage solutions you can build or install yourself — no new furniture required.

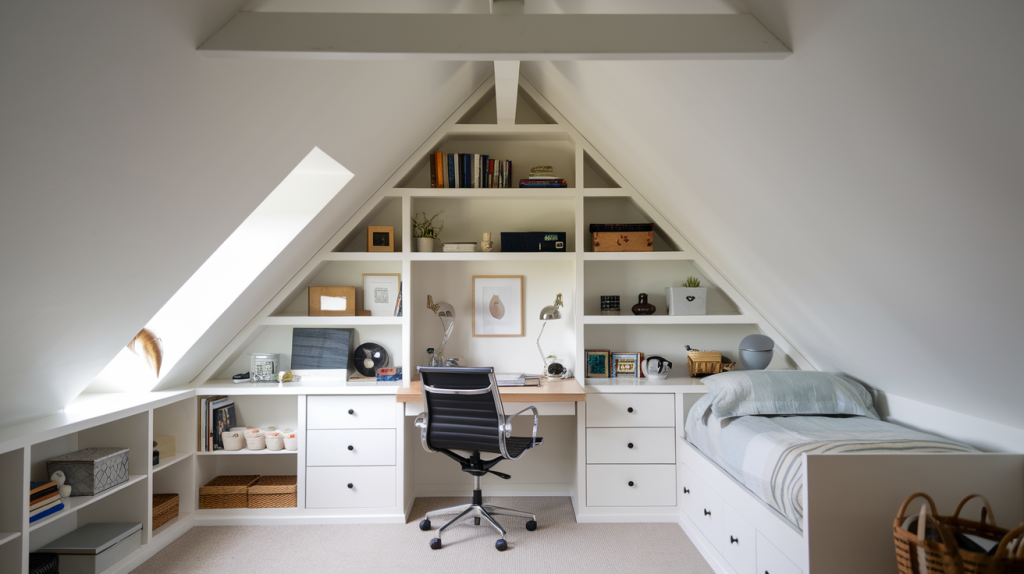
Use Your Walls, Not Your Floor
Floor space is precious. Wall space is almost always underused. A few well-placed hooks, rails, or shallow shelving can offload a surprising amount of everyday clutter without touching a single square foot of living area.
Pegboards are one of the most flexible wall storage systems available. Originally a garage staple, they’ve moved into kitchens, home offices, entryways, and craft rooms. A 2×4-foot pegboard panel mounted at counter height in a kitchen, for example, can hold pots, utensils, cutting boards, and spice jars — clearing out an entire cabinet. The hooks and accessories are cheap and reconfigurable whenever your needs change.
French cleats take a similar approach with more weight capacity. Two beveled boards lock together on the wall and let you hang virtually anything: shelves, bins, tool holders, even monitor arms. If you’re comfortable making 45-degree rip cuts on a table saw, a full French cleat wall in a garage or home office runs about $50 in lumber and opens up endless modular storage options.
Magnetic knife strips and spice rails work on the same principle in kitchens. Mounted inside a cabinet door or on a backsplash, they pull frequently used items off counters and out of drawers without requiring any additional footprint.
Doors Are Underrated Real Estate
The back of every door in your home is an untapped storage surface. Over-the-door organizers are the obvious option, but there are better-looking solutions if you’re willing to spend a few more minutes installing them.
Shallow shelves on door backs — cut from 1×4 lumber and mounted with simple L-brackets — can hold paperback books in a bedroom, cleaning supplies in a laundry closet, or pantry overflow in a kitchen. Keep the shelves narrow enough that they clear the door frame when the door closes, usually under 3.5 inches deep.
Cabinet door mount systems are common in RV builds and small kitchens. A few command strips or low-profile brackets on the inside of a cabinet door hold a rack for foil, plastic wrap, and parchment paper — items that otherwise clutter a drawer or fall over in a cabinet.
Towel bars on bathroom cabinet doors hold hair dryers, flat irons, or cleaning spray bottles with hooks. It’s a five-minute install and keeps those items accessible without taking up under-sink space.
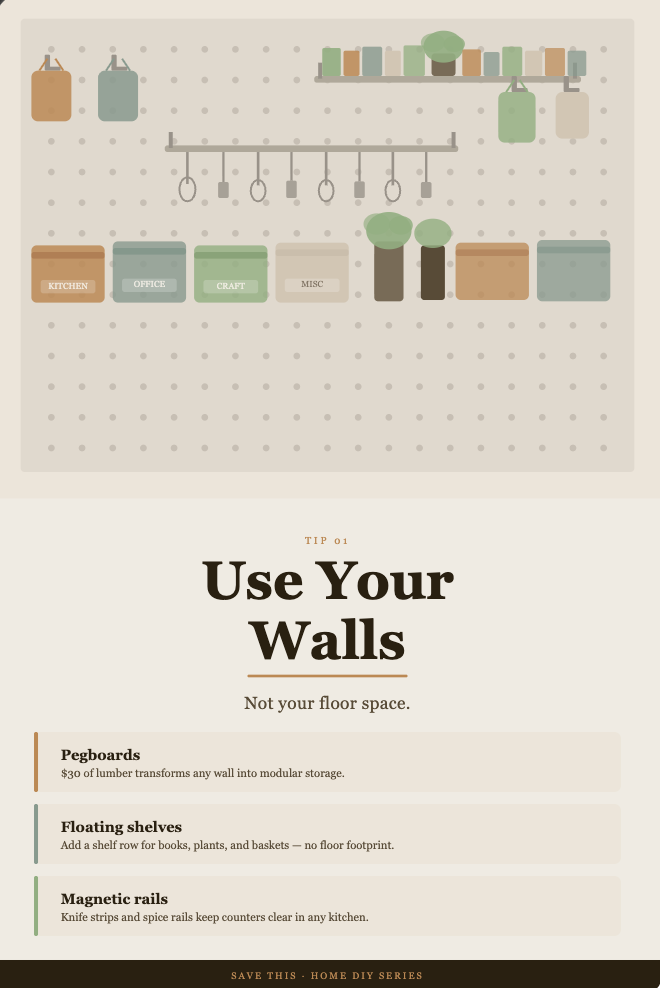
Think Vertically in Closets
Most closets ship from builders with a single rod and one shelf — a setup that wastes roughly half the usable vertical space. Reconfiguring a closet without buying a full modular system is one of the highest-return DIY projects in a home.
Start by adding a second hanging rod below existing clothes. If your closet currently has one rod at about 66 inches, adding a second at 40 inches creates a double-hang section perfect for shirts, jackets, and folded pants. Two tension rods, a length of pipe, or a simple wooden dowel supported by chains or brackets can do the job for under $20.
Stacking bins and labeled baskets above the top shelf capture dead vertical space near the ceiling. Items that are seasonal or rarely accessed — holiday decorations, extra bedding, archival paperwork — belong up high where they’re out of sight but not taking up closet floor space.
In a reach-in closet, a shoe shelf built from 1×8 lumber and basic shelf brackets along one wall frees the closet floor for bulkier items and keeps pairs together instead of piled. A three-tier angled shoe shelf for a standard closet takes about two hours and 30 dollars in materials.
The Inside of Kitchen Cabinets Is Doing Too Little
Kitchen storage is often a problem of poorly organized depth, not lack of space. A cabinet stacked with pots, pans, and lids looks full, but much of it is wasted air between and around items.
Vertical dividers — either installed as permanent wood panels or as simple wire racks — let you store baking sheets, cutting boards, and pan lids on edge instead of stacking them flat. This transforms one chaotic cabinet into something you can actually navigate. A few pieces of 1×2 lumber or a tension-mount vertical rack from a hardware store gets this done in minutes.
Lazy susans in corner cabinets are almost cliché at this point, but the principle extends further: a small spinning tray inside a standard pantry cabinet makes condiments, oils, and vinegars accessible without unloading the whole shelf.
Risers and step shelves inside cabinets create two levels of storage in the same footprint. Canned goods, spices, and small appliances are much easier to grab when they’re not hiding behind each other. Simple wooden risers can be built from scrap lumber in 30 minutes or bought for a few dollars at any home goods store.
Staircase Nooks and Underused Architectural Space
If your home has stairs, it almost certainly has usable storage space that isn’t being used at all.
Under-stair storage ranges from simple open cubbies framed in with basic carpentry to full pull-out drawers built into the risers. Even without major construction, the open floor space under a staircase can hold baskets, totes, a small desk, or a mudroom-style bench with hooks above it. Framing a few basic shelves into an unfinished under-stair space is a weekend project that adds meaningful storage without touching any other room.
Window seats with lift-top storage are another underused option in homes that have bay windows or deep sill areas. A simple plywood box with a hinged lid and some basic upholstery becomes both seating and storage. The inside holds board games, extra blankets, or kids’ toys — all invisible when the lid is down.
Hallway niches and bump-outs that were meant to be decorative can hold shallow shelving, hooks, or even a compact mudroom setup. A 6-inch-deep recessed shelf between studs holds books, framed photos, and decorative objects without projecting into the hallway at all.
Garage Walls and Ceilings
In most homes, the garage is the most underused storage environment in the building. Walls are bare, ceilings are empty, and everything ends up on the floor.
Overhead ceiling storage systems — grid-style platforms hung from the ceiling joists — hold totes, seasonal gear, and rarely used equipment above the car. DIY versions use 2×4 lumber and threaded rod; commercial kits with steel grid panels start around $150 and hold several hundred pounds.
Wall-mounted bike hooks are one of the simplest garage upgrades possible. A single J-hook rated for 50 pounds, mounted into a stud at about head height, keeps a bike vertical and off the floor. Two bikes can hang side-by-side on six inches of wall.
Slat wall panels in the garage give you the same flexibility as pegboard but with more weight capacity and a cleaner look. They accept hooks, bins, and shelves that can be repositioned without tools. A few panels on a two-car garage wall can hold an entire workshop’s worth of tools, sporting equipment, and garden supplies.
A Few Principles That Apply Everywhere
Regardless of where in your home you’re adding storage, a few consistent principles make the difference between systems that work and systems that get abandoned.
Store things where you use them. The best storage location is the one closest to where the item actually gets used. Hooks by the back door for bags and keys. Charging cables in the drawer next to the couch. Tools in the garage, not a hall closet.
Make it easy to put things away. If the return path for an item requires more than one step — opening a door, moving something else, lifting a lid — it won’t get used consistently. The simpler the access, the more likely things stay organized.
Vertical before horizontal. Going up is almost always better than spreading out. Vertical storage keeps floor space open, makes rooms feel larger, and typically costs less per cubic foot of storage than new furniture.
Label everything you can’t see into. Bins, baskets, and boxes that conceal their contents create just as much confusion as having nothing at all. A label maker or even a piece of tape and a marker solves the problem immediately.
The most organized homes aren’t usually the ones with the most storage furniture. They’re the ones that use structural space well — walls, doors, ceilings, and architectural features — and make it genuinely easy to put things back where they belong. Most of these projects cost under $50 and can be completed in a weekend or less. The hardest part is usually just deciding to start.