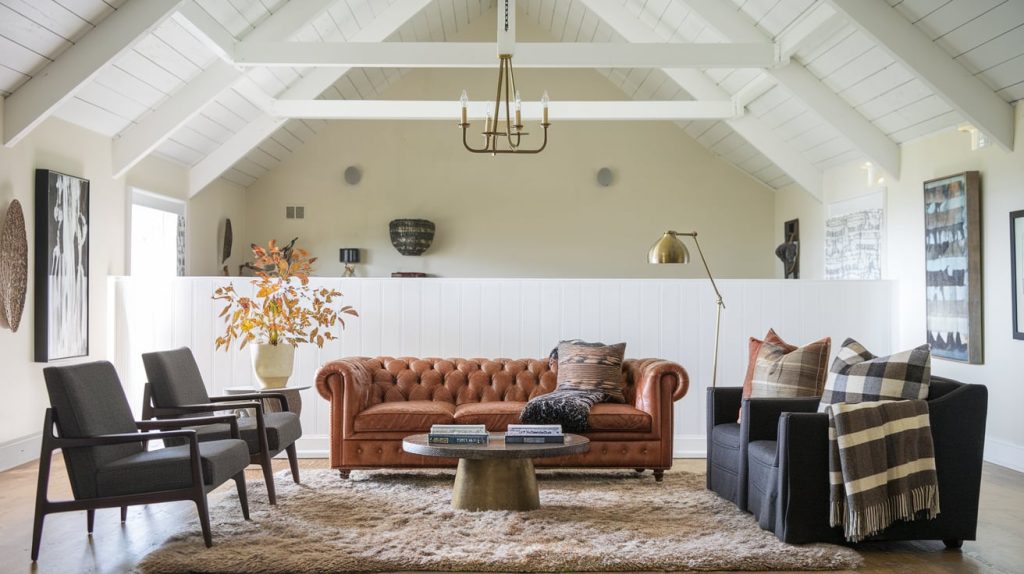
A low ceiling often feels lower because of what sits beneath it: a bulky light fixture, a strong paint break, a curtain rod halfway up the wall, or several tall pieces of furniture competing for space. Changing those relationships can make the room feel more open without changing its actual height.
Start by looking at the whole wall from the doorway. Notice where your eye stops. The following ten ideas help soften those stops and create a more continuous vertical line. Choose the changes that suit your room instead of using every trick at once.
1. Use a few continuous vertical lines
Long curtain panels, a narrow upright bookcase, or simple vertical paneling can give the eye a path up the wall. The effect is strongest when the line reads clearly from near the floor toward the ceiling rather than being interrupted by several shelves and decorative bands.
Choose one or two vertical features and let them lead. A room filled with striped wallpaper, tall shelves, tall art, and patterned curtains can feel busy rather than taller.
2. Compare furniture height with the wall behind it
A lower sofa back or a bed with a restrained headboard leaves more visible wall above the furniture. That proportion can help a room feel less compressed, particularly when the ceiling is low and the room is small.
Measure the pieces you are considering and mark their heights on the wall with removable tape. Compare the full composition, including lamps and artwork, rather than deciding from a sofa photograph alone.
Keep comfort in the decision. A low seat is not helpful if it is difficult for someone in the household to use. You may be able to create the same visual breathing room by simplifying the wall above your current furniture.
3. Reduce harsh paint breaks near the ceiling
A dark horizontal stripe or strongly contrasting trim can make the top of the wall more prominent. Painting the wall, crown, and ceiling in related tones can soften that boundary.
Test samples on the actual surfaces and view them from the doorway in daytime and evening light. Different surface angles and finishes can make one paint color read differently on the wall and ceiling.
Keep any paint transition deliberate. A small, uneven band of wall paint carried onto the ceiling can look accidental. Decide where each color ends before painting.
4. Choose the palette for the room’s light
Light colors can be useful in a room that receives limited daylight, but a low ceiling does not automatically require bright white. A white that looks crisp in one room may feel stark or gray in another.
Compare the ceiling color with the floor, furniture, and natural light. A quieter relationship between the large surfaces can matter more than choosing the palest possible paint.
If you prefer a darker, enclosed feeling, you can keep it intentional. A low room can be comfortable and atmospheric without trying to look taller; the important choice is whether the finish supports the way you want the room to feel.
5. Hang curtains with the full wall in mind
Curtain panels that begin higher on the wall and continue close to the floor can connect the window to the room’s height. First check the available wall space, the mounting surface, and any crown molding or ceiling detail.
Measure from the planned rod or track position to the desired hem. Check that the panels can open clear of the glass where practical and that the fabric does not block vents or interfere with furniture.
- Choose a rod or track with the load capacity and fixing method needed for the fabric.
- Avoid a short panel that ends awkwardly between the window and the floor.
- Retain suitable privacy or blackout layers if the room needs them.
- Use a floor-length hem that will not create a trip or cleaning problem.
Sheer fabric is one option, but the useful visual feature is the continuous drop. You can create that line with heavier fabric when privacy and light control are important.
6. Use artwork and mirrors at a comfortable viewing height
A tall piece of art or a vertical mirror can emphasize the wall’s shape. It does not need to be pushed close to the ceiling. Start with its relationship to the furniture beneath it and the position from which it will be viewed.
Try a paper template before making holes. One generously sized vertical piece may give a calmer result than several small pieces scattered up the wall.
Check what a mirror will reflect from the main seating position. Reflected daylight or a pleasant view can help the room; a reflection of ceiling glare or a crowded shelf may add visual clutter. Secure heavy items using suitable fixings.
7. Keep paneling and trim proportionate
Simple full-height vertical paneling can reinforce height, while several contrasting horizontal trim bands may divide a short wall into smaller strips. The width, spacing, and color of the detail all affect how prominent it becomes.
Mock up a small section with removable tape before committing. View it from across the room rather than standing directly beside it. A restrained detail often suits a low wall better than several layers of molding.
If you already have chair rail or crown molding, paint can change how strongly it reads. You do not necessarily need to remove sound trim to improve the proportions.
8. Simplify the ceiling plane
Look for features that visually hang down or crowd the ceiling: a large pendant, a deep decorative beam, or a collection of contrasting details. Simplifying one of them may do more than adding another vertical accent.
Decorative beams can add character, but they also occupy visual and physical space. Do not assume that adding them will make a low ceiling appear higher.
Avoid opening or altering the ceiling simply to pursue a visual effect. If a project involves structure, wiring, ventilation, or other concealed services, have the existing conditions assessed before deciding what can change.
9. Choose lighting that fits the height and use of the room
A compact ceiling fixture can keep a low room from feeling crowded overhead. A pendant may still suit a defined location such as a dining table, but its position and dimensions should be coordinated with the furniture and circulation.
Use wall or table lighting where it helps illuminate the room without filling the ceiling with fixtures. Test for glare and reflections before finalizing the placement.
- Compare the fixture’s overall depth, not only its diameter.
- Check manufacturer installation clearances and suitability for the location.
- View a proposed fixture from doorways and normal seating positions.
- Keep walking routes clear and have electrical work handled appropriately.
10. Leave some wall and ceiling space unoccupied
A little open space above a cabinet or around artwork helps the room read as one composition. If every gap contains an object, the eye has several competing stopping points.
Try removing the objects from the tops of tall cabinets, reducing the number of small frames, or grouping accessories on one shelf. Take a photograph from the doorway before and after. It is often easier to judge the balance in a wide view than while moving each object.
This is an editing exercise, not a requirement for a minimal room. Keep the pieces you enjoy and give the most important ones enough space to be seen.
Which change should you try first?
If the room feels cut off at the top, review paint contrast and curtain height. If it feels crowded, compare furniture scale and the depth of the ceiling fixture. If it feels visually restless, simplify the number of patterns and horizontal breaks.
Start with the reversible options: rearrange accessories, use paper templates, test paint samples, or mark a proposed curtain position. Those checks can help you avoid buying a new fixture or furniture piece that does not solve the main problem.
For related color decisions, read when to paint trim the same color as the walls, or explore more Design & Decor.