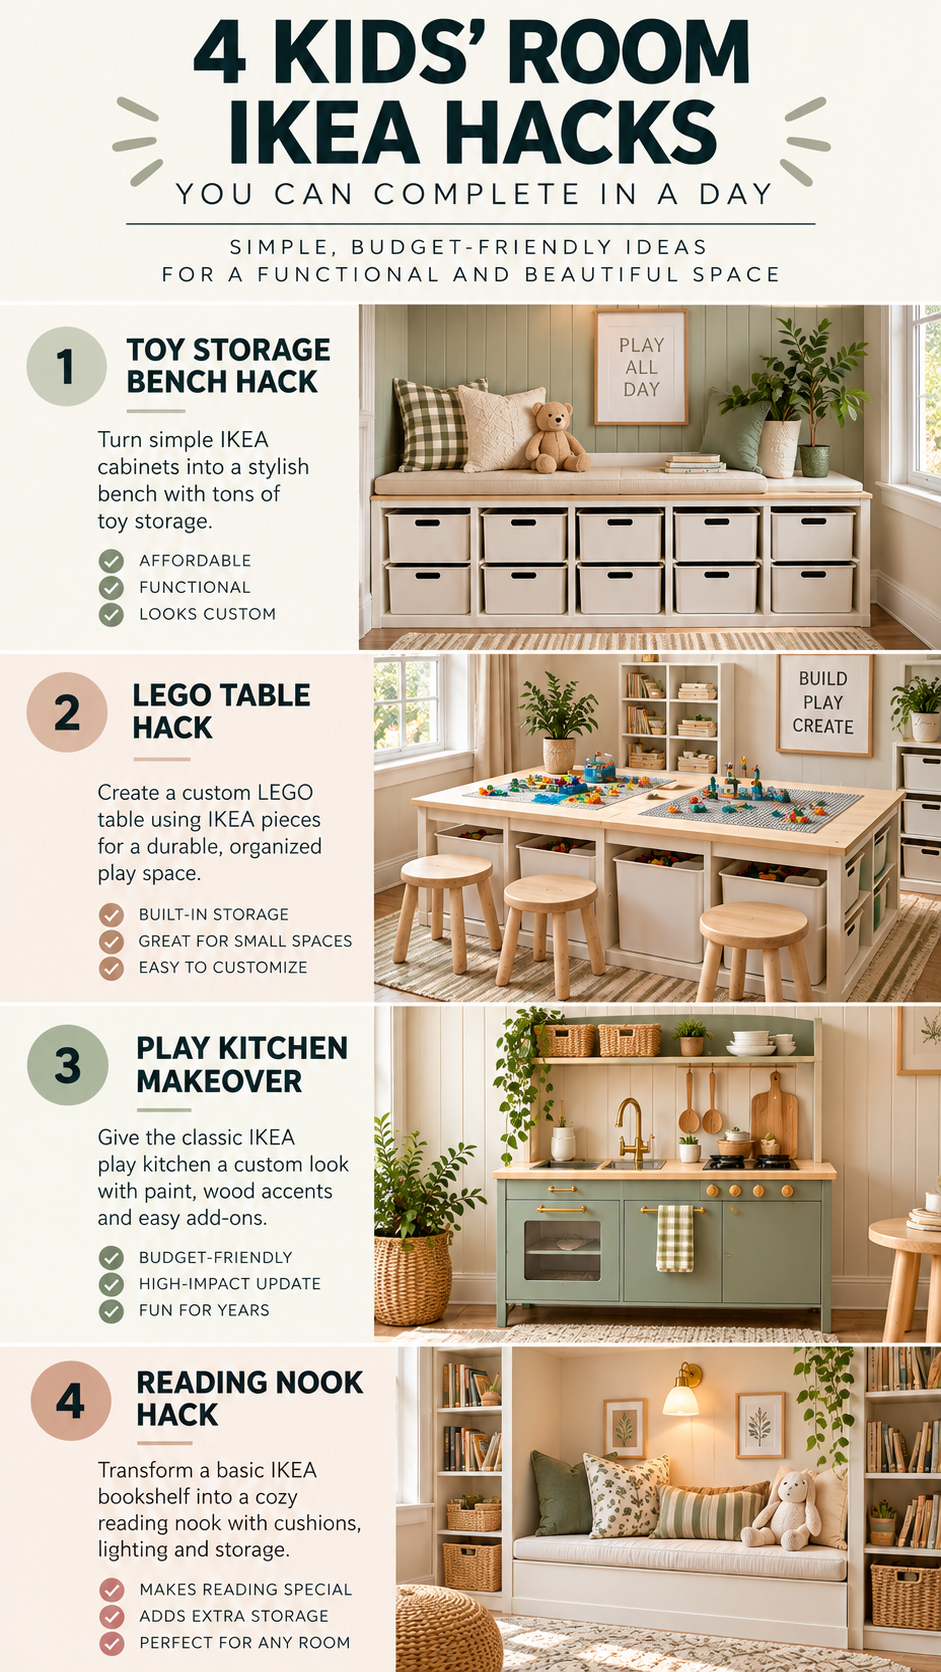
There is something about a beautifully designed playroom that makes you want to believe your children will suddenly start putting their toys away.
The labeled baskets. The perfectly arranged bookshelves. The adorable little play kitchen. The LEGO pieces that somehow never end up under anyone’s feet.
Of course, anyone with kids knows that a playroom can go from picture-perfect to complete chaos in approximately seven minutes.
But here’s the good news: a functional, beautiful playroom doesn’t require expensive custom cabinetry, a professional organizer, or an entire weekend devoted to DIY projects.
Sometimes, all you need is a trip to IKEA, a few inexpensive supplies, and one afternoon.
IKEA furniture is practically made for playroom transformations. Its simple shapes, modular storage systems, and affordable accessories make it easy to create something that looks much more expensive than it actually is.
And with a few thoughtful modifications, even the most recognizable IKEA pieces can look surprisingly custom.
Whether you’re trying to organize a mountain of toys, create a dedicated LEGO station, give an old play kitchen a makeover, or carve out a cozy reading nook, these four IKEA playroom hacks deliver serious style without requiring advanced woodworking skills.
The best part? Each project can be completed in a day, assuming you have your materials ready and allow extra time for any paint or finishes to dry.
Let’s get into it.
Why IKEA Furniture Is Perfect for Playroom DIY Projects
Before we dive into the projects, let’s talk about why IKEA is such a great starting point for creating a functional kids’ space.
First, IKEA furniture is generally designed around simple, versatile shapes. That makes it easy to personalize with paint, decorative trim, hardware, baskets, or a different furniture arrangement.
Second, many of its storage products are modular. You can combine pieces, rearrange them, or adapt them as your children’s interests change.
And that flexibility is particularly important in a playroom.
The space your toddler needs is probably not the same space your eight-year-old needs. A playroom filled with pretend food and stuffed animals might eventually need to accommodate LEGO collections, art supplies, board games, and homework.
Instead of buying furniture that only works for one stage of childhood, you can choose adaptable pieces that grow with your family.
IKEA also makes it possible to create a coordinated look without purchasing an entire matching furniture collection.
A simple white storage unit, a natural wood tabletop, and a few woven baskets can look surprisingly sophisticated when styled together.
The secret is to focus on three things:
- Function: What does your child actually do in the room?
- Storage: Where will everything go when playtime is over?
- Style: How can you make the room feel cohesive without sacrificing personality?
The four projects below address all three.
1. IKEA Storage Bench Hack: Turn Basic Cubby Storage Into a Custom-Looking Playroom Bench
Best for: Toy storage, stuffed animals, games, books, and small playrooms.
Estimated project time: 2–4 hours, depending on assembly and customization.
DIY difficulty: Beginner.
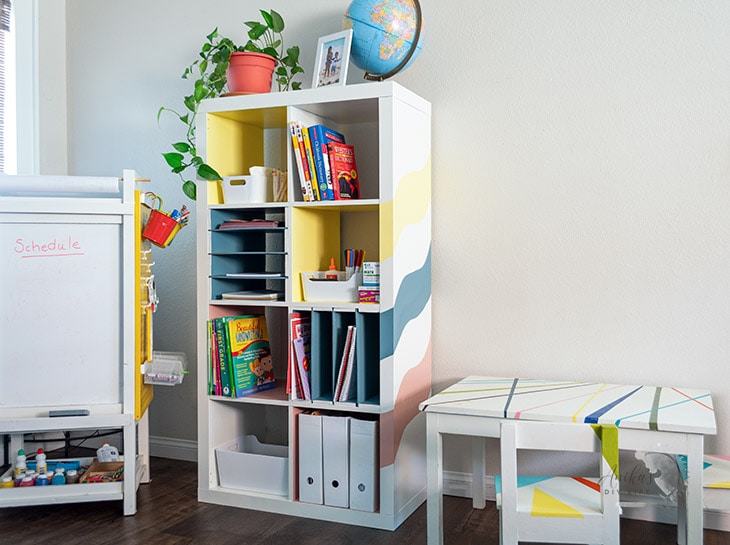
One of the most useful pieces of furniture you can put in a playroom is a low storage unit.
Not a giant armoire. Not a towering bookshelf. Just a simple piece that gives kids easy access to their toys while keeping the room organized.
That’s why an IKEA KALLAX shelving unit is such a popular choice for playrooms.
Its cube-shaped compartments work beautifully with storage bins, and several configurations can be positioned horizontally to create a low-profile storage wall.
With a few decorative touches, you can give it the appearance of a custom built-in.
What you’ll need
- An IKEA KALLAX shelving unit in an appropriate size
- Storage baskets or compatible bins
- Optional decorative wood trim
- Optional finished wood panel for a decorative top
- Construction adhesive or fasteners appropriate for the materials
- Measuring tape
- Level
- Sandpaper
- Paint or wood stain, if desired
- Manufacturer-approved wall anchoring hardware
Important: KALLAX is shelving, not automatically a weight-rated seating bench. A decorative top doesn’t make it safe for sitting. If you want a true bench, choose a seating-rated base or construct an independently supported bench structure designed for the intended load.
Step 1: Choose the right configuration
Start by measuring the wall where you want the storage unit to go.
A horizontal KALLAX arrangement can be especially useful beneath a window, along a playroom wall, or beside a reading area.
If your playroom is small, avoid choosing a unit that’s so large it makes the room feel crowded.
Remember that you’ll need space for children to pull bins out comfortably.
One of my favorite tricks is to use low storage around the perimeter of the room while keeping the center open for play.
This makes the space feel bigger and gives children a natural area to spread out their toys.
Step 2: Give the unit a more finished appearance
The easiest way to make inexpensive furniture look custom is to pay attention to the details.
You might add a finished wood top for contrast, create a decorative frame around the front, or coordinate the unit with the room’s wall color.
A natural oak-look top paired with white storage cubbies feels warm and timeless.
For a more playful look, try muted sage green, dusty blue, or a soft mushroom color.
You don’t need to paint everything.
Sometimes a single material change is enough to make the furniture feel intentional.
Before attaching anything, check the furniture’s construction and assembly instructions. Avoid drilling into unsupported hollow-core sections or making modifications that compromise stability.
Step 3: Add matching storage bins
This is where the transformation really happens.
Instead of filling every cubby with a different container, choose one or two styles that work together.
For example, you could use:
- White bins for LEGO pieces and building toys
- Woven baskets for stuffed animals
- Fabric bins for dress-up accessories
- Open cubbies for frequently used books and favorite toys
Keeping the containers consistent instantly makes the room feel more organized.
And unlike elaborate organization systems, bins are easy for children to use.
Step 4: Create simple categories
The biggest mistake people make when organizing a playroom is creating categories that are too complicated.
Kids don’t need separate bins for every tiny toy variation.
Try broad categories like LEGO, cars, dolls, art supplies, games, and pretend play.
If your children are too young to read, use picture labels.
If they’re older, simple written labels are usually enough.
Step 5: Style the surrounding wall
To make your storage unit feel more like furniture and less like a toy organizer, add a few thoughtful details around it.
A framed print, a wall sconce, or a piece of children’s artwork can help anchor the space.
Keep decorative items out of reach if they’re breakable or could create a hazard.
And remember: the point isn’t to make the playroom look like nobody uses it.
The point is to create a space that can actually be cleaned up.
Designer tip: Mix open and closed storage
A wall of identical bins can feel a little flat.
Try leaving a few cubbies open for books or attractive toys, while hiding the visual clutter in the remaining compartments.
The combination gives you the best of both worlds: easy access and a more polished appearance.
2. DIY IKEA LEGO Table Hack: Create a Dedicated Building Station With Built-In Storage
Best for: LEGO lovers, building sets, craft projects, and children who need a dedicated activity surface.
Estimated project time: 3–5 hours.
DIY difficulty: Beginner to intermediate.
If you have a child who loves LEGO, you already know the problem.
The bricks start on a table.
Then they migrate to the floor.
Then someone builds a masterpiece that absolutely cannot be taken apart.
And suddenly your dining table has become a permanent LEGO exhibition.
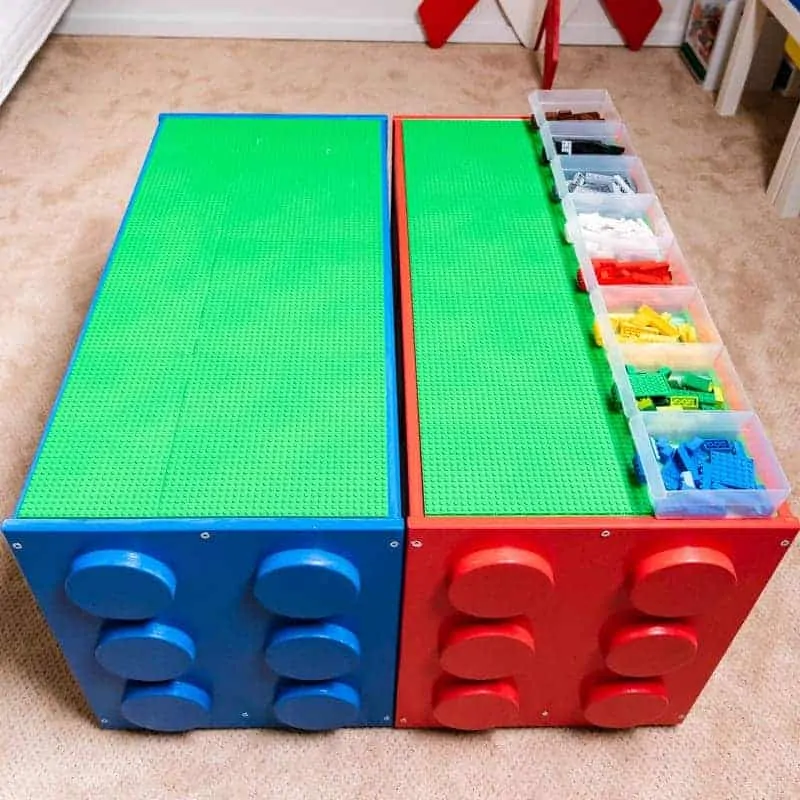
A dedicated LEGO table solves several problems at once.
It gives kids a place to build, provides storage for loose bricks, and creates a home for projects that are still in progress.
And it doesn’t need to be an enormous piece of furniture.
With a few IKEA components, you can create a custom-looking building station that fits your room.
What you’ll need
- A sturdy IKEA table or compatible furniture components
- LEGO-compatible baseplates, if desired
- Removable building trays
- Storage bins or drawers
- Strong removable mounting strips or another suitable attachment method
- Measuring tape
- Nonslip pads
- Optional stools or child-sized chairs
Step 1: Decide how your children actually build
Before buying anything, think about how your children use LEGO.
Do they prefer sitting at a table?
Do they spread out hundreds of pieces at once?
Do they build large sets that take several days to finish?
Or do they mostly create smaller projects?
The answers will determine the ideal size and configuration.
For children who like big building projects, prioritize tabletop space.
For younger builders, easy-access storage may matter more.
If several kids will use the table together, allow enough space so they aren’t constantly reaching over one another.
Step 2: Choose a sturdy base
A simple IKEA table can be an excellent starting point.
You can also create a larger activity station using compatible components and a properly supported tabletop.
The key is stability.
Avoid assuming that any IKEA shelf can safely support a tabletop, especially if children might lean, climb, or sit on it.
Use a base intended for the purpose and follow its load limits.
For a simple one-day project, adapting an existing sturdy table is often the easiest approach.
Step 3: Create a building surface
You have two main options.
Option A: A dedicated LEGO surface
Attach compatible baseplates to a removable panel or tray.
This gives children a defined place to build while allowing you to lift the entire project off the table when necessary.
Option B: A multipurpose activity table
Leave the tabletop smooth and use removable LEGO building mats or trays.
This is my preferred option if the table will also be used for crafts, puzzles, drawing, or homework.
A permanent LEGO surface can be great for a dedicated LEGO room, but a smooth tabletop offers more flexibility.
Step 4: Add storage underneath
This is the feature that makes the biggest difference.
Instead of keeping LEGO bricks in one enormous container, create a simple sorting system.
For younger children, sorting by broad categories usually works best.
You might have one bin for:
- General bricks
- Wheels and vehicle pieces
- Minifigures
- Special accessories
- Unfinished projects
Older children may prefer organizing by color, size, or specific sets.
Don’t feel pressured to create an elaborate system immediately.
Start simple and adjust as you see what actually gets used.
Step 5: Make room for works in progress
One of the smartest additions to a LEGO table is a dedicated tray for unfinished creations.
A shallow removable tray allows children to move their projects without dismantling everything.
You can even designate a shelf for completed builds.
This helps establish a boundary between projects worth saving and loose pieces that need to go back into storage.
Step 6: Finish the space with good lighting
LEGO building involves a lot of small pieces, so lighting matters.
Position the table near a window if possible.
If the room is dim, add a safe, stable light source that illuminates the entire surface.
Keep cords secured and out of play areas.
Designer tip: Don’t make the LEGO table too precious
This is a work surface.
It’s going to get covered in bricks, fingerprints, and half-finished creations.
Choose a durable finish that can be wiped clean, and avoid delicate materials that will make you nervous every time the kids use it.
A beautiful playroom should still be a place where children can play.
3. IKEA DUKTIG Play Kitchen Makeover: Give a Basic Play Kitchen a Custom Designer Look
Best for: Toddlers, preschoolers, pretend play, and playrooms that need a charming focal point.
Estimated project time: 3–5 hours of hands-on work, plus drying and curing time.
DIY difficulty: Beginner to intermediate.
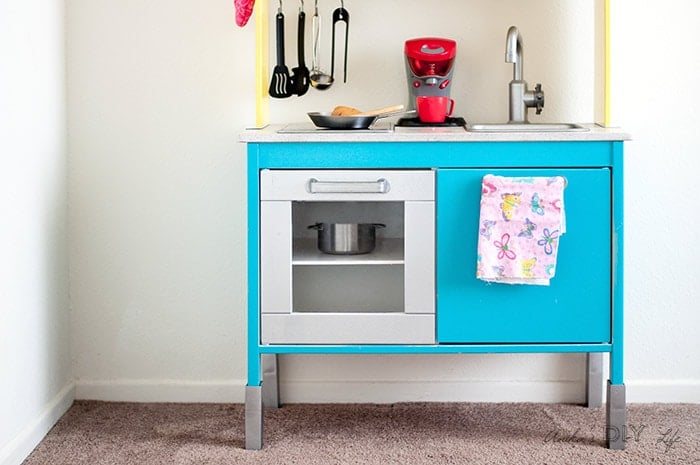
The IKEA DUKTIG play kitchen is one of those pieces that practically begs for a makeover.
Its simple design provides a blank canvas for all kinds of creative upgrades.
With a little paint, new hardware, and a few decorative details, you can transform a basic play kitchen into something that looks like a miniature version of a beautiful real kitchen.
Think soft sage cabinets, warm wood accents, brass-look hardware, and a playful backsplash.
It’s the kind of project that’s just as fun to design as it is for kids to use.
What you’ll need
- IKEA DUKTIG play kitchen
- Paint suitable for the surfaces being painted
- Appropriate primer
- Fine-grit sandpaper
- Small paint roller or brush
- Optional decorative backsplash material
- Optional replacement handles or knobs
- Measuring tape
- Painter’s tape
- Optional miniature kitchen accessories
Step 1: Choose your color palette
The easiest way to make a play kitchen look more expensive is to give it a cohesive color scheme.
Instead of using five bright colors, choose two or three complementary finishes.
Some combinations I love include:
Sage green + warm wood + brass
Soft, timeless, and especially pretty in a neutral playroom.
Cream + natural oak + black accents
A classic combination that works with almost any decorating style.
Dusty blue + white + warm metallic details
A playful option that still feels sophisticated.
Mushroom beige + wood + brushed nickel
Perfect for a warm, minimalist space.
Don’t worry about matching the real kitchen in your home exactly.
The play kitchen can have its own personality.
Step 2: Prep the surfaces
Preparation is what separates a paint job that looks beautiful for a week from one that holds up to everyday use.
Disassemble the pieces you plan to paint when practical.
Clean the surfaces thoroughly to remove dust and oils.
Lightly sand only where appropriate for the material and finish, then apply a compatible primer.
Because IKEA furniture often has factory-finished surfaces, choosing the right primer is especially important.
Always follow the paint manufacturer’s directions for application, drying, and full curing.
Use child-appropriate coatings and avoid painting food-contact accessories or surfaces children may put in their mouths.
Step 3: Paint the cabinets
For the most polished finish, use thin, even coats.
A small foam roller can help minimize visible brush marks on flat surfaces.
Don’t rush this part.
It’s tempting to reassemble everything as soon as the paint feels dry, but freshly painted surfaces can still be soft.
Give the finish adequate curing time before putting the kitchen back into regular use.
If you want a one-day makeover, consider focusing on removable decorative details instead of repainting the entire kitchen.
Step 4: Add a backsplash
A decorative backsplash can completely change the appearance of the play kitchen.
You can use a lightweight, removable decorative panel to create the look of tile without the mess of a real tile installation.
Some beautiful options include:
- White subway tile patterns
- Soft green square tile patterns
- Miniature marble-look finishes
- Neutral geometric patterns
- Simple beadboard-style panels
Keep the design relatively subtle if you’ve chosen a colorful cabinet finish.
And make sure all materials are securely attached, with no sharp edges or loose pieces.
Step 5: Upgrade the hardware
Changing the handles can make a surprising difference.
Look for simple shapes that coordinate with your overall design.
Small brass-look pulls can create a miniature designer-kitchen feel.
Wooden knobs are another beautiful option.
Use hardware that’s appropriate for children’s furniture, without sharp projections or small detachable parts.
Step 6: Style the finished kitchen
This is the fun part.
Add a few wooden play utensils, miniature pots, pretend food, or a small basket.
You can even coordinate the accessories with the room’s color palette.
Just resist the urge to overstyle it.
Children need space to actually play, so leave the counters and shelves functional.
Designer tip: Treat it like a real kitchen design
Think about the same details you would consider in a full-size kitchen.
Cabinet color, hardware finish, backsplash, and accessories should work together.
When everything feels coordinated, the finished project looks much more custom.
And because the kitchen is small, even a modest amount of material can make a big impact.