If you’re a parent, you know the scene: a growing mountain of adorable, colorful, and oh-so-precious artwork brought home from school and created at the kitchen table. The fridge is covered, bins are overflowing, and you’re running out of surfaces to display these mini-masterpieces. While you love every single piece, you’re probably wondering what to do with it all. Well, get ready for an amazing craft idea that not only solves the clutter problem but also turns those cherished memories into a stunning piece of home decor!
This guide will walk you through creating a beautiful collage canvas using your child’s art. It’s a fantastic way to celebrate their creativity, preserve their work, and make a unique piece of art that’s 100% personal. So, let’s gather those drawings and paintings and get ready to create something truly special.
Step 1: The Treasure Hunt – Gathering Your Masterpieces
First things first, it’s time to go on a treasure hunt! Your mission is to gather a collection of your child’s best and most memorable artwork. Spread everything out on the floor and have fun looking through all the amazing things they’ve created. This is a great opportunity to see how their skills have grown!
To help you pick the perfect pieces for your collage, here are a few things to look for:
- Pure Imagination: Look for the drawings and paintings that came straight from their head. A purple cat or a six-legged dog? Perfect! These show off their unique personality.
- Cute Handwriting: Don’t forget pieces that have their name on them, especially if it’s written backwards or with a few creative spellings. These little details are priceless.
- Artistic Leaps: Did you save the first stick figure they ever drew? Or the first time they used scissors like a pro? These milestone pieces are must-haves for your collage.
- A Rainbow of Fun: To make your canvas pop, grab a variety of pieces. Mix and match crayon drawings, watercolor paintings, and even projects with a little sparkle from glitter or craft supplies.
- Ask the Artist: Get your little one involved! Ask them to pick out their absolute favorites. They’ll be thrilled to be part of the project and you’ll get to hear the stories behind their creations.
Remember, you’re not trying to use every single piece. You’re creating a highlight reel of their greatest hits! For the rest, you can take photos to create a cool digital album.
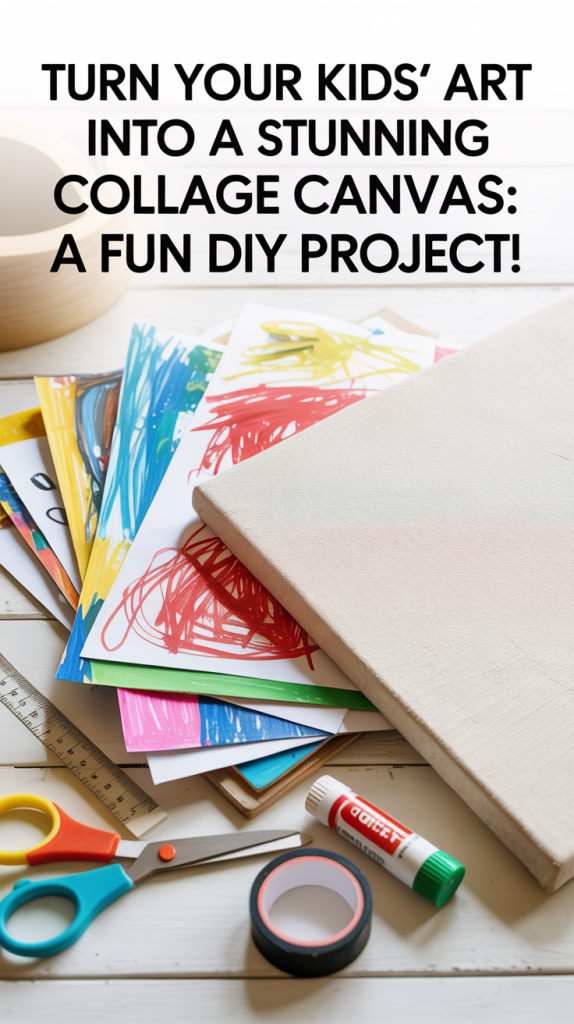
Step 2: Gear Up! Assembling Your Crafting Toolkit
Now that you have your pile of treasures, it’s time to gather your tools. You don’t need a fancy art studio for this—just a few simple supplies will do the trick. Here’s your crafting checklist:
| Material | What it’s for |
|---|---|
| Canvas | The base of your masterpiece! A pre-stretched canvas from any craft store is perfect. |
| Mod Podge | The secret sauce! This is your glue, sealer, and finish all in one. Grab a matte or gloss finish, whichever you prefer. |
| Brushes | A simple foam brush is cheap and works great for spreading the Mod Podge. |
| Scissors | For snipping out the best parts of the artwork. |
| Brayer (Optional) | This is a small roller that’s awesome for getting a super smooth, bubble-free finish. |
For the Mod Podge, a Matte finish will give you a modern, non-shiny look, while a Gloss finish will make the colors pop and give it a shiny coat. If you can’t decide, Satin is a nice in-between. It’s always a good idea to test it on a scrap piece of paper first to see which look you like best!
Step 3: Let’s Get Crafting! Your Step-by-Step Guide
Alright, it’s time for the main event! Put on some music, clear a space, and get ready to have some fun.
Part 1: The Prep Work
Go through your chosen artwork and decide what you want to feature. You can use whole sheets of paper or get creative by cutting out specific characters, shapes, or colorful patterns. Snipping out the fun parts gives you more pieces to play with in your design. If you’re nervous about cutting up the originals, just make some color copies and use those instead!
Part 2: The Layout Design
Before you get sticky, plan your design. Lay your canvas on the floor and arrange your cut-out art pieces on top. Move them around, overlap them, and play with the composition until you have a look you love. Here are some fun layout ideas:
- Star of the Show: Pick one or two favorite drawings to be the main focus and arrange the smaller pieces around them.
- Color Splash: Spread out the colors evenly so the whole canvas looks balanced and bright.
- Big and Small: Mix up large and small cut-outs to make the collage more exciting to look at.
- Let it Breathe: You don’t have to cover every single inch. Leaving a little bit of the canvas showing can make your chosen pieces stand out even more.
Once you have a design that makes you smile, snap a quick photo with your phone. That way, you’ll remember where everything goes when you start gluing.
Part 3: The Mod Podge Magic
Now for the magic! Working in small sections, use your foam brush to paint a thin, even layer of Mod Podge onto the canvas. Place a piece of art onto the wet area and gently smooth it down with your fingers or the brayer to get rid of any air bubbles. Then, paint another thin layer of Mod Podge right over the top of the art piece to seal it in. Keep doing this, piece by piece, until your canvas is a beautiful, colorful collage!
Part 4: Layer It Up!
For a really cool, professional look, don’t be afraid to overlap your pieces. Having a corner of one drawing peeking out from behind another creates depth and makes the canvas more interesting. This is where your collage starts to look like a single, unified piece of art.
Part 5: The Finishing Touch
Once everything is in place and dry, it’s time to seal the deal. Brush two or three more coats of Mod Podge over the entire canvas, letting it dry completely between each coat. This will give it a durable, protective finish that will last for years.
Creative Layout Ideas to Try
Now that you know the basics, let’s talk about some fun ways to arrange your collage. The layout is where you can really let your creativity shine!
The Patchwork Quilt Style: Cut all your artwork into uniform squares or rectangles and arrange them in a grid pattern, just like a quilt. This creates a super organized, modern look and is perfect if you want to showcase a ton of different pieces. You can alternate between busy, colorful pieces and simpler ones to create a nice rhythm.
The Sunburst Design: Place one special piece of art right in the center of your canvas and arrange all the other pieces radiating outward like sun rays. This creates a dynamic, eye-catching focal point that draws everyone’s attention.
Color Blocking: Dedicate different sections of your canvas to different colors. Maybe the top left is all blues and greens, the bottom right is reds and oranges, and the middle is a mix. This creates a really cohesive, artistic look.
The Frame Within a Frame: Paint or draw a large shape on your canvas—like a heart, a star, or even your child’s initial—and fill only that shape with the collage pieces. Leave the rest of the canvas blank or painted a solid color. This creates a bold, intentional design that looks super professional.
The Timeline Approach: Arrange the artwork chronologically, starting with the earliest pieces in one corner and working your way to the most recent in the opposite corner. This tells a visual story of your child’s artistic journey and growth.
Pro-Tips for Extra Fun
Want to take your collage canvas to the next level? Try these fun ideas:
- Go 3D! Who says you have to stick to paper? Glue on small, lightweight treasures like a pasta necklace, a tiny clay figure, or even a few cool-looking beads. Just use a stronger glue like a hot glue gun for these items.
- Paint the Background: Before you start collaging, paint the canvas a solid color that matches your room. This can make the final piece look even more polished.
- Create a Theme: How about an “Animals Only” canvas? Or a collage dedicated to a specific color, like a “Blue Period” piece? Themed collages can be a fun way to organize the art.
- Add Some Words: Look for your child’s name or sweet little notes on their artwork and make sure to include them. You can even have them write a new message on a piece of paper to add in!
Canvas Size Guide: Picking the Perfect Fit
Not sure what size canvas to get? Here’s a quick guide to help you decide based on how much artwork you want to include and where you plan to hang it:
Small Canvas (8×10 or 11×14 inches): Perfect for a first attempt or if you want to make multiple canvases. Great for a desk, shelf, or small wall space. You can fit about 10-15 smaller art pieces on a canvas this size.
Medium Canvas (16×20 or 18×24 inches): This is the sweet spot for most projects! It’s large enough to make a statement on a wall but not so big that it’s overwhelming to work on. You can comfortably fit 20-30 pieces of art, depending on how much you cut them down.
Large Canvas (24×36 inches or bigger): Go big or go home! A large canvas is perfect if you have years of artwork to showcase or if you want to create a real showstopper for a prominent wall. You can fit 40+ pieces on a canvas this size. Just keep in mind that larger canvases require more Mod Podge and more patience!
Choosing the Right Artwork for Different Effects
The type of artwork you choose will dramatically affect the final look of your collage. Here’s how to think about it:
For a Bold, Colorful Look: Choose pieces with bright, saturated colors and bold patterns. Watercolor paintings, finger paintings, and pieces with lots of paint coverage work great for this style.
For a Soft, Delicate Look: Select pieces with lighter colors, gentle pastels, and more white space. Pencil drawings, light watercolors, and sketches create a more subtle, sophisticated canvas.
For a Playful, Whimsical Look: Mix everything! Combine different media, textures, and styles. Throw in some glitter art, some crayon drawings, some painted pieces, and even some collage work they’ve done. The more variety, the more fun and energetic the final piece will be.
For a Cohesive, Artistic Look: Stick to a specific color palette or theme. For example, only use artwork that features blues and greens, or only include pieces with animals. This creates a more intentional, gallery-worthy feel.
Make it a Family Art Day!
This project is the perfect excuse for a family art day! Let your kids help with the fun parts. They can pick their favorite pieces, help with the cutting (if they’re old enough), and even do some of the Mod Podge painting. It’s a fantastic way to make a new memory while celebrating old ones. Put on some tunes, lay out some snacks, and enjoy making a mess and a masterpiece together.
Quick Fixes for Crafty Hiccups
- Wrinkles? If you get a few wrinkles, don’t worry! You can usually smooth them out with the brayer. If a bubble appears, poke it with a tiny pin and then smooth it down.
- Sticky Finish? If your canvas feels a little tacky after it’s dry, it might just need more time to cure. Give it another day or two. A final coat of clear acrylic sealer can also solve this.
Caring for Your Canvas Creation
Your collage canvas is pretty durable, but a little care will keep it looking fresh and beautiful for years to come. To clean it, just use a soft, dry cloth to dust it off every now and then. Avoid using any harsh cleaners or sprays, as these can damage the finish. If you used the gloss Mod Podge, you might notice it picks up fingerprints easily, so try to hang it in a spot where little hands won’t be tempted to touch it constantly!

Gift Ideas and Other Fun Uses
Once you’ve made your first collage canvas, you’ll probably want to make more! Here are some fun ideas for other ways to use this technique:
Grandparent Gifts: Create a smaller collage canvas featuring your child’s artwork and give it as a gift to grandparents. They’ll absolutely love having a piece of their grandchild’s creativity to display in their home.
Birthday Keepsakes: Make a special canvas featuring all the artwork from a specific year or age. This becomes a time capsule of that particular stage of childhood.
Teacher Appreciation: Create a collage canvas as a thank-you gift for a favorite teacher or daycare provider. Include artwork that was created in their class for an extra special touch.
Sibling Collaborations: If you have multiple kids, create a canvas that features artwork from all of them. It’s a beautiful way to celebrate their combined creativity and makes a great family piece.
Room Decor Sets: Make a series of smaller canvases (like three 8×10 inch pieces) that can be hung together as a gallery wall. Each canvas can have a different theme or color scheme.
Displaying Your Canvas Like a Pro
Once your canvas is complete and fully dry, it’s time to show it off! Here are some tips for displaying it in a way that really makes it shine:
Choose the Right Spot: Hang your canvas at eye level in a place where it will get noticed. The living room, entryway, or a hallway are all great choices. If it’s for your child’s room, hang it where they can see it from their bed.
Consider the Lighting: Good lighting can make your canvas look even more amazing. If possible, position it near a window or add a picture light above it to make the colors pop.
Frame It (Optional): While a stretched canvas looks great on its own, you can also put it in a floating frame for an extra polished look. This is especially nice if you used a canvas panel instead of a stretched canvas.
Create a Gallery Wall: Make several smaller collage canvases and hang them together in a grid or cluster. This creates a really impressive display and is a great way to organize artwork by year, theme, or child (if you have multiple kids).
Add a Label: Consider adding a small plaque or label underneath the canvas with information like “Emma’s Artwork, Ages 3-5” or “Kindergarten Masterpieces, 2025-2026.” This adds context and makes it feel even more special.
Troubleshooting: What to Do When Things Don’t Go as Planned
Even the best crafters run into problems sometimes. Here are solutions to some common issues you might encounter:
Problem: The paper is wrinkling when I apply Mod Podge. Solution: Use thinner coats of Mod Podge and work quickly. You can also try applying Mod Podge to the canvas first, placing the paper down, and then applying a very light coat on top. Some wrinkling is normal, especially with thinner paper, and it often adds to the handmade charm!
Problem: I can see brush strokes in the Mod Podge. Solution: Use a foam brush instead of a bristle brush, and apply thin, even coats. If you’ve already applied it and can see strokes, don’t worry—you can lightly sand the dried surface with very fine sandpaper (400 grit) and apply another coat.
Problem: The edges of my paper are lifting up. Solution: Make sure you’re applying Mod Podge all the way to the edges and even slightly over them. You can also use your finger or a brayer to really press down the edges. If they’re still lifting after it dries, apply a little more Mod Podge just to those spots.
Problem: There are air bubbles under the paper. Solution: Use a brayer or credit card to smooth out the paper as soon as you place it down. If you spot a bubble after it’s dry, you can carefully poke it with a pin, press the air out, and seal it with a tiny bit of Mod Podge.
Problem: The colors in the artwork are bleeding or running. Solution: This can happen with certain types of markers or paints. To prevent it, test a small corner of the artwork first. If it bleeds, make a color copy of the artwork and use that instead of the original.
Your Masterpiece is Complete!
And there you have it! A beautiful, one-of-a-kind piece of art that’s bursting with personality and memories. Hang it in a place of honor—the living room, a playroom, or your child’s bedroom—and get ready for all the compliments. Every time you look at it, you’ll be reminded of your child’s amazing creativity and the fun you had making it together. It’s more than just a craft; it’s a celebration of childhood, and a beautiful reminder that the best art is the art that’s made with love.

Why This Craft is Worth Your Time
Creating a collage canvas from your child’s artwork is more than just a clever storage solution. It’s a way to show your kids that you value their creativity and that their efforts matter. When they see their drawings and paintings transformed into a beautiful piece of art hanging on the wall, it sends a powerful message: “Your creativity is important. Your art is worth celebrating.” Plus, you get to enjoy a unique, colorful piece of decor that no store could ever sell you. So grab that pile of artwork, pick up some supplies, and get ready to create something truly special. Happy crafting!