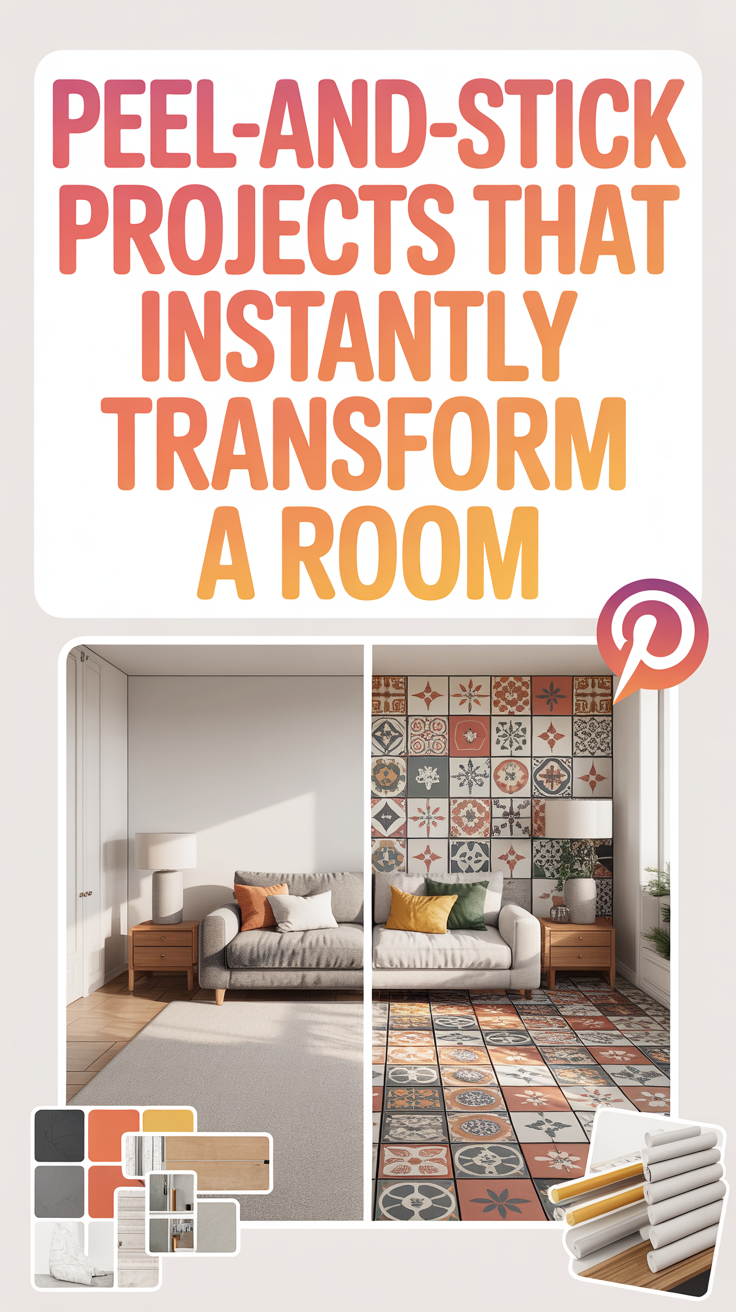
Have you ever walked into a room in your home and just felt… uninspired? Maybe the floors are a little dated, the walls feel a bit too plain, or the kitchen cabinets are screaming for a refresh. I’ve been there. We’ve all been there. The desire to completely overhaul a space is strong, but the reality of the budget, the time commitment, and the sheer mess of a full renovation can be incredibly daunting. That’s where the magic of peel-and-stick projects comes in. It’s like having a magic wand for your home decor, you can completely change the vibe of a room in a single weekend, without the need for power tools, contractors, or a second mortgage.
I remember the first time I tried a peel-and-stick project. I was skeptical. Could something that essentially amounts to a giant sticker really look good? Could it hold up to daily life? The answer, I quickly discovered, was a resounding yes. The quality of peel-and-stick products has skyrocketed in recent years. We are no longer talking about the flimsy, shiny contact paper of decades past. Today’s options are textured, durable, and incredibly realistic. From faux marble floors to intricate wallpaper patterns, the possibilities are truly endless.
Today I want to share some of my absolute favorite peel-and-stick projects that can instantly transform any room in your house. We’ll talk about everything from flooring to backsplashes, stair risers to furniture flips, and I’ll share some insider tips on how to get the best results. And, of course, we have to talk about the absolute game-changer that is the new line of peel-and-stick flooring from Chris Loves Julia. Trust me, you’re going to want to hear about this one. So grab a cup of coffee, get comfortable, and let’s dream up some beautiful, budget-friendly transformations for your home.
The Floor Is Yours: Transforming Spaces from the Ground Up
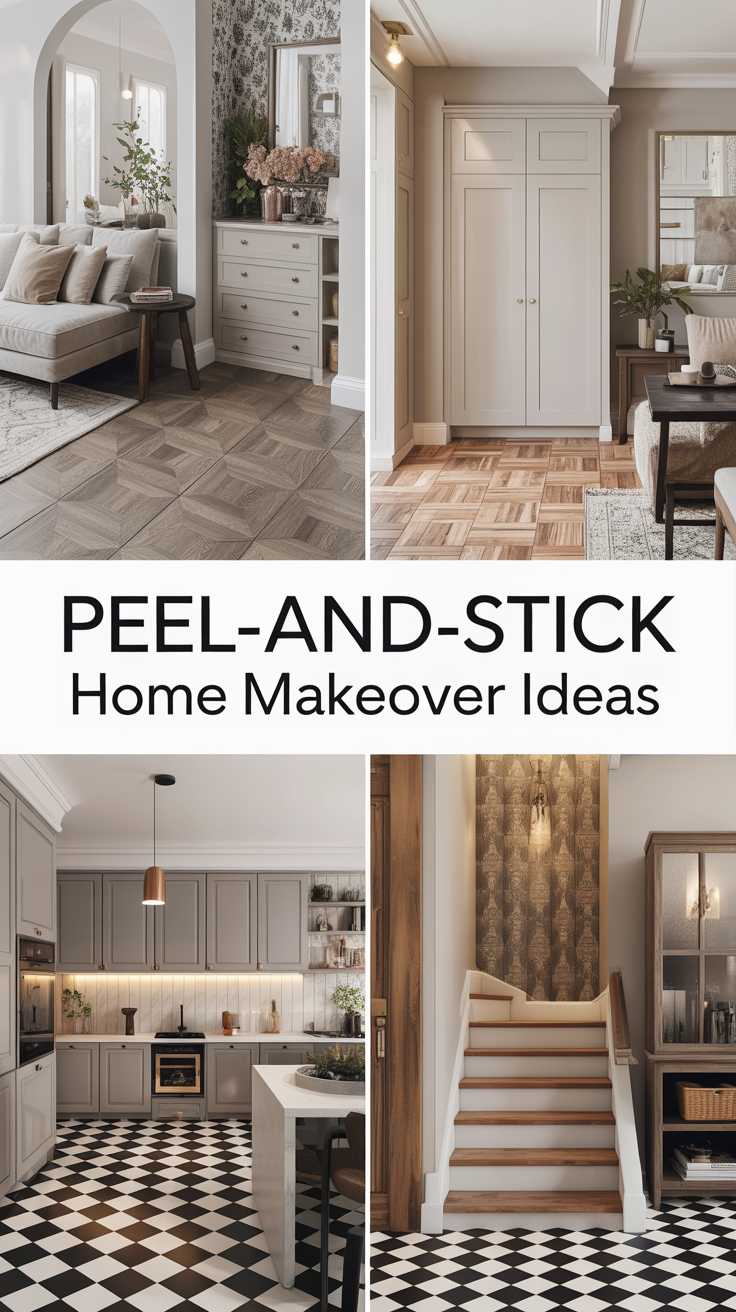
Let’s start with the foundation of any room: the floor. Flooring is often the most expensive and disruptive part of a renovation. Ripping up old tile or laying down new hardwood is a massive undertaking. But what if you could get the look of luxury flooring for a fraction of the cost and effort? Enter peel-and-stick floor tiles.
For a long time, peel-and-stick flooring had a bit of a bad reputation. It was often seen as a cheap, temporary fix that looked exactly like what it was: plastic stickers. But the industry has evolved dramatically. Today’s peel-and-stick tiles are thick, durable, and feature incredibly realistic textures and patterns. They are a fantastic option for bathrooms, laundry rooms, kitchens, and even entryways.
When considering peel-and-stick flooring, preparation is key. The surface you are applying the tiles to must be completely clean, smooth, and dry. Any bumps or debris will show through the tile and can compromise the adhesive. If you are applying over existing tile, you may need to fill in the grout lines to create a level surface, or simply stagger the direction of your new tiles so the seams don’t line up with the grout lines underneath. It takes a bit of prep work, but the results are absolutely worth it.
The beauty of these tiles is that they are relatively easy to install yourself. All you need is a utility knife, a straight edge, and a little bit of patience. Start from the center of the room and work your way out, this ensures that any cut tiles end up at the edges, where they are far less noticeable. It’s a weekend project that yields incredibly satisfying results, and the transformation can be genuinely jaw-dropping.
One of the most important things to remember is to roll the floor with a heavy roller after installation. This ensures that all the tiles are firmly adhered and that there are no air pockets lurking beneath the surface. You can rent a floor roller from most home improvement stores for a very reasonable price. It’s a small step that makes a big difference in the longevity and appearance of your new floor.
The Chris Loves Julia x FloorPops Collaboration: A Design Dream Come True
Now, let’s talk about the absolute star of the peel-and-stick flooring world right now: the Chris Loves Julia x FloorPops collection. If you follow the design world at all, you are likely familiar with Chris and Julia Marcum. They are known for their impeccable taste, their moody, modern-traditional aesthetic, and their ability to make high-end design feel accessible and achievable. Their motto, “make the everyday extraordinary” is not just a tagline; it’s a genuine design philosophy that runs through everything they create.
When they announced their collaboration with FloorPops, a DIY line within York Wallcoverings, the design community collectively swooned. And let me tell you, the collection does not disappoint. They have taken the classic elegance of a marble checkerboard floor and made it incredibly easy to achieve in your own home.
The key to the collection’s success lies in the details. The tiles aren’t just flat squares of color; they feature a beautiful, low-lustre finish and subtle marble veining that makes them look incredibly authentic. They are thick, rigid vinyl, designed to be a permanent, durable flooring solution rather than a temporary fix. They are water-resistant and wipeable, making them perfect for high-traffic areas like kitchens and bathrooms. Each pack of ten tiles is priced under $25, making it genuinely easy to cover a room without breaking the bank.
The original launch, featuring the Bonneville Grey and the Lawrence (a striking black and white faux wood grain check), sold out almost immediately. It proved that there was a massive appetite for high-design, low-cost flooring solutions. But the expansion of the line is where things get truly exciting.
The Bonneville Beige offers a soft, neutral take on the classic marble check, perfect for creating a warm, inviting space. The Bonneville Jade is a stunning green and white marble that adds a beautiful pop of color, it pairs beautifully with brass accents and natural wood tones. The Bonneville Oxblood is a rich, moody red and white marble that makes a serious, sophisticated statement. These aren’t colors you typically see in budget flooring. They are nuanced, deliberate shades that reflect a genuine design sensibility and allow homeowners to make a real statement without the permanence or expense of colored ceramic tile.
And just when we thought the collection couldn’t get any better, Chris Loves Julia released two brand new colorways: Bonneville Bronze and Bonneville Slate. The Bronze is a warm-toned, honeyed hue that layers beautifully with creamy neutrals and natural wood tones, bringing a quiet richness to any space. The Slate carries a cool, calm blue-gray with subtle veining that feels grounded and sophisticated, the kind of color that pairs naturally with warm taupes, earthy greens, and white oak.
What this collection demonstrates is that peel-and-stick products are no longer just a compromise; they are a legitimate design choice. They allow you to achieve a specific, high-end look in spaces where real stone might be impractical due to weight, cost, or subfloor issues. It’s a masterclass in accessible design, and it has genuinely changed the way a lot of people think about budget home renovations.
The checkerboard floor is a classic motif that dates back centuries, often found in grand estates and historic homes. By offering this look in a peel-and-stick format, Chris and Julia have allowed everyday homeowners to inject a sense of grandeur and timeless elegance into their spaces without the prohibitive cost of real marble or the structural requirements of heavy stone tile. It’s a brilliant piece of design thinking.
Walls That Wow: The Magic of Peel-and-Stick Wallpaper
Moving up from the floor, let’s talk about walls. Paint is great, but sometimes a room just needs a little something extra. It needs pattern, texture, and personality. That’s where peel-and-stick wallpaper comes in.
Much like peel-and-stick flooring, removable wallpaper has come a long way. The patterns available today are incredibly sophisticated, ranging from delicate florals to bold geometric prints to textured grasscloth looks. And the best part? It’s completely removable. This makes it an absolute dream for renters, or for anyone who likes to change up their decor frequently without committing to a permanent change.
I love using peel-and-stick wallpaper to create a stunning accent wall in a bedroom or living room. It instantly draws the eye and adds a layer of visual interest that paint simply can’t achieve. But don’t limit yourself to just walls. Peel-and-stick wallpaper is incredibly versatile. You can use it to line the back of a bookcase for a subtle pop of pattern. You can apply it to the drawer fronts of a plain dresser to give it a custom, high-end look. You can even use it on the ceiling to create a truly unexpected and dramatic effect. The possibilities are only limited by your imagination.
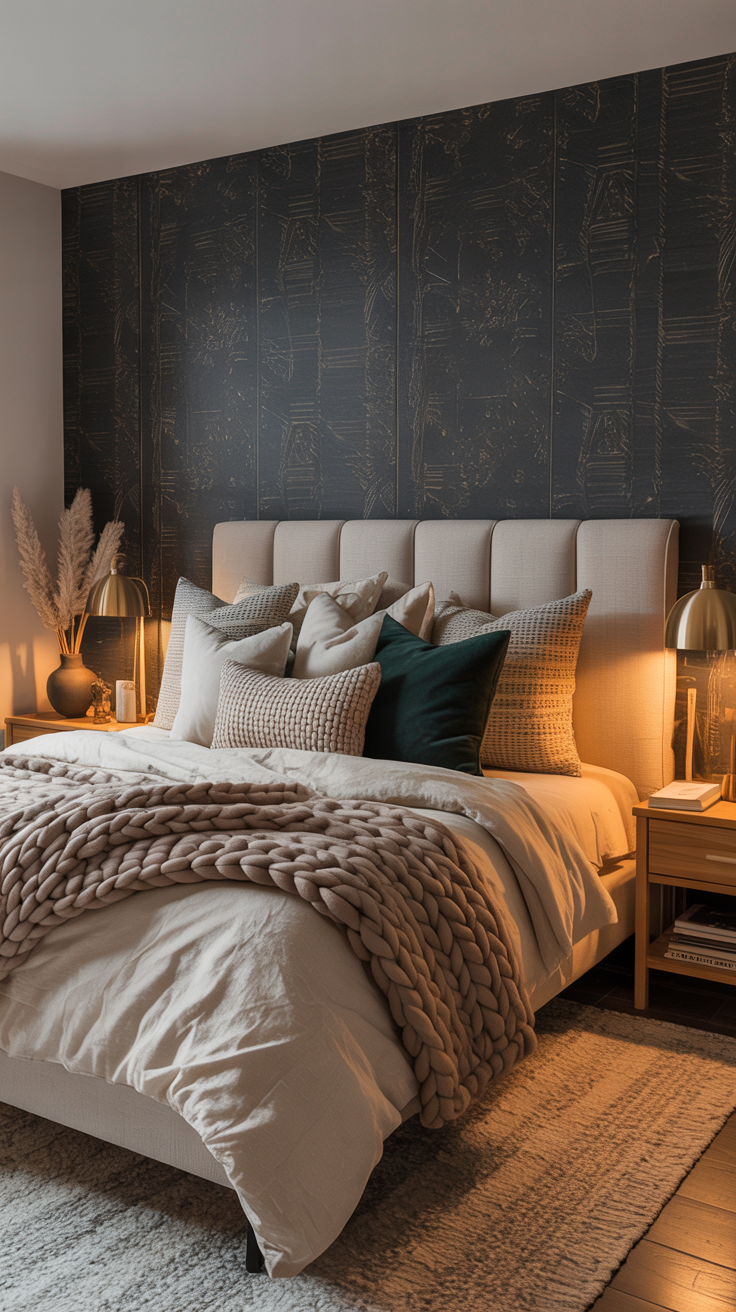
The concept of the accent wall deserves special attention here. An accent wall is a powerful design tool — it can anchor a room, define a space within an open floor plan, or simply provide a stunning focal point. And peel-and-stick wallpaper is arguably the best way to create one, precisely because it’s low commitment. If you decide to paint an accent wall a bold, dark color and then change your mind a year later, you’re looking at multiple coats of primer and paint to cover it up. With peel-and-stick wallpaper, you simply peel it off. This freedom allows you to be much more daring with your design choices.
When installing peel-and-stick wallpaper, the most important thing is to take your time. Start with a clean, smooth wall. Use a smoothing tool to gently press the paper onto the wall, working from the center outwards to eliminate any air bubbles. If you make a mistake, don’t panic — the beauty of removable wallpaper is that you can simply peel it back and try again. It’s a forgiving medium that allows you to experiment and have fun with your decor.
One of my favorite peel-and-stick wallpaper projects was transforming a small, boring powder room into a jewel box of a space. I chose a bold, dark floral pattern that completely enveloped the room, making it feel cozy and intimate. The installation took a bit of patience, especially around the sink and toilet, but the end result was absolutely worth it. Guests always comment on it first.
Kitchen Updates on a Dime: Backsplashes and Cabinet Makeovers
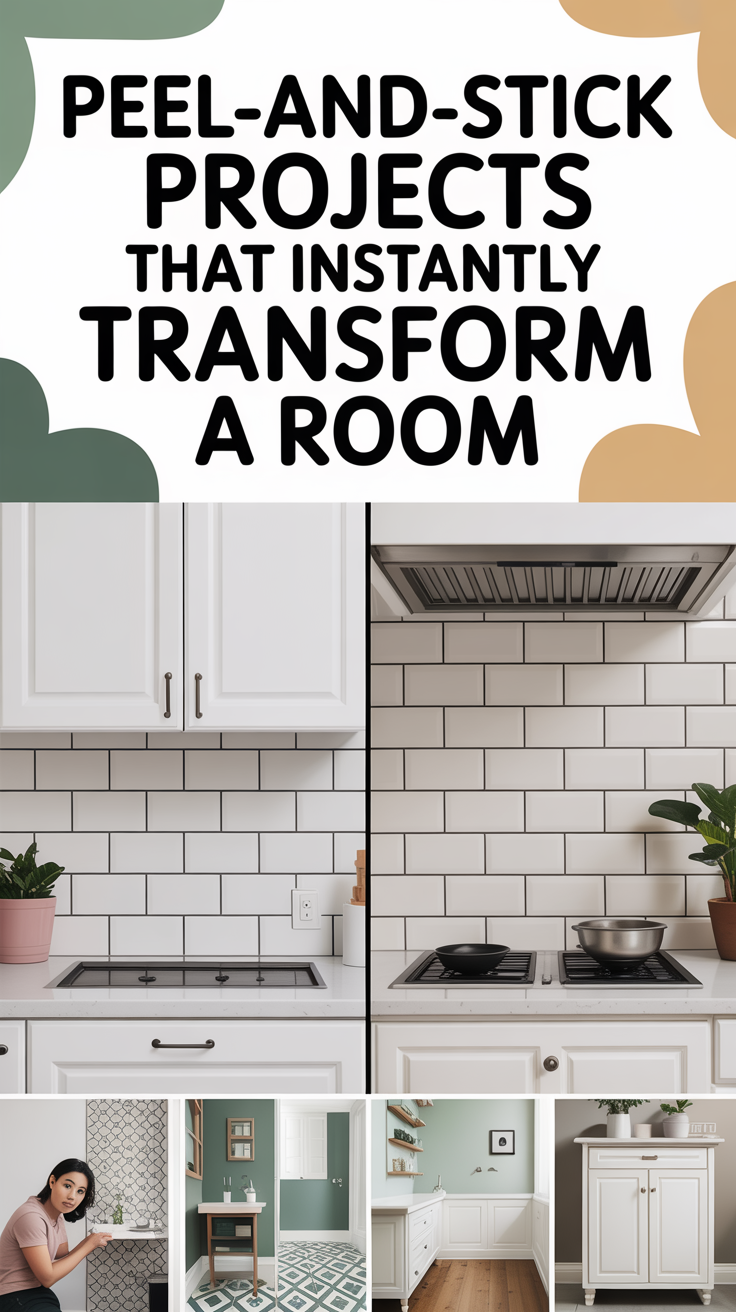
The kitchen is often considered the heart of the home, but it’s also one of the most expensive rooms to renovate. If your kitchen is feeling a little tired, but a full remodel isn’t in the budget, peel-and-stick projects can be an absolute lifesaver.
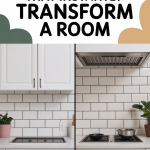
Let’s start with the backsplash. A new backsplash can completely change the look and feel of a kitchen. But traditional tile installation is messy, time-consuming, and requires specialized tools. Peel-and-stick backsplash tiles offer a brilliant alternative. These tiles come in a huge variety of styles, from classic subway tile to intricate mosaic patterns, and they are designed to withstand the heat and moisture of a kitchen environment. You simply cut them to size with a utility knife, peel off the backing, and stick them to the wall. It’s a project you can easily complete in an afternoon, and the transformation is truly remarkable.
But what about the cabinets? If your cabinets are structurally sound but cosmetically dated, peel-and-stick contact paper can work wonders. Today’s architectural films are thick, durable, and designed specifically for resurfacing furniture and cabinetry. You can find contact paper that perfectly mimics the look of real wood grain, sleek matte black, or high-gloss modern finishes. Applying contact paper to cabinets takes a bit of patience and precision, but the results can be stunning. Just be sure to thoroughly clean and degrease your cabinets before applying the paper to ensure a strong, lasting bond.
I recently helped a friend update her rental kitchen using peel-and-stick products. We covered the dated oak cabinets with a sleek, matte white contact paper and added a classic subway tile peel-and-stick backsplash. The entire project cost less than $200 and took a single weekend to complete. The transformation was unbelievable — the kitchen went from feeling dark and cramped to bright, modern, and inviting. Her landlord was none the wiser, and she got to enjoy a kitchen that actually felt like hers.
Small Details, Big Impact: Stair Risers and Furniture Flips
Sometimes, it’s the smallest details that make the biggest impact in a room. Peel-and-stick products are perfect for these little touches that add personality and charm to your home.
Take your staircase, for example. The stair risers, the vertical part of the stair, are often overlooked, but they present a fantastic opportunity for a design moment. Peel-and-stick stair riser decals are an incredibly easy and affordable way to add pattern and color to your staircase. You can choose a classic tile pattern, a fun geometric design, or even a faux wood grain. It’s a simple project that can completely transform the look of your entryway or hallway, and it’s the kind of detail that makes visitors do a double-take.
And let’s not forget about furniture. We all have that one piece that is perfectly functional but visually uninspiring — a plain IKEA dresser, a hand-me-down side table, a basic bookshelf. Peel-and-stick products can give these pieces a whole new lease on life. Imagine transforming a basic white desk into a stunning faux-marble masterpiece, or giving a dated laminate table a sleek, modern wood-grain finish. The key is preparation: lightly sand the surface to give the adhesive something to grip onto, make sure the piece is completely clean and free of dust, and take your time applying the paper with a smoothing tool.
Leftover wallpaper scraps can also be used to cover light switch plates, creating a seamless look on an accent wall. You can use peel-and-stick tiles to create a custom, easy-to-clean mat for your pet’s food and water bowls. You can line the inside of a glass-front cabinet, adding a surprise element of design when the doors are opened. The applications extend far beyond the obvious, and once you start looking at your home through a peel-and-stick lens, you’ll see opportunities everywhere.
Step-by-Step: Executing the Perfect Peel-and-Stick Bathroom Refresh
To truly understand the transformative power of these products, let’s walk through a complete project: updating a dated, builder-grade bathroom.
Imagine a bathroom with yellowing linoleum floors, a plain oak vanity cabinet, and stark white walls. A full renovation would cost thousands and take weeks. But with a weekend and a few hundred dollars, we can completely change the narrative.
The Prep. This is the unglamorous but essential phase. Start by removing the baseboards carefully so they can be reused. Thoroughly clean the linoleum floor with a heavy-duty degreaser to ensure absolutely no residue remains. Fill any dips or gouges with a leveling compound and sand smooth. This step is non-negotiable — the quality of your finished floor depends entirely on the quality of the surface beneath it.
The Floor. For this project, the Chris Loves Julia Bonneville Slate tiles are the perfect choice for a calming, sophisticated base. Find the exact center of the room and snap chalk lines to create a crosshair. Peel the backing off the first tile and carefully align it with the crosshair, pressing it firmly into place. Continue laying tiles outward from the center, ensuring the checkerboard pattern remains perfectly aligned. When you reach the edges, use a sharp utility knife and a straight edge to cut the tiles to fit snugly against the wall. Finally, roll the entire floor with a rented 100-pound floor roller to ensure maximum adhesion.
The Vanity. The cabinet base is dating the room. Remove the cabinet doors and hardware. After a thorough cleaning and light sanding, apply a matte black architectural contact paper to the cabinet base and doors. Use a squeegee to smooth out any bubbles and a heat gun or hairdryer to gently stretch the vinyl around the edges and corners for a seamless look. Reinstall the doors with sleek new brass hardware, this single hardware swap alone makes a remarkable difference.
The Walls. Choose a peel-and-stick wallpaper with a large-scale, moody floral print and apply it to the top half of the walls, above a newly installed chair rail. Measure carefully, cut your strips, and apply them one by one, smoothing from the center out and carefully matching the pattern at the seams.
The Finishing Touches. Reinstall the baseboards, caulk the edges where the new floor meets the tub and toilet, and hang a new framed mirror over the vanity. The result is a bathroom that looks entirely custom and high-end, achieved in two days with zero demolition. This is the true magic of peel-and-stick.
Troubleshooting Common Peel-and-Stick Problems
While peel-and-stick projects are generally straightforward, they aren’t entirely foolproof. Knowing how to handle common issues can save you a lot of frustration.
Air Bubbles are the most common issue, particularly with wallpaper and contact paper. The best prevention is a slow, methodical application using a smoothing tool. If you do get a bubble, try gently peeling the paper back and reapplying. If the bubble is small and stubborn, you can use a tiny pin to prick the center and smooth the air out.
Misaligned Patterns are especially tricky with geometric designs or the checkerboard layout of the Chris Loves Julia tiles. Always start from a center point or a highly visible focal point and work outward. Use a level and a straight edge constantly. If a piece is slightly off, it’s usually better to peel it up and reposition it immediately rather than trying to force it into place.
Peeling Edges usually result from inadequate surface preparation — dust or grease on the wall or floor — or insufficient pressure during application. For floor tiles, a heavy floor roller is essential. For wallpaper, ensure the walls are meticulously clean and dry before starting. If an edge does lift, a tiny amount of specialized adhesive or double-sided tape can secure it, but prevention is always the best cure.
Residue Upon Removal can occur, especially if products have been in place for a long time or exposed to heat. A citrus-based adhesive remover like Goo Gone, or warm soapy water and a bit of elbow grease, will usually take care of it. Always test any remover on an inconspicuous area first to ensure it doesn’t damage the underlying surface.
It’s also worth noting that the Chris Loves Julia x FloorPops tiles are specifically designed with a strong adhesive for long-term durability. This means they are not as casually removable as some peel-and-stick wallpapers. Think of them as a long-term upgrade rather than a temporary fix. If you ever need to remove them, a scraper or a thin, flat object to wiggle under a seam will do the trick, but go slowly and be patient.
Renter-Friendly Renovations: Making a Space Your Own
One of the most significant impacts of the peel-and-stick revolution has been on the rental market. For decades, renters have been stuck with whatever design choices their landlords made, beige walls, dated linoleum, and uninspiring cabinets were simply facts of life. But peel-and-stick products have changed all that.
Because these products are removable, they offer renters a way to customize their spaces without risking their security deposits. Imagine moving into an apartment with a kitchen that features 1980s oak cabinets and a stained laminate countertop. Today, you can cover those cabinets with sleek, matte black contact paper, add a faux-marble peel-and-stick backsplash, and completely transform the space. When it’s time to move on, you simply peel it all away, leaving the apartment exactly as you found it.
If you are concerned about the adhesive on peel-and-stick floor tiles damaging the existing floor, you can lay down a layer of poster board or masking tape first as a protective barrier. It’s an extra step, but it provides peace of mind. This approach allows you to enjoy the look of the Chris Loves Julia checkerboard floor in your rental without any anxiety about what lies beneath.
The ability to personalize a rental space has a profound impact on how we feel about our homes. It turns a temporary living situation into a true sanctuary. It allows us to express our creativity and to surround ourselves with things we love. And this democratization of design is perhaps the most exciting aspect of the peel-and-stick trend: it proves that beautiful, personalized spaces are not just for homeowners with large budgets. They are accessible to everyone, regardless of whether they own or rent, regardless of their DIY experience level, and regardless of how much time they have to dedicate to a project.
The Power of Peel-and-Stick
In the end, the beauty of peel-and-stick projects lies in their accessibility. They democratize design, allowing anyone, regardless of their budget or DIY experience, to create a home they truly love. They offer a low-risk, high-reward way to experiment with color, pattern, and texture. The low-stakes nature of these products is what makes them so liberating; when you aren’t committing thousands of dollars and weeks of construction to a project, you are far more likely to take a design risk. You might choose that bold, dark floral wallpaper for the powder room, or opt for the striking Bonneville Oxblood floor tiles instead of a safe, neutral option. And those bold choices are often the ones that create the most memorable, personality-filled spaces.
Whether you are completely transforming a room with the stunning new Chris Loves Julia x FloorPops flooring, adding a pop of personality with removable wallpaper, updating a tired kitchen with a peel-and-stick backsplash, or simply giving a piece of furniture a fresh new look with contact paper, these products offer endless possibilities. They empower us to take control of our spaces and to create homes that reflect our unique style and personality.
There is also a deeper psychological benefit to these quick transformations that is worth acknowledging. Our homes are extensions of ourselves. When our environment feels stagnant or doesn’t reflect who we are, it can have a subtle but pervasive impact on our mood and energy. A room refresh, even a simple one achieved with peel-and-stick products, acts as a visual reset. The act of physically transforming a space: measuring, cutting, smoothing, and stepping back to admire the result, is inherently empowering. It provides a tangible sense of accomplishment and a renewed sense of connection to your home.
So the next time you walk into a room and feel uninspired, don’t despair. You don’t need a massive budget or a team of contractors to make a change. You just need a little bit of creativity, a free weekend, and the magic of peel-and-stick. Embrace the process, have fun with it, and watch as your home transforms before your very eyes. The power to create a beautiful space is literally in your hands. Happy peeling and sticking.