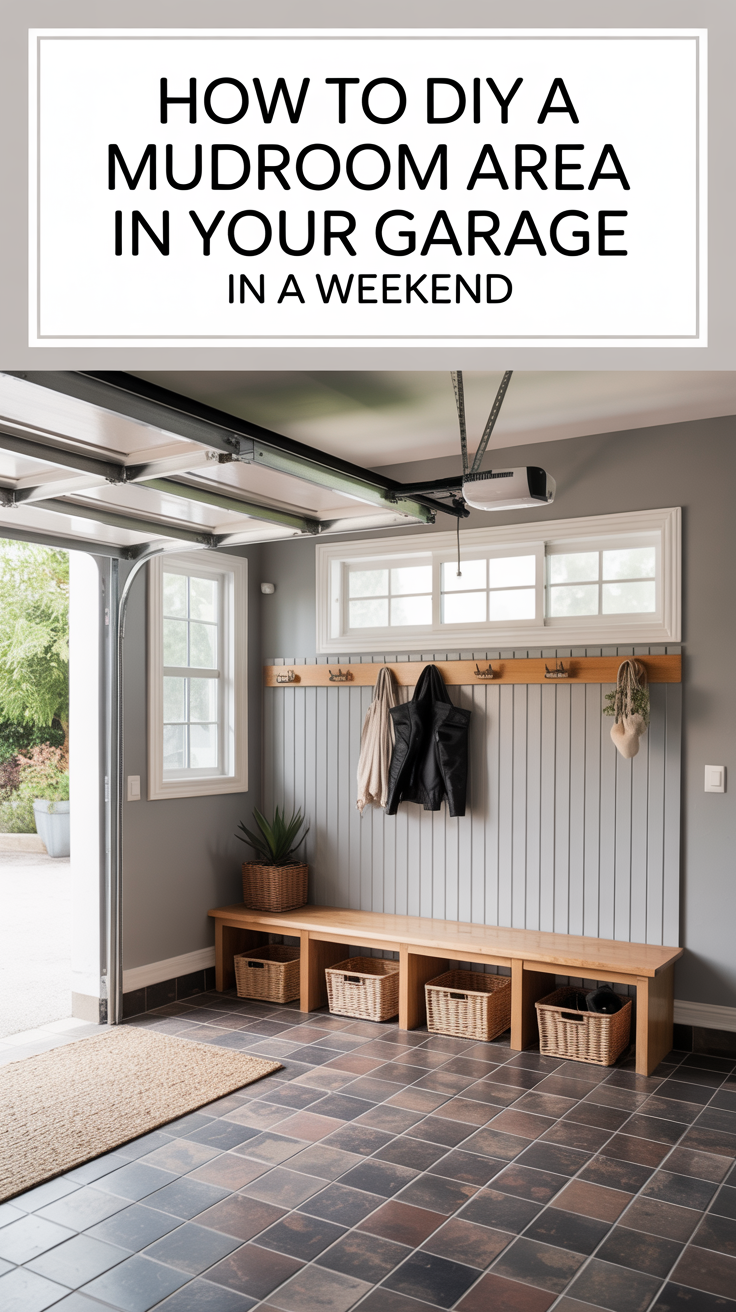
If you’ve ever walked into your home and immediately tripped over a pile of shoes, jackets, and backpacks, you know how chaotic life can get without a designated landing zone. The garage often becomes the unofficial drop zone for most households, which makes it the perfect spot to create a functional, beautiful mudroom area.
The best part? You can DIY it in a single weekend.
With a little planning, some smart design decisions, and the right tools, you’ll transform a neglected wall in your garage into an organized, welcoming space that keeps the mess contained and makes mornings smoother.
Why a Garage Mudroom Is a Game-Changer
A mudroom isn’t just about making your garage look pretty — it’s about creating systems that make daily life easier. Here’s what a well-designed garage mudroom does for you:
Keeps dirt out of the house — muddy shoes, wet coats, and dripping umbrellas never make it past the door.
Streamlines mornings — kids know exactly where to find backpacks, jackets, and shoes.
Maximizes underused space — turns an empty wall into a high-functioning storage hub.
Protects your home’s flooring — keeps moisture, salt, and dirt contained in one easy-to-clean area.
Boosts resale value — organized storage is a huge selling point for buyers.
Whether you’re working with five feet of wall or a full-blown garage bay, you can design a mudroom that fits your space, style, and lifestyle.
Step 1. Visualize Your Ideal Mudroom
Before buying lumber or picking paint colors, take a few minutes to plan your space intentionally. The more thought you put into this step, the smoother your weekend build will go.
Measure Your Space First
Start with the basics:
Width of the wall
Ceiling height
Distance from the garage entry door
Depth you can comfortably allocate without blocking cars or walkways
Pro Tip: If your garage is tight, aim for no more than 18 inches of depth to keep the walkway clear while still providing functional storage.
Choose Your Layout
There are three main layouts to consider:
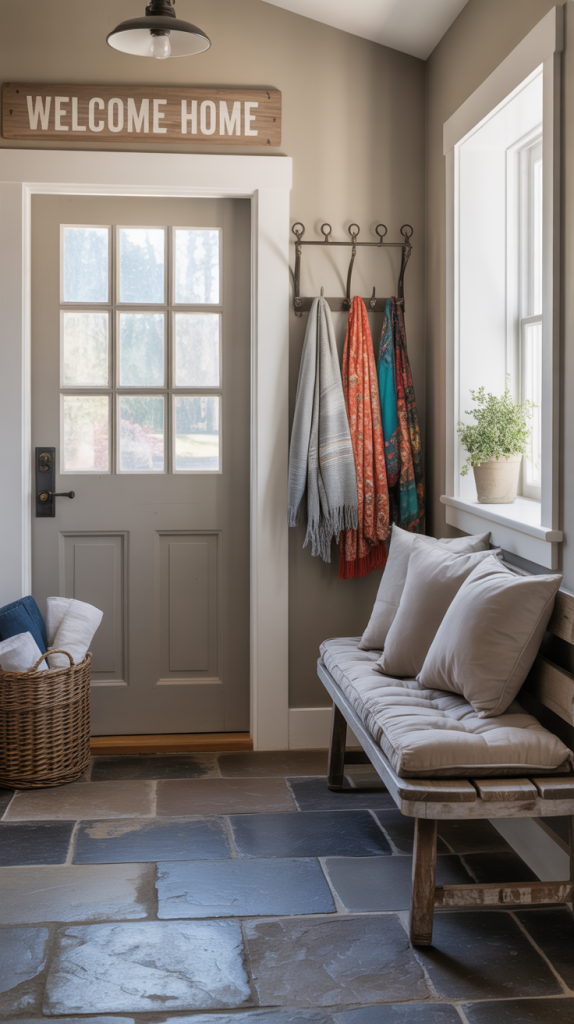
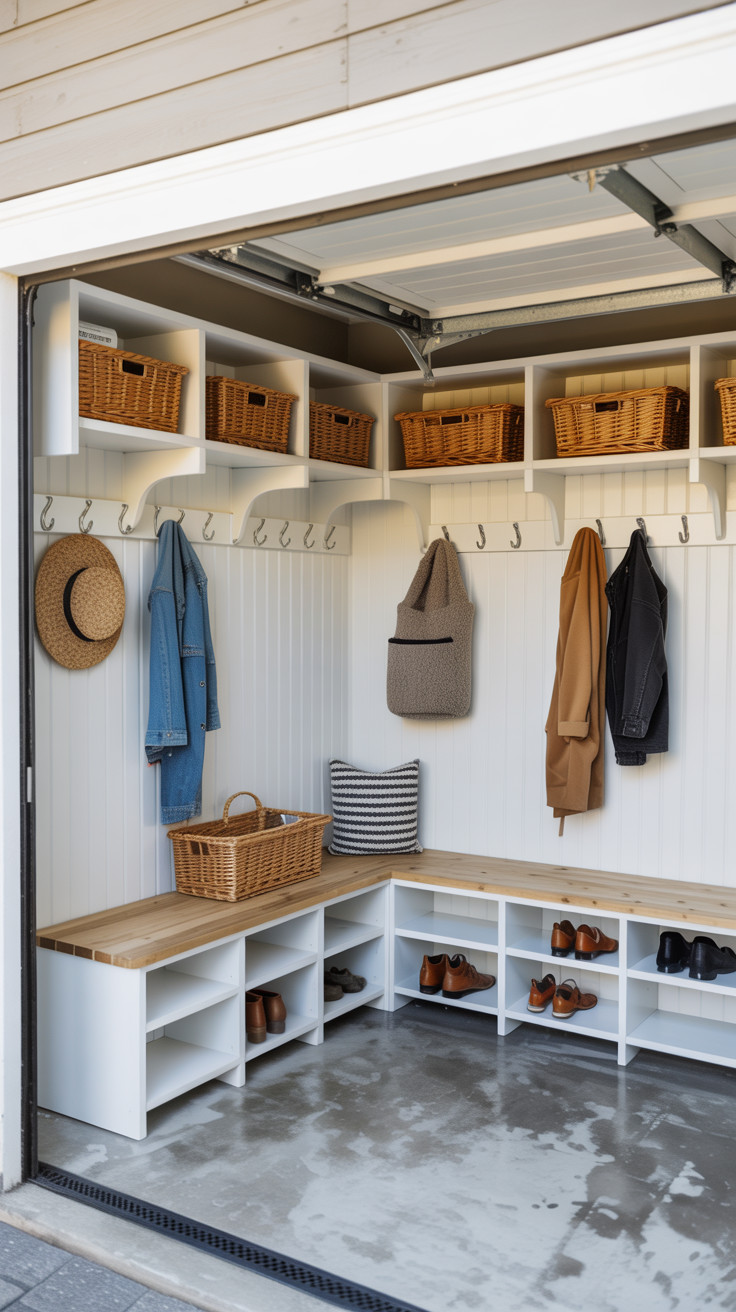
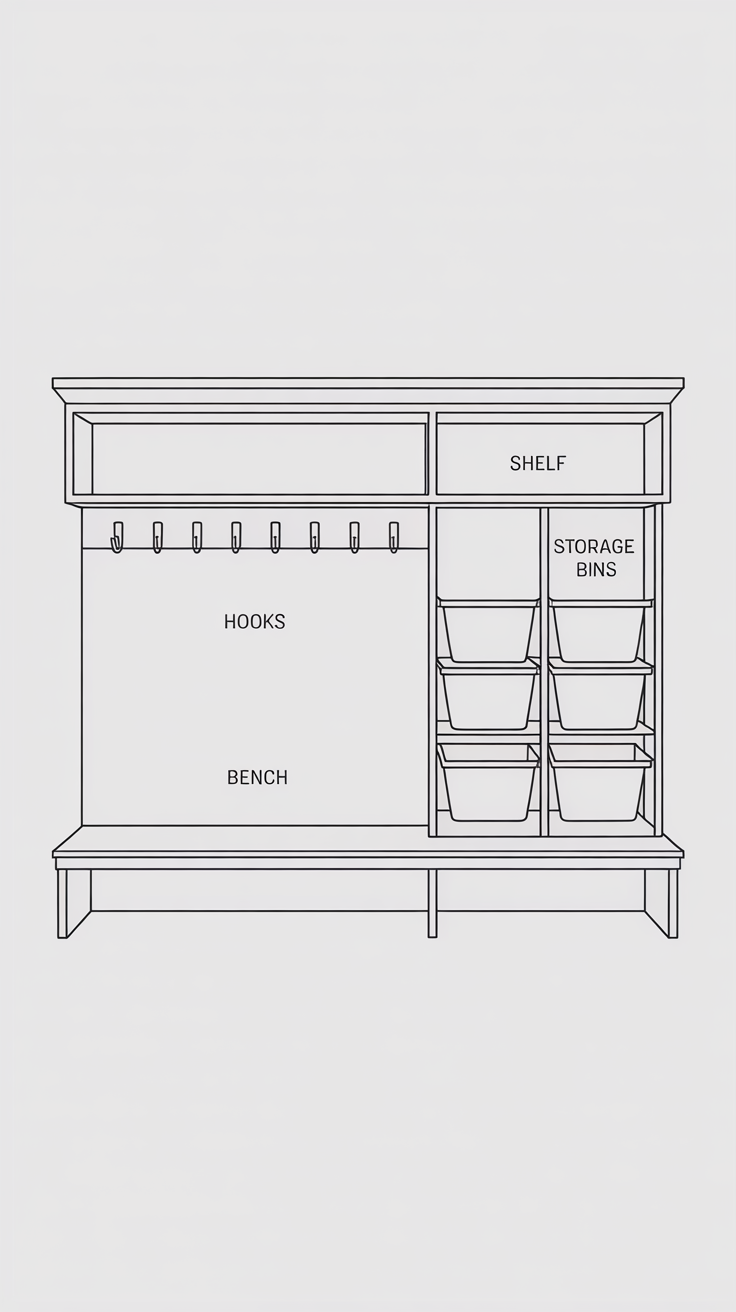
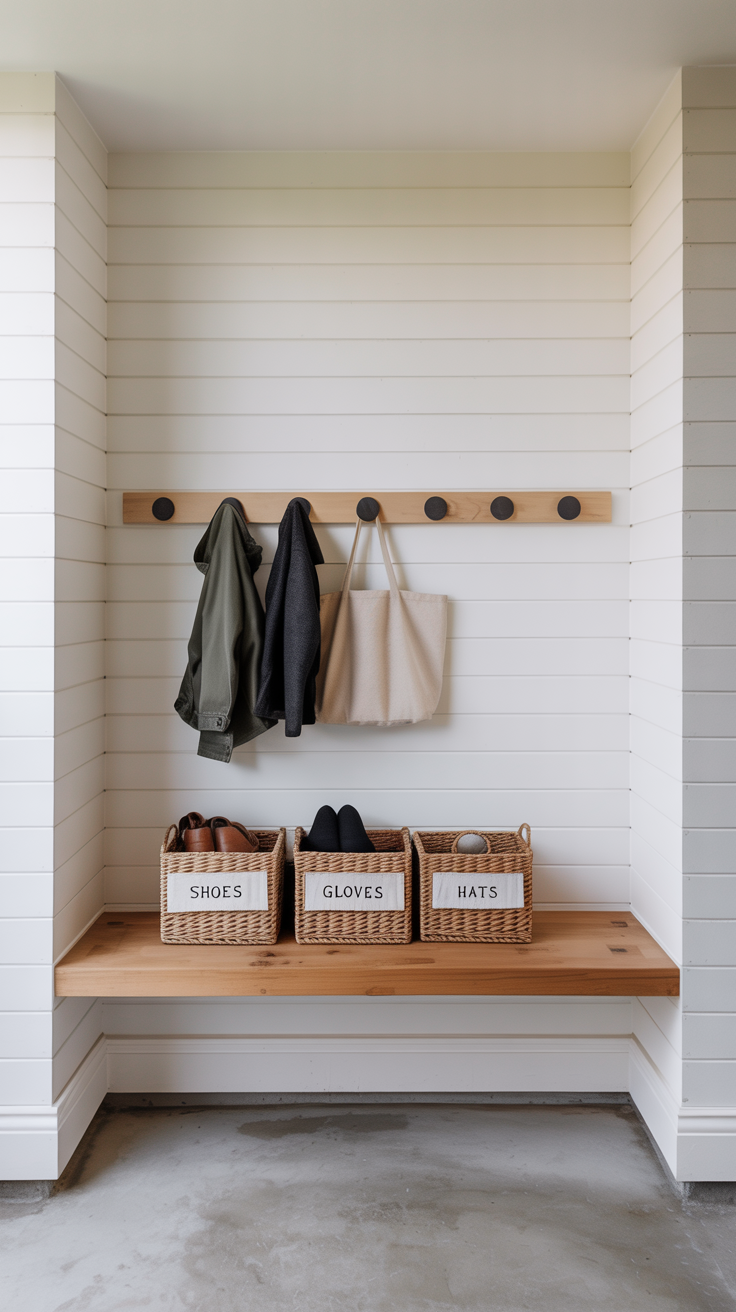
1. Single-Wall Mudroom (Most Common)
Bench with cubbies underneath
Hooks above for coats and bags
Upper shelf for baskets and seasonal gear
Best for: Small garages or spaces where you need storage along one wall.
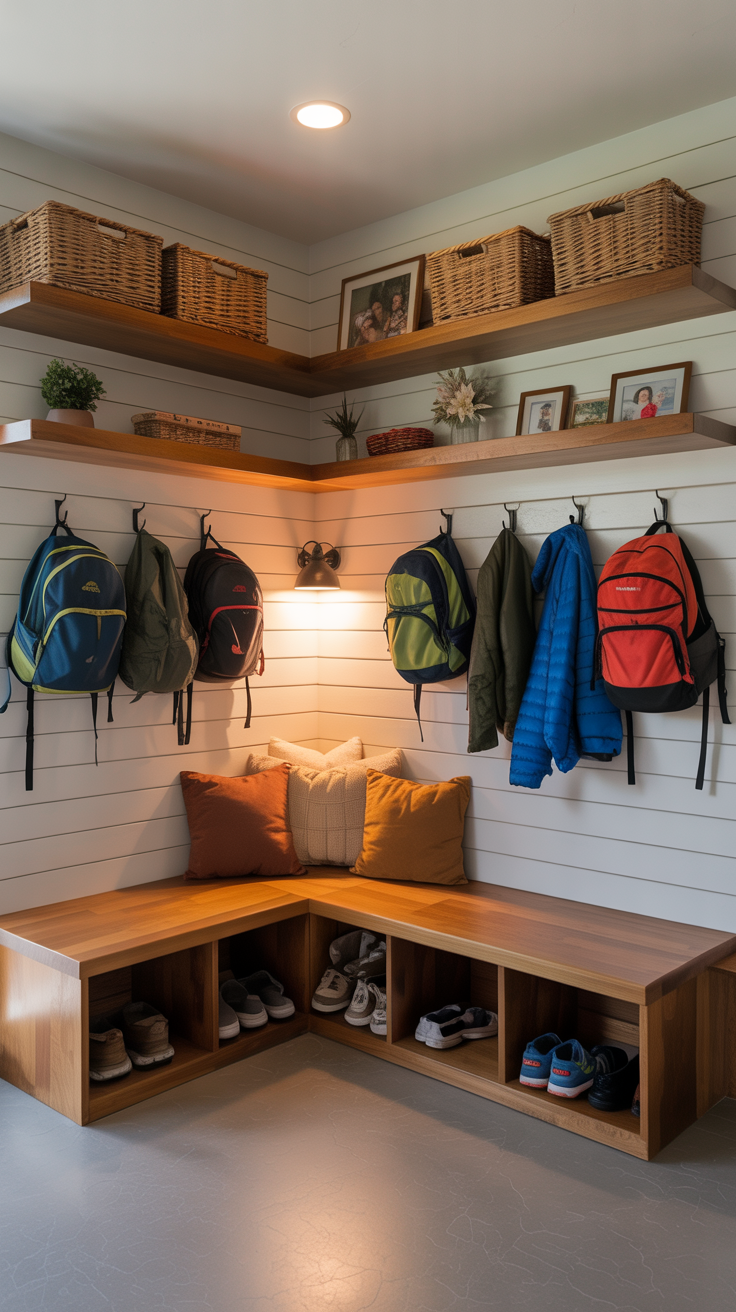
2. Corner Mudroom (Great for Odd Spaces)
Uses a tucked-away garage corner
Wrap-around bench + shelving for a cozy, contained feel
Perfect if you want to separate zones for different family members
3. Built-In Locker Wall (High-End Look)
Full-height lockers with doors to hide clutter
Charging stations inside for devices
Perfect for families juggling sports gear, backpacks, and seasonal items
Think About Daily Flow
Imagine a typical weekday:
Where do you drop shoes?
Do kids need a spot for backpacks?
Are there sports bags or dog leashes to store?
Mapping your routine helps you design a mudroom that solves real-life problems instead of just looking good.
Step 2. Create Your Style Vision
A mudroom can be as simple or elevated as you want. Since this space often sets the tone when you walk in, consider a style that complements your home:
Farmhouse Chic
Shiplap backing
Rustic wood bench
Black matte hooks
Modern Minimalist
Sleek cabinetry
Floating shelves
Hidden storage baskets
Industrial Edge
Pipe-style hooks
Metal baskets
Raw wood + black accents
Cozy Traditional
Warm stains
Woven baskets
Beadboard backing
Pro Tip: Since garages can feel cold, mix textures like wood, wicker, and soft fabrics to make the space inviting.
Step 3. Build Your Weekend Game Plan
Here’s a two-day timeline to keep you on track:

Step 4. Gather Tools and Materials
Essential Tools
Drill + bits
Stud finder
Circular or miter saw
Tape measure
Level
Nail gun or hammer
Caulk gun
Safety gear
Materials
Plywood/MDF for bench and cubbies
1×4 or 1×6 boards for shelves and trim
Shiplap or beadboard for wall backing
Heavy-duty hooks
Baskets/bins for storage
Primer + paint (semi-gloss for easy cleaning)
Step 5. Build the Bench Base
Your bench is the workhorse of the mudroom.
Steps:
Cut wood panels to size for the bench top, base, and vertical supports.
Assemble the frame using screws and wood glue.
Optional: Divide the underside into cubbies using vertical dividers.
Secure bench to studs for maximum stability.
Pro Tip: Use a butcher-block bench top for a polished, high-end look that holds up to heavy traffic.
Also check out my more detailed tutorial on how to transform a basic IKEA bench for a mudroom here.
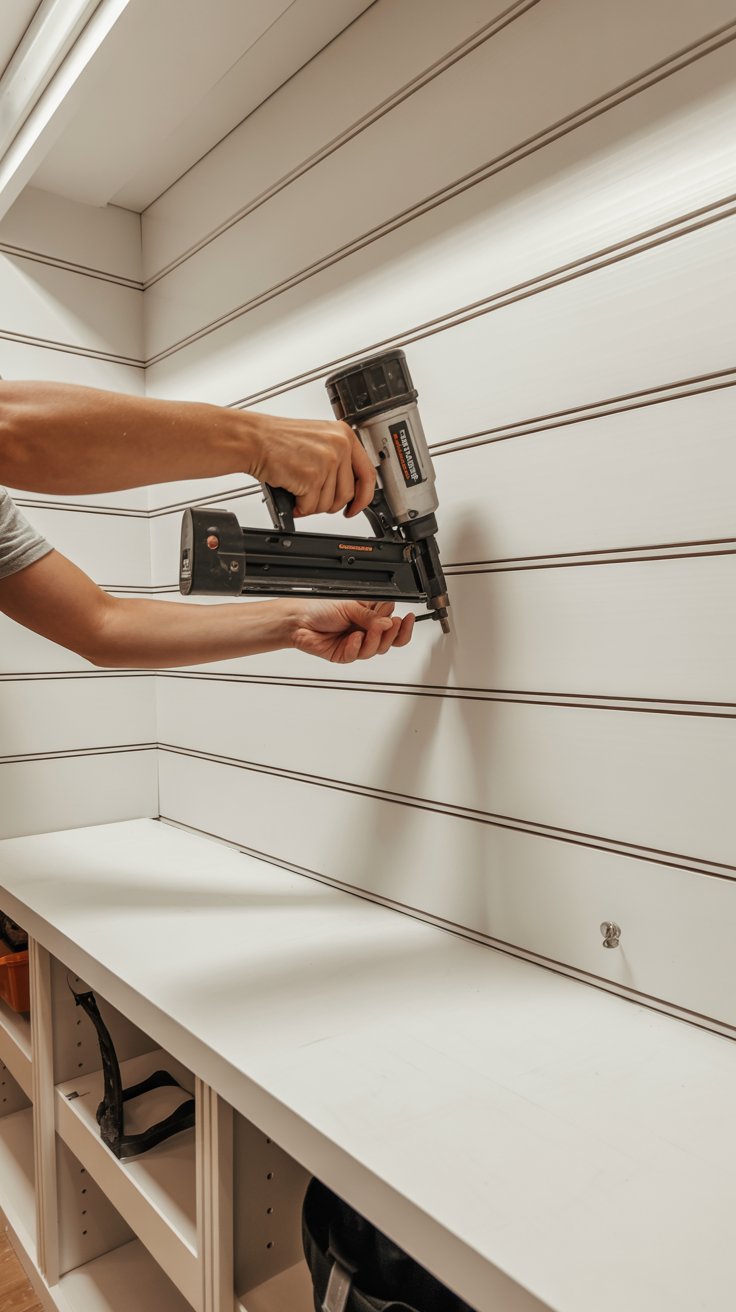
Step 6. Add Backing Panels and Vertical Dividers
A finished backing makes your mudroom look custom and protects walls from scuffs.
Install shiplap for a farmhouse vibe or painted MDF for a sleek look.
Add vertical dividers if you want individualized cubbies for each family member.
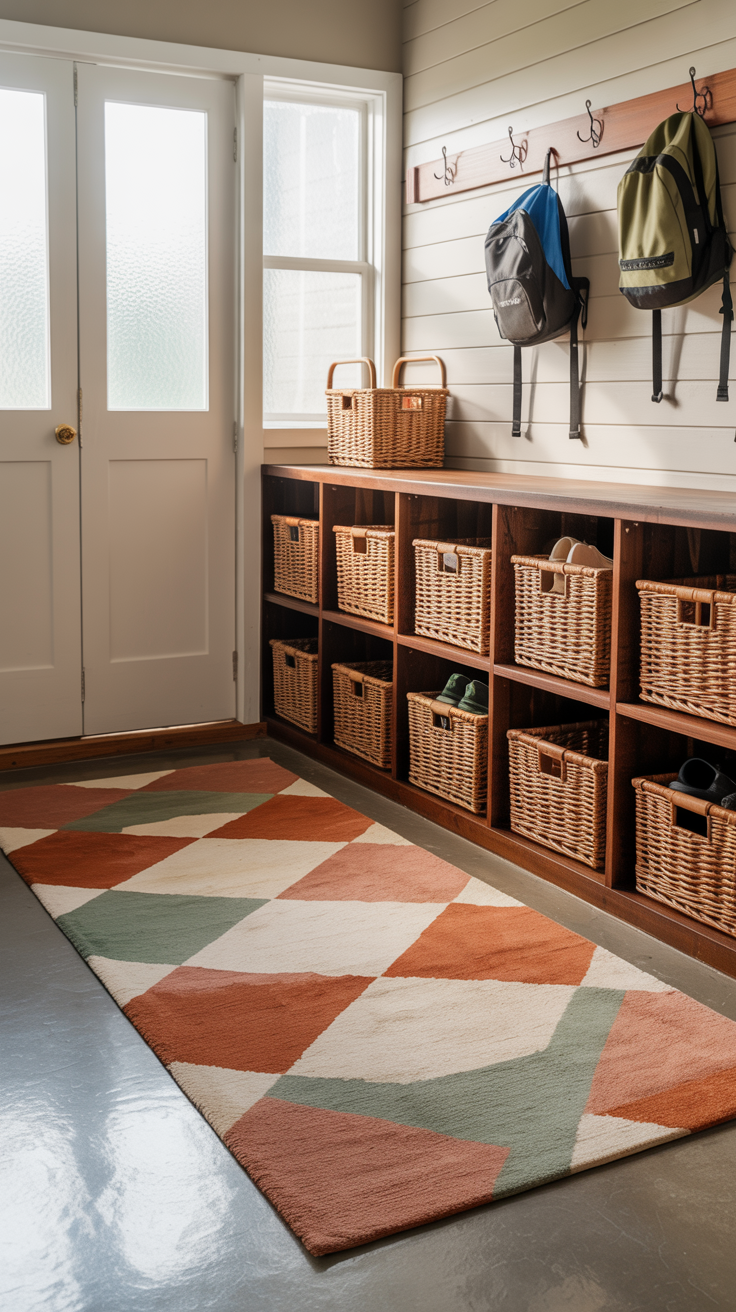
Step 7. Install Shelves, Hooks, and Baskets
Hooks
Space 8–12 inches apart
Use double hooks for coats + backpacks
Shelves
One upper shelf is usually plenty for baskets holding hats, gloves, scarves, or seasonal gear.
Baskets
Use labeled bins for kids
Woven baskets soften the garage feel
Step 8. Upgrade Flooring for Durability
Since garages deal with wet shoes, mud, and dirt, think about flooring:
Rubber mats → durable and easy to clean
Tile with dark grout → upscale look, resistant to moisture
Epoxy-coated concrete → low-maintenance and tough
Step 9. Add Lighting and Outlets
Good lighting makes a huge difference:
Install a wall sconce or pendant above the bench for a cozy vibe
Add a USB charging station inside a cubby for devices
Step 10. Style and Personalize
This is where your garage mudroom goes from functional to beautiful:
Add a patterned rug to soften the floor
Use matching baskets for a polished look
Hang a small chalkboard or corkboard for family notes
Incorporate plants or faux greenery to make it feel less “garage-y”
Budget Breakdown

Pro Tips for a Flawless Finish
Pre-paint parts before assembling for cleaner edges.
Use pocket hole screws for a professional finish.
Label cubbies and bins for effortless organization.
Elevate the bench slightly to prevent water damage.
Maintenance Tips
Wipe down surfaces weekly.
Rotate baskets seasonally to avoid clutter creep.
Reseal the bench annually if using natural wood.
With a free weekend, a clear plan, and a few smart tools, you can transform a neglected garage wall into a functional, stylish mudroom that simplifies your life and keeps your home cleaner.
Imagine: no more tripping over piles of shoes, no more lost backpacks, and no more stress about muddy floors. Instead, you’ll have a personalized landing zone that works as hard as you do — and looks good doing it.