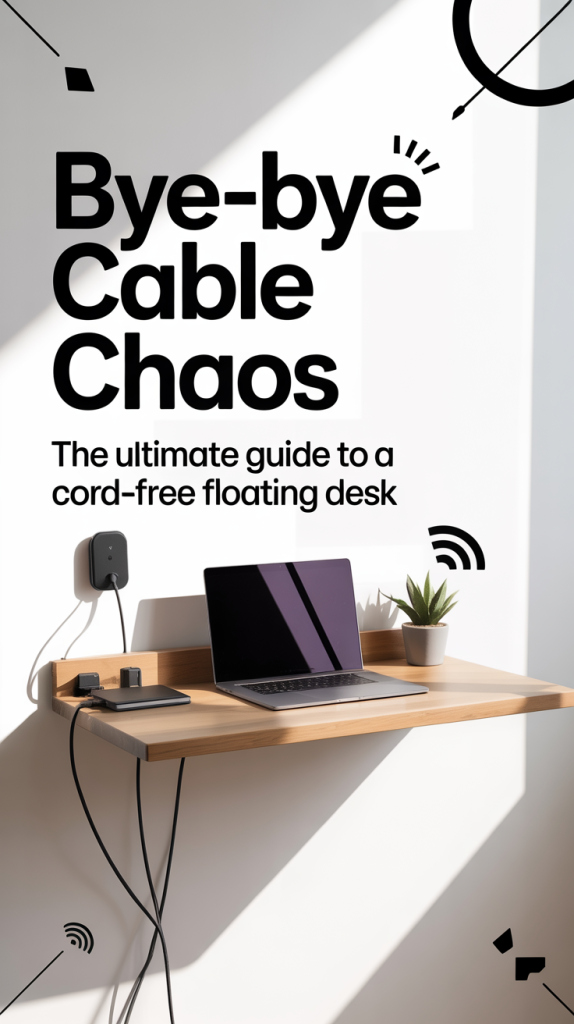
A beautiful floating desk can instantly elevate a home office, bedroom nook, or study area. Sleek, modern, and minimalist, it creates the illusion of more space while giving your room a clean, airy feel. But there’s one thing that can ruin even the most stylish setup: cord clutter.
Tangled wires from lamps, laptops, chargers, and other electronics can quickly become a visual eyesore and even a safety hazard. If you’ve been staring at a mess of cords trailing across the floor and wishing for a simple solution, this guide is for you. In this article, we’ll dive deep into everything you need to know to hide cords for a floating desk—from practical DIY solutions to styling tips, tools, and alternative approaches. By the end, your desk will look organized, professional, and perfectly polished.

Why Cord Management Matters
Before we get into the “how,” let’s discuss the why. Cord management isn’t just about aesthetics. Here are several reasons it’s worth the effort:
Visual Appeal: Cords can quickly make even a stylish setup look messy. Hiding them ensures your desk remains a clean focal point.
Safety: Loose cords are a tripping hazard, especially if they cross a walkway or floor space. Keeping them tucked away reduces risk.
Functionality: Organized cords make it easier to plug and unplug devices without tangling or damaging wires.
Longevity: Bundling and managing cords can prevent kinks, fraying, and wear, extending the life of your electronics.
In short, a clutter-free desk is not only prettier—it’s safer, smarter, and more functional.
Step 1: Choose the Right Desk Setup
Not all floating desks are created equal, and your cord-hiding strategy will depend on your specific desk. Here’s what to consider:
Desk Depth and Overhang: A deeper desk provides more space for hiding cords behind the surface. Minimal overhangs may require extra creativity.
Wall Placement: If your desk sits against a wall with a nearby outlet, hiding cords is easier. A floating desk in the middle of a room may need longer extension cords or creative routing.
Material: Solid wood desks can easily support screws for mounting power strips. Lighter materials may require adhesive strips or clamps.
Pro tip: Before buying or installing your floating desk, visualize your electronics layout. This planning step can save you a lot of frustration later.
Step 2: Gather Your Cord-Hiding Tools
Here’s what you’ll need for a successful cord-free floating desk:
Under-desk power strip: Choose one with multiple outlets, USB ports, and an on/off switch for convenience.
Screws or mounting hardware: Most power strips include these.
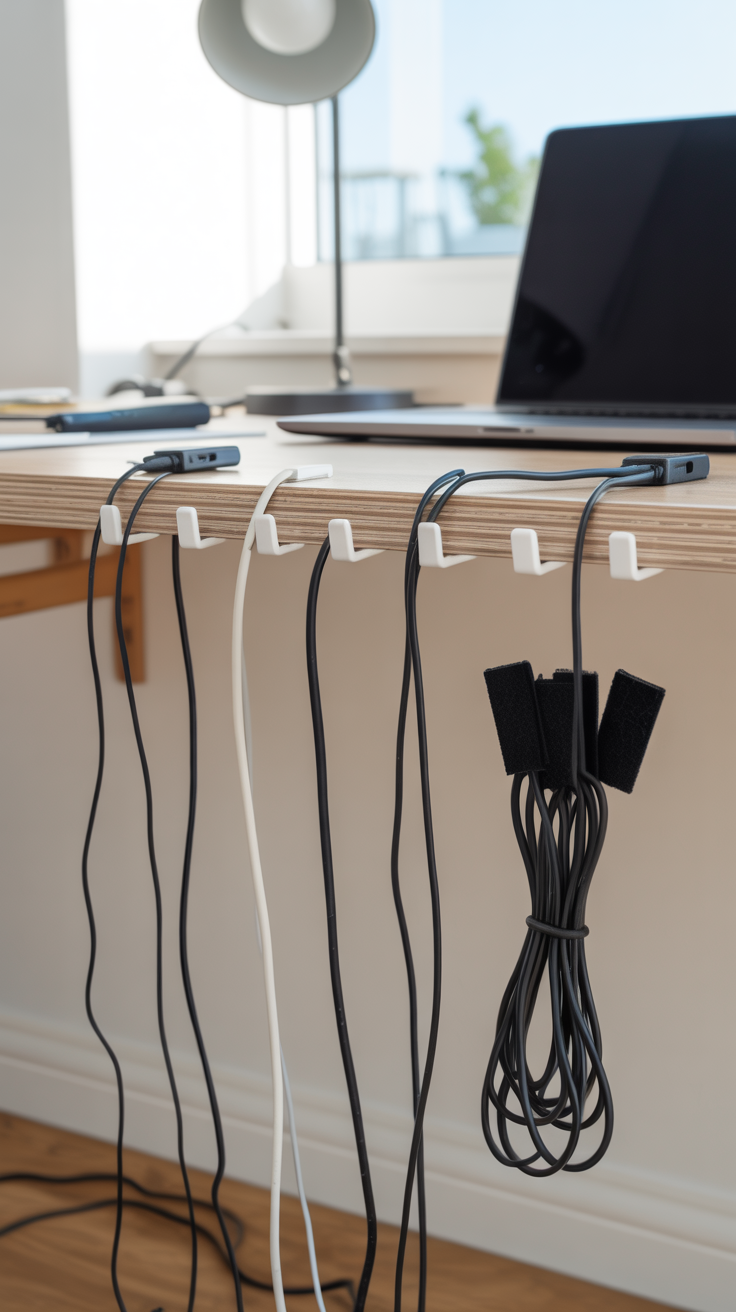
Command hooks or adhesive cable guides: For directing cords neatly along the desk’s underside.
Velcro cable ties or reusable zip ties: Perfect for bundling extra cord length.
Flat extension cords: These slide under rugs seamlessly and minimize tripping hazards.
Utility knife or scissors: For cutting small slits in rugs if needed.
Optional: Labeling your cords can be helpful if you have multiple devices running to a single power strip.
Step 3: Install the Under-Desk Power Strip
The under-desk power strip is the cornerstone of a clutter-free desk. Here’s a step-by-step guide:
Measure and Mark: Determine the exact spot for your power strip under the desk. Use a pencil to mark screw holes.
Secure the Strip: Drill screws into the marked spots, leaving a small stopper screw nearby if possible. This prevents the strip from moving when unplugging devices.
Snap In Place: Most under-desk strips clip easily onto mounted screws. Confirm it’s secure and level.
A well-installed power strip keeps all your devices in one convenient spot and eliminates the need for cords trailing down to the floor.
Step 4: Guide and Bundle Cords
Now that the power strip is installed, it’s time to manage your individual cords:
Use Hooks: Stick small Command hooks or adhesive cable guides under the desk. Run your lamp, laptop, and other cords through them to keep everything in place.
Bundle Excess Cord: Velcro cable ties work beautifully for excess cord length. Wrap cords neatly and attach them to hooks, keeping them out of sight.
Route to the Wall: For cords that need to reach a wall outlet, a flat extension cord works best. Flat cords slide easily under rugs or along baseboards without creating a noticeable bump.
Pro tip: If your desk has drawers or compartments, consider routing cords through them to further conceal wires.
Step 5: Hide Cords Under a Rug
This step can feel intimidating, but it’s one of the most effective ways to achieve a seamless, cord-free look:
Choose the Spot: Identify where the anchor cord (from the power strip to the wall outlet) will run.
Cut a Slit in the Rug: Make a small slit or channel, just wide enough for the flat extension cord. If you ever move the rug, the slit will remain mostly invisible due to texture or tufting.
Slide the Cord Through: Feed the flat cord under the rug, ensuring it lies flat and is barely noticeable.
Optional tip: If you have a rug pad, you can cut a small channel in the pad to prevent any bumps entirely. This technique creates a nearly invisible route for your cords.
Step 6: Alternative Cord-Hiding Methods
While the under-desk power strip + flat cord method works for most setups, here are a few alternatives:
Cable Raceways: Plastic channels that attach to walls or furniture, perfect for long cords running to an outlet. Can be painted to match your decor.
Cord Covers: Flexible sleeves that bundle multiple cords together for a neat look.
Built-In Desk Solutions: Some floating desks come with built-in cable management trays or channels, eliminating the need for DIY hacks.
Each method has pros and cons, so choose what fits your desk, room, and aesthetic best.
Step 7: Styling Tips for a Sleek Desk
Once your cords are hidden, you can focus on making your floating desk a functional and beautiful workspace:
Keep Essentials on Top: Limit desktop items to essentials like a lamp, notebook, and laptop to maintain a clean look.
Add Decorative Touches: A small plant, framed photo, or decorative organizer adds personality without clutter.
Use Wireless Devices: Where possible, use wireless keyboards, mice, and chargers to reduce visible cords further.
Maintain the Setup: Regularly check that cords remain bundled and organized. Over time, adding new devices may require updating your cord management.
Troubleshooting Common Issues
Even with a well-planned setup, you may encounter a few bumps:
Cord Pulling Out: Ensure your power strip is secured with a stopper screw.
Cord Visibility Under Rug: Flat extension cords are key; thicker cords may need a deeper channel.
Limited Power Outlets: Use a high-capacity power strip with USB ports to reduce clutter.
Multiple Devices in Small Spaces: Consider a small cable box or raceway to hide clusters of cords.

Benefits of a Cord-Free Floating Desk
By following this guide, you’ll enjoy:
Aesthetic Harmony: Your desk becomes a sleek focal point rather than a tangled mess.
Safety and Functionality: No more tripping hazards or cords getting caught in chairs.
Easy Maintenance: Cleaning under the desk is simple with cords neatly tucked away.
Enhanced Productivity: A clutter-free workspace encourages focus and creativity.
Hiding cords for a floating desk is one of the quickest and most satisfying DIY projects you can do for your home office. With an under-desk power strip, cable hooks, Velcro ties, and a flat extension cord under your rug, you can achieve a professional, cord-free setup in a matter of hours.
Even if you’ve been living with cord clutter for years, this simple project makes a dramatic difference. Your floating desk will finally look the way it was meant to—sleek, clean, and inspiring.
Take the leap and say goodbye to tangled cords—your workspace (and your sanity) will thank you!
Supplies Checklist
Under-desk power strip with USB ports
Screws and screwdriver
Command hooks or adhesive cable guides
Velcro cable ties or reusable zip ties
Flat extension cord
Utility knife or scissors (for rug slit)
Optional: Labels for cords