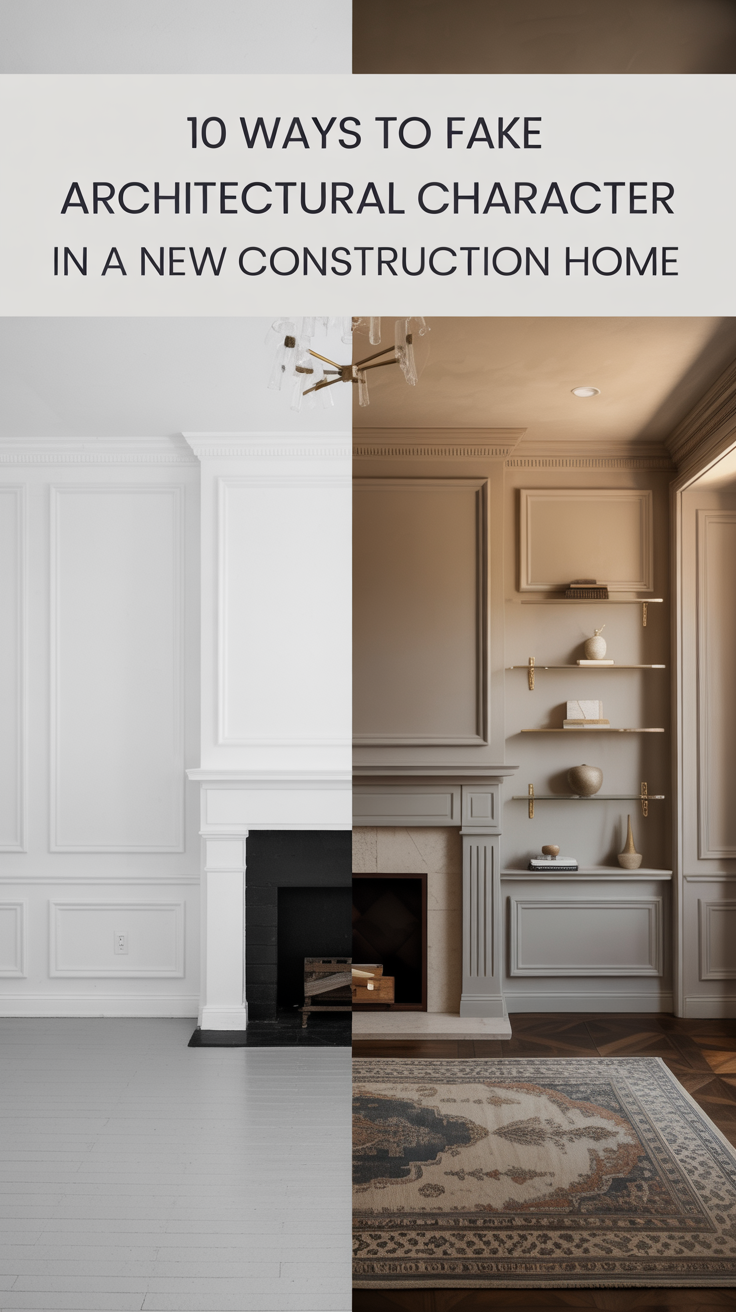
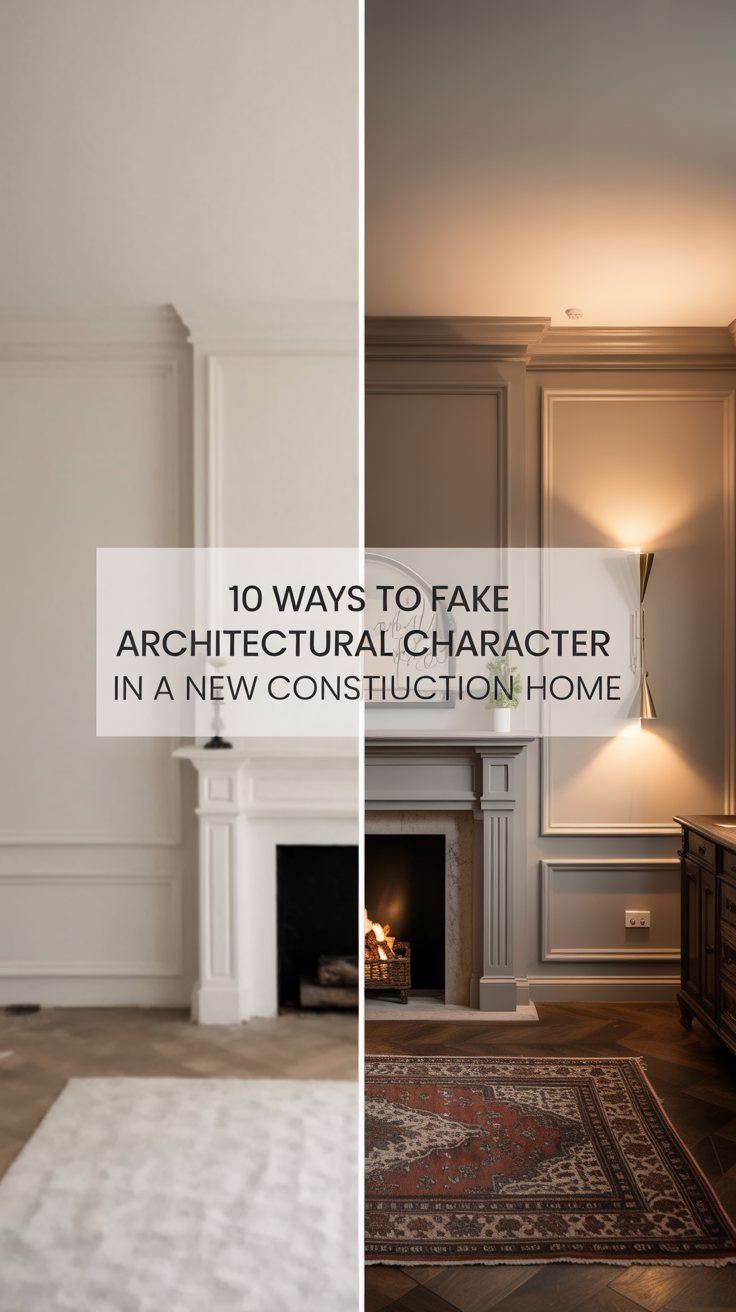
Ever walk into a room and just feel… nothing? It’s clean, it’s new, it’s functional, but it has all the personality of a cardboard box. This, my friends, is the classic “builder-grade blahs”. And the feeling is all too familiar– I felt it myself when we moved into our new construction home! They really just don’t make homes like they used to–efficiency trumps elegance. New construction spaces lack the quirks and soulful details that make older homes so enchanting.
But here’s a little secret to keep in mind: you don’t have to be born with good bones. You can fake them. With a little creativity and some clever tricks, you can add layers of architectural character to even the most generic space, making it feel custom, timeless, and uniquely yours.
Today I want to walk through a few techniques (many that I’ve done myself in my new construction home) to fake the coveted architectural character.
1. The Magic of Millwork: Add Molding and Trim
Molding and trim are the single most effective way to add dimension to a flat, boring room. Why? Because they create shadows and lines that break up plain walls, making a space feel more substantial and finished. Think of old Victorian homes, that elaborate trim was a sign of quality craftsmanship. In your home, the trim is a sign you know what you’re doing.
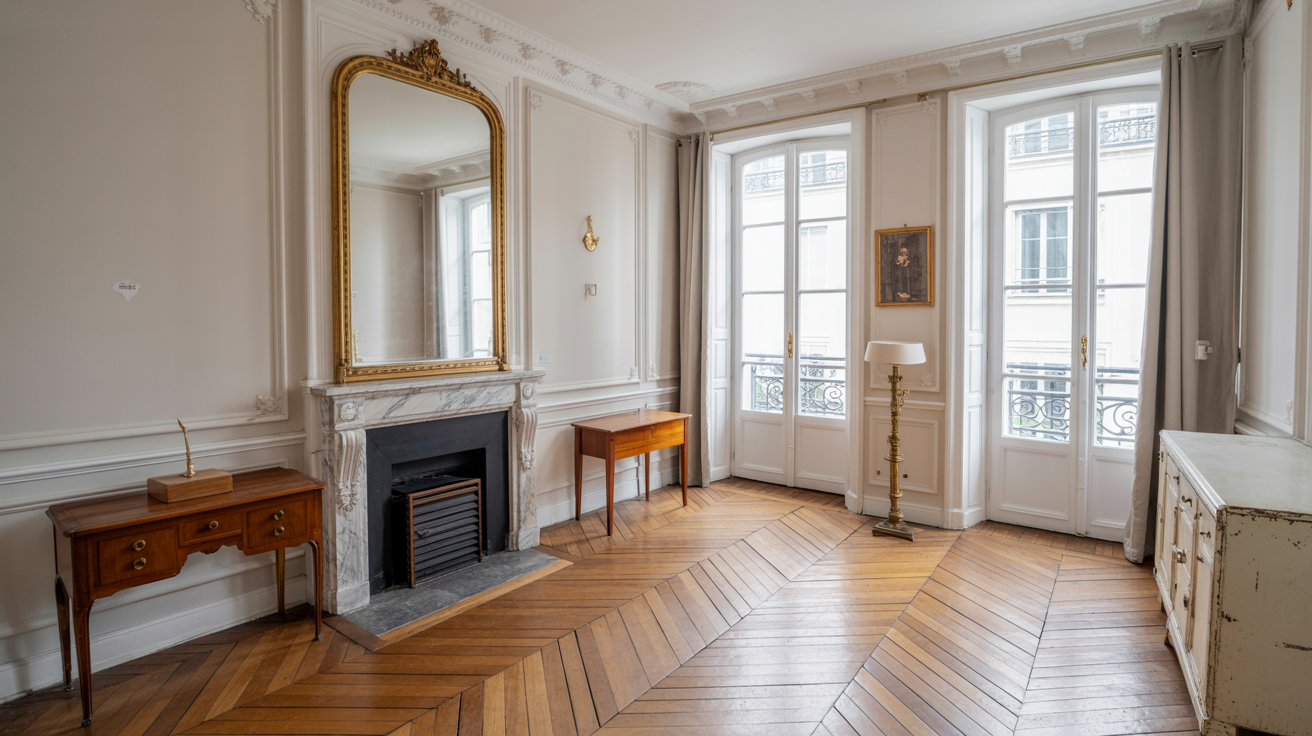
Why it Works: Crown molding draws the eye upward, making ceilings feel higher. Substantial baseboards anchor the room, giving it a solid, grounded feel. Picture frame molding or box trim (also known as applied molding) adds a sophisticated, almost Parisian vibe to plain walls, creating instant texture and rhythm.
Designer-Approved Tip: Don’t be afraid to go bold. A skinny little strip of crown molding can sometimes look worse than none at all. Opt for trim that feels substantial and proportional to your room’s height. And for the ultimate pro move, paint your trim, walls, and ceiling all the same color in a satin or semi-gloss finish. This “color drenching” technique highlights the shadows created by the molding, making it feel incredibly chic and modern while still adding that classic architectural detail.
Get the Look:
- The Easy DIY: There are tons of lightweight foam and peel-and-stick molding options on the market that are incredibly forgiving for beginners. They cut easily and go up in an afternoon.
- The Weekend Project: Buy traditional MDF or wood molding from a home improvement store. You’ll need a miter saw for clean cuts and a nail gun for installation, but it’s a skill that pays dividends. Start with a simple project, like adding a chair rail or creating a few decorative boxes on a feature wall.
- The Pro-Level Upgrade: Hire a carpenter to install a full suite of custom millwork, including multi-layered crown molding, tall baseboards, and intricate wall paneling. It’s an investment, but it will fundamentally change the feel of your home.
2. Upgrade Your Doors (and Hardware)
Think of your interior doors as the handshakes of your home. A flimsy, hollow door feels weak and cheap. A solid, heavy door with beautiful hardware feels confident and elite. Swapping out your standard-issue doors is a power move that instantly adds a sense of character.
Why it Works: A door isn’t just a way to close off a room; it’s a major vertical design element. Upgrading to a solid-core door with a classic Shaker-style or multi-panel design adds visual weight and texture. Annnd it will block sound better which is another plus! The hardware (as always) is the jewelry. A generic, brushed-nickel lever is unmemorable. A heavy, unlacquered brass knob, a crystal octagonal handle, or a matte black lever with a square rosette feels intentional.
Designer-Approved Tip: Look for salvaged doors at architectural salvage yards or online marketplaces. Here in Austin my go-tos for salvaged artchitectural pieces are Habitat for Humanity ReStore and also Save the Good Stuff. Just Google for the equivalent in your town! An old door with a bit of history—maybe with its original glass knob or a transom window above—can become a stunning focal point. Even if you just replace one or two key doors, like the one to your primary bedroom or powder room, it can make a huge impact.
Get the Look:
- The Easy DIY: If replacing the whole door isn’t in the budget, just swap out the hardware. It’s a ten-minute job that requires nothing more than a screwdriver.
- The Weekend Project: Replace a standard door with a new, pre-hung solid-core door from a big-box store. Painting it a dramatic color—like black, deep green, or even a soft, moody blue will add so much character!
- The Pro-Level Upgrade: Install a set of antique French doors to divide a living and dining space.

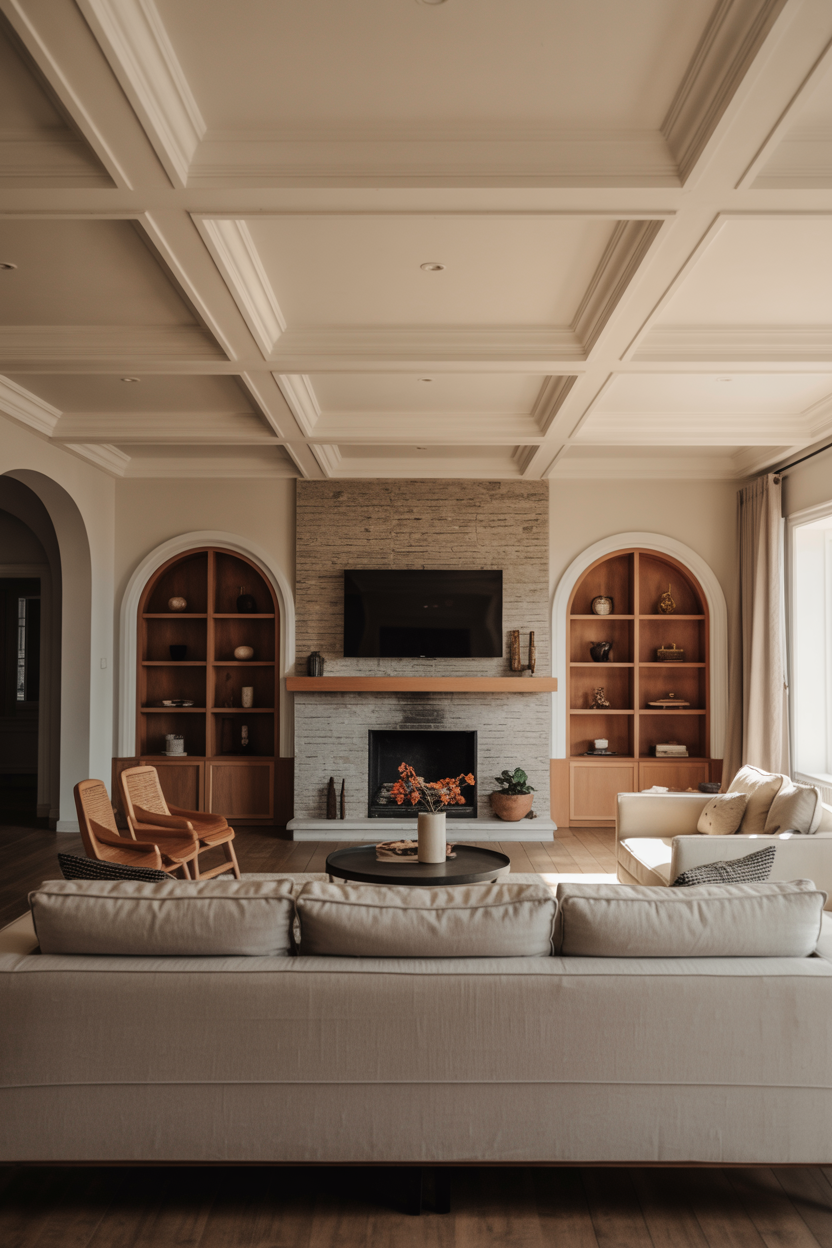
3. The Built-In Illusion
Nothing says “custom home” quite like a wall of built-in bookshelves. They provide storage, a place for styling, and architectural charm that freestanding furniture just can’t replicate. But a truly custom built-in can cost a small fortune. But what if I told you this is one of the easiest architectural features to fake?!
Why it Works: Built-ins make a room feel meticulously planned. Built-ins create a focal point and add so much depth to a flat wall. By surrounding a doorway, flanking a fireplace, or filling an entire wall, they give a room a cozy character filled vibe.
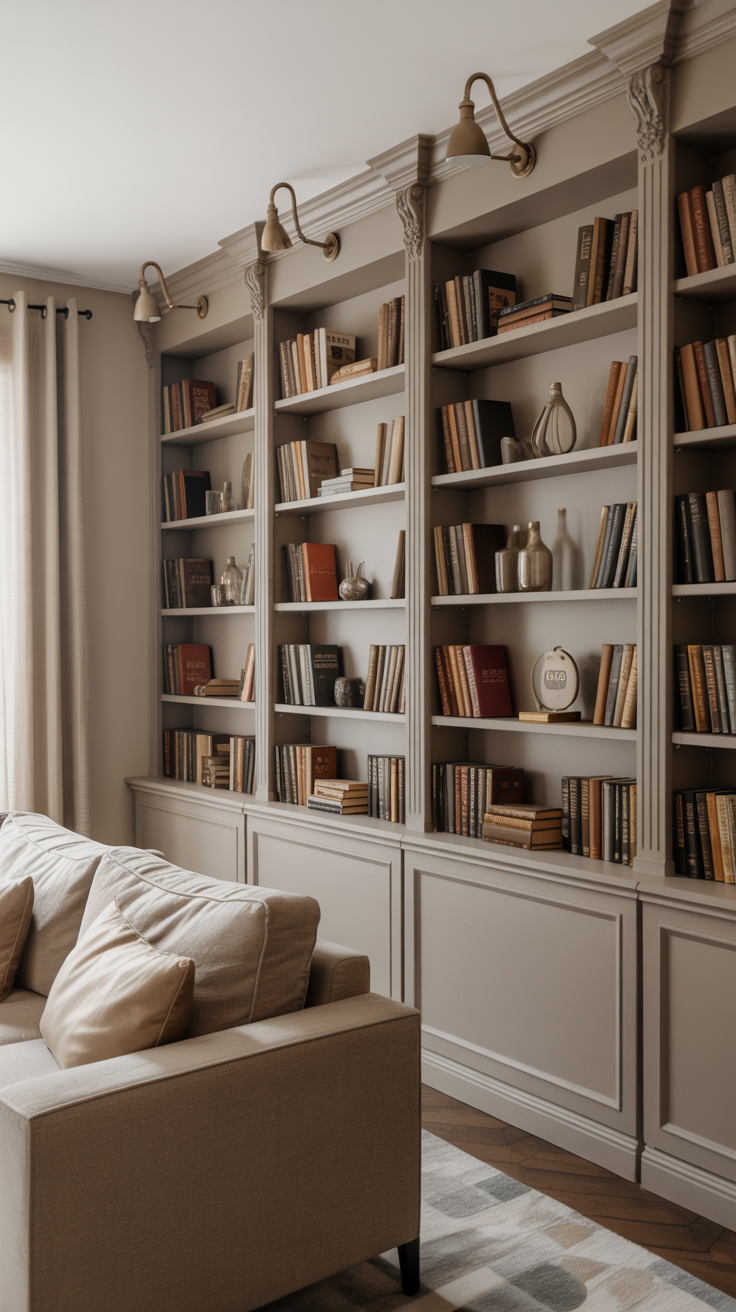
Designer-Approved Tip: The key to a convincing fake built-in is making it look, well, built-in. This means running baseboards and crown molding across the front of the bookcases and caulking all the seams so they blend seamlessly with the wall. Painting the bookcases the same color as the walls is another pro move that elevates the look from “IKEA hack” to “custom carpentry.” Be sure to check out my post here with more tips on how to fake built-ins with IKEA cabinets and trim.
Get the Look:
- The Easy DIY: Place two identical, tall bookcases on either side of a doorway or window. It won’t be a true built-in, but it will create a sense of symmetry and architectural weight.
- The Weekend Project: The classic IKEA BILLY bookcase hack. Buy several bookcases, arrange them along a wall, and use MDF trim and molding to build them in. Add picture lights above each section for a high-end touch. Be sure to check out this post for more step by step instructions on this hack!
- The Pro-Level Upgrade: My sister-in-law recently scored the most beautiful built-in setup in her living room by local Amish cabinet makers who are know to be masters of their craft! Hire a cabinet maker to design and install a custom unit. You can incorporate a mix of open shelving and closed storage, a window seat, or even a built-in desk.
4. Look Up! Ceiling Treatments That Wow
Did you know that the ceiling is often referred to as the “fifth wall”? That means leaving it blank is a massive missed opportunity. Adding texture, pattern, or dimension to your ceiling can completely transform a room, making it feel grander, cozier, or more historic.
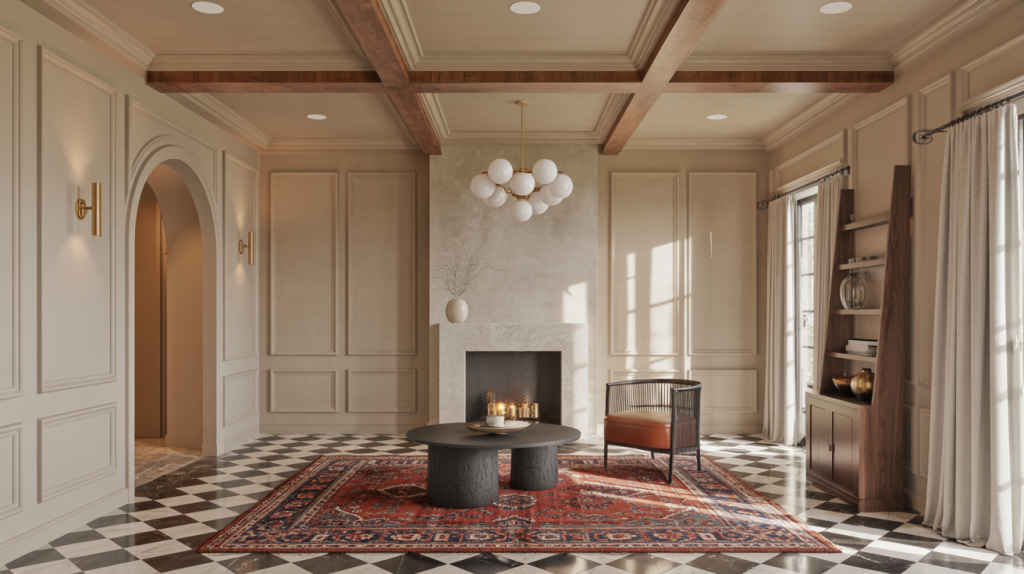
Why it Works: A ceiling treatment draws the eye upward and adds a layer of detail that most people don’t expect, making the whole room feel more luxurious. Faux wood beams can add grandness and warm at the same time. A coffered ceiling (a grid of sunken panels) lends a traditional, formal feel. Even a simple ceiling medallion like this can make a standard light fixture feel like a grand chandelier.
Designer-Approved Tip: When adding faux beams, think about realism. They should look like they could be structural. In fact, this is a major pet peeve and goes for this entire guide. When you are adding architectural charm, if it is something that would normally be structural, make sure it makes sense!
This often means placing the beams perpendicular to the longest walls and considering where real structural beams might logically be. For a lower-commitment option, try painting your ceiling a dark, moody color to create a cozy, intimate vibe, or apply a high-gloss paint finish to bounce light around and add a touch of glamour.
Get the Look:
- The Easy DIY: Install a lightweight foam ceiling medallion around a light fixture. It’s a peel-and-stick or glue-up application that takes less than an hour. Another option is to use paint to create the illusion of architectural detail, such as a painted border or a simple geometric pattern.
- The Weekend Project: Install faux wood beams. Modern versions are made from lightweight, high-density foam and are designed to look incredibly realistic. They can be attached to the ceiling with adhesive and a few screws.
- The Pro-Level Upgrade: Create a full coffered ceiling. This is a more complex project involving a grid of MDF boxes, but it is a beautiful and dramatic upgrade you will not regret!
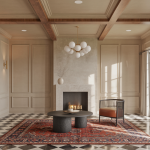
5. The Faux Fireplace Focal Point
A fireplace is simply the anchor of a character-filled room. If your home wasn’t blessed with one, you can create a surprisingly convincing stand-in.
Why it Works: Even without a real fire, a mantelpiece provides the architectural structure that a room often craves. I always wanted a fireplace in our bedroom. While our house does not have a fireplace in the master, I sourced an an old mantle on Facebook Marketplace and it is a vibe! A mantle gives you a place to hang a mirror or a piece of art, a surface to style with candles and objects, and a sense of grounding for your furniture arrangement.
Designer-Approved Tip: Sell the illusion by treating the faux fireplace as if it were real. Paint the “firebox” area with matte black, high-heat paint. You can then fill the opening with a stack of birch logs, an artful arrangement of candles, a collection of vintage books, or even a decorative metal screen. The key is to make it look intentional, not just like an empty hole.
Get the Look:
- The Easy DIY: Find a vintage mantel on Facebook Marketplace, a flea market, or salvage yard. They often come in one piece. Anchor it to the wall and you’re done!
- The Weekend Project: Build your own simple mantel surround using MDF and decorative molding. You can customize the size and style to perfectly fit your room.
- The Pro-Level Upgrade: Build a more substantial floor-to-ceiling fireplace surround and cover it in faux brick veneer, tile, or a plaster-like finish for a truly authentic look.
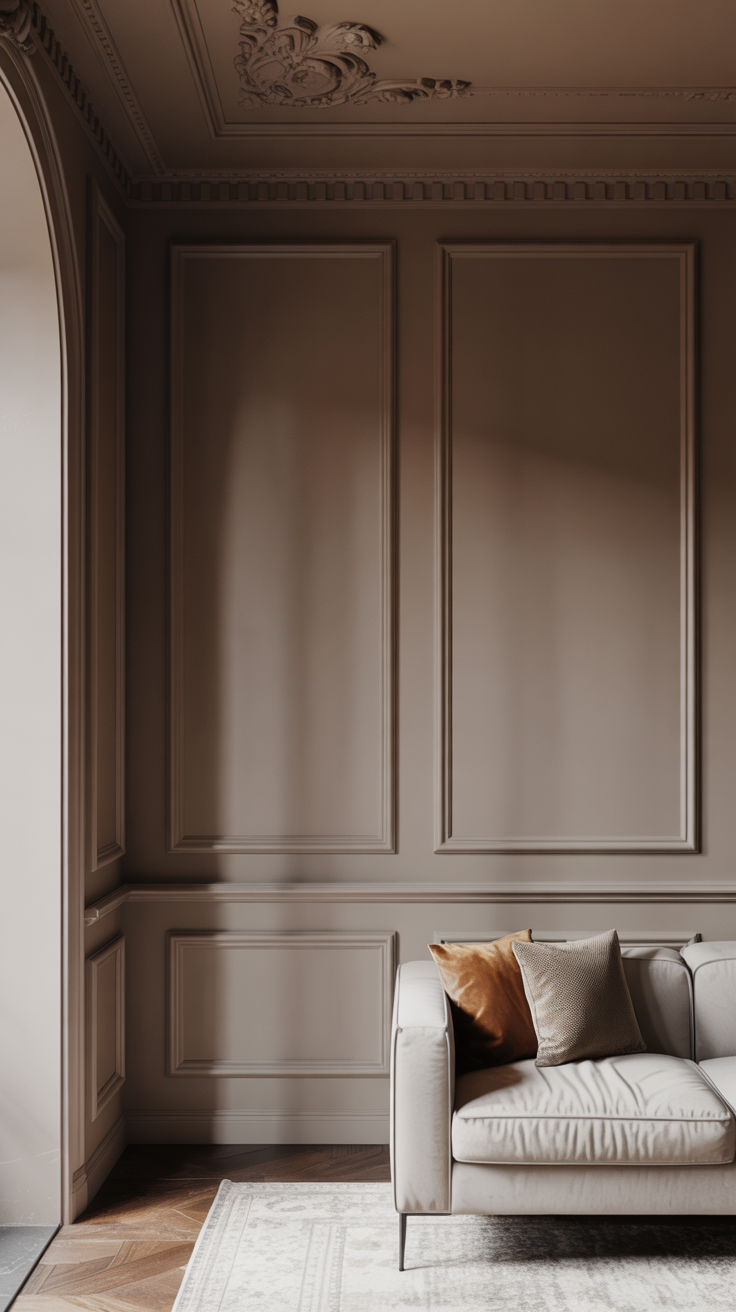
6. Add History with Wall Paneling
Paneling, in all its forms, adds texture, shadow, and a sense of craftsmanship that makes a room feel like it has a past.
Why it Works: Wall paneling breaks up large, empty walls into more interesting segments. Wainscoting aka paneling on the lower third of the wall, adds a classic, traditional feel and protects walls from scuffs and bumps. Full-wall treatments like board and batten (a grid of wide and narrow boards) or beadboard can give the feeling of anything from a cozy cottage to a sophisticated, historic home.
Designer-Approved Tip: You can fake the look of expensive wainscoting with a clever paint trick. Install a chair rail at the desired height. Then, add thin pieces of picture frame molding to create a series of boxes below the rail. Finally, paint the chair rail, the boxes, and the entire wall section below the rail in a single, cohesive color (usually a white or cream). It gives you 90% of the look for 10% of the cost and effort.
Get the Look:
- The Easy DIY: Use peel-and-stick beadboard wallpaper. It’s a fast and affordable way to get the look of classic paneling without any power tools.
- The Weekend Project: Install a board and batten accent wall. This typically involves attaching thin MDF boards to the wall in a grid pattern and then painting everything the same color. It’s a high-impact project that’s surprisingly beginner-friendly.
- The Pro-Level Upgrade: Install traditional frame-and-panel wainscoting. This is a more advanced carpentry project but results in a timeless and durable architectural feature.
7. Create Drama Around Windows and Doorways
Let’s get real, in most modern homes, windows and doors are simply holes in the wall with forgettable trim. Zhuzhing up these holes in the wall is like putting a great piece of art in a beautiful, substantial frame. It elevates the entire composition.
Why it Works: Adding thick, detailed molding around windows and doorways makes them feel more important and intentional. It draws attention to the sources of natural light and the transitions between spaces. Adding a header or a pediment above a doorway can make a standard 8-foot ceiling feel much taller and grander.
Designer-Approved Tip: For a classic, high-end look, build a “craftsman-style” window casing. This involves replacing the thin trim with a combination of flat stock boards, a thicker top ledge, and a small “apron” piece at the bottom. It’s a simple, clean-lined look that adds value and character.
Get the Look:
- The Easy DIY: Use paint to create the illusion of a larger frame. Paint a 4-inch border around your existing window trim in the same color as the trim. It visually extends the frame and makes the window feel larger.
- The Weekend Project: Replace the skinny trim around a key doorway or a large window with wider, more substantial molding. It’s a manageable project that makes a surprisingly big difference.
- The Pro-Level Upgrade: Create an arched entryway where there was once a standard rectangular opening. This is a more involved drywall and framing project, but it adds an incredible amount of custom, European-inspired charm. This is on my current list of DIY projects for our home, so stay posted!
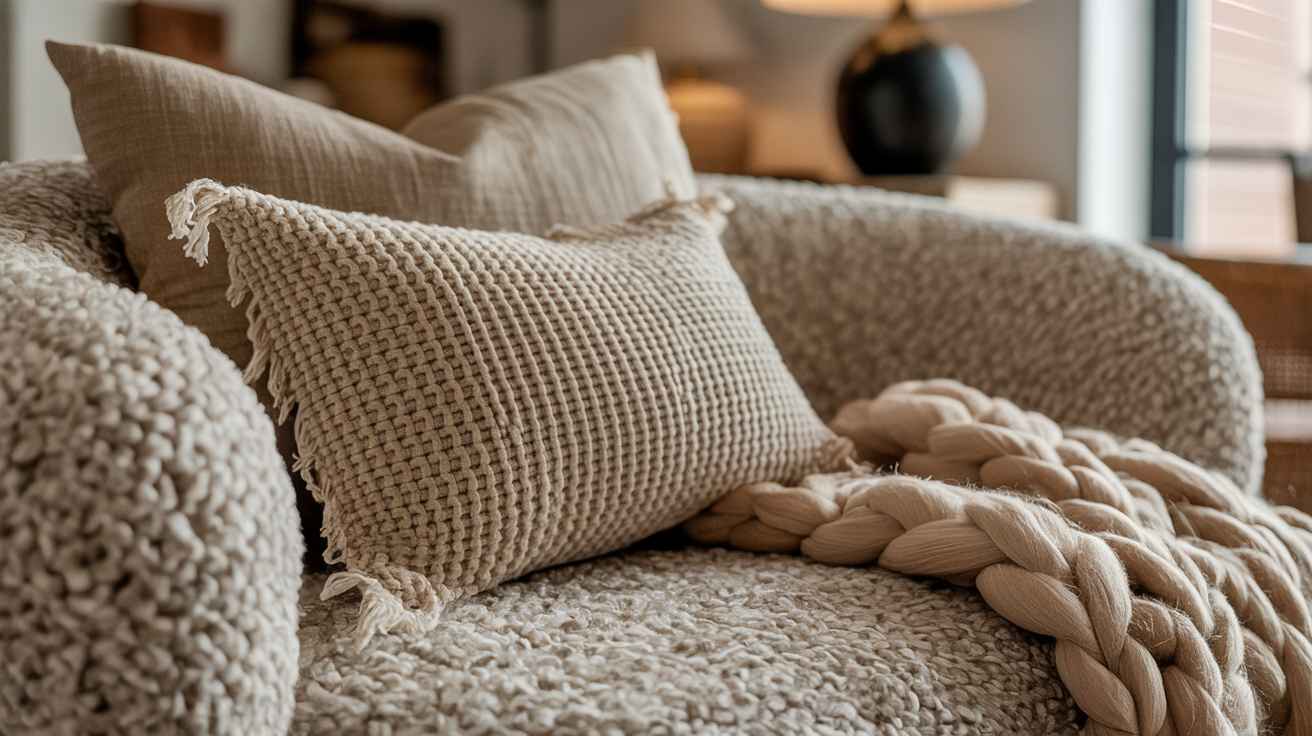
8. Embrace Raw, Textural Materials
Character isn’t just about lines and shapes; it’s also about texture. Modern homes are often a sea of smooth, perfect drywall. Introducing raw, natural, or imperfect materials provides a much-needed dose of soul.
Why it Works: Materials like brick, stone, and wood have an inherent warmth and history. They connect a space to the natural world and provide a tactile quality that smooth, painted walls lack. Even the subtle, velvety texture of a limewash or Roman clay finish can make a room feel ancient and modern at the same time.
Designer-Approved Tip: A little goes a long way. You don’t need to turn your living room into a full-on brick dungeon. A single accent wall behind a sofa, the wall of a powder room, or the backsplash in a kitchen can provide just the right amount of textural character without overwhelming the space.
Get the Look:
- The Easy DIY: Apply a specialty paint finish like limewash or Roman clay. These plaster-like paints are applied with a brush or trowel and create a soft, mottled texture with beautiful depth and movement.
- The Weekend Project: Install a faux brick or stone veneer wall. I still remember our faux brick wall in the office of our first home was one of our first-ever DIY projects! Modern veneer products are thin, lightweight, and designed for DIY installation. They look remarkably realistic and add instant industrial loft or rustic farmhouse vibes.
- The Pro-Level Upgrade: Install a reclaimed wood accent wall. Using wood salvaged from old barns or buildings brings genuine history and patina into your new space. Salvaged brick can also be found on sites like Etsy and also BrickSalvage.com.
9. Ground the Room with Statement Flooring
Don’t forget to look down! Your floor is a massive canvas for adding character. A sea of beige carpet or standard-issue laminate can suck the life out of a room. A bold, patterned floor, on the other hand, can be the foundation of a character-filled space.
Why it Works: A statement floor provides a strong graphic element and a sense of place. A classic black-and-white checkerboard floor instantly feels like a Parisian bistro. A beautifully patterned tile can make a laundry room or powder room feel like a hidden gem. Interesting floor details provide a layer of detail from the ground up.
Designer-Approved Tip: If replacing your floors isn’t an option, use paint and stencils to create the look of expensive patterned tile on top of existing vinyl, wood, or even concrete floors. Seal it with several coats of durable polyurethane to protect your work.
Get the Look:
- The Easy DIY: Use large, high-quality peel-and-stick vinyl tiles to create a checkerboard pattern in a small space like a bathroom or entryway.
- The Weekend Project: Paint and stencil an existing floor. It’s a labor-intensive but budget-friendly project with a huge payoff.
- The Pro-Level Upgrade: Retile a bathroom or laundry room with bold, patterned cement or ceramic tiles.
10. Finish with the Power of Patina
Finally, true character is about more than just what’s built into the walls—it’s about the soul that comes from objects that have lived a life. Patina is the gentle sheen that develops on surfaces over time through use and exposure. It’s the opposite of shiny and new, and it’s the final layer in faking architectural character. It provides the perfect balance with a modern home!
Why it Works: Incorporating pieces with patina—vintage furniture, antique rugs, aged metal finishes—tells a story. It creates a sense that the home has been curated over time, not decorated in a single weekend. It’s the element of soul that makes a house feel like a home.
Designer-Approved Tip: One of the easiest ways to inject patina is with your metal finishes. Instead of sealed, lacquered brass that will stay shiny forever, choose unlacquered brass for your cabinet hardware, light fixtures, and faucets. It will arrive shiny but will slowly darken and develop a beautiful, warm patina over time as you touch and use it. It’s living character.
Get the Look:
- The Easy DIY: Scour flea markets and thrift stores for vintage accessories—old brass candlesticks, worn wooden bowls, antique mirrors with slightly foxed glass, and oil paintings in aged frames.
- The Weekend Project: Refinish a piece of modern furniture to give it an aged look, or build a simple picture ledge to display a collection of vintage art.
- The Pro-Level Upgrade: Invest in a signature antique piece, like a well-worn Persian rug, a vintage leather armchair, or an old wooden cabinet. These pieces bring an irreplaceable sense of history and soul to any room. My favorite online sources for vintage pieces are Etsy (especially for rugs) and Chairish.
Creating a home with character is a marathon, not a sprint. It’s about layering these details over time, choosing elements that speak to you, and slowly building a story, your story.