There’s a certain magic in transforming a piece of wood. Whether it’s a family heirloom with decades of history, a thrift store find with hidden potential, or a brand-new piece for a custom project, the ability to alter the color and character of wood is a powerful skill for any DIY enthusiast or professional woodworker. While stains and finishes can enhance the natural beauty of wood, sometimes a more dramatic change is needed. This is where wood bleaching comes in – a transformative process that can lighten wood, remove unwanted colors, and create a stunning, modern aesthetic.
Wood bleaching is the process of using chemical agents to remove the natural color, or tannins, from wood. It’s a technique that has been used for centuries in furniture restoration and is now gaining popularity in contemporary design for its ability to create a light, airy, and minimalist look. Unlike staining, which adds color to wood, bleaching subtracts it, revealing the wood’s natural grain in a whole new light. This allows for a level of customization that is simply not possible with other finishing methods.
Here we are going to talk about the world of wood bleaching. We will explore the science behind how it works, the different types of bleaches available, and how to choose the right one for your project. We will provide a detailed, step-by-step guide to the bleaching process, from preparation to finishing, and we will cover the crucial safety precautions that you need to take. We will also provide a troubleshooting guide to help you with any issues that may arise, and we will explore some creative applications for bleached wood that will inspire your next project. By the end of this article, you will have all the knowledge and confidence you need to master the art of wood bleaching and unlock a new world of creative possibilities.
The Science of Wood Bleaching: A Chemical Transformation
At its core, wood bleaching is a chemical process that alters the molecular structure of the compounds responsible for wood’s color. These compounds, primarily lignin and other chromophores, absorb certain wavelengths of light and reflect others, which our eyes perceive as color. The goal of bleaching is to modify these chromophores so they no longer absorb light in the visible spectrum, rendering them colorless and making the wood appear lighter.
Different types of bleaches achieve this through various chemical reactions. The most effective type for removing the natural color of wood is a two-part bleach, also known as an A/B bleach. This system involves two separate solutions that work in tandem to produce a powerful bleaching effect.
- Part A is typically a solution of sodium hydroxide (NaOH), a strong base commonly known as lye. When applied to wood, the sodium hydroxide opens up the wood’s cellular structure and breaks down the complex lignin molecules into smaller, more water-soluble components. This initial step prepares the wood for the second stage of the bleaching process.
- Part B is a solution of hydrogen peroxide (H₂O₂), a powerful oxidizing agent. When the hydrogen peroxide is applied to the lye-treated wood, a chemical reaction occurs. The hydrogen peroxide attacks the chromophores within the lignin, breaking the chemical bonds that are responsible for their color. This oxidation process is what effectively “bleaches” the wood, leaving it with a lighter, more uniform appearance.
Other types of bleaches, such as chlorine bleach and oxalic acid, work through different mechanisms and are typically used for more specific applications. Chlorine bleach (sodium hypochlorite) is an effective disinfectant and can remove dye-based stains, but it is not strong enough to alter the natural color of the wood itself. Oxalic acid, on the other hand, is a reducing agent that is particularly effective at removing iron-based stains, which often appear as black or gray discolorations on wood.
Understanding the science behind wood bleaching is crucial for selecting the right product for your project and for achieving the desired results. By knowing how each type of bleach interacts with the wood on a chemical level, you can make informed decisions and troubleshoot any issues that may arise during the process.
Types of Wood Bleach: Choosing the Right Tool for the Job
When it comes to bleaching wood, there is no one-size-fits-all solution. The type of bleach you choose will depend on the type of wood you are working with, the desired effect, and the specific problem you are trying to solve. Here is a breakdown of the most common types of wood bleach and their applications:
| Bleach Type | Active Ingredient(s) | Primary Use | How it Works | Safety Precautions |
|---|---|---|---|---|
| Two-Part (A/B) Bleach | Sodium Hydroxide (Lye) & Hydrogen Peroxide | Lightening the natural color of wood | Lye opens wood fibers, peroxide oxidizes and removes color | Extremely caustic. Wear gloves, goggles, and apron. |
| Chlorine Bleach | Sodium Hypochlorite | Removing dye-based stains and killing mildew | Oxidizes and breaks down dye molecules | Irritates skin and mucous membranes. Wear gloves and goggles. |
| Oxalic Acid | Oxalic Acid | Removing iron and rust stains | Reduces and dissolves iron compounds | Toxic and irritating. Wear gloves, goggles, and dust mask. |
| Peroxide | Hydrogen Peroxide (35% solution) | Removing blue mold stains from maple | Oxidizes and removes mold stains | Very caustic. Wear gloves, goggles, and apron. |
Two-Part (A/B) Wood Bleach
This is the most powerful and effective type of bleach for altering the natural color of wood. It is the go-to choice for projects where the goal is to achieve a significantly lighter, more uniform appearance. As discussed in the previous section, two-part bleaches work through a chemical reaction between sodium hydroxide and hydrogen peroxide. This process is highly effective at removing the natural tannins and pigments in wood, resulting in a dramatically lightened effect. Two-part bleaches are ideal for a wide range of woods, including oak, mahogany, and other hardwoods with strong natural colors.
Chlorine Bleach
Common household bleach, or chlorine bleach, is a familiar product to most people. While it is a powerful disinfectant and can be effective at removing certain types of stains, it is not the best choice for lightening the natural color of wood. Chlorine bleach can remove dye-based stains and is useful for cleaning and killing mildew on outdoor furniture and decks. However, it will not significantly alter the natural pigments in the wood itself. When using chlorine bleach, it is important to work in a well-ventilated area and to wear gloves and eye protection to avoid irritation.
Oxalic Acid
Oxalic acid is a specialized type of bleach that is primarily used for removing iron-based stains from wood. These stains often appear as black or gray discolorations and can be caused by a variety of factors, including contact with metal hardware, water damage, or exposure to the elements. Oxalic acid works by chemically reducing the iron compounds, effectively dissolving them and removing the stain. It is particularly effective on tannin-rich woods like oak, which are prone to iron staining. Oxalic acid is a toxic substance and should be handled with care. Always wear gloves, goggles, and a dust mask when working with oxalic acid, and be sure to neutralize the wood with a baking soda solution after treatment.
Peroxide
A concentrated solution of hydrogen peroxide (35%) can be used on its own to treat specific types of stains, particularly the blue mold stains that can sometimes affect maple wood. This type of bleach works by oxidizing the mold and removing the discoloration. Concentrated peroxide is a caustic substance and should be handled with the same level of care as two-part bleaches. Always wear gloves, goggles, and an apron when working with concentrated peroxide.
A Step-by-Step Guide to Bleaching Wood
Now that you have a good understanding of the different types of wood bleach and their applications, it’s time to get hands-on. This step-by-step guide will walk you through the entire process of bleaching wood, from preparation to finishing. For this guide, we will be focusing on the use of a two-part (A/B) wood bleach, as it is the most effective method for lightening the natural color of wood.
Supplies You Will Need:
- Two-part (A/B) wood bleach
- Chemical-resistant gloves (neoprene or butyl rubber)
- Safety goggles or a face shield
- A respirator with organic vapor cartridges
- A waterproof apron
- Two separate plastic or glass containers (do not use metal)
- Two separate sponges or synthetic-bristle brushes
- A chemical stripper (if removing an existing finish)
- A paint scraper or putty knife
- Sandpaper (various grits, from 120 to 220)
- A random orbital sander (optional, but recommended for larger projects)
- Clean rags
- A solution of equal parts white vinegar and water for neutralizing
- A wood stain or sealer of your choice
Step 1: Preparation is Key
Proper preparation is the most critical step in the wood bleaching process. Skipping or rushing this stage can lead to uneven results, blotchiness, and a lot of frustration. Take your time and do it right.
- Work in a Well-Ventilated Area: Wood bleaching involves the use of strong chemicals that can release harmful fumes. It is essential to work in a well-ventilated area, such as a garage with the doors open or, even better, outdoors. If you must work indoors, open all the windows and use fans to create cross-ventilation. Always wear a respirator with organic vapor cartridges to protect your lungs.
- Protect Yourself and Your Workspace: Before you begin, put on your chemical-resistant gloves, safety goggles, and waterproof apron. Cover your work surface with a plastic drop cloth or other protective covering to prevent damage from spills.
- Strip Any Existing Finish: Wood bleach will only work on bare wood. If the piece you are working on has any existing finish, such as paint, varnish, or stain, you will need to remove it completely. The most effective way to do this is with a chemical stripper. Apply the stripper according to the manufacturer’s instructions, and then use a paint scraper or putty knife to remove the old finish. You may need to apply the stripper multiple times to remove all traces of the old finish.
- Sand the Wood: Once the old finish has been removed, you will need to sand the wood to open up the grain and ensure that the bleach absorbs evenly. Start with a medium-grit sandpaper (around 120-grit) and then move to a finer grit (around 180 or 220-grit). A random orbital sander can make this process much faster and easier, especially for larger surfaces. Be sure to sand with the grain of the wood to avoid scratching the surface.
- Clean the Surface: After sanding, it is crucial to remove all dust and debris from the wood. Use a vacuum with a brush attachment to remove the majority of the dust, and then wipe the surface with a clean, damp rag. Allow the wood to dry completely before moving on to the next step.
Step 2: Applying the Bleach
Now that your wood is properly prepared, it’s time to apply the bleach. Remember to read and follow the manufacturer’s instructions for the specific product you are using, as the application process can vary slightly from brand to brand.
- Mix the Solutions: Pour a small amount of Part A (sodium hydroxide) into one of your plastic or glass containers. In a separate container, pour a small amount of Part B (hydrogen peroxide). It is crucial to use separate containers and applicators for each solution to avoid cross-contamination.
- Apply Part A: Using a clean sponge or synthetic-bristle brush, apply a liberal and even coat of Part A to the wood. Work in the direction of the grain and make sure to cover the entire surface. You will notice that the wood will darken as you apply the lye. This is a normal part of the process.
- Wait (but not too long): Most manufacturers recommend waiting for a short period of time (usually around 5-10 minutes) after applying Part A before applying Part B. This allows the lye to penetrate the wood and begin the chemical reaction.
- Apply Part B: Using a new, clean sponge or brush, apply a liberal and even coat of Part B to the wood. As you apply the hydrogen peroxide, you will see the wood begin to lighten almost immediately. You may also see some foaming or bubbling, which is a sign that the chemical reaction is taking place.
- Let it Dry: Once you have applied both parts of the bleach, you will need to let the wood dry completely. This can take several hours, or even overnight. As the wood dries, you will see the full effect of the bleach. The wood will continue to lighten as it dries.
Step 3: Neutralizing and Finishing
Once the wood is completely dry and you are happy with the level of lightness, there are a few final steps to complete the process.
- Neutralize the Bleach: It is important to neutralize the bleach to stop the chemical reaction and prevent any further lightening. To do this, mix a solution of equal parts white vinegar and water. Wipe the entire surface of the wood with the vinegar solution, and then wipe it down with a clean, damp rag to remove any residue. Allow the wood to dry completely.
- Lightly Sand the Surface: The bleaching process can raise the grain of the wood, leaving it with a slightly rough texture. To smooth it out, lightly sand the entire surface with a fine-grit sandpaper (220-grit or higher). Be careful not to sand too aggressively, as you don’t want to remove the bleached layer of wood.
- Apply a Finish: The final step is to apply a protective finish to the wood. This will not only protect the wood from damage, but it will also enhance the beauty of the bleached finish. You can use a clear, water-based polyurethane for a natural look, or you can apply a light-colored stain to add a subtle hint of color. Always test your finish on a scrap piece of wood or an inconspicuous area of your project first to make sure you are happy with the results.
Troubleshooting Common Wood Bleaching Problems
Even with the best preparation and technique, you may encounter some issues when bleaching wood. Don’t be discouraged! Most common problems can be fixed with a little patience and troubleshooting. Here are some of the most common issues and how to solve them:
Problem: The Wood is Blotchy or Uneven
This is perhaps the most common problem people face when bleaching wood. Blotchy or uneven results can be caused by a number of factors:
- Inadequate Preparation: If the old finish was not completely removed, or if the wood was not sanded evenly, the bleach will not be able to penetrate the wood uniformly. This will result in a patchy or blotchy appearance.
- Solution: The only way to fix this is to start over. You will need to strip the wood again, sand it thoroughly to ensure a uniform surface, and then re-bleach it.
- Uneven Application: If the bleach was not applied evenly, or if some areas were allowed to dry out before others, the results will be uneven.
- Solution: To avoid this, apply the bleach in a systematic way, working in small sections and making sure to maintain a wet edge. If you do end up with an uneven result, you can try to spot-treat the darker areas with another application of bleach. However, this can be tricky and may not always produce a perfect result.
- Natural Variations in the Wood: Some woods, like pine and poplar, are naturally more prone to blotchiness due to their uneven density. The bleach will absorb more into the softer areas of the wood, resulting in a darker or more pronounced effect in those areas.
- Solution: While you can’t change the nature of the wood, you can minimize blotchiness by using a pre-stain conditioner before applying the bleach. A pre-stain conditioner will help to even out the absorption of the bleach, resulting in a more uniform finish.
Problem: The Wood Didn’t Get Light Enough
If you have followed all the steps and the wood is still not as light as you would like, there are a few things you can try:
- Apply Another Coat: The simplest solution is to apply another coat of bleach. You can repeat the bleaching process as many times as you like until you achieve the desired level of lightness. Just be sure to neutralize and lightly sand the wood between each application.
- Use a Stronger Bleach: If you are using a household bleach and not getting the results you want, you may need to switch to a two-part wood bleach. Two-part bleaches are much more powerful and are specifically designed for lightening the natural color of wood.
- Consider the Wood Species: Some woods are naturally more resistant to bleaching than others. Dark, dense woods like mahogany may require multiple applications of a strong two-part bleach to achieve a significantly lighter color.
Problem: The Wood Turned an Unwanted Color
In some cases, the wood may take on an unwanted color after bleaching. For example, some high-tannin woods like oak can sometimes turn a greenish or grayish color.
- Solution: This is a natural reaction between the chemicals in the bleach and the tannins in the wood. To correct this, you can try neutralizing the wood with a solution of baking soda and water. This will help to balance the pH of the wood and may remove the unwanted color. If that doesn’t work, you can try applying a light-colored stain to counteract the unwanted color.
Problem: The Wood Feels Fuzzy or Spongy
If the wood feels fuzzy or spongy after bleaching, it is a sign that the wood fibers have been damaged. This can happen if the bleach was left on for too long, or if the wood was over-saturated with the bleach.
- Solution: Unfortunately, there is no easy way to fix this. You will need to sand the wood down to remove the damaged layer of fibers. This may mean that you will lose some of the bleached effect. To avoid this problem in the future, be sure to follow the manufacturer’s instructions carefully and avoid over-saturating the wood with bleach.
Creative Applications for Bleached Wood
The beauty of bleached wood lies in its versatility. The light, neutral tones of bleached wood can complement a wide range of design styles, from modern and minimalist to rustic and coastal. Here are a few creative ways you can incorporate bleached wood into your home:
Furniture Restoration and Transformation
One of the most popular applications for wood bleaching is in furniture restoration. An old, dark, and dated piece of furniture can be given a new lease on life with a simple bleaching treatment. A bleached finish can highlight the natural grain of the wood and give the piece a fresh, modern look. This is a great way to update family heirlooms or thrift store finds and make them your own.
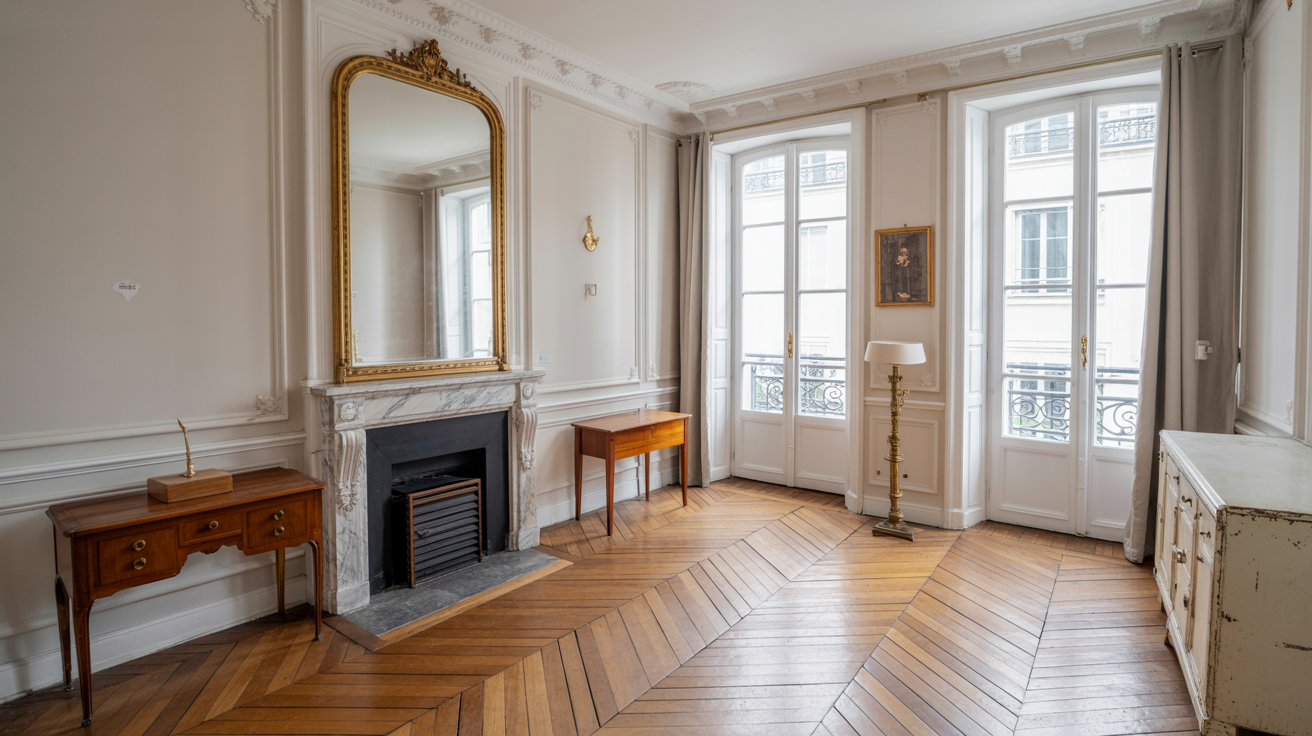
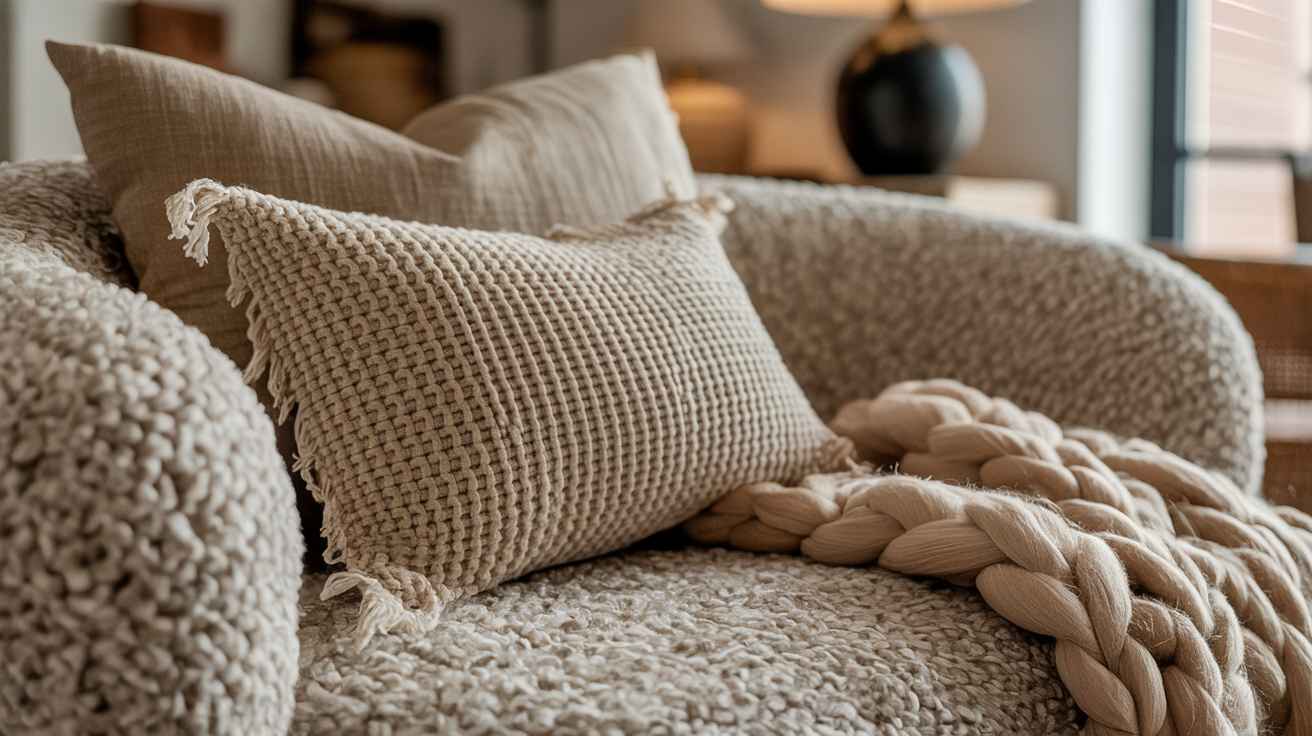
Modern Farmhouse and Coastal Vibes
The light, airy feel of bleached wood makes it a perfect choice for modern farmhouse and coastal-inspired interiors. A bleached wood dining table, coffee table, or set of chairs can create a relaxed and inviting atmosphere. The neutral tones of bleached wood also pair beautifully with natural textures like linen, jute, and rattan, which are staples of these design styles.
Kitchen and Bathroom Updates
Bleached wood can also be used to update kitchen and bathroom cabinets. If you have dark, outdated cabinets that are making your space feel small and dark, bleaching them can be a great way to brighten things up. A bleached wood finish can give your kitchen or bathroom a fresh, clean, and modern look. It is also a great alternative to painting, as it allows the natural beauty of the wood grain to show through.
Flooring with a Scandinavian Flair
For a truly dramatic transformation, consider bleaching your hardwood floors. Bleached wood floors are a hallmark of Scandinavian design, and they can make any room feel larger, brighter, and more open. This is a big project that requires a lot of time and effort, but the results can be stunning. If you are considering bleaching your floors, it is a good idea to consult with a professional to ensure that it is done correctly.
Decorative Accents and DIY Projects
In addition to large-scale projects, bleached wood can also be used to create a variety of decorative accents and DIY projects. You can bleach small pieces of wood to create custom picture frames, shelves, or serving trays. You can also use bleached wood to create a unique piece of wall art or a statement headboard for your bed. The possibilities are endless!

Embrace the Power of Transformation
Wood bleaching is a powerful and versatile technique that can open up a whole new world of creative possibilities for your woodworking and DIY projects. By understanding the science behind how it works, choosing the right type of bleach for your project, and following the proper safety precautions, you can transform any piece of wood into a stunning work of art. Whether you are restoring an old piece of furniture, updating your kitchen cabinets, or creating a unique piece of home decor, wood bleaching is a skill that will allow you to unleash your creativity and bring your vision to life.