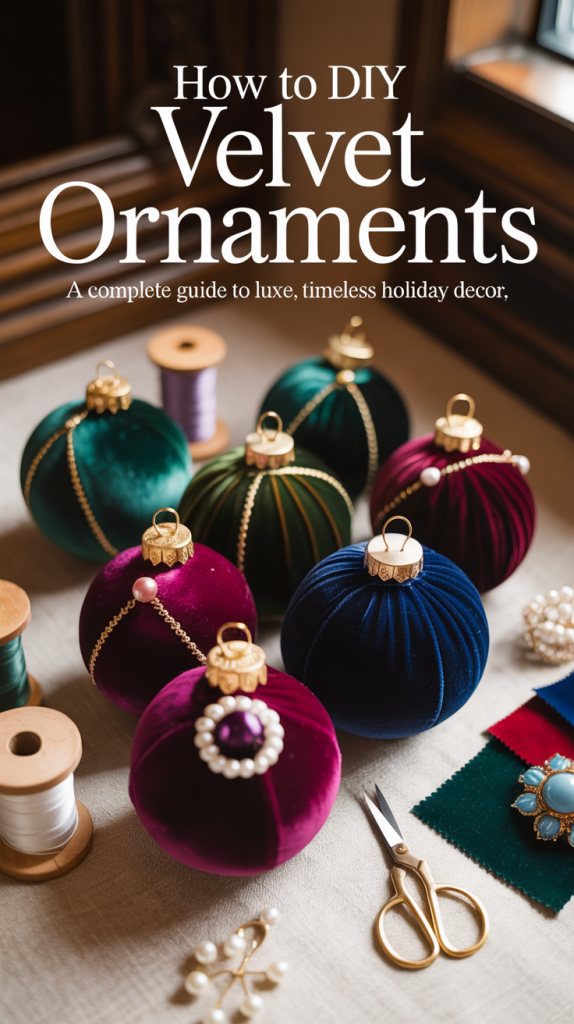
You all have been loving my DIY decoupage ornament tutorial, so today I want to share another favorite: DIY velvet ornaments!
Velvet ornaments have become one of the most-loved holiday décor trends—and for good reason. Rich, soft, and timeless, velvet adds a layer of luxury to any Christmas tree or holiday vignette. But here’s the best part: you don’t have to splurge on designer sets or hunt down limited-stock boutique options. With just a few supplies and a bit of creativity, you can make your own stunning velvet ornaments at home.
Whether you prefer a classic, elegant look or a whimsical, modern style, these DIY velvet ornaments can be customized to match any color palette, any aesthetic, and any level of crafting experience. This step-by-step guide will walk you through multiple techniques, from simple covering methods to more professional finishes. You’ll also find ideas for embellishments, troubleshooting tips, and styling suggestions so your tree looks effortlessly luxurious.
Let’s get crafting!
Why Velvet Ornaments?
Before we jump into the instructions, it’s worth understanding why velvet ornaments are the holiday décor item of the season.
1. Velvet Looks Expensive (Even If Your Ornaments Aren’t)
Velvet instantly elevates anything—whether it’s a plastic craft-store ball or a thrifted ornament past its prime. The soft sheen creates a lush visual texture that catches the light beautifully.
2. They Match Any Decoration Style
From ultra-modern minimalism to cozy cottage charm, velvet ornaments can be made to suit your holiday theme:
Deep jewel tones for a luxe, glam look
Soft neutrals and creams for Scandinavian or minimalist trees
Earthy greens and browns for rustic or woodland aesthetics
Bright, playful colors for kid-friendly holiday décor
3. They’re Budget-Friendly and Surprisingly Easy
For a few dollars, you can create ornaments that look like high-end boutique pieces. With the right technique, even beginners can produce professional-looking results.
4. They Make Perfect Gifts
Handmade velvet ornaments are thoughtful, customizable, and easy to bundle into gift sets. Teachers, coworkers, and family members will love them.
Now that you know why velvet ornaments are worth the DIY effort, let’s get into the fun part: making them!
Materials You’ll Need
The exact supplies depend on which method you choose (you’ll get several options below), but here’s a general list to get you started:
Basic Materials
Velvet fabric (crushed, stretch, or traditional velvet works)
Foam or plastic ornament balls (fillable or solid)
Fabric scissors or rotary cutter
Hot glue gun and glue sticks
Fabric glue (optional, but helpful)
Needle and thread
Ribbon or ornament hangers
Gold or silver ornament caps (optional)
Optional Embellishments
Rhinestones or gems
Sequins or glitter
Gold leaf
Mini tassels
Beads
Decorative trim or rope
Tiny holiday charms (bells, stars, branches)
Helpful Tools
Small paintbrush for smoothing glue
Ruler or tape measure
Fabric clips
Straight pins
Foam brush
Once you’ve gathered your supplies, it’s time to choose your favorite technique.
Method 1: The Classic Fabric-Wrap Velvet Ornament (Beginner-Friendly)
This is the easiest method and produces beautifully smooth ornaments with minimal effort. It works best with stretch velvet because the elasticity helps avoid wrinkles.
What You Need:
Stretch velvet
Hot glue gun
Scissors
Ornament ball
Ornament cap or ribbon
Step-by-Step Instructions:
Step 1: Cut a Large Velvet Circle
Cut a circle of velvet approximately 2–3 times the diameter of your ornament ball. Larger circles make wrapping easier.
Tip: Use a large plate or bowl to trace a perfect circle.
Step 2: Place the Ornament in the Center
Lay the velvet face down and place your ornament directly in the middle.
Step 3: Gather the Velvet at the Top
Pull the fabric up around the ball like you’re wrapping a gift. Gather neatly at the top, ensuring the velvet is smooth on all sides.
Stretch velvet will naturally pull tight without wrinkling.
Step 4: Secure the Fabric
Twist the gathered fabric at the top and tie tightly with thread or a small rubber band.
Optionally add a dot of hot glue underneath to secure.
Step 5: Attach the Ornament Cap
Place your ornament cap over the gathered top. If your ornament doesn’t have one, glue a loop of ribbon around the top for hanging.
Step 6: Trim the Excess
Cut away any extra velvet that sticks out above the cap.
Why This Method Works
It’s quick, requires minimal cutting or measuring, and the stretchy velvet hides small imperfections. Even children can help with this version.
Method 2: Seamless Velvet-Covered Ornaments (Professional Finish)
If you want that ultra-smooth, luxury look (similar to what you’d find at Pottery Barn or boutique shops), this method is for you.
What You Need:
Non-stretch velvet (for a richer, more structured look)
Fabric glue or spray adhesive
Scissors
Hot glue gun
Ornament ball
Step-by-Step Instructions
Step 1: Cut Velvet Panels
Cut your velvet into 6–8 long, narrow panels (like orange slices). The thinner panels create a smoother finish.
Step 2: Glue the First Panel
Apply a thin layer of fabric glue down one vertical section of the ornament. Attach one velvet panel.
Smooth gently with your fingers.
Step 3: Continue Around the Ornament
Apply panels one at a time, slightly overlapping or perfectly meeting the previous edges.
Tip: Stretch your velvet slightly as you go to prevent wrinkles.
Step 4: Cover Seams
Once all panels are attached, run your finger along each seam to ensure it’s smooth and well secured.
Step 5: Glue On a Velvet or Metal Cap
Finish the top with a decorative cap to hide the panel edges.
Why This Method Works
The panel technique produces a refined, store-bought quality ornament.

Method 3: Plush Velvet Puff Ornaments (No Ornament Ball Needed!)
These soft, pillowy ornaments look cozy, vintage, and incredibly elegant.
What You Need:
Velvet fabric
Fiberfill stuffing or scrap fabric
Needle and thread
Ribbon or string

Step-by-Step Instructions
Step 1: Cut a Large Circle
Cut a velvet circle approximately 10–12 inches wide.
Step 2: Sew a Loose Running Stitch Around the Perimeter
This can be done quickly by hand.
Step 3: Pull the Thread to Form a Pouch
Gently gather the fabric into a pouch shape.
Step 4: Add Stuffing
Add fiberfill until the ornament is firm and round.
Step 5: Pull Tight and Knot to Close
Once closed, attach a hanging loop and hide the closure with ribbon, a decorative button, or a jeweled embellishment.
Why This Method Works
It’s simple, soft, and gives a plush, cozy designer look.
Method 4: Molded Velvet Ornaments (For Velvet-Touch Texture)
This trendy technique gives ornaments a velvet-frosted texture—perfect for matte, upscale décor.
You Need:
Velvet powder (also called flocking powder)
Liquid adhesive (mod podge works)
Foam brush
Ornament ball
How to Do It:
Brush the ornament with adhesive.
Sprinkle velvet flocking powder generously.
Let dry completely.
Brush off loose powder.
Add more layers if needed for thickness.
Result: A perfectly matte, fuzzy, modern ornament that looks custom-made.

Embellishment Ideas to Take Your Velvet Ornaments to the Next Level
Velvet already looks elegant on its own, but you can elevate your handmade ornaments with a few thoughtful touches.
1. Add Ribbon or Trim
Velvet ribbon for a monochrome luxe look
Satin ribbon for contrast
Metallic rope trim for glam
2. Add Gems or Pearls
Glue small accents for sparkle.
3. Add Mini Tassels
Perfect for boho or vintage-inspired designs.
4. Add Letter Monograms
Personalize for gifts or stockings.
5. Add Gold Leaf Designs
Apply adhesive in small shapes or swirls, then press on gold leaf.
6. Add Dried Flowers
Deep red roses or dried greenery add a soft, romantic feel.
Color Palette Inspiration
Choosing the right velvet colors can make or break the overall look. Here are some designer-approved combinations:
Classic & Elegant
Emerald
Deep navy
Burgundy
Gold accents
Scandinavian Minimal
Soft beige
Warm ivory
Faded blush
Dusty gray
Cozy Cottagecore
Sage green
Mustard
Mauve
Linen white
Glam & Luxe
Black
Ruby
Champagne
Metallics
Vintage Whimsy
Mint
Baby pink
Pale lavender
Antique gold
Troubleshooting Guide
Even the best crafters hit roadblocks—here’s how to fix the most common issues.
Wrinkles in the Velvet
Use stretch velvet
Use smaller panels
Warm the fabric slightly with a hairdryer before smoothing
Visible Seams
Overlap panels slightly
Add decorative trim or gems
Use flocking powder to blur the lines
Fabric Bunching at the Top
Trim excess fabric
Use smaller gathering circles
Hide the bunching with a high-quality metal cap
Glue Seeping Through the Velvet
Switch from hot glue to fabric glue
Apply adhesive more sparingly
Choose a thicker velvet
How to Display Your Velvet Ornaments
These ornaments aren’t just for Christmas trees. Try:
1. A Velvet Ornament Bowl
Pile them in a decorative bowl on your coffee table.
2. A Holiday Garland
String them along a mantel for a luxe look.
3. A Centerpiece
Create a velvet ornament cluster with candles and greenery.
4. A Gift Topper
Tie one onto a wrapped present for a designer touch.
5. A Wreath Accent
Mix velvet ornaments into a lush green wreath for contrast.

Cleaning and Storing Velvet Ornaments
To keep them looking their best year after year:
Cleaning
Use a lint roller or soft brush
Avoid water
Spot clean fabric gently if needed
Storing
Store in hard plastic ornament containers
Keep away from moisture
Wrap individually in tissue paper
Velvet Ornaments Are the Perfect DIY for a Luxe Holiday Season
DIY velvet ornaments are one of the most rewarding and beautiful holiday crafts you can make. They’re simple, customizable, budget-friendly, and elevate your décor instantly. Whether you choose the classic wrap method or the seamless panel technique, you’ll create high-end pieces that look store-bought—if not better.
So gather your supplies, put on your favorite holiday playlist, and enjoy making ornaments that will become cherished decor for years to come.