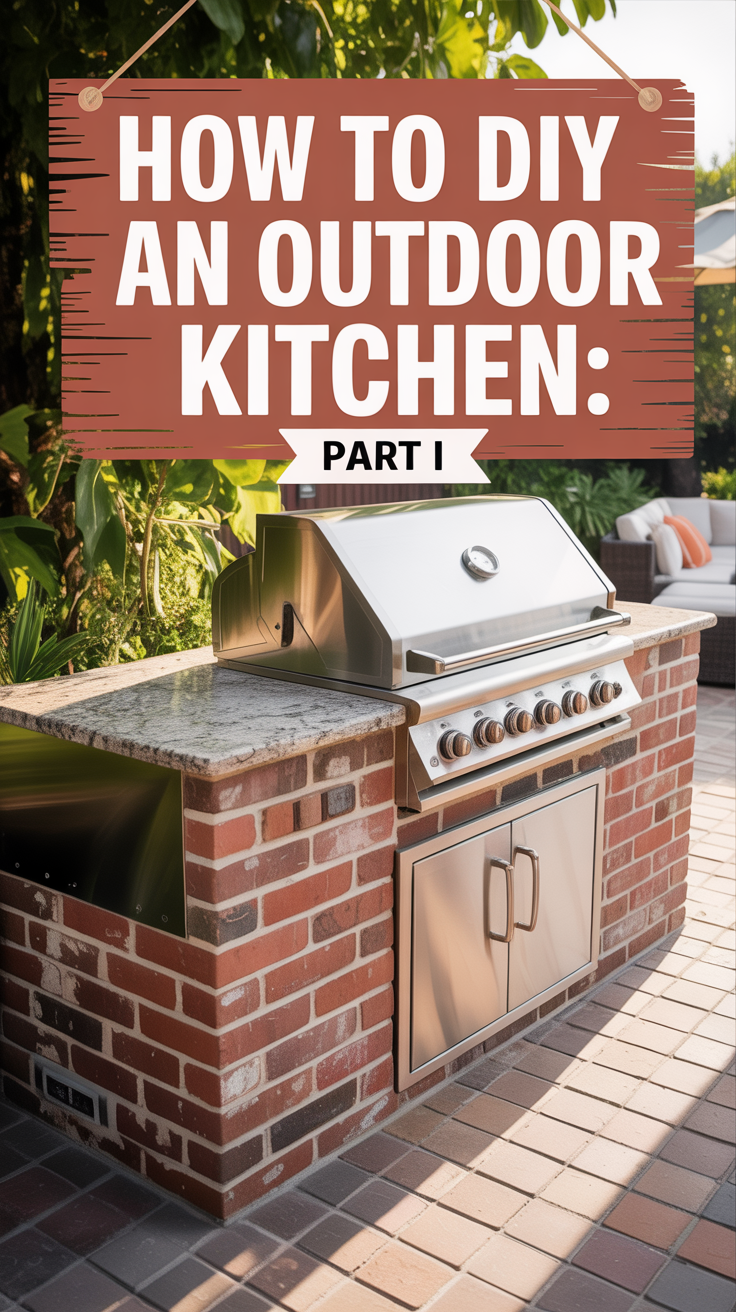
Why Build a DIY Outdoor Kitchen?
Now that school is out and summer is full swing, we have been spending long hours outdoors and naturally (for us) Nick and I are in the full-on planning phase of our outdoor kitchen. If you saw my last post on Outdoor Design trends, you were maybe struck with the statistic on ROI for outdoor kitchens! Outdoor kitchens have surged in popularity, becoming a must-have feature for homeowners who love to entertain, cook, and create lasting memories with family and friends. The allure of al fresco dining, combined with the freedom of cooking in an open, breezy space, makes an outdoor kitchen a backyard centerpiece. But while custom-built kitchens can carry a hefty price tag, building your own offers a rewarding blend of creativity, cost savings, and customization.
We are feeling energized at the idea of designing a space that suits our cooking style, aesthetics, and budget. While summer months can get unbearably hot here, I would say outdoor entertaining is a 3 season sport in Austin. Whether you dream of a rustic cooking station with a pizza oven or a sleek, modern setup with polished concrete countertops and streamlined appliances, the DIY route lets you control every detail. Not only does it save on labor costs, but it also provides the satisfaction of transforming a blank canvas into a functional and stylish space.
Moreover, a well-built outdoor kitchen adds real value to your home. It can become a gathering spot for weekend BBQs, family celebrations, or quiet evening dinners under the stars. With proper planning and the right materials, you can create a kitchen that withstands the elements and stands the test of time.
Planning Your Outdoor Kitchen: Laying the Groundwork for Success
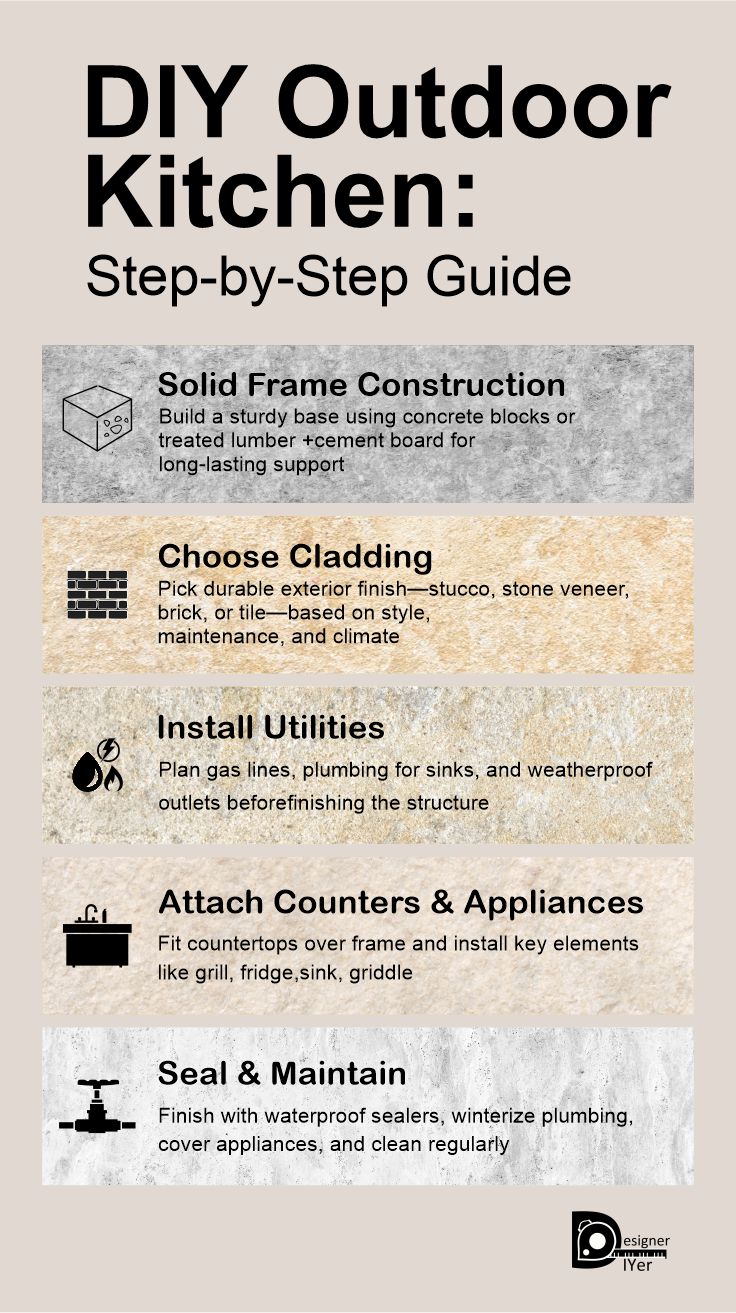
Before you lift a hammer or pour concrete, careful planning is crucial. A well-thought-out plan ensures that your kitchen is functional, aesthetically pleasing, and structurally sound. Here’s how how we approached the planning phase.
Assess Your Backyard Space
Start by evaluating your available space. Consider these factors:
Size and Layout: Measure the area where you envision your outdoor kitchen. Look for flat, stable ground and ensure there’s ample room for movement and seating. Avoid overly tight spaces that restrict cooking or dining areas. We will be adding our outdoor kitchen in our covered patio. You’d think this would be very straight forward but our patio is very long and skinny. Surprise to me as I was looking for inspiration online that it is very common for houses to have long skinny patio areas. Anyway, we really had to think through how our layout would work to ensure ample movement in the kitchen area as well as a small lounge space.
Sun Exposure and Wind Direction: Notice how sunlight moves across the area during the day. You may want shade during the hottest hours or a sunny spot for cooler evenings. Wind direction is equally important; placing your grill or stove upwind from seating areas prevents smoke from blowing toward guests.
Utilities and Accessibility: Is the space close to water, gas, and electrical lines? Planning for these early will save headaches later. Also, consider proximity to the house—a close location makes transporting food and drinks easier.
Drainage and Ground Preparation: Ensure the area has proper drainage to avoid pooling water. You may need to grade the space or install a gravel or concrete base for stability.
Define Your Cooking and Entertaining Needs
A successful outdoor kitchen meets your unique needs:
Cooking Preferences: Do you prefer grilling, smoking, or griddling? Will you install a pizza oven or a smoker? I hear the best things about the Ooni pizza oven, but as well began to layout the kitchen, we decided a grill, our Green Egg, a beverage fridge, and a griddle were the most important items for us.
Storage and Prep Space: Include cabinets or shelving for utensils, seasonings, and cookware. Ensure you have ample countertop space for food prep.
Entertaining Style: How often do you host gatherings? Plan for enough seating, serving areas, and perhaps even a bar for drinks.
Sketch a Layout
A simple sketch helps visualize your design. Include:
Zones: Cooking (grill, griddle, oven), prep (countertops), cleaning (sink), cold storage (fridge), and serving (bar or table).
Workflow: Arrange the zones to mimic an indoor kitchen’s efficiency—placing the fridge near prep space and the grill close to the serving area.
Clearances: Leave enough space around appliances for safety and comfort. Plan at least 3 feet between cooking and seating areas.
Budget Wisely
While DIY saves on labor, materials and appliances add up. Your budget should include:
Materials: Frame structure, countertops, cladding, fasteners, sealants.
Appliances: Grill, fridge, sink, griddle, lighting.
Tools: Saws, drills, trowels, polishers, safety gear.
Contingency: 10-20% extra for unexpected costs.
A realistic budget guides your material choices, including the cladding–up next!
Choosing Your Cladding: Weighing Options for Style, Durability, and Cost
Cladding is the outer layer that defines your kitchen’s look and protects its structure. The right choice balances style, durability, cost, and maintenance. Let’s dive into popular options:
Plaster (Cement Plaster or Stucco)
Plaster offers a sleek, contemporary finish with versatile color and texture options. It’s applied in multiple coats over a wire mesh or cement board substrate, creating a smooth or textured surface.
Advantages:
Aesthetics: Plaster delivers a seamless, modern look. It can be tinted to match your color palette or painted later.
Lightweight: Compared to stone or brick, plaster is lighter, reducing frame load.
Weather Resistance: When sealed properly, it stands up well to sun, rain, and moderate temperature changes.
Custom Finishes: From smooth, polished surfaces to rough textures, plaster allows creative freedom.
Disadvantages:
Skill-Intensive: Applying plaster evenly requires practice. Poor technique can lead to cracks or uneven surfaces.
Prone to Cracking: Freeze-thaw cycles, settling, or improper installation can cause cracks.
Maintenance: Periodic resealing and crack repairs are necessary to maintain appearance and integrity.
Stone Veneer (Natural or Manufactured)
Stone veneer replicates the look of full-thickness stone without the weight and expense. It’s adhered to a substrate and creates a luxurious, natural feel.
Advantages:
High-End Appeal: Adds timeless elegance and blends beautifully with landscaping.
Durability: Resistant to weather, impact, and heat.
Natural Variations: Each piece offers unique colors and textures, enhancing visual interest.
Disadvantages:
Heavy: Requires a strong, stable frame and may necessitate additional support.
Higher Cost: Material and installation can be expensive.
Moisture Traps: Without proper drainage and sealing, moisture can accumulate behind the veneer.
Brick (Thin or Full-Size)
Brick cladding brings rustic charm and warmth. Options include full-size bricks or lightweight thin bricks adhered to the substrate.
Advantages:
Classic Aesthetic: Complements traditional homes and adds timeless character.
Fire-Resistant: Excellent for kitchens with high heat sources.
Durability: Long-lasting and low-maintenance with proper installation.
Disadvantages:
Weight: Like stone, brick can add significant load to the frame.
Mortar Maintenance: Joints may require occasional repointing.
Limited Color Options: Brick colors tend to be more traditional, though painting is possible.
Tile (Porcelain or Ceramic)
Tile offers endless design possibilities with a variety of colors, patterns, and textures.
Advantages:
Design Flexibility: Available in bold colors, intricate patterns, and modern finishes.
Ease of Cleaning: Smooth, sealed surfaces resist stains and are easy to wipe down.
Lightweight: Reduces stress on the frame compared to stone or full bricks.
Disadvantages:
Cracking Risk: Substrate movement or extreme temperature changes can cause cracks.
Grout Maintenance: Grout lines may discolor or require sealing.
Less Natural Look: Some tiles can feel less organic than stone or brick.

Comparing Costs and Considerations
| Cladding Option | Approximate Cost (per sq. ft) | Durability | Maintenance | Aesthetic Appeal |
|---|---|---|---|---|
| Plaster | $6–$10 | Moderate | Moderate | Modern, sleek |
| Stone Veneer | $12–$25 | High | Low | Timeless, natural |
| Brick | $8–$15 | High | Moderate | Classic, rustic |
| Tile | $5–$12 | Moderate | Moderate | Colorful, flexible |
Choosing the Perfect Cladding for Your Outdoor Kitchen
Selecting the right cladding isn’t just about looks—it’s a decision that affects the longevity, maintenance, and overall vibe of your DIY outdoor kitchen. Plaster offers a chic, modern look but requires careful installation and periodic maintenance. Stone veneer delivers timeless beauty and durability at a higher cost. Brick brings rustic charm and fire resistance, while tile offers colorful, customizable options with easy cleaning but more risk of cracking.
Take time to weigh your budget, style preferences, and DIY skill level. Whether you opt for plaster’s smooth finish, the earthy richness of stone, the classic appeal of brick, or the versatility of tile, your chosen cladding will shape the heart of your backyard culinary haven.
DIY Outdoor Kitchen: Building a Strong, Durable Frame
Introduction to Frame Building
The frame is the backbone of your outdoor kitchen. It supports everything from polished concrete countertops to appliances, cladding, and decorative finishes. A poorly constructed frame can result in sagging counters, cracked cladding, or even safety hazards. Conversely, a well-built frame ensures stability, longevity, and a professional finish.
In this section, we’ll walk you through step-by-step instructions to build a robust frame, discuss materials (including wood and concrete block options), and integrate appliance spaces like the Weber griddle and outdoor fridge. By the end, you’ll have a clear roadmap to constructing a solid base for your entire kitchen.
Choosing the Right Frame Material
There are two primary materials for building an outdoor kitchen frame: concrete blocks (CMU) and pressure-treated lumber with cement board sheathing. Both have their pros and cons.
Concrete Block (CMU) Frames
Concrete Masonry Units (CMUs) are durable, non-combustible, and highly weather-resistant.
Advantages:
Fireproof and resistant to moisture and pests
Provides solid weight-bearing support for heavy countertops and appliances
Long-lasting with minimal maintenance
Disadvantages:
Requires masonry tools and skills
Heavier and harder to modify after construction
Typically more time-consuming to build
Pressure-Treated Wood Frames with Cement Board
Pressure-treated lumber (rated for ground contact) forms the skeleton, which is then covered with cement board for fire resistance and durability.
Advantages:
Easier to cut and assemble with standard carpentry tools
Lighter and faster to build than concrete block
More adaptable for custom designs and last-minute changes
Disadvantages:
Requires cement board sheathing for fire protection
More vulnerable to moisture and pests without proper sealing
Needs careful bracing to handle heavy countertops
Tools and Materials for Frame Construction
Materials:
Pressure-treated 2x4s or 2x6s (or CMUs if using blocks)
Cement backer board (e.g., HardieBacker)
Galvanized screws and brackets
Concrete mix (for footings or pads, if needed)
Metal lath for plaster cladding (if applicable)
Tools:
Tape measure and level
Circular saw or masonry saw
Drill/driver with masonry bits (for blocks)
Hammer and nails (if using wood)
Safety gear: gloves, goggles, dust mask
Preparing the Site
Before building, prepare the foundation:
Clear the Area: Remove grass, roots, and debris. Level the site.
Lay a Base: For CMU frames, pour a concrete footing. For wood frames, use concrete pavers or treated posts on compacted gravel for stability.
Drainage: Ensure the ground slopes slightly away from the kitchen to prevent water pooling.
Step-by-Step Frame Construction
Layout and Marking
- Mark the perimeter of the kitchen layout using stakes and string lines.
- Double-check measurements for appliance placement (grill, griddle, fridge) and counter heights. Standard countertop height is ~36 inches.
Building with Concrete Blocks (if chosen)
- Lay the first row of blocks on a concrete footing, ensuring level placement.
- Stagger joints in subsequent rows for strength. Use masonry adhesive or mortar to bond blocks.
- Leave gaps for appliances: frame openings for the fridge and griddle, ensuring proper dimensions.
- Fill block cores with concrete and rebar if extra strength is needed.
Building with Pressure-Treated Lumber
- Cut 2x4s to size for horizontal and vertical framing.
- Assemble the base frame, securing corners with galvanized screws and corner brackets.
- Add vertical supports every 16–24 inches. Include extra bracing at appliance cutouts.
- Attach horizontal supports at the top and bottom of openings.
- Cover the entire frame with cement board, securing with corrosion-resistant screws.
Integrating Appliances into the Frame
Weber Griddle
Dimensions: Check your specific griddle model (e.g., Weber 36″ or 28″).
Frame Support: Add extra horizontal supports to bear the weight. Consider using angle brackets for reinforcement.
Ventilation: Leave clearance underneath and behind for airflow.
Gas Line Access: Plan a pathway for safe, concealed gas connections.
Outdoor Fridge
Placement: Frame an opening large enough for the fridge’s dimensions plus 1–2 inches of ventilation space.
Base Platform: Create a solid, level surface using treated plywood or a concrete slab.
Power Access: Leave space for electrical wiring and outlets. Use GFCI-protected circuits.
Key Considerations for Frame Strength and Longevity
Level and Square: Use a spirit level to check horizontals and verticals at each stage. Uneven frames lead to countertop and appliance issues.
Bracing: Add diagonal braces for stability, especially for wood frames.
Fasteners: Use corrosion-resistant screws and brackets to withstand outdoor conditions.
Fireproofing: Cover wood frames entirely with cement board. For CMU frames, ensure proper sealing of joints.
Weatherproofing: Seal all wood surfaces and apply flashing or waterproof barriers where necessary.
Preparing for Cladding and Countertops
Before applying cladding or installing countertops:
Clean Surfaces: Remove dust and debris from the frame.
Attach Metal Lath: If using plaster cladding, secure lath over cement board for a solid base.
Plan Cutouts: Mark and cut spaces for the griddle, fridge, sink, and gas/electrical lines.
Support Countertops: Ensure the frame can bear the weight of polished concrete or other heavy materials. Add extra supports under large spans.
Optional Enhancements
Add a Bar Overhang: Extend part of the countertop beyond the frame to create a casual bar seating area.
Incorporate Shelving or Cabinets: Frame in additional storage for utensils, cookware, or cleaning supplies.
Integrate Lighting: Pre-run conduit or low-voltage wiring for under-counter or accent lighting.
Your Frame, Your Foundation
Building a solid frame is the most important step in your DIY outdoor kitchen. Whether you opt for a concrete block or wood frame with cement board, meticulous planning and execution will ensure your kitchen stands strong for years to come. Pay attention to appliance integration, use weatherproof and fire-resistant materials, and don’t rush the process—this foundation supports every element to follow, from polished concrete countertops to sleek plaster finishes.
What’s Next?
In part II, we will cover a step-by-step process of installing DIY polished concrete countertops, including how to:
Build concrete forms
Reinforce with steel mesh
Pour and level concrete
Polish to a glossy finish
Seal and finish for outdoor durability