So you want your kids to spend less time staring at screens and more time playing outside this summer, but you also need activities that will actually hold their attention for more than five minutes. You want a backyard that looks beautiful and reflects your personal style, but you also need it to be a functional, magical space where your kids can just be kids. I get it. That’s exactly where I was.
For the longest time, our backyard was a battleground between my desire for a pretty patio and my kids’ desire to dig holes in my flower beds. I was constantly saying, “Don’t touch that!” or “Stay out of the dirt!” It was exhausting for all of us. But then I realized something important: kids need to get messy. They need to touch, feel, pour, mix, and create. It’s how they learn about the world.
So, instead of fighting the mess, I decided to lean into it. I went down a massive rabbit hole of outdoor play ideas, DIY projects, and backyard hacks. I wanted to find a solution that would give my kids the sensory play they craved, while keeping the chaos contained to one specific area.
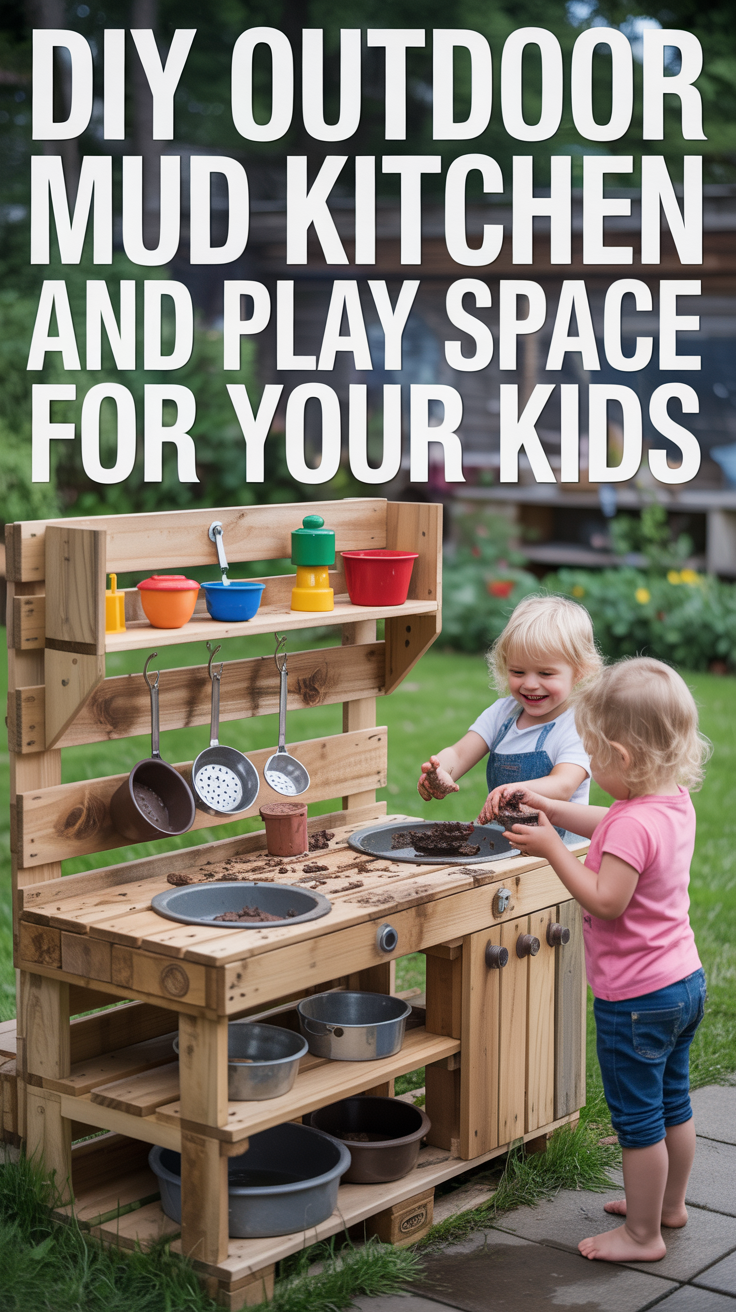
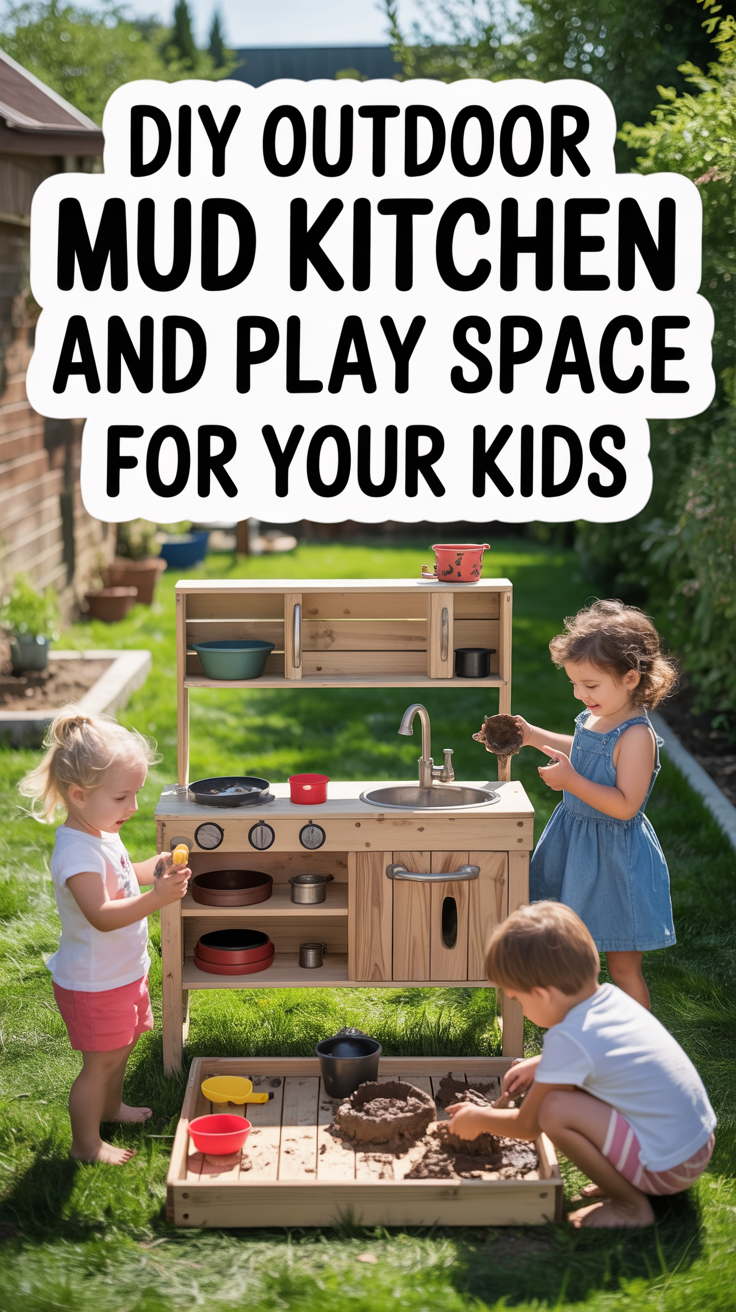
Enter: the mud kitchen.
If you haven’t heard of a mud kitchen, prepare to have your mind blown. It is exactly what it sounds like—an outdoor play kitchen where the main ingredients are dirt, water, leaves, and imagination. It is, without a doubt, the best thing we have ever added to our backyard.
Whether you have a sprawling suburban lawn or a tiny urban patio, there are so many ways to create an epic outdoor play space!
Part 1: Why Your Kids Need a Mud Kitchen
Before we get into the nitty-gritty of building and styling, let’s talk about why mud kitchens are so incredible. It’s easy to look at a pile of muddy pots and pans and think, “Why on earth would I invite that kind of mess into my life?” But the benefits of mud play go far beyond just keeping your kids busy while you drink your coffee in peace (although that is a very valid benefit!).
The Magic of Sensory Play
We hear the term “sensory play” thrown around a lot in parenting circles, but what does it actually mean? Sensory play is any activity that stimulates a child’s senses: touch, smell, taste, movement, balance, sight, and hearing.
A mud kitchen is the ultimate sensory experience. When kids plunge their hands into cool, squishy mud, they are engaging their tactile system. When they crush mint leaves or pine needles to make a “potion,” they are engaging their sense of smell. When they pour water from a heavy pitcher into a small teacup, they are developing their proprioception (awareness of their body in space) and fine motor skills.
This kind of play is crucial for brain development. It helps build nerve connections in the brain’s pathways, which leads to a child’s ability to complete more complex learning tasks.
Fostering Independent, Open-Ended Play
One of the biggest struggles of modern parenting is that our kids are used to being entertained. They have toys that light up, sing songs, and tell them exactly what to do. A mud kitchen is the exact opposite. It is the definition of open-ended play.
There are no rules in a mud kitchen. There is no “right” way to make a mud pie. A bowl of dirt can be a birthday cake, a witch’s potion, a bowl of soup, or a construction site. This kind of unstructured play forces kids to use their imagination, problem-solve, and entertain themselves.
The first time my kids played in their mud kitchen, they were out there for two straight hours. Two hours! No fighting, no whining that they were bored. Just pure, focused, imaginative play.
Building a Connection with Nature
In a world where kids are spending more and more time indoors, a mud kitchen is a beautiful way to foster a connection with the natural world. It encourages them to notice the changing seasons. In the spring, they might use cherry blossoms and fresh green grass in their recipes. In the fall, they might use crunchy leaves and acorns.
It teaches them that nature is not just a backdrop; it is a resource, a playground, and a canvas. And yes, it teaches them that a little bit of dirt never hurt anyone. In fact, research shows that exposure to the friendly bacteria found in soil can actually help build a stronger immune system!
Part 2: How to Build Your Mud Kitchen
Okay, you’re convinced. You need a mud kitchen. But how do you actually get one? The beauty of this project is that it can be as simple or as elaborate as you want it to be. You don’t need to be a master carpenter to pull this off. Here are three different ways to create a mud kitchen, depending on your budget, your DIY skills, and your aesthetic.
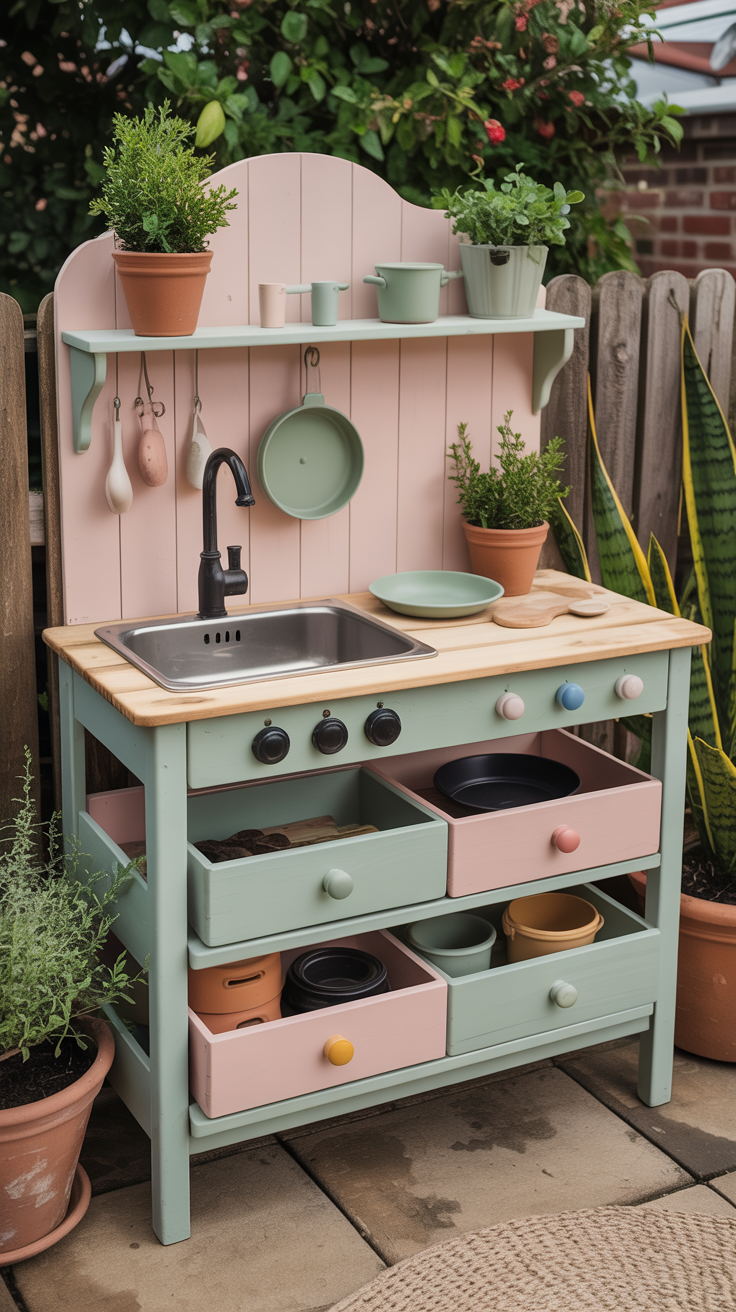
Option 1: The Upcycled Furniture Hack (Low Effort, High Style)
If you want a beautiful mud kitchen but don’t want to build something from scratch, upcycling an old piece of furniture is the way to go. This is my personal favorite method because it gives the kitchen so much character and charm.
What you need:
- An old wooden dresser, nightstand, or potting bench (check Facebook Marketplace, thrift stores, or the side of the road!)
- Exterior paint or a good quality outdoor wood sealant
- A jigsaw (if you want to drop in a sink)
- An old stainless steel mixing bowl or a cheap plastic dishpan
How to do it: First, remove any drawers you don’t want and give the piece a good sanding. If you are painting it, make sure to use an exterior-grade paint so it can withstand the elements. A bright, cheerful color like mint green or sunny yellow looks adorable, but a classic white or natural wood finish is timeless.
Next, you need a sink. Take your stainless steel bowl or plastic dishpan, turn it upside down on the top of the dresser, and trace around the edge. Use your jigsaw to cut a hole that is slightly smaller than the circle you traced, so the lip of the bowl will catch on the wood and hold it in place. Drop the bowl in, and boom—you have a sink!
You can use the remaining drawers for storage, add some hooks to the sides for hanging utensils, and you’re done. It’s incredibly easy and looks so custom.
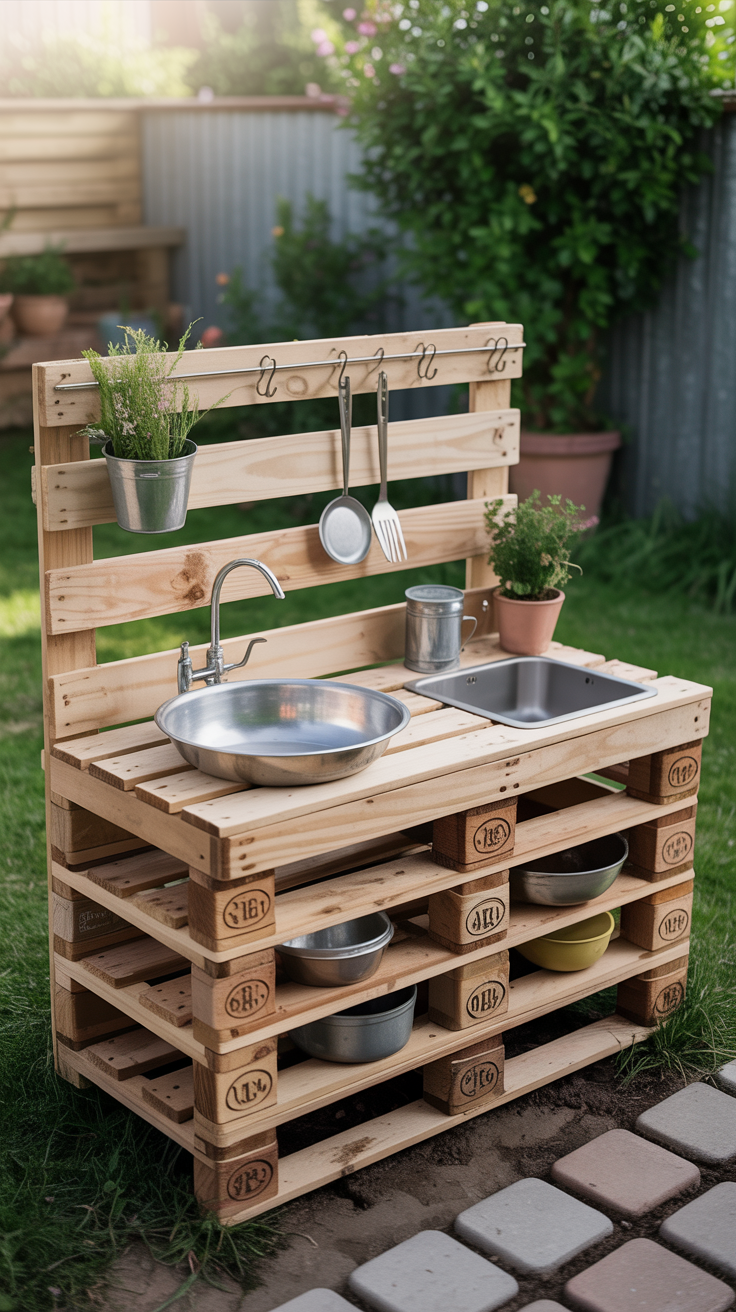
Option 2: The Pallet Build (Budget-Friendly and Rustic)
If you love a rustic, farmhouse vibe and want to spend next to nothing, building a mud kitchen out of wooden pallets is a fantastic weekend project.
What you need:
- 2-3 wooden pallets (make sure they are stamped “HT” for heat-treated, not chemically treated)
- A crowbar and hammer (for dismantling)
- A circular saw or hand saw
- Deck screws and a drill
- Sandpaper (lots of it!)
How to do it: The hardest part of this build is taking the pallets apart. Once you have your wood, you are essentially building a simple table with a backboard.
Use the thickest pieces of wood for the four legs. Build a rectangular frame for the countertop, and screw your pallet slats across the top to create the work surface. (Again, you can use a jigsaw to cut a hole for a drop-in bowl sink).
Take another pallet and attach it vertically to the back of your table to act as a backsplash. This is the perfect place to add hooks for pots and pans, or even a small shelf for “spice” jars.
Crucial step: Because pallet wood is rough, you must sand the entire thing thoroughly to prevent splinters. Once it’s smooth, seal it with a weatherproofing stain or oil to protect it from the rain.
Option 3: The Ultimate Upgrade (Adding Running Water!)
If you want to win the “Parent of the Year” award, adding real, running water to your mud kitchen is the ultimate flex. It sounds intimidating, but it is surprisingly easy to do.
What you need:
- A cheap cold-water bar faucet (you can find these on Amazon for under $20)
- A brass adapter fitting (to connect the faucet hose to a standard garden hose)
- A drill with a hole saw bit
How to do it: Drill a hole in the countertop of your mud kitchen, right next to your drop-in sink bowl. Feed the base of the faucet through the hole and secure it underneath according to the package directions.
Underneath the counter, attach the brass adapter to the water line coming from the faucet. Then, simply screw your regular garden hose into the adapter.
When your kids want to play, turn the garden hose on at the spigot (keep the pressure low so it doesn’t blast them!). They can now use the faucet handle to turn the water on and off themselves. It is a total game-changer for mud mixing and potion making!
Part 3: Stocking Your Mud Kitchen (The Fun Part!)
Now that you have the structure built, it’s time to stock it. This is where the magic happens. You want to provide tools that encourage mixing, pouring, measuring, and creating.
The best part? You don’t need to buy expensive, specialized “mud kitchen” toys. In fact, the best accessories are often the ones you already have in your house or can find for pennies at a thrift store.
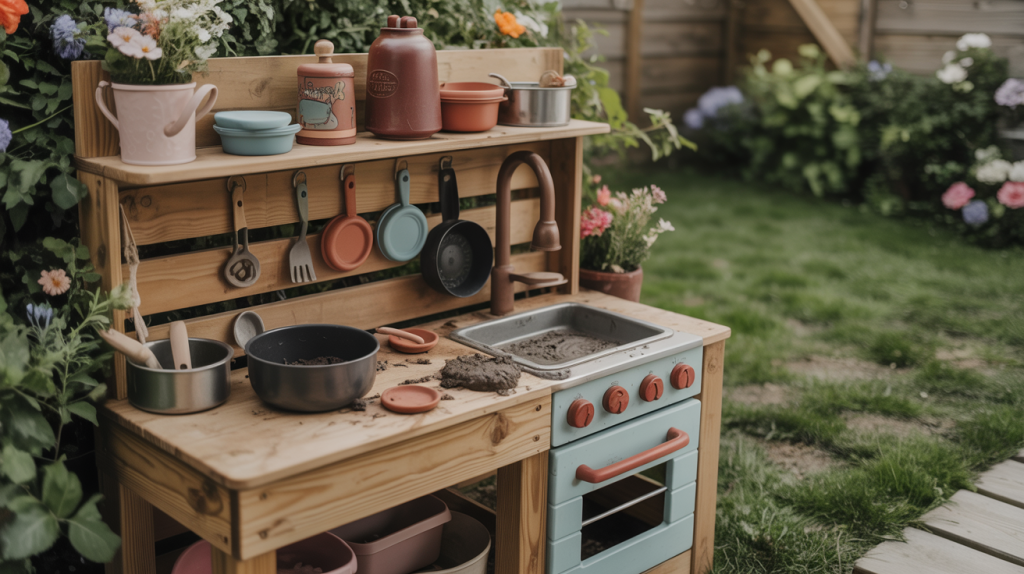
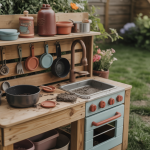
The Essentials: Pots, Pans, and Utensils
When you are stocking a mud kitchen, think about the tools you use in your own kitchen. Kids love to mimic what they see adults doing.
What to look for:
- Stainless steel pots and pans: These are durable, weather-resistant, and make a satisfying “clink” when you stir them. Thrift stores are a goldmine for these.
- Muffin tins and baking sheets: Perfect for making mud pies, sorting pebbles, or freezing “ice gems.”
- Wooden spoons and ladles: Essential for stirring thick mud and serving up “soup.”
- Whisks and potato mashers: Great for mixing water and dirt, or crushing leaves and berries.
- Measuring cups and spoons: These are fantastic for fine motor skills and early math concepts.
- A sturdy cutting board: For chopping up herbs or rolling out mud dough.
The “Ingredients”: Nature’s Pantry
A mud kitchen is only as good as its ingredients. While dirt and water are the foundation, adding a variety of natural elements takes the play to the next level.
What to provide:
- Good quality soil: If your yard doesn’t have a lot of loose dirt, buy a bag of cheap topsoil (make sure it doesn’t have added fertilizers or chemicals).
- Sand and pebbles: Different textures make for more interesting recipes.
- Pinecones, acorns, and seed pods: These are great for decorating mud cakes or adding “crunch” to a potion.
- Flower petals and leaves: Encourage your kids to forage ethically from your yard. Dandelions, clover, and fallen leaves are perfect.
- Herb clippings: Mint, lavender, rosemary, and lemon balm add an incredible sensory element to the play. The smell of crushed mint mixed with mud is surprisingly wonderful!
The Extras: Taking It to the Next Level
If you want to make your mud kitchen truly epic, add a few special touches that spark imagination.
What to add:
- A chalkboard menu: Paint a piece of scrap wood with chalkboard paint and hang it above the kitchen. Kids love writing out the “Soup of the Day.”
- Spice jars: Save your empty plastic spice jars, wash them out, and fill them with sand, crushed chalk, or dried herbs.
- A mortar and pestle: This is a fantastic tool for grinding up leaves and berries to make “fairy dust.”
- Ice cube trays or silicone molds: In the summer, freeze water with flower petals or berries inside to make beautiful ice blocks for their potions.
Part 4: Complementary DIY Play Areas
A mud kitchen is amazing on its own, but if you want to create a truly epic outdoor play space, consider adding a few complementary areas nearby. These DIY projects are easy to tackle and will keep your kids engaged for hours.
The Sensory Garden
A sensory garden is a dedicated space filled with plants that are meant to be touched, smelled, and even tasted. It is the perfect companion to a mud kitchen because it provides a constant supply of fresh “ingredients” for their recipes.
How to build it: You don’t need a massive plot of land for a sensory garden. A few large pots or a small raised bed near the mud kitchen is perfect.
What to plant:
- For smell: Lavender, mint, lemon balm, and rosemary. (Mint is incredibly invasive, so always plant it in a pot, never directly in the ground!)
- For touch: Lamb’s ear (which is incredibly soft and fuzzy), ornamental grasses (for a tickly texture), and succulents (for a smooth, rubbery feel).
- For sight: Brightly colored flowers like marigolds, zinnias, and sunflowers.
- For taste: Edible flowers like nasturtiums and pansies, or easy-to-grow veggies like cherry tomatoes and sugar snap peas.
Encourage your kids to gently harvest from the sensory garden to use in their mud kitchen creations. It teaches them about plant life cycles and respect for nature.
The Digging Pit
If your kids are constantly digging holes in your pristine lawn or flower beds, give them a dedicated space where digging is not only allowed, but encouraged. A digging pit is essentially a sandbox, but filled with dirt instead of sand.
How to build it: You can build a simple wooden frame (like a raised garden bed) or use an old plastic kiddie pool or large galvanized tub. Fill it with a mix of topsoil and play sand to keep it loose and easy to dig.
What to add:
- Sturdy metal shovels and trowels (skip the flimsy plastic ones; they break too easily).
- Toy dump trucks, excavators, and bulldozers.
- Hidden “treasures” like smooth river rocks, plastic dinosaur bones, or large seashells for them to excavate.
A digging pit is fantastic for heavy work, which helps kids regulate their sensory systems and burn off excess energy.
The Water Wall
Water play is a natural extension of mud play. A water wall is a vertical play station where kids can pour water through a series of tubes, funnels, and spinning wheels. It is mesmerizing, educational, and incredibly fun.
How to build it: You can attach a water wall directly to a fence, the side of a shed, or a piece of lattice.
What you need:
- A pegboard or a piece of wooden lattice (this makes it easy to attach and rearrange the pieces).
- Zip ties or bungee cords.
- Recycled plastic bottles, funnels, PVC pipes, and clear plastic tubing.
- A large bucket or tub at the bottom to catch the water.
How to do it: Cut the bottoms off of your plastic bottles to create funnels. Use zip ties to attach the bottles, tubes, and PVC pipes to the pegboard in a zigzag pattern, so water poured into the top funnel will cascade down through the different elements and into the bucket at the bottom.
Kids can use pitchers or cups to scoop water from the bottom bucket and pour it back into the top, learning about gravity, flow, and cause-and-effect in the process.
Part 5: Keeping It (Relatively) Clean and Safe
Okay, let’s address the elephant in the room: the mess. A mud kitchen is, by definition, muddy. But with a little bit of planning, you can keep the chaos contained and make cleanup a breeze.
Setting Boundaries
Before your kids start playing, establish clear rules about where the mud stays. For example, “Mud stays in the kitchen area,” or “No throwing mud.”
It’s also helpful to define the physical space. You can put down a layer of wood chips or pea gravel under and around the mud kitchen. This not only looks nice and defines the “play zone,” but it also prevents the area from turning into a slippery, dangerous swamp when water spills.
The Cleanup Station
Make cleanup part of the play. Set up a simple hand-washing station near the mud kitchen.
What you need:
- A large bucket or tub of clean, soapy water.
- A scrub brush or nail brush.
- An old towel hung on a hook nearby.
When playtime is over, have the kids wash their hands and their tools in the soapy water before they come inside. It teaches responsibility and saves your indoor sinks from getting clogged with dirt.
Safety First
While mud play is incredibly beneficial, there are a few safety precautions to keep in mind.
- Check your soil: If you are using dirt from your yard, make sure it hasn’t been treated with chemical fertilizers, pesticides, or weed killers. If you aren’t sure, buy a bag of organic topsoil.
- Watch for standing water: Empty any buckets, pots, or tubs of water at the end of the day to prevent mosquitoes from breeding.
- Inspect for splinters: If you built your kitchen out of wood or pallets, check it regularly for rough spots or splinters and sand them down as needed.
- Know your plants: If you are letting your kids forage for ingredients, make sure they know which plants are safe to touch and which ones to avoid (like poison ivy or thorny bushes).
Embrace the Mess
Creating an epic outdoor mud kitchen and play space is one of the best investments you can make in your kids’ childhood. It provides hours of independent, imaginative play, fosters a deep connection with nature, and gives them the sensory input their growing brains crave.
Yes, there will be dirty clothes. Yes, there will be muddy footprints on the patio. But there will also be giggles, creativity, and memories that will last a lifetime.
So, find an old dresser, grab some thrift store pots, and let them get messy. You might just find that you want to get in there and make a mud pie, too.
Have you ever built a mud kitchen for your kids? What are their favorite “ingredients” to use? Let me know in the comments below!