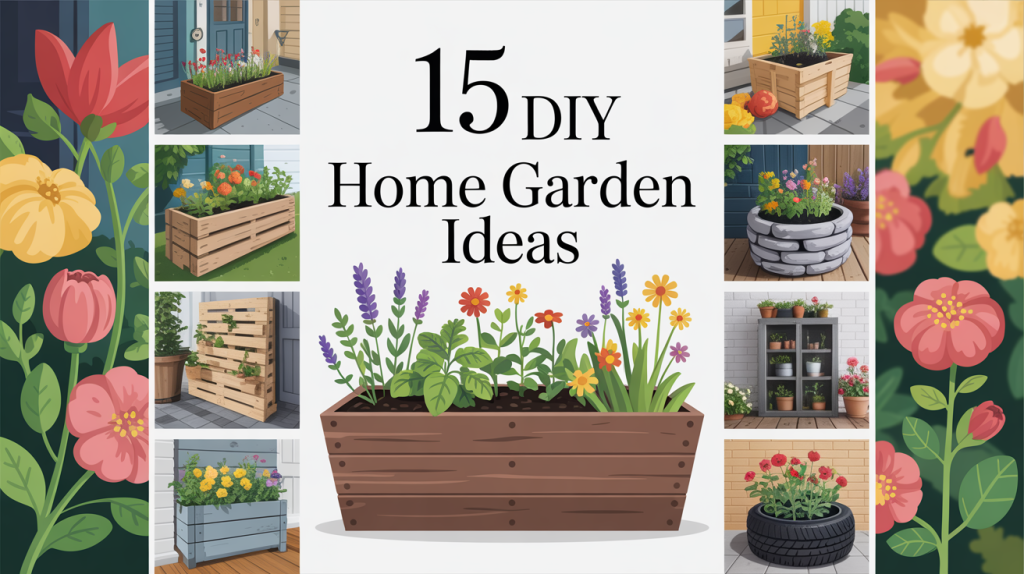
Welcome to the wonderful world of do-it-yourself (DIY) gardening! Creating a beautiful and thriving garden doesn’t have to be an expensive or daunting task. With a little creativity, some basic materials, and a bit of effort, you can transform your outdoor space into a green oasis that reflects your personal style. DIY gardening projects are not only cost-effective but also incredibly rewarding. They allow you to customize your garden to your exact needs and preferences, whether you have a sprawling backyard or a tiny balcony. This article will guide you through 15 exciting DIY home garden ideas, complete with detailed instructions, tips, and visual inspiration. From building your own raised garden beds to creating a stunning vertical succulent wall, you’ll find projects for every skill level and budget. So, roll up your sleeves, and let’s get ready to build the garden of your dreams!
1. Raised Garden Beds
Raised garden beds are a fantastic starting point for any DIY gardener. They offer numerous benefits, including better soil control, improved drainage, and easier maintenance, as you won’t have to bend down as much. Building your own raised bed is a straightforward project that can be completed in an afternoon.
Materials:
- Four 2×12 inch cedar or pine boards (cut to your desired length and width)
- Deck screws (3-inch)
- A drill
- A measuring tape and pencil
- A level
- Cardboard or newspaper (for weed suppression)
- High-quality garden soil and compost
Step-by-Step Guide:
- Cut Your Boards: Decide on the dimensions of your raised bed. A popular size is 4×8 feet, which provides ample space for a variety of plants. Cut your 2×12 inch boards to the desired lengths. You will need two boards for the length and two for the width.
- Assemble the Frame: On a flat surface, arrange the boards in a rectangular shape. Use your drill and deck screws to fasten the corners together. It’s a good idea to pre-drill the holes to prevent the wood from splitting. Use at least three screws per corner for a sturdy frame.
- Position the Bed: Choose a sunny spot in your garden for your raised bed. Clear the area of any grass or weeds. Lay down a layer of cardboard or newspaper at the bottom of the frame. This will act as a natural weed barrier and will decompose over time, adding organic matter to the soil.
- Fill with Soil: Fill the raised bed with a mixture of high-quality garden soil and compost. A 50/50 mix is a good starting point. The soil level should be a few inches below the top of the frame.
- Start Planting: Your raised garden bed is now ready for planting! You can grow a wide variety of vegetables, herbs, and flowers in your new bed. The controlled environment of a raised bed makes it easier to manage pests and diseases, ensuring a healthier and more productive garden.
Estimated Cost: $50 – $100
2. Vertical Pallet Garden
A vertical pallet garden is an ingenious solution for those with limited space. It allows you to grow a variety of plants, especially herbs and lettuces, in a compact and stylish way. This project is not only space-saving but also a great way to upcycle an old wooden pallet.
Materials:
- A wooden pallet (ensure it’s heat-treated, not chemically treated – look for the “HT” stamp)
- Landscape fabric
- A staple gun and staples
- Sandpaper
- Scissors
- Potting soil
- Your choice of plants (herbs, succulents, or annual flowers work well)
Step-by-Step Guide:
- Prepare the Pallet: Inspect the pallet for any loose nails or sharp edges. Sand down any rough spots to create a smooth surface. You can also paint or stain the pallet to match your outdoor decor.
- Create Planting Pockets: Lay the pallet flat on the ground. You will be creating planting pockets on the front-facing slats. Cut the landscape fabric into large pieces that will be folded in half to create pouches. Staple the fabric to the inside of the front and back of each slat, leaving the top open for planting. Ensure the fabric is securely stapled to hold the weight of the soil and plants.
- Fill with Soil: Carefully fill each fabric pocket with potting soil. Make sure the soil is evenly distributed and not too compacted.
- Plant Your Garden: Now for the fun part! Gently place your chosen plants into the soil pockets. You can create a beautiful arrangement with a mix of colors and textures.
- Water and Display: Water your newly planted vertical garden thoroughly. You can lean the pallet against a wall or fence, or mount it securely. Make sure it’s in a location that receives the appropriate amount of sunlight for your chosen plants.
Estimated Cost: $20 – $40
3. DIY Tiered Herb Planter
A tiered herb planter is a beautiful and functional addition to any garden or patio. It allows you to grow a variety of herbs in a compact, vertical space, making it easy to have fresh herbs right at your fingertips. This project requires some basic woodworking skills but the result is a stunning and practical planter.
Materials:
- Five 1×6 inch cedar boards (8 feet long)
- One 1×4 inch cedar board (6 feet long)
- 1 1/4-inch deck screws
- A drill
- A miter saw or circular saw
- A measuring tape and pencil
- Wood glue
- Potting soil and a selection of your favorite herbs
Step-by-Step Guide:
- Cut the Boards: Using your saw, cut the 1×6 inch boards into the following lengths: six pieces at 24 inches, six pieces at 20 inches, and six pieces at 16 inches. These will form the boxes of your planter. From the 1×4 inch board, cut four pieces at 36 inches for the legs.
- Assemble the Boxes: For each of the three planter boxes, you will use two of the cut 1×6 inch boards for the sides and two for the bottom. Apply wood glue to the edges and then secure them with deck screws. You will have three boxes of different lengths: 24, 20, and 16 inches.
- Attach the Legs: Lay two of the 36-inch leg pieces on a flat surface. Position the planter boxes between the legs, starting with the largest box at the bottom and the smallest at the top. Leave about 6 inches of space between each box. Secure the boxes to the legs using wood glue and screws.
- Add the Other Legs: Once the first two legs are attached, carefully flip the planter over and attach the other two legs in the same manner. Make sure the planter is stable and all the boxes are level.
- Drill Drainage Holes: Drill several drainage holes in the bottom of each planter box to ensure good drainage for your herbs.
- Fill and Plant: Fill each planter box with high-quality potting soil and plant your favorite herbs. You can plant a different herb in each tier, or create a themed planter with a mix of culinary or medicinal herbs.
Estimated Cost: $40 – $70
4. Upcycled Container Planters
Upcycling is a fantastic way to be both creative and environmentally friendly in your garden. Everyday items that you might otherwise throw away can be transformed into unique and charming planters. From old boots to tin cans, the possibilities are endless!
Materials:
- A variety of old containers (e.g., tin cans, plastic bottles, old boots, a broken wheelbarrow, a colander)
- A drill or a hammer and nail (for creating drainage holes)
- Primer and paint (optional, for decoration)
- Potting soil
- Your choice of plants
Step-by-Step Guide:
- Choose Your Containers: Look around your home for items that could be repurposed as planters. Be creative! Almost any container that can hold soil can be used. Just make sure it’s clean and free of any harmful residues.
- Create Drainage Holes: This is a crucial step. Most containers won’t have drainage holes, so you’ll need to create them. For plastic or thin metal containers, you can use a drill. For thicker materials, a hammer and nail might be necessary. Aim for several small holes at the bottom of the container.
- Decorate Your Planters: This is where you can let your creativity shine. You can paint your containers with bright colors, create patterns, or even decoupage them with fabric or paper. A coat of primer before painting will help the paint adhere better and last longer.
- Fill with Soil and Plant: Once your decorated containers are dry, fill them with potting soil. Choose plants that are appropriate for the size of your container. Smaller containers are great for individual herbs or succulents, while larger containers can accommodate a mix of flowers or even a small vegetable plant.
- Arrange Your Upcycled Garden: Group your upcycled planters together to create a whimsical and eclectic garden display. You can place them on your patio, hang them from a fence, or scatter them throughout your garden beds.
Estimated Cost: $10 – $30
5. Garden Trellis System
A garden trellis is an excellent way to support climbing plants like beans, peas, cucumbers, and tomatoes. It not only helps you save space by encouraging vertical growth but also improves air circulation around your plants, which can help prevent diseases. Building a simple and sturdy trellis is a rewarding DIY project.
Materials:
- Two 4×4 inch wooden posts (8 feet long)
- A roll of galvanized wire mesh or cattle panel
- Wire cutters
- A post-hole digger or shovel
- A level
- Gravel or concrete (for securing the posts)
- Staples or U-nails
Step-by-Step Guide:
- Set the Posts: Choose a location for your trellis. Dig two holes, about 2 feet deep and the same distance apart as the width of your wire mesh. Place the 4×4 inch posts in the holes and use a level to ensure they are straight. Fill the holes with gravel or concrete to secure the posts in place. If using concrete, allow it to cure for at least 24 hours.
- Attach the Wire Mesh: Unroll the wire mesh and cut it to the desired height. Stretch the mesh between the two posts and attach it using staples or U-nails. Make sure the mesh is taut to provide a sturdy support for your plants.
- Train Your Plants: As your climbing plants grow, gently guide them towards the trellis. They will naturally start to climb the mesh. You can use soft ties to help secure the plants to the trellis in the beginning.
- Variations: There are many variations of DIY trellises. You can create an A-frame trellis, a fan-shaped trellis, or even a trellis archway. The materials can also be adapted to what you have on hand. For a more rustic look, you can use sturdy branches for the posts and twine for the mesh.
Estimated Cost: $25 – $50
6. DIY Compost Bin
Composting is a fantastic way to reduce kitchen waste and create nutrient-rich soil for your garden. Building your own compost bin is a simple and effective way to start composting at home. A three-bin system is ideal, as it allows you to have compost in different stages of decomposition.
Materials:
- Four 4×4 inch wooden posts (4 feet long)
- 12 2×6 inch wooden boards (4 feet long)
- A roll of hardware cloth or chicken wire
- A staple gun and staples
- Deck screws
- A drill
Step-by-Step Guide:
- Build the Frame: Create three U-shaped sections using the 2×6 inch boards. These will form the three compartments of your compost bin. The back of each section will be 4 feet long, and the sides will be 4 feet long. Screw the boards together to create the three sections.
- Set the Posts: Dig four holes, 1 foot deep and 4 feet apart, in a row. Place the 4×4 inch posts in the holes and ensure they are level. These posts will form the corners of your compost bin.
- Attach the Sections: Attach the three U-shaped sections to the posts, with the open side facing forward. The posts will be at the corners of the three-bin system.
- Add the Wire Mesh: Line the inside of each bin with hardware cloth or chicken wire. This will help to contain the compost while still allowing for air circulation. Staple the wire mesh securely to the wooden frame.
- Start Composting: Your three-bin compost system is now ready to use. Start by adding a layer of brown materials (e.g., dried leaves, twigs, cardboard) to the first bin, followed by a layer of green materials (e.g., kitchen scraps, grass clippings). Continue to alternate layers and turn the pile regularly to aerate it. Once the first bin is full, you can start filling the second bin, allowing the first bin to decompose. By the time the third bin is full, the first bin should have produced rich, dark compost ready to be used in your garden.
Estimated Cost: $30 – $60
7. Self-Watering Planters
Self-watering planters are a game-changer for busy gardeners or those who live in hot, dry climates. They have a built-in water reservoir that provides a consistent supply of moisture to your plants, reducing the need for frequent watering. You can easily make your own self-watering planters using a few simple materials.
Materials:
- Two 5-gallon buckets
- A drill
- A short piece of PVC pipe (about 1 inch in diameter)
- A small plastic container (like a yogurt cup)
- A piece of wicking material (e.g., a strip of cotton fabric or a piece of rope)
- Potting mix
Step-by-Step Guide:
- Prepare the Buckets: Take one of the 5-gallon buckets and drill several small holes in the bottom. This will be the inner bucket.
- Create the Water Reservoir: The second bucket will serve as the water reservoir. Place the inner bucket inside the reservoir bucket. There should be a gap of a few inches between the bottoms of the two buckets.
- Make the Wicking Chamber: Drill several holes in the small plastic container. This will be your wicking chamber. Place it in the center of the inner bucket.
- Install the Watering Pipe: Cut a hole in the side of the inner bucket, near the top, large enough to fit the PVC pipe. Insert the PVC pipe through the hole, so that it extends down into the water reservoir. This pipe will be used to fill the reservoir.
- Add the Wicking Material: Thread the wicking material through the holes in the wicking chamber. The wicking material should be long enough to reach the bottom of the water reservoir and also extend up into the potting mix.
- Fill and Plant: Fill the inner bucket with potting mix, making sure the wicking material is distributed throughout the soil. Plant your chosen plant in the planter. Water the plant from the top for the first time to help settle the soil.
- Fill the Reservoir: Fill the water reservoir through the PVC pipe until water starts to come out of the overflow hole you drilled in the side of the reservoir bucket. The wicking material will draw water up from the reservoir as the soil dries out, providing a constant supply of moisture to your plant.
Estimated Cost: $15 – $35
8. Garden Path with Stepping Stones
A charming garden path not only adds beauty and structure to your garden but also provides a practical way to navigate through your plants without compacting the soil. Creating your own stepping stones is a fun and creative project that allows you to personalize your garden path.
Materials:
- Quick-set concrete mix
- A mixing tub or wheelbarrow
- A shovel or trowel
- Molds for your stepping stones (you can use cake pans, plastic containers, or purchase pre-made molds)
- Decorative elements (e.g., sea glass, pebbles, mosaic tiles, leaves)
- Cooking spray or petroleum jelly (to coat the molds)
Step-by-Step Guide:
- Prepare the Molds: Coat the inside of your chosen molds with cooking spray or petroleum jelly. This will make it easier to remove the stepping stones once they have cured.
- Mix the Concrete: In your mixing tub, combine the quick-set concrete mix with water according to the package instructions. Mix until you have a smooth, thick consistency, similar to brownie batter.
- Pour the Concrete: Carefully pour the concrete mix into the prepared molds. Fill each mold to the top and gently tap the sides to release any air bubbles.
- Add Decorative Elements: This is the creative part! Gently press your decorative elements into the surface of the wet concrete. You can create patterns, spell out words, or make a mosaic design. If you are using leaves, press them firmly into the concrete to create an impression, and then carefully remove them before the concrete sets.
- Cure the Stepping Stones: Let the stepping stones cure for at least 24-48 hours, or as directed on the concrete mix package. They should be hard and dry to the touch before you attempt to remove them from the molds.
- Install Your Path: Once your stepping stones are fully cured, you can lay them out in your garden to create a path. You can either place them directly on the ground or dig shallow holes for each stone to create a more stable and level path. Fill in the gaps between the stones with mulch, gravel, or ground cover plants.
Estimated Cost: $40 – $80
9. DIY Garden Fountain
A garden fountain can bring a sense of tranquility and elegance to your outdoor space. The gentle sound of trickling water is both relaxing and can help to mask unwanted noise. While a store-bought fountain can be expensive, you can create your own beautiful and affordable version using a few simple materials.
Materials:
- Two or three terracotta pots of varying sizes
- A small submersible water pump
- A length of clear vinyl tubing that fits the pump outlet
- A waterproof sealant (like silicone caulk)
- A drill with a masonry bit
- Decorative river rocks or pebbles
Step-by-Step Guide:
- Prepare the Pots: The largest pot will be the base of your fountain. The smaller pots will be stacked on top. You will need to drill a hole in the bottom of each of the smaller pots, large enough to accommodate the vinyl tubing.
- Seal the Drainage Hole of the Base Pot: The largest pot needs to hold water, so you will need to seal its drainage hole. You can do this with a plug and waterproof sealant.
- Assemble the Fountain: Place the submersible pump in the bottom of the largest pot. Thread the vinyl tubing onto the pump outlet and then feed it up through the holes in the smaller pots. Stack the smaller pots on top of the largest pot, with the tubing running through the center.
- Secure the Pots: To create a stable fountain, you can use silicone caulk to secure the pots to each other. Apply a bead of caulk around the base of each pot before stacking it.
- Add Decorative Rocks: Fill the top pot and the base pot with decorative river rocks. This will help to hide the pump and tubing and also create a more natural look.
- Fill with Water and Turn On: Fill the fountain with water, making sure the pump is fully submerged. Plug in the pump and watch your beautiful DIY fountain come to life! You may need to adjust the position of the tubing to get the desired water flow.
Important Safety Note: Always use a GFCI (Ground Fault Circuit Interrupter) outlet when working with water and electricity to prevent the risk of electric shock.
Estimated Cost: $60 – $120
10. Raised Bed with Built-in Seating
This project combines the benefits of a raised garden bed with the convenience of built-in seating, creating a functional and stylish focal point for your garden. It’s the perfect spot to sit and enjoy the fruits of your labor, and the bench top can even double as a handy work surface.
Materials:
- Pressure-treated lumber (2×6 inch boards for the bed, 2×4 inch boards for the bench)
- Deck screws
- A drill
- A miter saw or circular saw
- A measuring tape and pencil
- A level
- Hinges (if you want the bench to have a storage compartment)
Step-by-Step Guide:
- Build the Raised Bed: Construct a raised garden bed to your desired dimensions using the 2×6 inch boards. A height of about 18-24 inches is ideal for comfortable seating.
- Build the Bench Frame: Using the 2×4 inch boards, build a frame for your bench on top of one of the sides of the raised bed. The frame should be the same length as the side of the bed and about 18 inches wide.
- Add the Bench Top: Cut several 2×4 inch boards to the length of the bench frame. These will form the bench top. Attach them to the frame with deck screws, leaving a small gap between each board for drainage.
- Optional Storage: If you want to create a storage compartment under the bench, you can attach the bench top to the frame with hinges. This will allow you to lift the bench top and store your gardening tools and supplies inside.
- Fill and Plant: Fill the raised bed with soil and plant your favorite flowers, vegetables, or herbs. The built-in bench provides a comfortable place to sit while you are planting, weeding, or simply admiring your garden.
Estimated Cost: $80 – $150
11. Vertical Succulent Wall
A vertical succulent wall is a stunning piece of living art that can be displayed both indoors and outdoors. Succulents are low-maintenance plants that come in a wide variety of colors, shapes, and textures, making them perfect for creating a beautiful and long-lasting vertical garden.
Materials:
- A shallow wooden box or a picture frame
- A piece of plywood for the back of the frame
- A roll of hardware cloth or chicken wire
- A staple gun and staples
- Wire cutters
- Potting mix specifically for succulents
- A variety of succulent cuttings
Step-by-Step Guide:
- Prepare the Frame: If you are using a picture frame, remove the glass and backing. Attach the piece of plywood to the back of the frame to create a shallow box.
- Attach the Wire Mesh: Cut a piece of hardware cloth or chicken wire to the same size as the frame. Stretch it over the front of the frame and staple it securely in place.
- Fill with Soil: Fill the box with succulent potting mix through the wire mesh. The mesh will hold the soil in place.
- Plant the Succulents: Take your succulent cuttings and poke the stems through the wire mesh and into the soil. Arrange the succulents in a pattern or a random design to create a beautiful and textured display.
- Let it Root: Lay the succulent wall flat in a sunny spot for a few weeks to allow the succulents to root. Water it sparingly during this time.
- Hang Your Living Art: Once the succulents are well-rooted, you can hang your vertical succulent wall on a wall or fence. Water it every few weeks by taking it down and laying it flat to water, or by using a spray bottle to mist the plants.
Estimated Cost: $30 – $60
12. DIY Garden Tool Organizer
A well-organized tool shed is a happy tool shed! This simple and effective DIY garden tool organizer will help you keep all your essential gardening tools in one place, making them easy to find and access. It’s a great way to upcycle an old pallet and bring some order to your gardening space.
Materials:
- A wooden pallet
- A variety of hooks, knobs, and small buckets
- Screws and a drill
- Paint or stain (optional)
Step-by-Step Guide:
- Prepare the Pallet: Clean the pallet and sand down any rough spots. You can paint or stain it to match your shed or fence.
- Attach Hooks and Holders: Decide on the layout of your tool organizer. Attach a variety of hooks, knobs, and small buckets to the pallet to hold your different tools. You can use large hooks for shovels and rakes, smaller hooks for hand tools, and buckets for smaller items like gloves and seed packets.
- Mount the Organizer: Mount the pallet securely to a wall in your shed or garage, or to a fence in your garden. Make sure it is at a comfortable height for you to reach your tools.
- Organize Your Tools: Hang your tools on the hooks and place your smaller items in the buckets. You can also add labels to your organizer to make it even easier to find what you need.
Estimated Cost: $20 – $40
13. Butterfly Garden Station
Attracting butterflies to your garden is a wonderful way to support local pollinators and add a touch of magic to your outdoor space. A butterfly garden station provides a place for butterflies to rest, drink, and feed. It’s a simple and rewarding project that the whole family can enjoy.
Materials:
- A shallow dish or a birdbath
- A variety of flat stones or pebbles
- A small dish for fruit
- A selection of butterfly-friendly native plants
Step-by-Step Guide:
- Create a Puddling Area: Butterflies are attracted to shallow puddles of water where they can drink and absorb minerals. Fill a shallow dish or birdbath with sand or gravel and add water until it is just damp. Arrange some flat stones in the dish to provide a landing spot for the butterflies.
- Provide a Food Source: In addition to nectar from flowers, butterflies also enjoy feeding on overripe fruit. Place a small dish near your puddling area and fill it with slices of overripe banana, orange, or watermelon.
- Plant a Butterfly Buffet: Plant a variety of native, nectar-rich flowers around your butterfly station. Butterflies are particularly attracted to brightly colored flowers like coneflowers, black-eyed Susans, and milkweed. Planting in clusters will make it easier for the butterflies to find the flowers.
- Choose a Sunny Spot: Place your butterfly garden station in a sunny and sheltered spot in your garden. Butterflies need sunlight to warm their wings, and they will appreciate a spot that is protected from strong winds.
Estimated Cost: $25 – $50
14. DIY Greenhouse Mini Tunnel
A DIY greenhouse mini tunnel, also known as a hoop house or cloche, is an excellent way to extend your growing season. It protects your plants from frost, wind, and pests, allowing you to start planting earlier in the spring and continue harvesting later in the fall. This is a simple and affordable project that can be adapted to fit any size garden bed.
Materials:
- PVC pipes (1/2 inch or 3/4 inch diameter)
- PVC pipe cutter
- Rebar stakes (2 feet long)
- A hammer
- Greenhouse plastic or heavy-duty plastic sheeting
- Clamps or clips
Step-by-Step Guide:
- Install the Rebar Stakes: Hammer the rebar stakes into the ground on either side of your garden bed, about 2-3 feet apart. The stakes should be inserted about 1 foot into the ground, leaving 1 foot exposed.
- Create the Hoops: Cut the PVC pipes to the desired length. The length will depend on the width of your garden bed and the desired height of your tunnel. A good rule of thumb is to make the pipes about twice the width of your bed.
- Assemble the Tunnel: Bend the PVC pipes into hoops and place the ends over the rebar stakes. The rebar will hold the PVC pipes securely in place, creating the frame of your tunnel.
- Cover with Plastic: Drape the greenhouse plastic or heavy-duty plastic sheeting over the PVC hoops. Make sure the plastic is long enough to cover the entire tunnel and has some extra length on the sides to secure it.
- Secure the Plastic: Use clamps or clips to secure the plastic to the PVC hoops. You can also weigh down the sides of the plastic with rocks or bricks to keep it in place.
- Ventilation: It is important to provide ventilation for your mini greenhouse, especially on sunny days, to prevent your plants from overheating. You can lift the sides of the plastic or create vents that can be opened and closed.
Estimated Cost: $35 – $70
15. Garden Lighting with Solar Stakes
Garden lighting can transform your outdoor space at night, creating a magical and inviting atmosphere. Solar-powered lights are an easy and eco-friendly way to illuminate your garden, and you can create your own unique and beautiful solar lights using mason jars and solar stake lights.
Materials:
- Mason jars
- Solar stake lights (the kind with a removable solar panel on top)
- Decorative materials (e.g., frosted glass spray paint, sea glass, pebbles, fairy lights)
- Strong glue or silicone caulk
Step-by-Step Guide:
- Prepare the Jars: Clean the mason jars and decorate them as you wish. You can spray them with frosted glass paint for a soft, diffused light, or fill them with decorative materials like sea glass or pebbles.
- Disassemble the Solar Lights: Carefully remove the solar panel and light from the top of the stake. You should be left with a small, self-contained solar light unit.
- Attach the Solar Light to the Jar Lid: Glue the solar light unit to the underside of the mason jar lid. Make sure the solar panel is facing up, so it can collect sunlight.
- Assemble the Solar Jars: Screw the lid onto the mason jar. Your DIY solar light is now complete!
- Charge and Display: Place your solar jars in a sunny spot in your garden to charge during the day. At night, they will automatically turn on, casting a beautiful and magical glow in your garden. You can hang them from trees, place them on tables, or line a garden path with them.
Estimated Cost: $20 – $45
Conclusion
Embarking on a DIY gardening journey is a fulfilling experience that brings both beauty and functionality to your outdoor space. From the simple satisfaction of growing your own herbs in a tiered planter to the pride of constructing a raised bed with your own hands, these projects offer a chance to connect with nature and unleash your creativity. We hope these 15 DIY home garden ideas have inspired you to get started. Remember to start small, choose projects that match your skill level and budget, and most importantly, have fun! Your garden is a reflection of you, so don’t be afraid to experiment and make it your own. Happy gardening!
Additional Resources
For more detailed instructions, video tutorials, and a wealth of gardening knowledge, we recommend exploring the following resources:
- Instructables: A fantastic website with a vast collection of DIY projects, including many for the garden. https://www.instructables.com/
- The Old Farmer’s Almanac: A trusted source for gardening tips, planting calendars, and weather forecasts. https://www.almanac.com/
- Garden Answer: A popular YouTube channel with beautiful and inspiring gardening videos. https://www.youtube.com/c/gardenanswer