Transform Your Studio Bedroom: Easy Upgrades for a Chic, Cozy Space

Living in a studio apartment means making the most of every inch — especially in your bedroom nook. Whether you’re renting or own, tiny spaces challenge us to blend style with smart solutions, turning what might feel cramped into a relaxing oasis. With a few tried-and-true hacks, you can refresh your studio’s sleeping area without a major overhaul or big budget.

From clever storage ideas to impact-making decor touches, these upgrades will help your bedroom feel thoughtfully designed and inviting. Best of all, many of these changes can be completed in just a weekend, so you’ll enjoy a fresh, functional space faster than you might expect.

1. Craft a Stylish Headboard Using Peel-and-Stick Wallpaper
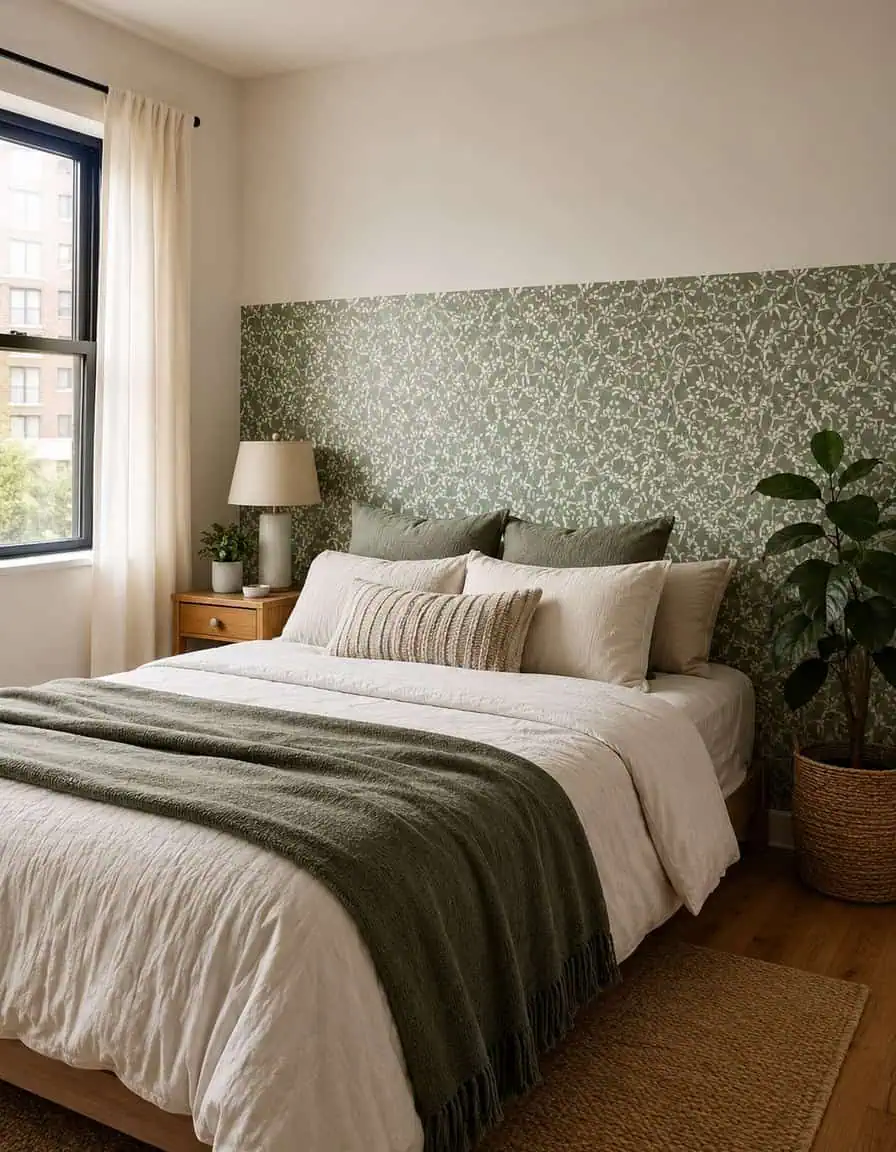
Craft a Stylish Headboard Using Peel-and-Stick Wallpaper

Skip the expense and bulk of a traditional headboard by designing your own with peel-and-stick wallpaper. This simple trick visually anchors your bed and brings instant personality to your bedroom wall. By covering a measured rectangle just wider than your bed and extending halfway up the wall, you create a custom, renter-friendly focal point that’s easy to adjust or remove.

Key Design Elements

  • Measure an area slightly wider than your mattress for perfect proportions
  • Apply peel-and-stick wallpaper halfway up the wall behind the bed
  • Easily peel off when it’s time to move

Pro Tip: Go for bold geometric prints or lush botanicals to create a headboard that feels curated and adds real design interest.

2. Add a Floating Shelf Above Your Bed for Practical Style
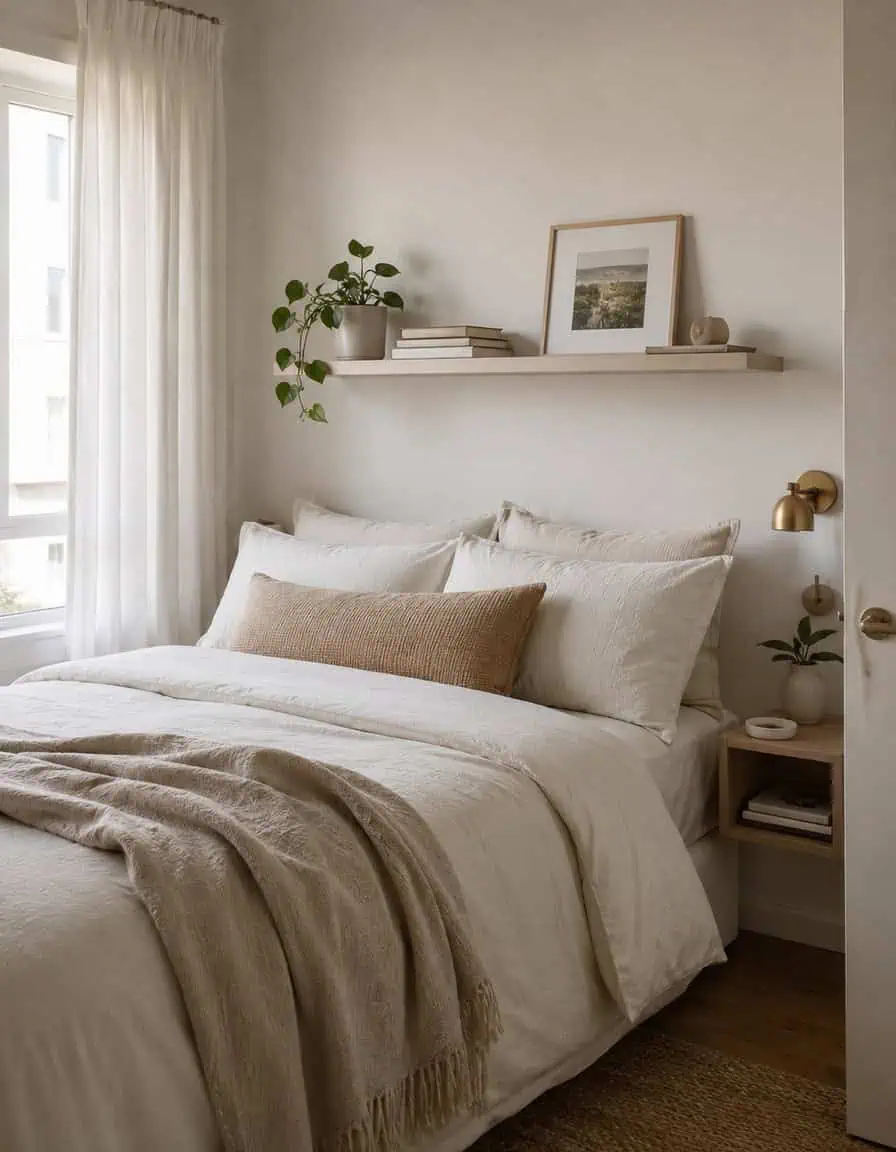
Add a Floating Shelf Above Your Bed for Practical Style

No room for a bulky nightstand? Elevate your space by installing a floating shelf above the bed. It provides a perfect perch for a small plant, your favorite book, and a framed photo — keeping essentials close without overwhelming your floor space. Lightweight acrylic or picture ledges mounted with strong adhesive strips are ideal when drilling isn’t an option.

Key Design Elements

  • Install a floating shelf over the headboard area to restore bedside function
  • Use heavy-duty adhesive strips if you can’t drill into studs
  • Style with a plant, book, and a small framed photo for balance

Pro Tip: Limit decor to three items maximum to keep the shelf tidy and visually appealing.

3. Elevate Your Furniture with Fresh Hardware Swaps
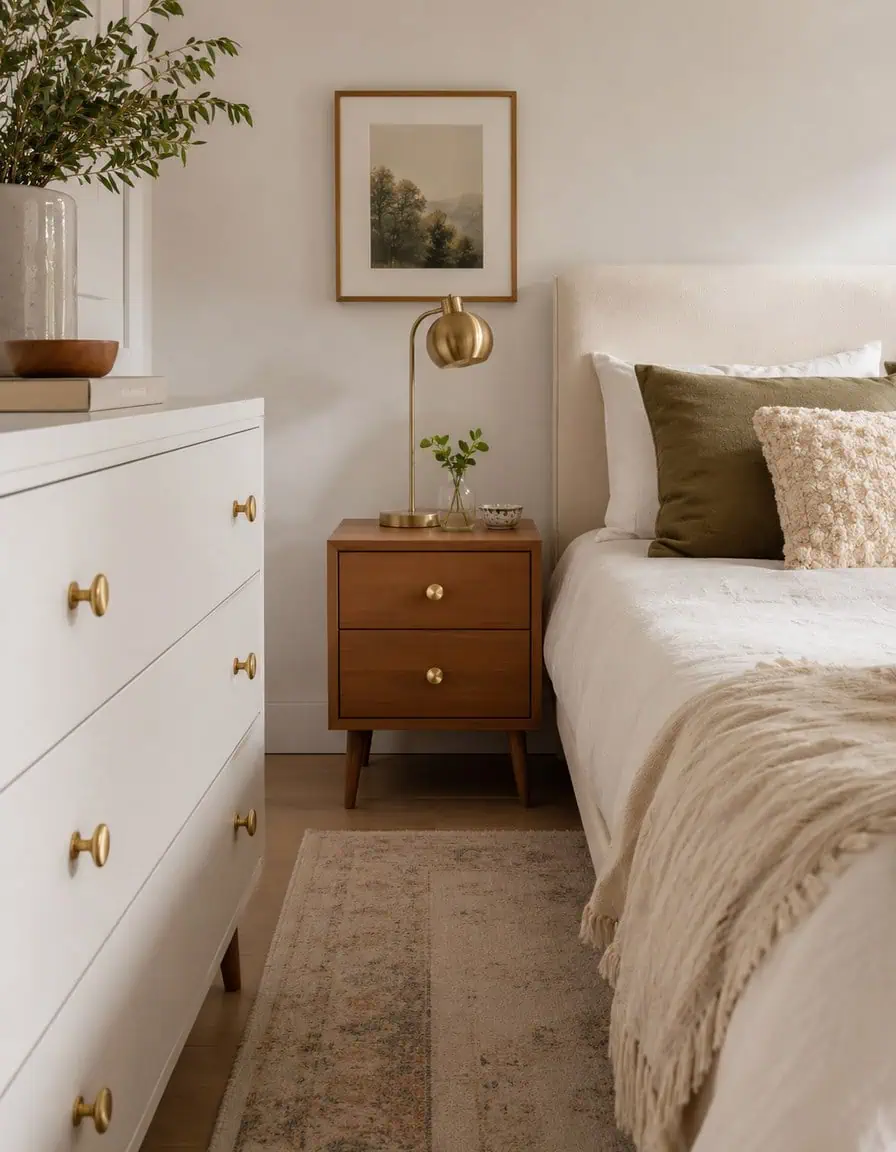
Elevate Your Furniture with Fresh Hardware Swaps

Updating drawer and cabinet handles is the quickest way to upgrade any dresser or nightstand, especially when working with budget or thrifted finds. Swapping out plain knobs for sleek brass pulls, matte black handles, or playful ceramic knobs transforms basic pieces into stylish furniture that complements your overall design.

Key Design Elements

  • Remove generic knobs from inexpensive or secondhand furniture
  • Replace with trendy metal or ceramic hardware for instant upgrade
  • Complete in under 10 minutes for less than $30

Pro Tip: Choose a single metal finish for all hardware to create a polished, cohesive look throughout your space.

4. Install Plug-In Wall Sconces for Sleek, Hotel-Worthy Lighting
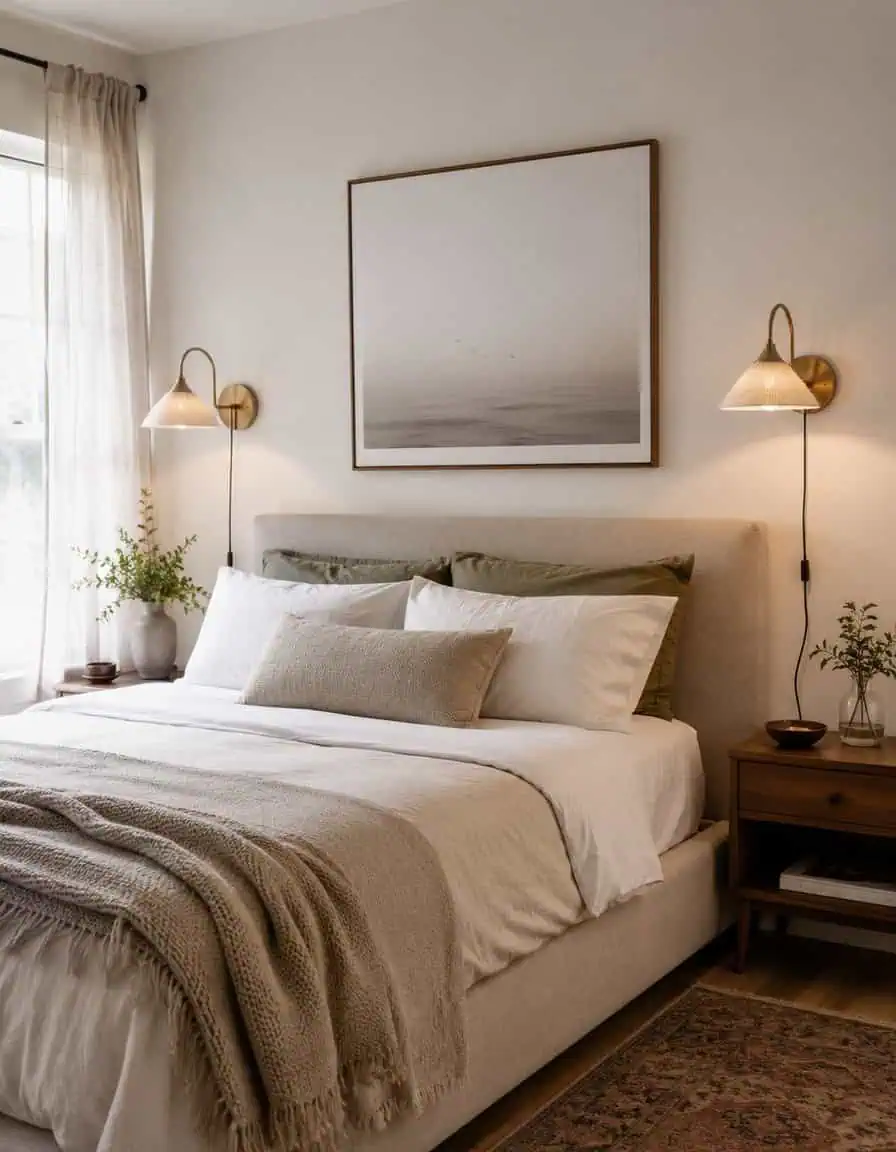
Install Plug-In Wall Sconces for Sleek, Hotel-Worthy Lighting

Upgrade your bedroom lighting without rewiring by adding plug-in wall sconces on either side of your bed. These fixtures clear clutter off your nightstands and deliver chic, boutique vibes to your studio. Simply mount them so cords can elegantly drape to nearby outlets — no electrician needed!

Key Design Elements

  • Mount one wall sconce on each side to frame the bed
  • Allow cords to hang neatly to the nearest power source
  • Open up nightstand space while adding sophisticated ambiance

Pro Tip: Use cord covers or fabric sleeves to make wiring look purposeful and neat rather than messy.

5. Swap Out Harsh Overhead Lights for Warm, Stylish Fixtures
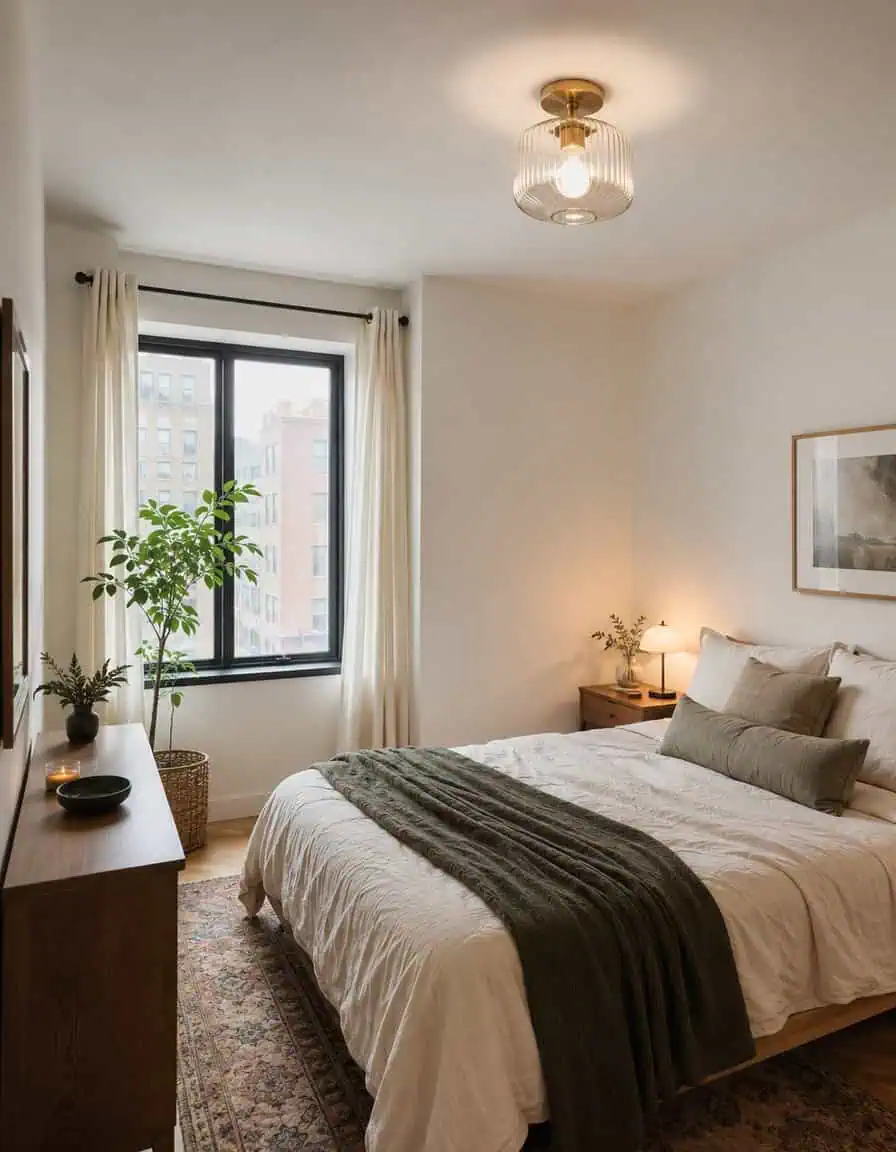
Swap Out Harsh Overhead Lights for Warm, Stylish Fixtures

Harsh ceiling lights can drain the warmth from your bedroom instantly. With some basic DIY skills, removing the typical landlord-issued fixture and replacing it with an affordable pendant or flush mount can dramatically soften and elevate your space. Don’t forget to save the original fixture so you can reinstall it before your lease ends.

Key Design Elements

  • Turn off power at the breaker box before working on fixtures
  • Replace with a stylish pendant or flush mount ceiling light
  • Keep the original light stored safely for easy reinstallation

Pro Tip: Choose a warm-color bulb around 2700K to create a cozy, inviting atmosphere.

6. Divide Your Studio with Soaring Floor-to-Ceiling Curtains
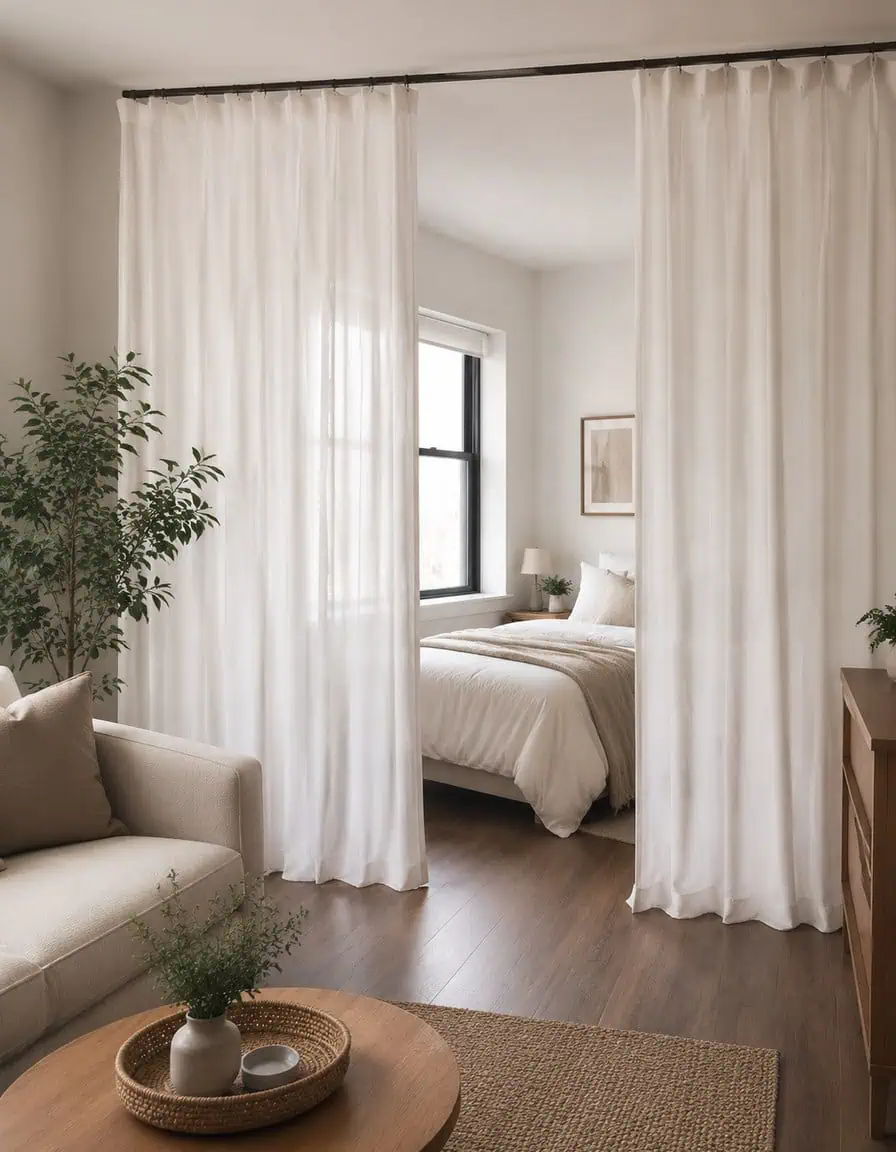
Divide Your Studio with Soaring Floor-to-Ceiling Curtains

Want to create a distinct bedroom zone without heavy walls? Use floor-to-ceiling curtains as an instant room divider. Mounted on a heavy-duty tension rod or lightweight curtain track, sheerer fabrics maintain the brightness while visually separating your sleep area from the rest of the studio.

Key Design Elements

  • Install a sturdy tension rod or use adhesive ceiling hooks for support
  • Opt for sheer curtains to keep natural light flowing throughout
  • Create a clear bedroom boundary without the bulkiness of real walls

Pro Tip: Select curtains twice the width of the rod to create soft, luxurious gathers.

7. Make an Open Closet with a Tension Rod and Coordinated Hangers
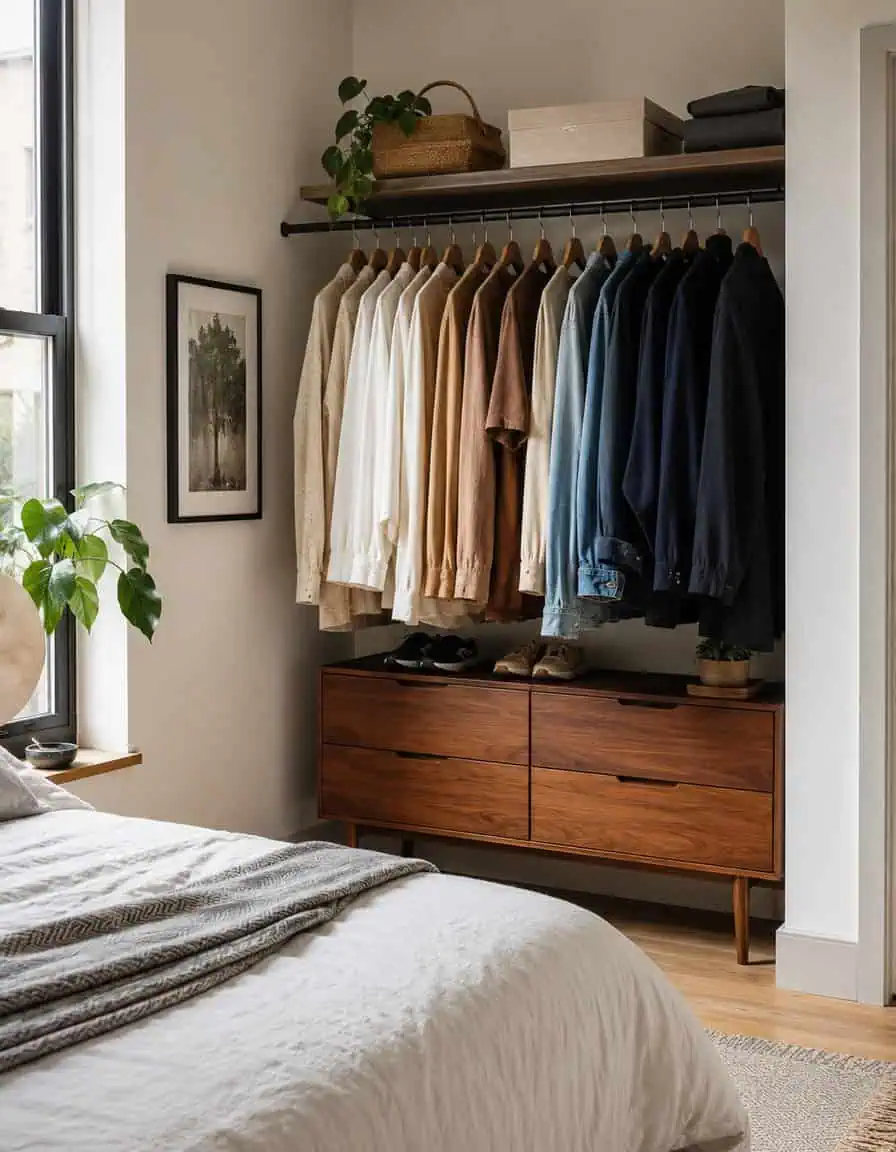
Make an Open Closet with a Tension Rod and Coordinated Hangers

If your studio lacks a traditional closet, an exposed wardrobe can be both functional and stylish. Find a corner or alcove, secure a heavy-duty tension rod, and hang your favorite clothes on matching wooden or velvet hangers. Adding a low dresser or shoe rack below keeps everything neat and accessible.

Key Design Elements

  • Choose a dedicated alcove or corner for your open wardrobe setup
  • Use matching hangers for a polished, cohesive wardrobe display
  • Incorporate a low dresser or shoe rack underneath for extra storage

Pro Tip: Organize clothes by color to create a curated look that feels intentional rather than cluttered.

8. Conceal Underbed Storage with Sleek Baskets or a Clean Bed Skirt
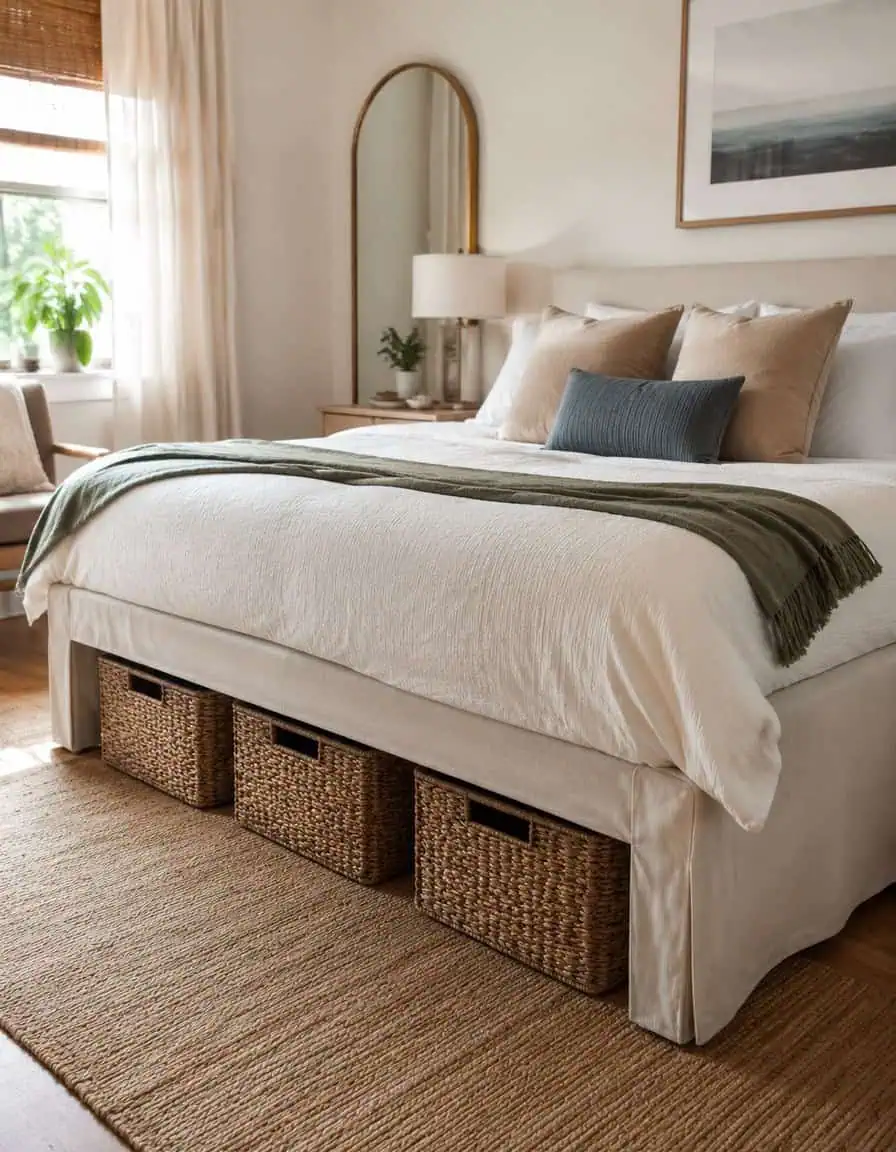
Conceal Underbed Storage with Sleek Baskets or a Clean Bed Skirt

Storing essentials under your bed is a must in a studio, but messy plastic bins can detract from your space. Instead, opt for matching woven or fabric baskets for a tidy, designed look. If your bed frame supports it, a crisp, tailored bed skirt offers complete concealment and a polished finish.

Key Design Elements

  • Choose matching woven or fabric baskets to create a uniform look
  • Use a tailored bed skirt with a straight drop to hide everything beneath
  • Avoid ruffled styles that tend to look outdated or messy

Pro Tip: Label baskets on the inside so you can find items easily without pulling everything out.

9. Create a Space-Saving Nightstand with a Wall-Mounted Floating Drawer

Create a Space-Saving Nightstand with a Wall-Mounted Floating Drawer

When floor space is at a premium, a traditional nightstand might not fit comfortably. Instead, mount a floating drawer next to your bed for a compact surface to rest your phone and stash chargers or small essentials. This clever setup keeps your floor clear while maintaining bedside convenience.

Key Design Elements

  • Attach a slim floating drawer directly to the wall beside your bed
  • Keep chargers and other small items inside the drawer, hidden from view
  • Takes up no floor space, freeing up your walkway

Pro Tip: Check out IKEA’s EKET or SEKTION series for affordable, customizable floating drawer options.

10. Upgrade Your IKEA Kallax with Chic Legs and Storage Baskets

Upgrade Your IKEA Kallax with Chic Legs and Storage Baskets

The IKEA Kallax is a studio staple, often doubling as a room divider or dresser. You can instantly elevate its look by attaching wooden or brass legs with mounting plates. Filling the cubbies with coordinated textured baskets keeps clutter out of sight and adds a designer finish to the piece.

Key Design Elements

  • Screw in stylish wooden or brass legs with mounting plates for custom flair
  • Fill cubes with matching woven or fabric baskets for tidy storage
  • Use as a multi-functional piece to separate spaces or store clothes

Pro Tip: Paint the interior of each cube a contrasting color before adding baskets to highlight your storage stylishly.

11. Refresh Your Bedding with Linen Textures and Plush Shams

Refresh Your Bedding with Linen Textures and Plush Shams

Since your bed often dominates a studio bedroom, styling your bedding is crucial. A textured linen or faux-linen duvet cover looks effortlessly chic, especially because it embraces natural wrinkles. Adding two large Euro shams behind your sleeping pillows instantly ups the cozy factor, making your bed feel layered and inviting.

Key Design Elements

  • Select a linen or faux-linen duvet that looks good in casual, lived-in style
  • Add two large Euro shams behind your regular pillows for dimension
  • Keep bedding colors simple—stick to two or three harmonious tones

Pro Tip: Finish with a chunky knit throw at the foot of the bed for extra texture without overwhelming the look.

12. Build a Vertical Gallery Wall Using Nail-Free Command Strips

Build a Vertical Gallery Wall Using Nail-Free Command Strips

Make your ceilings feel taller and your walls more interesting by curating a gallery wall that stretches from floor to ceiling. Use thrifted frames, postcards, and budget-friendly prints arranged on the floor first to plan the layout. Then, secure each piece with Command strips to avoid holes and enable easy rearranging.

Key Design Elements

  • Test your layout extensively on the floor before hanging
  • Use Command picture-hanging strips for damage-free mounting
  • Extend art from baseboard up to the ceiling to visually enlarge the room

Pro Tip: Mix frames of varying sizes and finishes — from gold to black to natural wood — for an eclectic, museum-worthy ambiance.

13. Lean a Large Thrifted Mirror to Amplify Light and Space

Lean a Large Thrifted Mirror to Amplify Light and Space

Natural light is precious in studios, so maximize it with a big mirror. Score a sizable mirror at a thrift store or flea market, and refresh the frame with spray paint if needed. Position it leaning opposite your main window to reflect and multiply daylight, instantly brightening and visually expanding your room.

Key Design Elements

  • Find an oversized mirror secondhand for budget-friendly elegance
  • Spray paint dated frames black or gold for a fresh look
  • Lean the mirror across from a window to bounce natural light effectively

Pro Tip: Angle your mirror slightly backward so it reflects the ceiling and lends a sense of added height.

14. Add Vertical Drama with Tall Faux or Real Plants

Add Vertical Drama with Tall Faux or Real Plants

Studio rooms can feel bottom-heavy when all furniture sits close to the floor. Balance it out by bringing in tall plants like olive trees or bird of paradise. If natural light or plant care is a challenge, invest in realistic faux options tucked into woven baskets — the results are just as chic and add height and warmth to your space.

Key Design Elements

  • Choose tall statement plants, real or faux, to draw the eye upward
  • Use faux olive trees or bird of paradise for easy, low-light greenery
  • Place plants in woven baskets for a natural, polished finish

Pro Tip: Corner placement fills empty space and naturally directs attention toward your ceiling’s height.

15. Define Your Bed Zone with a Painted or Peel-and-Stick Arch

Define Your Bed Zone with a Painted or Peel-and-Stick Arch

A large arch painted or applied behind your bed creates an instant visual anchor, separating the sleeping area from the rest of the studio. If painting isn’t an option, peel-and-stick vinyl arches are a renter-friendly alternative that provide the same bold statement without damage. Opt for earthy or muted tones for a sophisticated, modern touch.

Key Design Elements

  • Paint a large arch behind your bed for a dedicated bedroom backdrop
  • Use removable peel-and-stick vinyl arches if painting is prohibited
  • Choose muted earth tones for an elegant, calming effect

Pro Tip: Try a half-arch starting from the floor on one side curving over the bed for asymmetrical drama.

16. Layer a Textured Rug Over Unsightly Apartment Carpet

Layer a Textured Rug Over Unsightly Apartment Carpet

If you’re stuck with bland, beige apartment carpeting, don’t despair — layer a large, stylish area rug over it to define your bedroom zone. A flat-weave rug under the bottom two-thirds of your bed helps disguise the carpet and adds warmth and pattern instantly. It’s an inexpensive way to bring personality and comfort underfoot.

Key Design Elements

  • Pick a large, flat-weave rug for ease of layering and cleaning
  • Position the rug beneath most of your bed to anchor the space
  • Hide tired carpet while adding cozy texture and color

Pro Tip: Use double-sided carpet tape around edges to keep the rug securely in place and prevent bunching.

17. Refresh Your Vanity or Sink Area with Peel-and-Stick Tiles

Refresh Your Vanity or Sink Area with Peel-and-Stick Tiles

If your vanity or sink area is visible in your studio bedroom, a quick facelift with peel-and-stick tiles can make a big impact. Whether subway style or geometric patterns, these tiles simply cut with scissors and stick over old surfaces, creating a fresh and modern focal point without significant time or effort.

Key Design Elements

  • Cut peel-and-stick tile sheets to fit your vanity or backsplash area
  • Apply directly over existing backsplash or wall surfaces
  • Complete the update in just a couple of hours for a striking transformation

Pro Tip: Press tiles firmly with a squeegee or credit card to eliminate air bubbles and ensure a smooth finish.

Conclusion

Refreshing your studio bedroom doesn’t require a major renovation or a huge budget. These practical upgrades blend style with functionality, helping you carve out a cozy, sophisticated sanctuary in one of the smallest spaces you’ll call home. With thoughtful tweaks like clever storage, layered textures, and lighting that feels intentional, you can shape a bedroom nook that’s both beautiful and inviting.

Treat your studio like a blank canvas where each piece and detail works double-duty — creating comfort and style without crowding your space. With just a weekend and some creative energy, you’ll wake up every day feeling proud of the space you crafted.

Leave a Reply

Your email address will not be published. Required fields are marked *