21 Insanely Easy DIY Home Decor Projects You Need to Try Now to Transform Every Room on a Budget

Transforming your living space with personal, handcrafted touches brings a unique sense of pride and warmth that no store-bought item can match. When you create your own home decor, every piece tells a story—one of creativity, effort, and thoughtful design tailored specifically to your lifestyle and tastes. Whether it’s a subtle accent or a bold centerpiece, DIY projects offer an opportunity to infuse your rooms with personality and charm without the need for specialized skills or extensive time commitments.

You don’t need a weekend-long renovation or a workshop full of tools to get started. Many rewarding home decor ideas can be completed in just a few hours with simple materials found at your local craft or hardware store. From enhancing your kitchen’s ambiance to refreshing your bedroom’s vibe or adding character to your entryway, these 21 carefully curated projects are designed to be approachable and enjoyable for beginners. Ready to roll up your sleeves? Let’s dive into creative ways to make every corner of your home distinctly yours.

1. Elevate Your Space with Elegant Framed Botanical Artwork
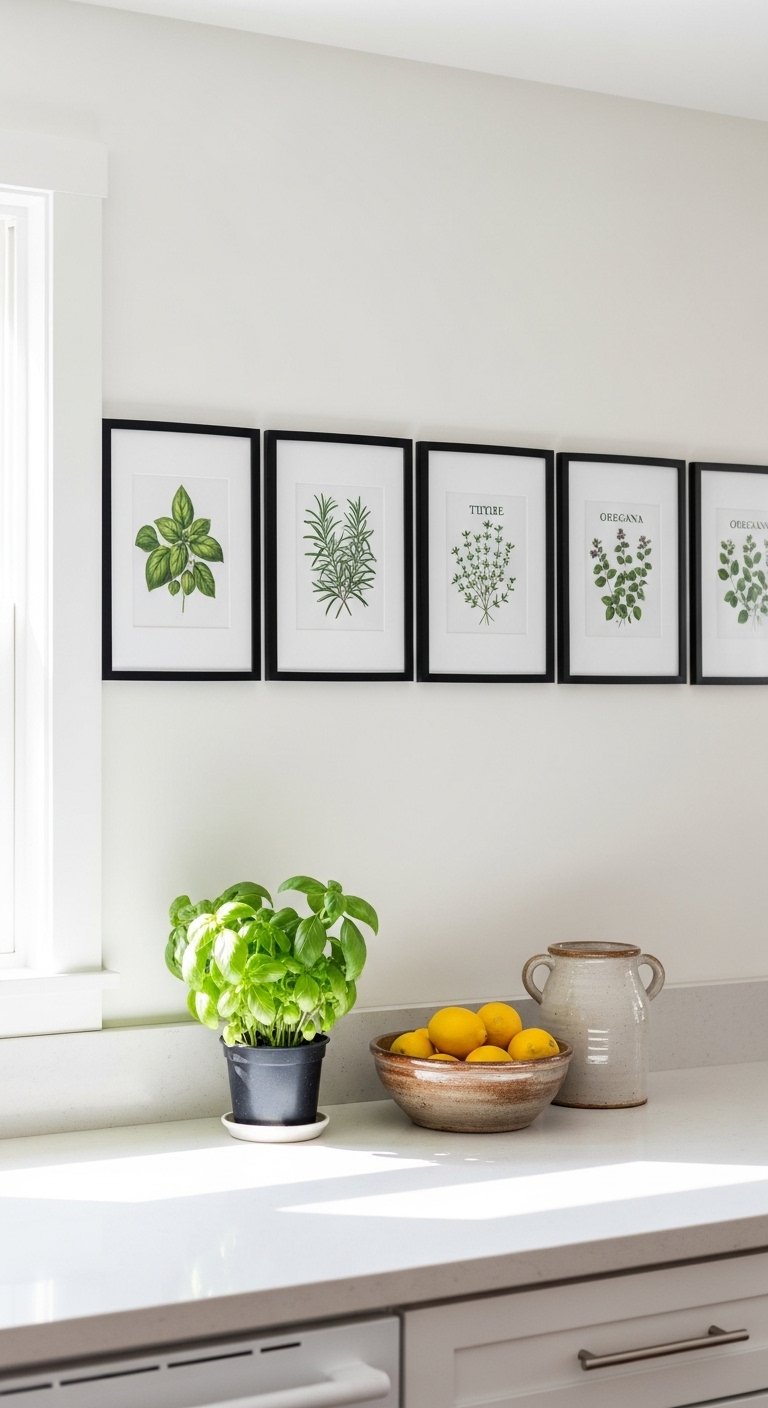
Elevate Your Space with Elegant Framed Botanical Artwork

Incorporating framed botanical illustrations into your home decor is a timeless way to bring nature’s beauty indoors while adding a touch of sophistication. These prints offer versatile charm, effortlessly enhancing areas like kitchens, bathrooms, dining rooms, or bedrooms. Many vintage botanical images are available as free high-resolution downloads from public domain archives, making it easy to find detailed, captivating designs that suit your style. Once printed, framing these artworks with clean, minimalist mats creates an artful display that complements a variety of interior aesthetics.

Arranging a collection of three or four botanical prints in matching frames can create a cohesive and curated look in any room. Whether positioned above a kitchen counter, along a hallway, or over a bed’s headboard, this arrangement introduces a subtle yet refined focal point. Choosing sleek black frames can add a contemporary edge, while natural wood options provide a cozy and organic vibe. This simple decor idea seamlessly marries classic elegance with modern flair without requiring a significant investment.

Key Design Elements

  • Download free, high-quality botanical illustrations from public domain archives.
  • Print your selected images at a local print shop for customized sizing.
  • Use simple white mats to highlight the details and add depth to your prints.
  • Display a series of three to four matching frames in a horizontal line for a polished look.

Pro Tip: For a cohesive theme, select botanical prints with similar color palettes or plant types, and consider mixing frame finishes for added visual interest while maintaining harmony.

2. Creative Terracotta Pot Transformations for Stylish Plant Displays
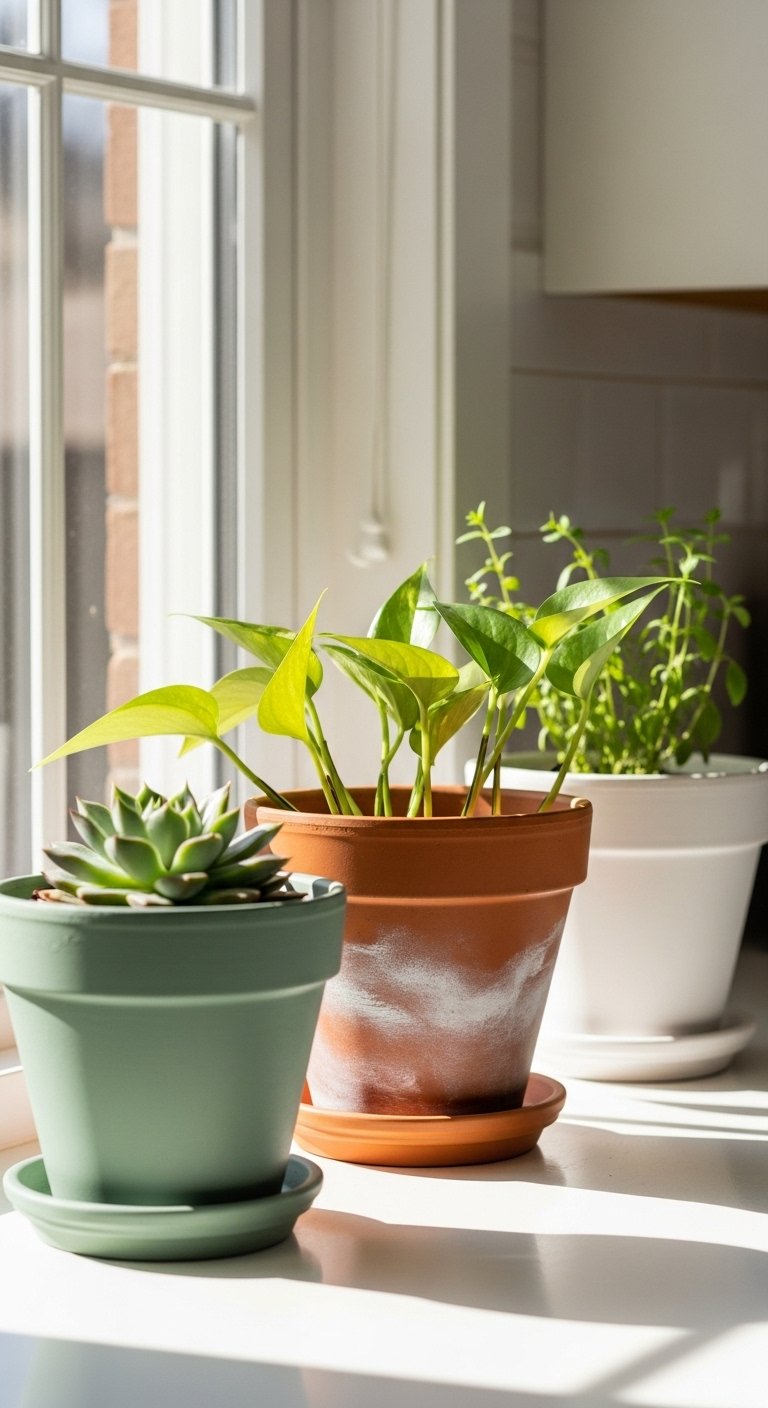
Creative Terracotta Pot Transformations for Stylish Plant Displays

Terracotta pots offer a fantastic foundation for a quick and affordable design upgrade that can instantly elevate your indoor or outdoor garden area. With just a bit of paint and creativity, these humble pots can be turned into chic, personalized pieces that complement any decor style. Whether you prefer a minimalist solid color, a playful dipped pattern, or bold geometric designs, it’s easy to customize your pots to suit your taste and space.

After painting, it’s important to protect your handiwork with a waterproof sealant to ensure longevity, especially if you plan to use the pots for live plants. These refreshed pots work beautifully on windowsills, kitchen counters, bathroom shelves, and even garden patios. For a visually appealing arrangement, consider grouping pots of varying heights and coordinating designs to create a unified, eye-catching plant display that brings life and style to any corner of your home.

Key Design Elements

  • Choose chalk or acrylic paint for easy application and vibrant color options.
  • Use painter’s tape to create clean lines or geometric patterns on your pots.
  • Apply a clear matte sealant to shield the paint from moisture and dirt.
  • Arrange pots of different sizes and styles together for an attractive layered look.

Pro Tip: For a textured finish, lightly dab a sponge with paint and gently press it onto the pot’s surface before sealing—this adds a handcrafted, rustic charm.

3. Create Your Own Stylish Wooden Plant Stand: A Beginner’s Guide
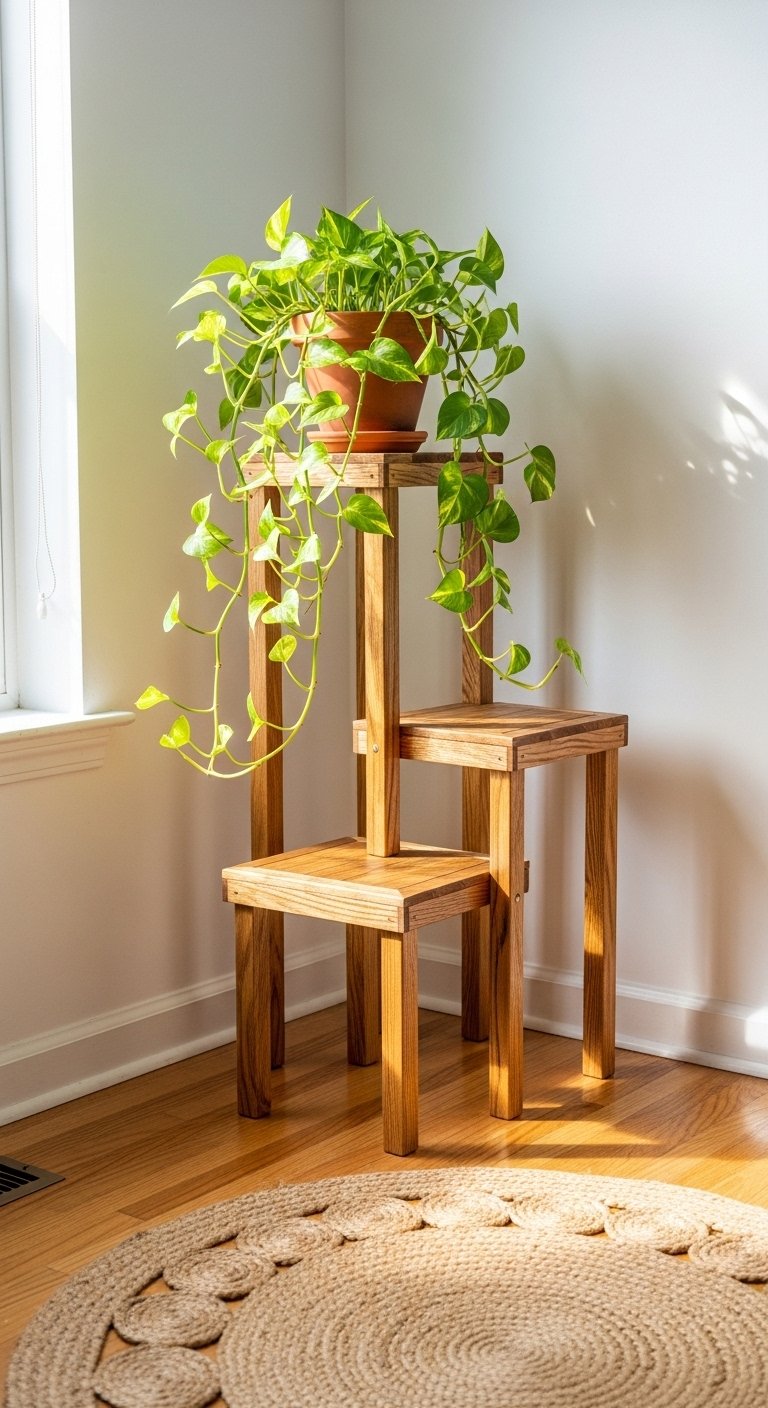
Create Your Own Stylish Wooden Plant Stand: A Beginner’s Guide

Building a wooden plant stand is an ideal project for those new to woodworking, requiring only straightforward tools and materials. By selecting simple components like four angled legs paired with a circular or square top, you can easily craft a functional and attractive piece that elevates your greenery. Many hardware stores offer pre-cut wood at budget-friendly prices and often provide cutting services to help customize your pieces without hassle.

Once assembled, smooth out the surfaces with sandpaper before applying paint or stain that complements your home’s décor. Finishing it with a clear protective coat ensures durability against moisture from your plant pots. Raising plants on a dedicated stand not only adds height and visual interest but also allows trailing varieties such as pothos or string of pearls to cascade beautifully, turning your greenery into a stunning focal point.

Key Design Elements

  • Use angled wooden legs to create a stable and stylish base for the stand.
  • Choose a painted or stained finish that coordinates with your existing décor.
  • Apply a waterproof sealant to protect the wood from plant moisture.
  • Position trailing plants on the stand to showcase their natural draping effect.

Pro Tip: For added flair and stability, consider attaching rubber feet to the bottom of your plant stand legs to prevent slipping and protect flooring surfaces.

4. Create Stunning Macrame Wall Art to Elevate Your Home Decor
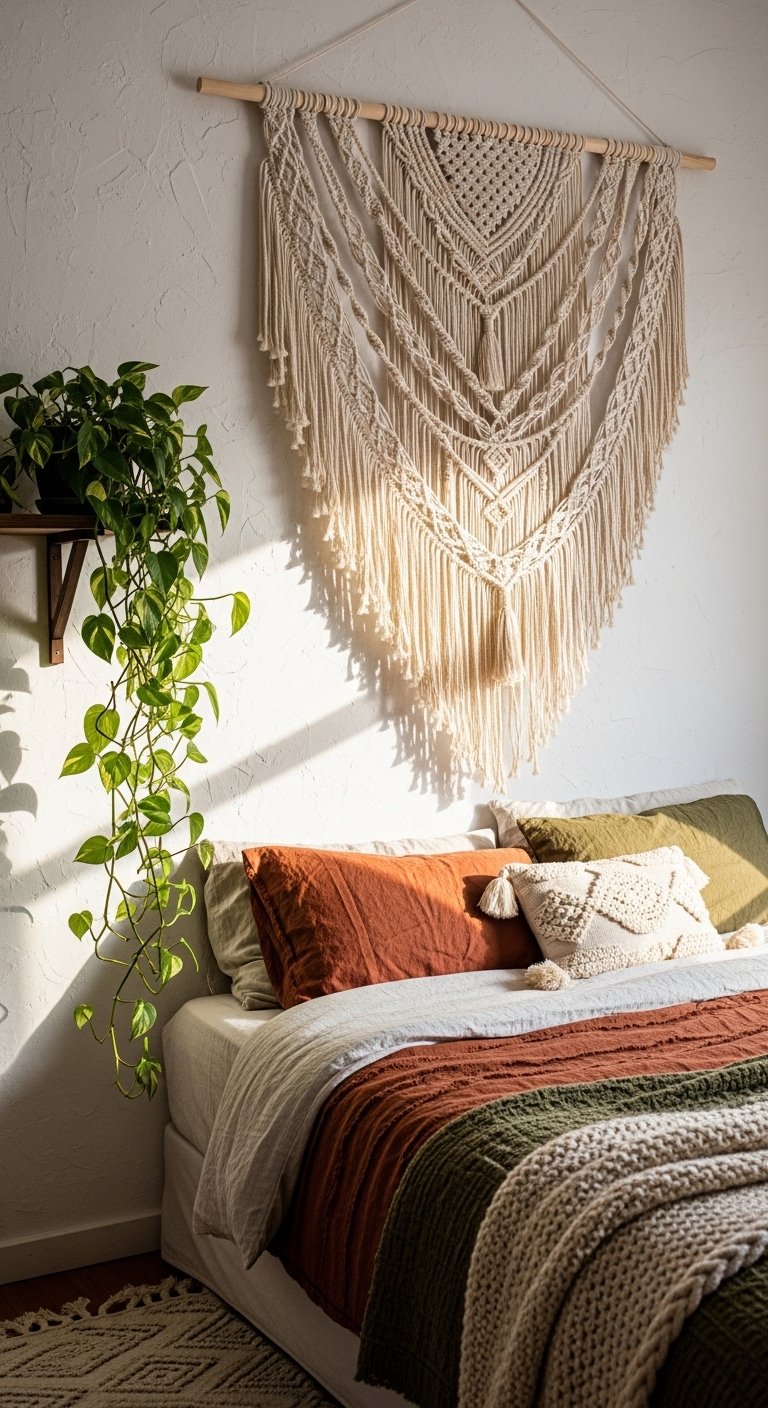
Create Stunning Macrame Wall Art to Elevate Your Home Decor

Macrame wall hangings are a timeless addition to any interior, effortlessly blending with various styles from rustic bohemian to sleek modern farmhouse and coastal themes. This craft uses simple knotting techniques that beginners can quickly master, making it an accessible and budget-friendly DIY project. All you need are basic supplies like natural cotton cords, a wooden dowel, and scissors to start weaving your own unique piece of art.

A straightforward design, such as a fringe-style wall hanging roughly eighteen inches wide and twenty-four inches long, makes an ideal beginner project. Once completed, it can be displayed above beds, sofas, or in cozy corners to introduce a handmade touch and soft texture that enhances any room’s ambiance. Unlike flat artwork or framed photos, macrame brings depth and tactile warmth, turning empty walls into inviting focal points.

Key Design Elements

  • Use natural cotton cords for a soft, organic look and easy handling.
  • Start with basic knots like square knots and half-hitch knots to build confidence.
  • Choose a sturdy wooden dowel or branch as the base for hanging your piece.
  • Incorporate beads or color-dyed cords to personalize your design.

Pro Tip: For a polished finish, gently steam your finished macrame to remove any creases and shape the fringe with scissors for a clean edge.

5. Transform Your Space with a Stunning Painted Furniture Refresh
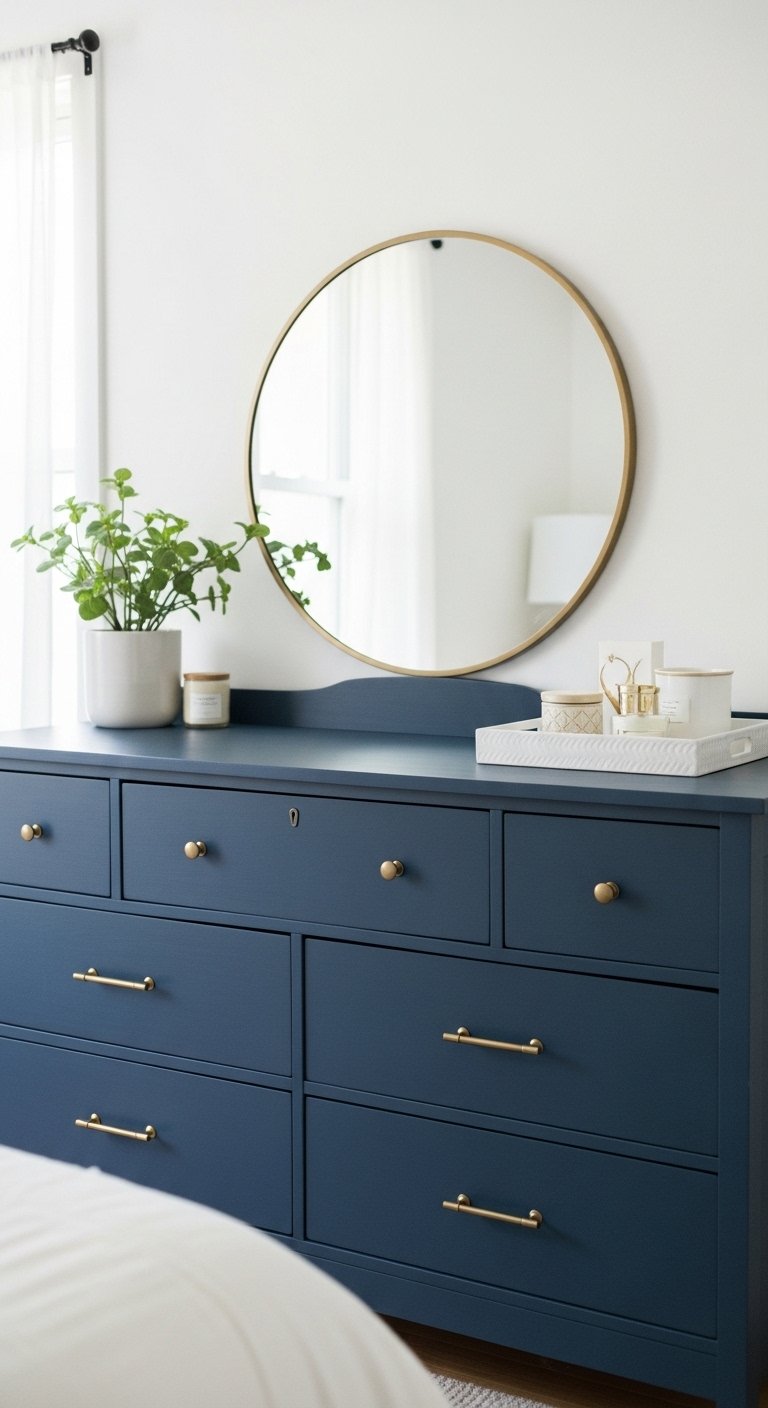
Transform Your Space with a Stunning Painted Furniture Refresh

Revitalizing tired or outdated furniture by applying a new layer of paint is an affordable and impactful way to breathe new life into your home decor. Whether it’s a dresser, nightstand, bookshelf, or chair, a fresh paint job can completely reinvent the look and feel of your pieces. Preparing the surface properly by lightly sanding and removing any dust ensures the paint adheres smoothly and lasts longer. Using a primer before painting helps achieve an even, polished finish that elevates the overall appearance.

For those new to furniture painting, chalk paint is a fantastic option because it requires minimal prep work and dries quickly, making the process easier and less messy. Alternatively, milk paint offers a charming, weathered texture that’s ideal for creating rustic or vintage vibes. Adding contrasting colors to different parts of the furniture, such as painting the legs a different shade than the body, can add an unexpected flair and make your piece stand out as truly unique.

Key Design Elements

  • Start by sanding your furniture lightly to create a smooth surface for paint adhesion.
  • Always wipe down the item after sanding to remove dust and debris before painting.
  • Use a primer to help the color coat apply evenly and improve durability.
  • Experiment with chalk paint for ease or milk paint for a rustic, distressed finish.

Pro Tip: For a professional touch, lightly sand between coats of paint to achieve a smoother, more refined finish.

6. Effortless Room Makeover with Peel-and-Stick Wallpaper
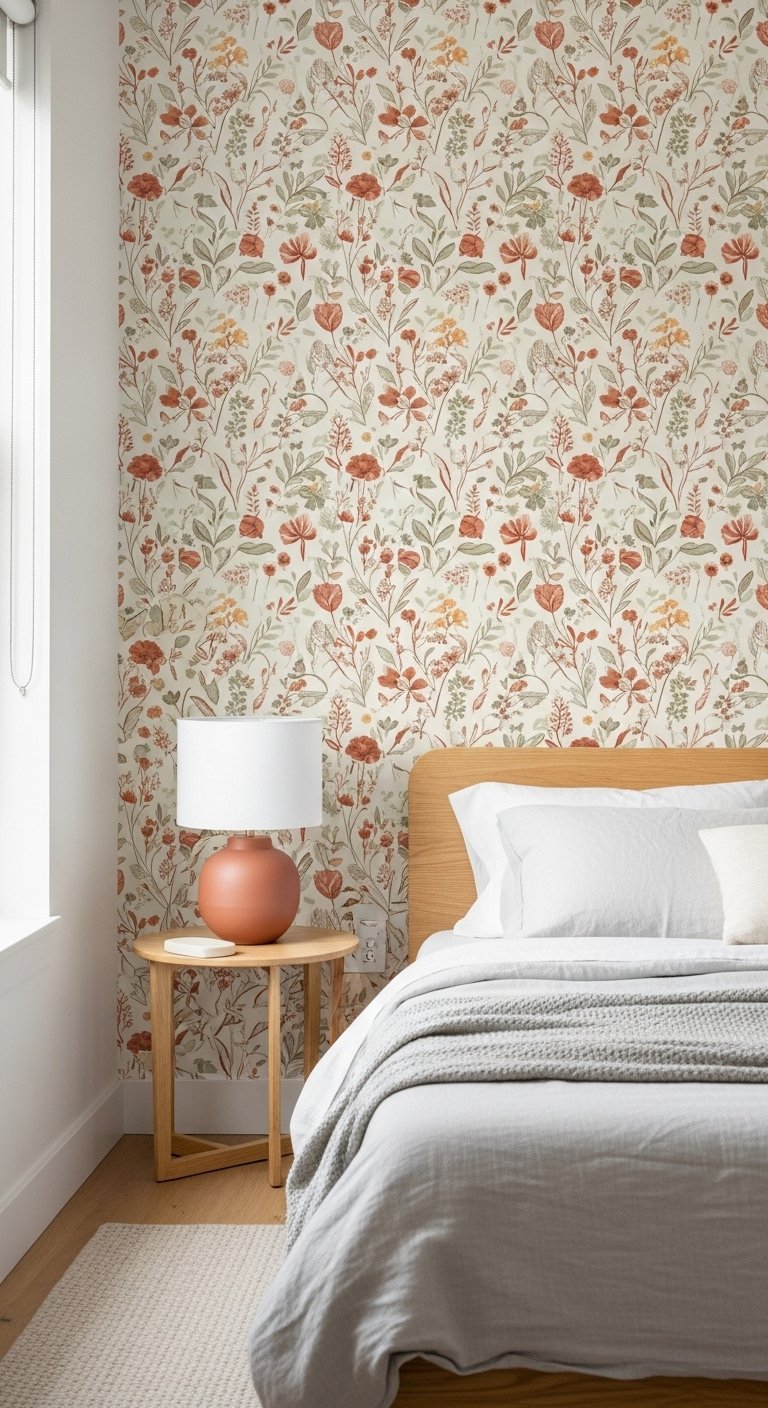
Effortless Room Makeover with Peel-and-Stick Wallpaper

Peel-and-stick wallpaper offers a quick and versatile way to transform any space without the hassle of traditional wallpapering. Its self-adhesive backing allows for easy installation, making it perfect for renters or anyone looking to refresh a room with minimal commitment. Whether used on an accent wall, inside cabinets, or as a backsplash, it adds instant style and personality with little cleanup required.

Applying peel-and-stick wallpaper requires patience and precision. Begin by carefully aligning the top edge, using a level to ensure it’s straight, then gradually smooth it down, removing any bubbles as you go. Taking your time during installation means a flawless finish, and the wallpaper can be repositioned if needed. Removing it later is just as simple and won’t damage your walls, making it ideal for those who like to change up their decor frequently.

Key Design Elements

  • Choose a clean, dry, and smooth surface for the best adhesion.
  • Use a level or plumb line to keep patterns straight during application.
  • Smooth the wallpaper with a soft tool like a squeegee or credit card to avoid air pockets.
  • Trim edges carefully with a sharp blade for a neat and professional look.

Pro Tip: For an even easier installation, peel off only a small section of the backing at a time and slowly work your way down, adjusting as needed to ensure perfect alignment.

7. Mastering Bookshelf Styling: Create Balanced and Eye-Catching Displays

Mastering Bookshelf Styling: Create Balanced and Eye-Catching Displays

Transforming a plain bookshelf into an engaging focal point can elevate the entire ambiance of your living room or workspace. The key is to mix various elements thoughtfully—combine books with decorative accessories while playing with different heights, textures, and orientations. By stacking some books horizontally and positioning others upright, you introduce visual interest and depth. Leaving a few open spaces prevents the shelf from looking cluttered and allows each item to stand out.

Incorporate a selection of personal touches like small plants, unique ceramics, framed photos, or candles to break up the monotony of rows of books. Group objects in odd numbers to create a more dynamic and appealing arrangement. This approach invites the eye to explore the shelves naturally, making the space feel curated and inviting rather than overcrowded or random.

Key Design Elements

  • Alternate between vertically shelved books and horizontal stacks to add dimension.
  • Include decorative elements such as plants or art pieces to diversify textures.
  • Use odd-numbered groupings (3 or 5) to create visually harmonious clusters.
  • Keep some shelf sections clear to balance the overall look and avoid clutter.

Pro Tip: Anchor your display by placing heavier or taller items at the bottom and lighter, smaller pieces toward the top to maintain balance and stability in your styling.

8. Transform Your Kitchen with Freshly Painted Cabinets: A Step-by-Step Guide

Transform Your Kitchen with Freshly Painted Cabinets: A Step-by-Step Guide

Refreshing your kitchen cabinets with a new coat of paint is one of the most impactful home improvement projects you can tackle on your own. While it demands time and attention to detail, the transformation it brings to your space is well worth the effort. The process begins with carefully removing cabinet doors and hardware, followed by a thorough cleaning to eliminate grease buildup. Sanding the surfaces ensures the paint adheres properly, and applying a primer creates a smooth base for your chosen color. Multiple thin layers of high-quality cabinet paint provide a durable finish that can withstand daily use.

Choosing the right hue is essential to setting the mood and style of your kitchen. Currently, shades like muted navy, earthy green, and soft cream are favored for their versatility and timeless appeal. Complementing freshly painted cabinets with updated hardware adds a polished touch that ties the whole look together. This simple swap can elevate your kitchen’s aesthetic without breaking the bank, making painted cabinets a smart and stylish makeover option.

Key Design Elements

  • Remove all cabinet doors and hardware before starting to ensure even coverage and a professional result.
  • Clean each surface thoroughly with a degreaser to remove oils and grime that could prevent paint from sticking.
  • Sand the cabinets lightly to create a smooth surface and improve paint adhesion.
  • Apply a primer followed by several thin layers of cabinet-grade paint, allowing proper drying time between coats.

Pro Tip: To achieve a smooth, factory-like finish, use a high-quality foam roller and finish with a fine brush for edges and corners.

9. Transform Your Mirror with a Stylish Rope Frame Wrap

Transform Your Mirror with a Stylish Rope Frame Wrap

Give an ordinary mirror a charming makeover by encasing its frame in rustic rope, adding a touch of natural texture and coastal appeal to any room. This straightforward DIY involves carefully adhering jute, sisal, or manila rope around the mirror’s border, creating a layered, handcrafted effect that instantly elevates its presence. The key is to steadily wrap the rope in tight, consistent coils, ensuring a neat and polished finish that looks both warm and inviting.

This technique works beautifully in spaces like bathrooms, hallways, and bedrooms where a bit of organic flair can soften the atmosphere. For an updated, contemporary twist, try using thicker rope and spacing the coils a little apart to introduce subtle dimension. Circular mirrors are particularly beginner-friendly for this treatment, as the rope naturally curves along the edges, making the wrapping process smoother and more intuitive.

Key Design Elements

  • Use a strong adhesive to securely attach the rope to the mirror frame.
  • Wrap the rope tightly and evenly to avoid gaps and maintain a clean look.
  • Choose natural-colored rope for a rustic vibe or dyed rope for a pop of color.
  • Start wrapping from the innermost edge and work outward for the best coverage.

Pro Tip: To prevent the rope from unraveling, apply a small dab of clear-drying glue at the beginning and end of each wrap section before pressing it down.

10. Crafting Charming Mason Jar Pendant Lights for Cozy Home Ambiance

Crafting Charming Mason Jar Pendant Lights for Cozy Home Ambiance

Transform your kitchen or dining area with handmade mason jar pendant lights that blend rustic charm with modern convenience. These lights offer a unique way to add personalized illumination to your space by repurposing classic glass jars, creating a warm and inviting atmosphere. Ideal for over kitchen islands, breakfast bars, or farmhouse tables, they combine both style and function effortlessly. Easy-to-install pendant light kits come with pre-wired sockets, letting you customize your fixtures without hassle.

To elevate the overall aesthetic, cluster several mason jar pendants at varying heights, which adds depth and character to the room. Opt for warm-colored Edison-style bulbs instead of harsh white lights to achieve a soft glow that enhances your space’s coziness. Whether you’re aiming for a vintage farmhouse feel or a casual rustic look, these pendants serve as an eye-catching focal point that complements a variety of interior styles.

Key Design Elements

  • Use readily available pendant light kits with pre-attached wiring for quick assembly.
  • Secure the light socket through the mason jar lid to ensure stability and safety.
  • Hang multiple jars at staggered heights to create visual interest and dimension.
  • Choose warm Edison bulbs to produce a gentle, inviting light rather than bright glare.

Pro Tip: For added texture and a personalized touch, try painting or etching the mason jars before assembly to match your room’s decor.

11. Mastering the Art of Layered Rugs for Stylish Interiors

Mastering the Art of Layered Rugs for Stylish Interiors

Combining multiple rugs in a single room is a creative way to bring dimension, warmth, and personality to your interior design. Start with a large, understated rug crafted from natural fibers like jute or sisal as the foundation. This base provides a subtle, textured backdrop that grounds the space without overwhelming it. Next, introduce a smaller rug with vibrant colors or intricate patterns placed atop the first, either slightly askew or centered, to create visual interest and contrast.

This layering method works beautifully across various rooms, such as living rooms, bedrooms, and dining areas. The foundational rug sets the overall tone and defines key zones, while the secondary rug injects character and style. To ensure the layers complement rather than clash, choose rugs with distinct textures or designs so each piece stands out, enhancing the space’s depth and cohesion instead of blending into a confusing mishmash.

Key Design Elements

  • Begin with a large, neutral rug to anchor the room and create a consistent base.
  • Add a smaller, colorful or patterned rug on top to infuse personality and contrast.
  • Experiment with placing the top rug off-center or at an angle for a dynamic look.
  • Mix different textures or materials to clearly distinguish each layer and avoid visual clutter.

Pro Tip: To elevate the layered look, secure the rugs with non-slip pads beneath each layer to keep them in place and prevent shifting, especially in high-traffic areas.

12. Chic Candle Tray Displays to Elevate Your Space

Chic Candle Tray Displays to Elevate Your Space

Creating a captivating centerpiece on your coffee table or console is simple with a thoughtfully curated candle tray. Start by selecting a tray that complements your room’s style—whether it’s rustic wood, sleek lacquer, or textured rattan. This base not only organizes your items but also visually anchors the arrangement, giving it a polished and intentional appearance. Incorporate candles of different sizes to build dimension, making sure to include a prominent pillar candle to act as a focal point.

Enhance the vignette’s charm by adding touches of greenery, such as a petite succulent or a small herb plant, which bring a natural, refreshing element to the composition. Layer in a couple of books with intriguing covers to introduce varied heights and textures without overwhelming the space. Remember to keep all pieces neatly inside the tray’s boundaries to maintain a cohesive and balanced look that effortlessly draws the eye.

Key Design Elements

  • Choose a tray material and color that complements your existing decor for seamless integration.
  • Mix candles of different heights, focusing on one taller candle to create visual interest.
  • Add a small plant like a succulent or herb to introduce a lively and organic touch.
  • Use a stack of two or three books to add height and texture while keeping the arrangement balanced.

Pro Tip: Opt for unscented candles if placing your tray near books or electronics to avoid unwanted fragrances or residue, keeping your vignette both stylish and functional.

13. How to Create a Stunning Gallery Wall: Tips for a Personalized Art Display

How to Create a Stunning Gallery Wall: Tips for a Personalized Art Display

Designing a gallery wall might seem intimidating, but it becomes much simpler when you break the process down. Start by collecting a variety of frames that share a similar style or color palette, though they don’t need to match exactly. Arrange them on the floor first to experiment with different layouts until you find a harmonious composition. Aim to keep the spacing between frames close—around two inches—to unify the display and give it a polished, intentional look.

Gallery walls are incredibly versatile and can enhance the ambiance of nearly any room, from cozy bedrooms to bustling hallways or staircases. Mix and match artwork, family photos, prints, or even unique keepsakes to add personality. To ensure a flawless installation, use tools like a level to keep the top row straight and create paper cutouts of your frames to test placements on the wall before making any permanent marks. This approach will help you achieve a balanced and eye-catching arrangement with ease.

Key Design Elements

  • Select frames with complementary finishes for a cohesive but dynamic look.
  • Lay all frames on the floor to experiment with different arrangements before hanging.
  • Keep spacing between frames tight, ideally around two inches, to unify the display.
  • Use a level and paper templates to accurately position frames on the wall.

Pro Tip: Create a central anchor piece in your gallery setup, then build outward around it to maintain balance and create a natural focal point.

14. Transform Your Sofa with Custom Stenciled Pillow Covers

Transform Your Sofa with Custom Stenciled Pillow Covers

Elevate your living space by turning plain pillow covers into unique, eye-catching accents using fabric stencils and paint. With an array of stencil designs available—from elegant florals to modern geometric shapes—you can easily personalize your pillows to complement any room theme. Simply secure the stencil on the fabric, and apply fabric paint with a foam roller to achieve a crisp and artistic pattern.

For the best results, apply paint sparingly to avoid any smudging or bleeding beneath the stencil. Using a technique that involves dabbing excess paint off before rolling helps maintain clean lines and sharp details. After the paint dries, setting the design with heat ensures durability and allows the pillow covers to be washed without fading or cracking, making this a fun and practical DIY project for refreshing your home decor.

Key Design Elements

  • Choose high-quality cotton or linen pillow covers for optimal paint adherence.
  • Secure the stencil firmly with painter’s tape to prevent shifting during application.
  • Use a foam roller lightly loaded with fabric paint to avoid bleeding under edges.
  • Heat-set the design with an iron following manufacturer instructions to make it washable.

Pro Tip: To create a multi-colored design, let each color dry completely before applying the next stencil layer to prevent colors from blending unintentionally.

15. How to Create Stylish and Sturdy DIY Floating Shelves for Any Room

How to Create Stylish and Sturdy DIY Floating Shelves for Any Room

Crafting your own floating shelves offers an elegant solution to maximize storage without sacrificing floor space. These minimalist shelves seem to effortlessly hover on the wall, providing a sleek way to showcase your favorite items or keep essentials within easy reach. By selecting quality wood planks and discreet mounting hardware, you can customize the size and finish to perfectly suit your décor style and functional needs.

Before installation, it’s best to prepare your shelves by sanding and applying paint or stain while they’re resting flat, ensuring a smooth, professional look. When mounting, securing the brackets into wall studs is essential for durability and load-bearing capacity. Floating shelves work well in kitchens for organizing glassware or spices, while living rooms and bedrooms benefit from their ability to display books, artwork, or plants at eye level, adding a curated touch to your space.

Key Design Elements

  • Use a stud finder to locate secure mounting points behind drywall.
  • Choose wood or MDF boards that suit your desired shelf thickness and finish.
  • Apply paint or stain before attaching shelves to ensure even coverage.
  • Measure and level carefully to maintain a clean, straight appearance.

Pro Tip: To increase shelf strength, consider installing additional hidden brackets or using thicker boards, especially if you plan to hold heavier items.

16. Craft Stylish Concrete Candle Holders for a Sleek Industrial Look

Craft Stylish Concrete Candle Holders for a Sleek Industrial Look

Creating concrete candle holders is an excellent way to add a trendy, industrial touch to your home decor without spending a fortune. By working with quick-drying concrete and simple molds, you can craft unique holders that resemble high-end pieces. The process involves mixing the concrete to a thick, spreadable texture and carefully molding it around a smaller insert to form the cavity for the candle. Once the concrete sets, you’ll have a sturdy, minimalist candle holder with a raw, urban aesthetic.

These holders can be customized to fit your personal style by incorporating pigments for color or leaving the natural gray finish for a modern vibe. Grouping holders of varying sizes together creates an eye-catching centerpiece, perfect for coffee tables, shelves, or mantels. The rough, textured surface combined with the soft flicker of candlelight makes this DIY project both functional and visually appealing, blending seamlessly with both contemporary and rustic interiors.

Key Design Elements

  • Use a fast-setting concrete mix for quicker curing times and easier handling.
  • Apply a light coating of cooking spray or oil inside molds to prevent sticking.
  • Sand the fully cured holders with fine-grit sandpaper for a smooth finish.
  • Experiment with concrete pigments to create custom colors suited to your decor.

Pro Tip: To achieve perfectly even cavities, secure the inner mold with a small weight or support so it doesn’t shift while the concrete cures.

17. Elevate Your Space with Stylish Woven Basket Wall Displays

Elevate Your Space with Stylish Woven Basket Wall Displays

Incorporating woven baskets as wall decor adds a touch of natural texture and warmth to any room without breaking the bank. By selecting a variety of baskets that share a similar color tone or material, you can create an eye-catching arrangement that feels cohesive yet dynamic. These handcrafted pieces bring an organic, artisanal vibe to your walls, transforming blank spaces into inviting art installations that blend rustic charm with modern design.

Before committing to your wall layout, experiment by laying the baskets out on the floor to determine the most visually appealing grouping. Odd numbers often create a more engaging and balanced composition. When ready, secure the baskets carefully using small hooks or nails through the woven material, ensuring they rest snugly against the wall for a polished, gallery-like effect that highlights their texture and craftsmanship.

Key Design Elements

  • Source baskets in varying sizes but keep a consistent color or fiber type for harmony.
  • Use odd numbers, like three or five baskets, to create an aesthetically pleasing display.
  • Arrange the baskets on the floor beforehand to visualize the best layout.
  • Attach baskets securely with small nails or hooks through sturdy weave sections for stability.

Pro Tip: To add extra depth, mix in baskets with different weaving techniques or subtle color accents while maintaining a cohesive palette for a layered, artistic look.

18. Craft Elegant Linen Curtains with Ease: A Simple DIY Guide

Craft Elegant Linen Curtains with Ease: A Simple DIY Guide

Creating your own linen curtains is a rewarding project that brings both style and warmth to your living space. Linen, renowned for its natural texture and durability, allows light to filter gently while adding a sophisticated touch to any room. Whether you’re an experienced crafter or new to sewing, making curtains with straight hems is achievable, especially when using helpful tools like iron-on hem tape to skip the sewing entirely.

To begin, carefully measure your window height and include extra fabric to accommodate hems and allow the curtains to drape gracefully. Hanging your curtains slightly above the window frame, extending them to the floor, can instantly enhance the illusion of height and openness in your room. For an easy installation, curtain clip rings paired with a sleek rod provide a functional yet stylish method to showcase your handmade panels.

Key Design Elements

  • Choose high-quality natural linen fabric for a luxurious look and soft light diffusion.
  • Add at least 8 inches to your window height measurement for top and bottom hems.
  • Use iron-on hem tape if you prefer a no-sew method for finishing edges neatly.
  • Hang curtains close to the ceiling and let them fall to the floor to visually expand room height.

Pro Tip: To prevent linen curtains from wrinkling excessively, steam them before hanging and consider adding a fabric conditioner to keep the material soft and smooth.

19. Transform Your Space with a Bold Painted Accent Wall

Transform Your Space with a Bold Painted Accent Wall

Adding a painted accent wall is a straightforward way to inject personality and depth into any room without a major renovation. By selecting one feature wall—often the one behind the bed in a bedroom or the wall facing the main seating area in a living room—you can create a dynamic focal point. Opt for a color that’s richer or slightly darker than the surrounding walls to give the space a striking yet cohesive look. Before fully committing, try painting a sample patch and live with it for a day to ensure it complements your lighting and décor perfectly.

Choosing the right paint finish is essential to achieving the desired atmosphere. Softer, matte finishes bring a calming, cozy vibe that’s ideal for bedrooms, while semi-gloss or satin paints offer durability and easy cleaning, making them perfect for high-traffic areas like living rooms or kitchens. For a polished outcome, use painter’s tape to protect trim and ceilings, and apply paint with smooth, overlapping strokes to avoid unevenness. Most accent wall projects are budget-friendly and can be completed within a few hours, offering an immediate style upgrade to your home.

Key Design Elements

  • Select a wall that naturally draws attention, such as behind a bed or main sofa.
  • Test paint colors on a small section and observe them at different times of day.
  • Use painter’s tape to ensure crisp edges along ceilings and baseboards.
  • Apply two coats with smooth, overlapping strokes for full coverage and even texture.

Pro Tip: To add subtle texture and interest, consider using a sponge or rag rolling technique with a slightly lighter or darker shade over the base color once it’s dry.

20. Craft Your Own Stylish Fabric-Covered Headboard for a Cozy Bedroom Upgrade

Craft Your Own Stylish Fabric-Covered Headboard for a Cozy Bedroom Upgrade

Transform your bedroom effortlessly by creating a custom fabric-covered headboard that adds both comfort and style. This project involves layering soft padding over a sturdy wooden base, then wrapping it tightly with your chosen fabric to form a smooth, upholstered surface. The result is a personalized focal point that elevates the entire room’s ambiance while providing a cushioned backrest for reading or relaxing.

Selecting the right fabric is crucial to achieving the desired look and feel. Natural fibers like linen offer timeless appeal and durability, making them versatile for various decor themes. For a touch of opulence, plush velvets or textured boucle fabrics add depth and richness, instantly making your bed the centerpiece of the space. Mounting your finished headboard securely ensures it stays in place and complements your bedroom’s aesthetic seamlessly.

Key Design Elements

  • Cut plywood to your bed’s width and preferred height for a perfect fit.
  • Attach a layer of high-density foam or batting to create a soft, cushioned surface.
  • Choose a durable fabric that complements your room’s color scheme and style.
  • Securely fasten the fabric by pulling it taut around the board and stapling on the back side.

Pro Tip: For a polished look and easier installation, use a French cleat system to hang your fabric-wrapped headboard flush against the wall.

21. Create a Cozy Bedroom Reading Corner with Simple DIY Touches

Create a Cozy Bedroom Reading Corner with Simple DIY Touches

Transform an overlooked corner of your bedroom into a peaceful retreat designed just for reading and relaxation. By adding a plush seat—whether a cushioned chair or a comfy floor pillow—paired with a small table or crate to hold your favorite books, you can craft a charming space without any major renovations. A soft area rug anchors the nook, while a carefully chosen light source, such as a standing lamp or wall-mounted fixture, ensures the perfect ambiance for getting lost in a good book.

To personalize your reading haven, consider installing a floating shelf nearby to keep your current reads and a few decorative items within easy reach. Layer in cozy elements like a comfy throw blanket and supportive cushions to invite lingering visits. The key to a successful reading nook lies in making it both inviting and functional—prioritize comfort and accessibility, so this little corner quickly becomes your go-to spot for unwinding.

Key Design Elements

  • Use a soft armchair or plush floor cushion tailored for long reading sessions.
  • Incorporate a small side table or storage crate to keep books and reading essentials organized.
  • Choose adjustable lighting options like floor lamps or wall sconces to reduce eye strain.
  • Add a textured rug to visually define the space and provide extra warmth underfoot.

Pro Tip: Opt for a shelf installed at arm’s reach to keep your current book, a cup of tea, or a small plant nearby without cluttering the floor.

Conclusion

Transforming your living space with your own hands is a journey filled with creativity and personal expression. You don’t need expert training or expensive materials—just a spark of inspiration and the willingness to dive in. Pick a project that excites you, set aside some time, and watch as your ideas take shape, turning your home into a unique reflection of your personality.

Remember, your home is a canvas that evolves with you, growing richer and more meaningful with every small change you make. Each DIY effort is a step toward creating a space that feels truly yours, a place where memories are made and stories unfold. Embrace the process, celebrate progress over perfection, and enjoy the magic of crafting a home that’s authentically you.

Leave a Reply

Your email address will not be published. Required fields are marked *