Thanksgiving is the perfect time for tiny hands to get creative in the kitchen, and these 31 treats are designed to make that playful collaboration simple and joyful. From easy no-bake bites and decorated cookies to gooey bars, popcorn and snack mixes, dipped pretzels, cake pops and other festive desserts, each idea is meant to be approachable and fun for bakers of all ages. With straightforward steps and plenty of decorating room, these recipes turn snack time into a chance to laugh, learn and build holiday traditions.
Many of the recipes require minimal adult prep so kids can handle most of the fun: stirring, shaping, pressing, and decorating with seasonal candies and sprinkles. You’ll find oven-free options for quick treats as well as simple baked ideas for when you want a slightly longer project, plus clever shortcuts that keep things tidy and stress-free. Whether you’re prepping for a classroom party, a family movie night, or an after-dinner sweet, these recipes are crafted to spark smiles and leave you with tasty keepsakes of the day.
1. Autumn Pumpkin Crunch Fingers
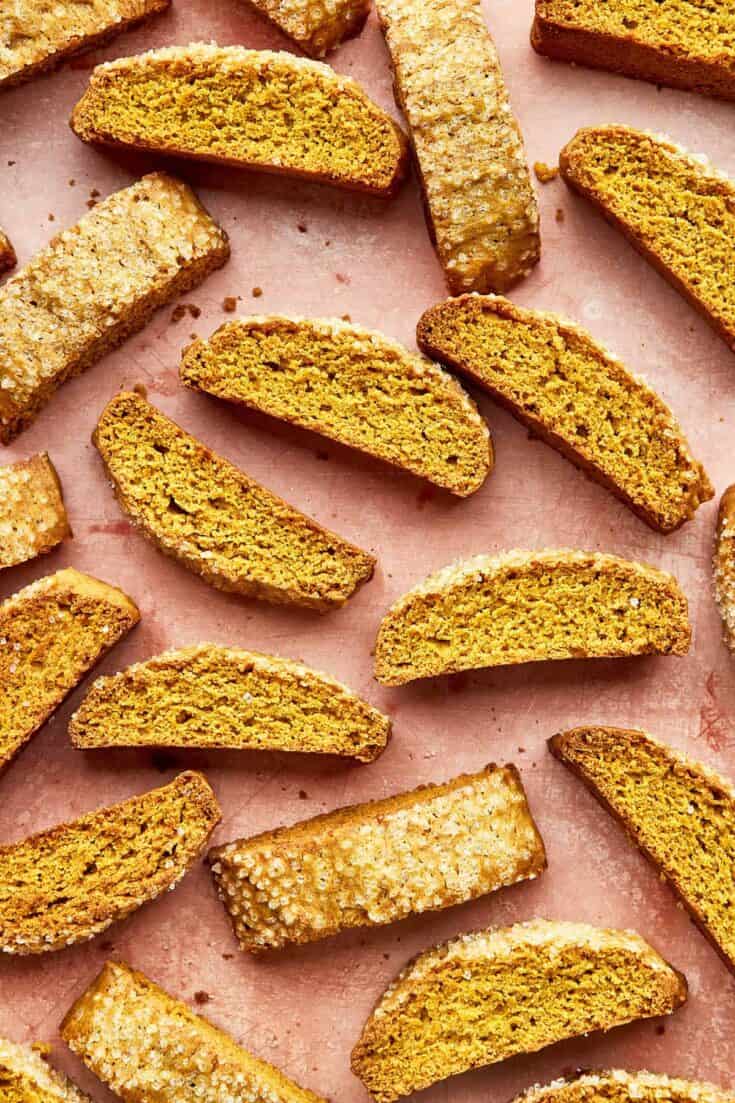
These crunchy pumpkin biscotti fingers make a kid-friendly twist on the classic twice-baked cookie—spiced pumpkin and crunchy pecans baked into long logs, sliced and baked again for a crisp dunkable treat. Kids can help mash the pumpkin, fold in nuts, and dip ends in chocolate. They store well and add autumn color to Thanksgiving treat tables without complicated steps or special equipment.
Yield: Makes about 24 cookies (Serves 10–12) Total time: 1 hour 25 minutes
Ingredients
- 2 cups all-purpose flour
- 1 cup granulated sugar
- 1/2 cup canned pumpkin puree
- 1/3 cup unsalted butter, softened
- 2 large eggs
- 1 teaspoon baking powder
- 1/2 teaspoon fine salt
- 1 tablespoon pumpkin pie spice
- 3/4 cup chopped toasted pecans
- 3/4 cup semisweet chocolate chips
Instructions
- Preheat the oven to 350°F (175°C) and line a baking sheet with parchment paper.
- Beat the butter, granulated sugar, pumpkin puree, and eggs in a large bowl until smooth and homogenous, about 1–2 minutes.
- Fold the flour, baking powder, salt, pumpkin pie spice, and toasted pecans into the wet mixture until a slightly sticky dough forms.
- Shape the dough into two even logs about 10 inches long and 2 inches wide; place them on the prepared sheet and bake 25–28 minutes until set and lightly golden at the edges.
- Slice the cooled logs on the diagonal into 1/2-inch thick fingers, reduce oven to 325°F (160°C), arrange slices cut-side down, and bake 12–14 minutes, flipping once halfway, until crisp and dry.
- Dip one end of cooled biscotti into melted chocolate chips, let excess drip off, and set on parchment until the chocolate firms, about 15–20 minutes.
Pro Tip: Make ahead: bake and freeze un-dipped biscotti in an airtight container up to 2 months; thaw at room temperature and dip in chocolate just before serving. Store dipped biscotti in an airtight tin at room temperature for up to 5 days.
2. Autumn Harvest Loaf with Cinnamon Sparkle Crust
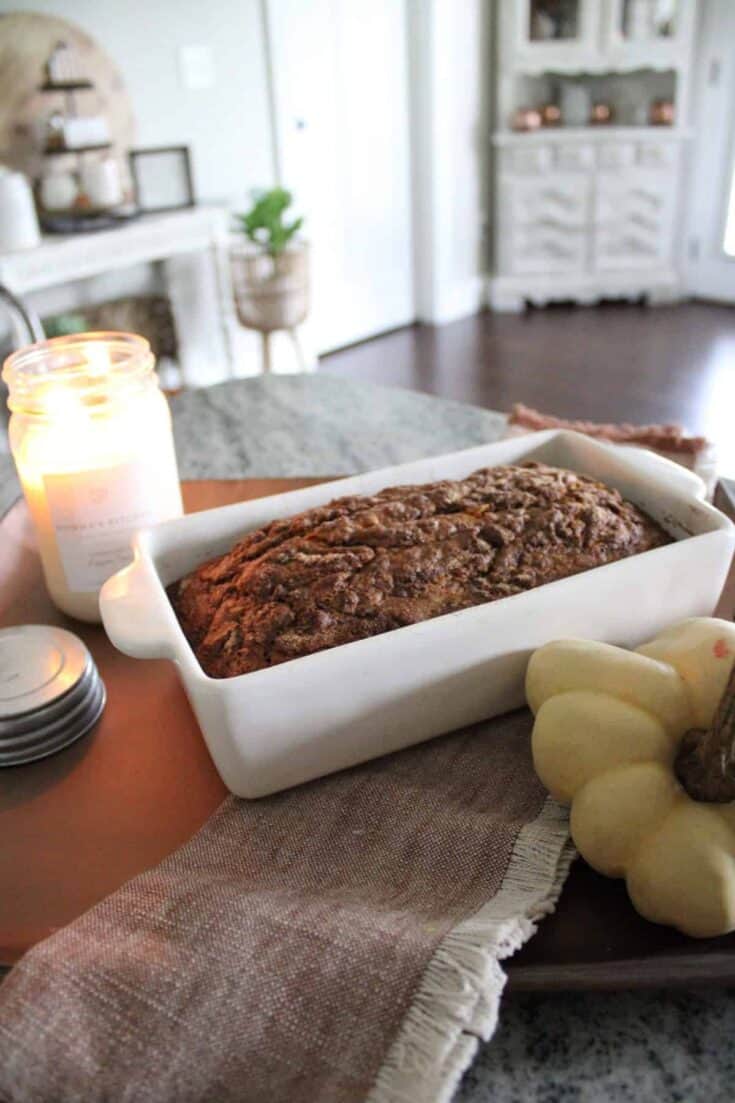
Kid-friendly and fragrant, this easy autumn loaf turns pumpkin puree into a tender quick bread crowned with a crunchy cinnamon-sugar crust—perfect for little hands to help sprinkle. The batter comes together in one bowl and accepts playful add-ins like mini chocolate chips or chopped pecans. Serve warm for breakfast, as a classroom treat, or sliced on a Thanksgiving snack platter.
Yield: Makes 1 (9×5-inch) loaf (8–10 slices) Total time: 2 hours 10 minutes
Ingredients
- 1 3/4 cups all-purpose flour
- 3/4 cup granulated sugar
- 1/4 cup packed light brown sugar
- 1 teaspoon baking powder
- 3/4 teaspoon baking soda
- 1/2 teaspoon fine sea salt
- 1 1/2 teaspoons ground cinnamon
- 1/2 teaspoon ground nutmeg
- 1 cup pumpkin puree (not pie filling)
- 1/2 cup neutral oil (vegetable or canola)
- 2 large eggs
- 2 tablespoons turbinado sugar mixed with 1 teaspoon ground cinnamon for topping
Instructions
- Preheat the oven to 350°F (175°C) and grease a 9×5-inch loaf pan, lining it with a parchment sling so the loaf can be lifted out easily.
- Whisk together the flour, granulated sugar, brown sugar, baking powder, baking soda, salt, cinnamon, and nutmeg in a large bowl until evenly combined.
- Beat the pumpkin puree, oil, and eggs in a separate bowl until smooth, then pour the wet mixture into the dry ingredients and stir with a spatula until just combined; do not overmix.
- Spoon the batter into the prepared pan, smooth the top, and have children or helpers gently sprinkle the turbinado-and-cinnamon mixture evenly across the surface.
- Bake for 50–60 minutes until the top is golden and a skewer inserted into the center comes out with a few moist crumbs (internal temperature about 200°F/93°C).
- Cool in the pan on a wire rack for 15 minutes, then use the parchment sling to lift the loaf from the pan and cool completely on the rack about 45 minutes before slicing.
Pro Tip: Make ahead by wrapping cooled slices tightly and storing at room temperature for up to 3 days, or freeze individual slices for up to 2 months and thaw or warm briefly before serving.
3. Sticky Bourbon Pecan Brownie Slabs
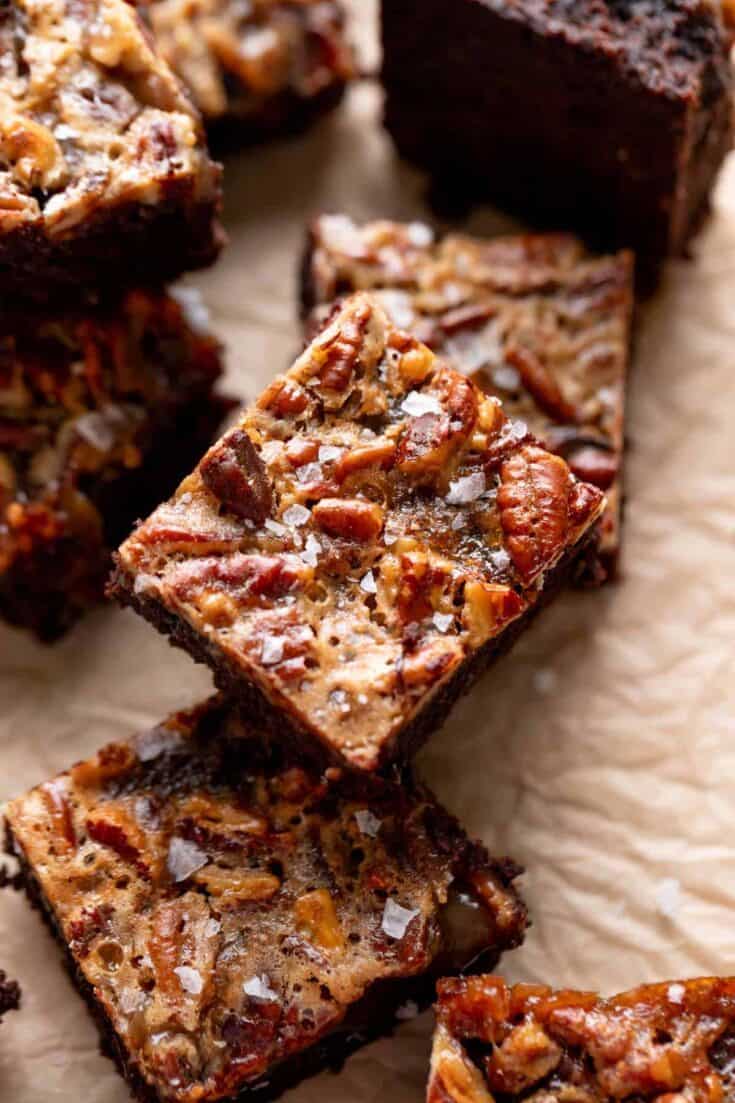
These fudgy chocolate bars pair a dense, brownie base with a sticky bourbon-pecan caramel for a handheld, Thanksgiving-friendly treat. Kids can help fold batter and sprinkle toasted pecans while adults handle the glaze and oven. The result is familiar pecan-pie flavor folded into a brownie — slices firm up in the fridge, making them perfect for passing around at holiday gatherings.
Yield: Serves 12 Total time: 2 hours 20 minutes
Ingredients
- 1 cup (2 sticks) unsalted butter, melted
- 1 1/2 cups granulated sugar
- 3/4 cup packed dark brown sugar
- 3 large eggs
- 2 teaspoons vanilla extract
- 1 cup all-purpose flour
- 3/4 cup Dutch-process cocoa powder
- 1/2 teaspoon fine sea salt
- 1/4 cup bourbon
- 1/2 cup light corn syrup
- 3/4 cup chopped toasted pecans
- 2 tablespoons unsalted butter
Instructions
- Preheat the oven to 350°F (175°C) and line a 9×13-inch baking pan with parchment, leaving an overhang for easy lifting; lightly grease the parchment.
- Combine the melted butter with the granulated sugar and 1/4 cup of the dark brown sugar in a large bowl; whisk until smooth, then whisk in the eggs and vanilla until fully incorporated.
- Add the flour, cocoa powder, and salt to the wet mixture and stir gently until just combined; spread the batter evenly into the prepared pan.
- Bake the base for 18–22 minutes at 350°F, until the edges are set and a toothpick inserted into the center comes out with a few moist crumbs; remove from the oven.
- Make the pecan-bourbon topping: in a small saucepan, combine the reserved 1/2 cup dark brown sugar, corn syrup, bourbon, and 2 tablespoons butter; simmer over medium-low heat, stirring, for 2–3 minutes until slightly thickened, then stir in the chopped toasted pecans and pour the mixture evenly over the baked brownie base. Return to the oven and bake 10–12 minutes more, until the topping is bubbly and set.
- Cool the pan on a wire rack at room temperature for 1 hour, then refrigerate uncovered for 30 minutes to firm before lifting from the pan and slicing into 12 squares.
Pro Tip: Make ahead by slicing and storing in an airtight container in the fridge for up to 4 days; bring to room temperature for 20 minutes before serving, or warm briefly for a gooier bite.
4. Sticky Pecan Pumpkin Squares with Rustic Crumble
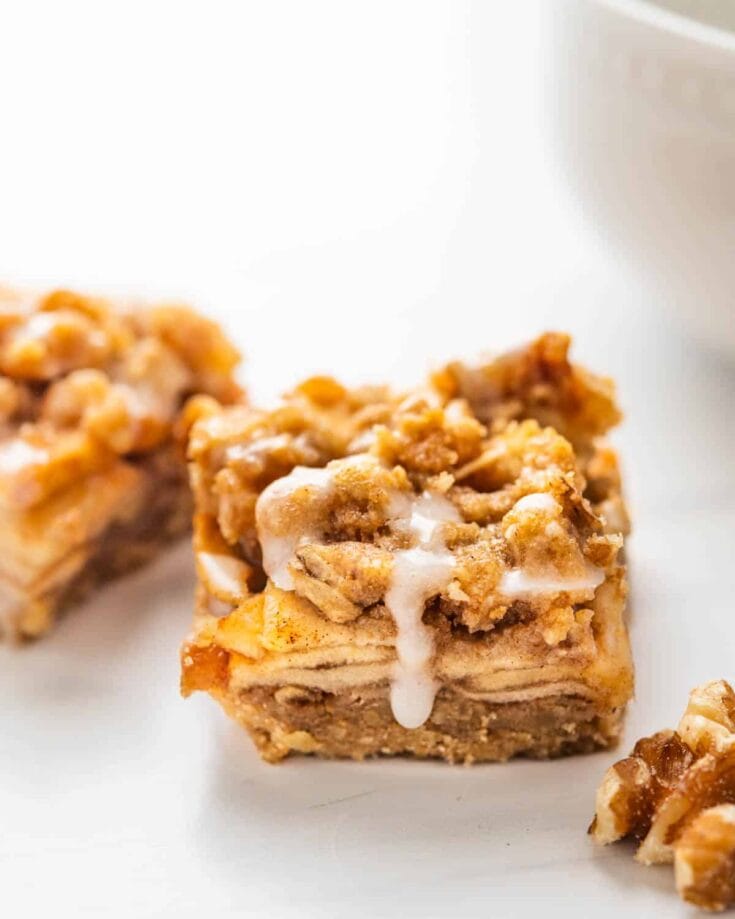
Kid-friendly and crunchy, these Autumn Pecan Pumpkin Squares pair silky pumpkin spice batter with a buttery pecan crumble that little hands can help sprinkle. The recipe keeps steps simple—mix wet and dry, press into an easy pan, then crumble and bake—so it’s perfect for a classroom-helper or countertop assembly line. The bars slice neatly after chilling for quick serving at a Thanksgiving spread.
Yield: Serves 10-12 Total time: 1 hour 40 minutes
Ingredients
- 1 1/2 cups all-purpose flour
- 3/4 cup light brown sugar, packed
- 1 tsp baking powder
- 1/2 tsp fine salt
- 1 tsp ground cinnamon
- 1/4 tsp ground nutmeg
- 1 cup canned pumpkin puree (not pumpkin pie filling)
- 1 large egg
- 1/2 cup unsalted butter, melted and cooled
- 1 tsp vanilla extract
- 1/2 cup old-fashioned oats
- 3/4 cup chopped pecans (divided)
Instructions
- Preheat oven to 350°F (175°C) and line a 9×13-inch baking pan with parchment, leaving an overhang for easy lift-out; butter the exposed edges of the pan.
- Reserve 2 tablespoons of the brown sugar for the crumble, then whisk together the remaining brown sugar, flour, baking powder, salt, cinnamon and nutmeg in a large bowl.
- Stir together the pumpkin puree, egg, melted butter and vanilla in a separate bowl, then fold the wet mixture into the dry until just combined; fold in half the chopped pecans and the oats.
- Spread the batter evenly into the prepared pan, smoothing the top with an offset spatula or spoon.
- Combine the reserved brown sugar, oats, remaining pecans and 2 tablespoons melted butter in a small bowl until clumpy; sprinkle the crumble evenly over the batter and bake for 30–36 minutes. Test for doneness by inserting a toothpick in the center — it should come out with a few moist crumbs but not wet batter — or check that the center reaches about 200°F (93°C).
- Cool the pan on a wire rack 20 minutes, then refrigerate uncovered 30 minutes to firm; lift out on the parchment, slice into 10–12 bars and serve at room temperature.
Pro Tip: Make-ahead: bake and cool completely, then wrap tightly and refrigerate up to 4 days or freeze uncut up to 2 months; thaw in the refrigerator before slicing.
5. Feather-Paint Sugar Rounds
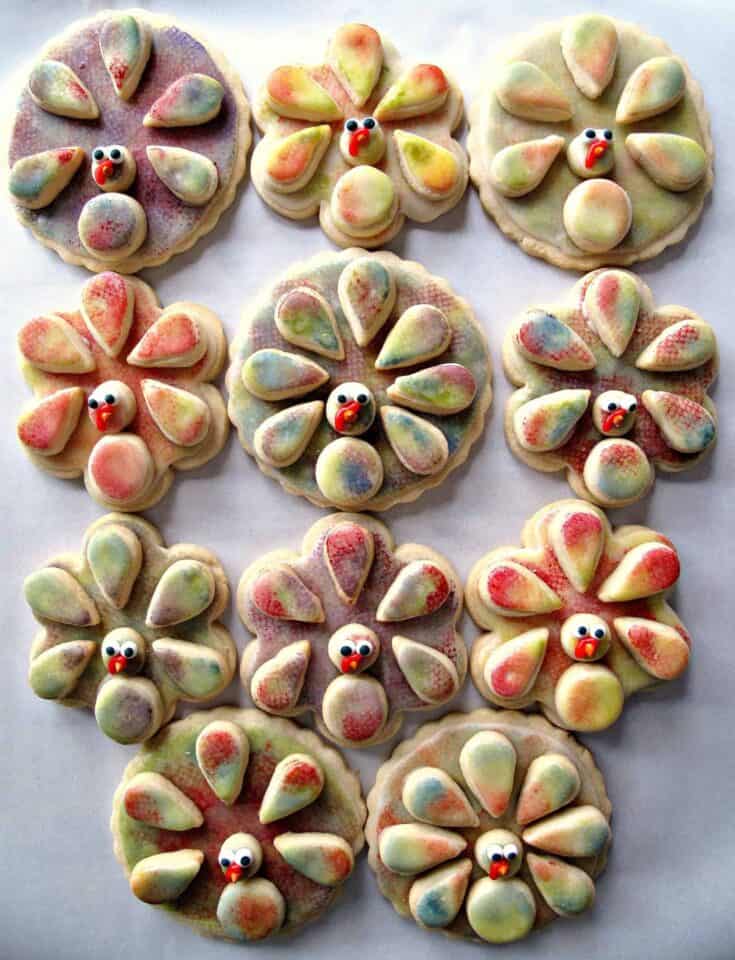
These playful turkey-feather sugar rounds are designed for little hands and big smiles. Soft, buttery sugar cookies are topped with a glossy, paintable royal icing that kids can brush and blend into feather patterns using gel colors. The activity is simple, low-mess, and lets everyone customize a flock of festive treats for Thanksgiving. No advanced piping skills needed—just small brushes, a palette of colors, and imagination.
Yield: Makes 20–24 cookies Total time: 4 hours 15 minutes
Ingredients
- 2 1/2 cups all-purpose flour
- 1/2 teaspoon baking powder
- 1/2 teaspoon fine salt
- 3/4 cup (1 1/2 sticks) unsalted butter, softened
- 1 cup granulated sugar
- 1 large egg
- 1 teaspoon pure vanilla extract
- 1 set (6–8) small gel food colors
- 2 cups powdered sugar (for icing)
- 3 tablespoons meringue powder
- 4–6 tablespoons warm water (for icing)
Instructions
- Preheat the oven to 350°F (175°C) and line two baking sheets with parchment paper or silicone mats.
- Cream the butter and granulated sugar with a stand mixer or hand mixer until light and fluffy, add the egg and vanilla, then mix in the flour, baking powder, and salt until a soft dough forms; wrap the dough and chill for 45 minutes.
- Roll the dough to about 1/4-inch thickness on a lightly floured surface, cut rounds with a 2 1/2–3 inch cutter, transfer to prepared sheets spacing 1 inch apart, and chill cut rounds 10 minutes on the baking sheet.
- Bake the cookies 8–10 minutes, until the edges are just set and the bottoms are pale golden; remove to a wire rack and cool completely before icing.
- Whisk the powdered sugar and meringue powder together, add warm water 1 tablespoon at a time until you reach a thick but brushable consistency; divide into bowls and tint each portion with gel colors to create a palette of feather tones.
- Flood each cookie with a thin base layer of icing and let set 45–60 minutes; then use small food-safe brushes to paint feather strokes and layered colors on the set base, and allow painted cookies to dry uncovered 2–3 hours before stacking or serving.
Pro Tip: Make the dough and bake the rounds up to two days ahead; store airtight at room temperature and paint the next day for easier handling and a fresher finish.
6. Pumpkin Cream Pockets — Cinnamon-Spiced Stuffed Cookies
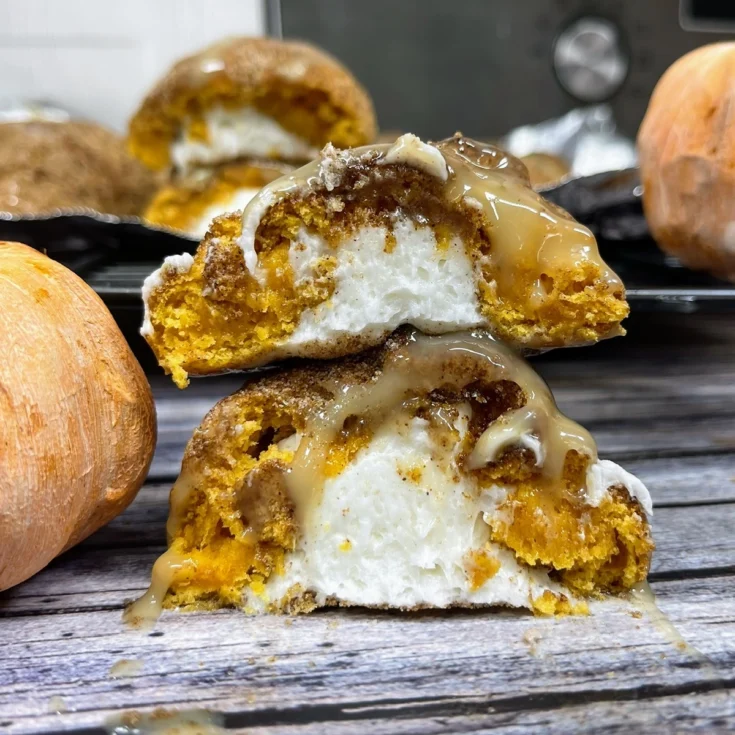
Soft, pumpkin-spiced cookies wrapped around a tangy cream-cheese center make for a playful Thanksgiving treat kids can help assemble. The dough is a snickerdoodle-style batter brightened with pumpkin and warm spices; a simple no-egg cream cheese filling is dolloped, sealed, and baked to tender perfection. These bite-sized pockets are cozy, not overly sweet, and great warm or room temperature for holiday snack tables.
Yield: Makes 18 cookies Total time: 1 hour 25 minutes
Ingredients
- 2 1/4 cups all-purpose flour
- 1 teaspoon cream of tartar
- 1/2 teaspoon baking soda
- 1 teaspoon ground cinnamon
- 1/2 teaspoon ground nutmeg
- 1/2 teaspoon fine salt
- 1 cup unsalted butter, softened
- 3/4 cup granulated sugar, plus 1 tablespoon ground cinnamon (for rolling)
- 1/2 cup pumpkin puree
- 8 ounces cream cheese, softened, with 1/3 cup powdered sugar and 1 teaspoon vanilla (for filling)
Instructions
- Preheat the oven to 350°F (175°C) and line two baking sheets with parchment paper; stir the 1 tablespoon cinnamon into the 3/4 cup sugar in a shallow bowl for rolling.
- Beat the butter and 3/4 cup granulated sugar until light, then add the pumpkin puree and mix until smooth; stir together the flour, cream of tartar, baking soda, 1 teaspoon cinnamon, nutmeg, and salt, then fold into the butter mixture to form a soft dough.
- Chill the dough in the refrigerator for 30 minutes. Meanwhile, beat the cream cheese with powdered sugar and vanilla until glossy, then chill the filling about 15 minutes to firm slightly.
- Portion the dough into 1 1/2-inch balls and flatten each into a 2-inch disc. Place about 1 teaspoon of chilled cream-cheese filling in the center, fold the dough over to fully enclose the filling, pinch to seal, and gently roll each sealed ball in the cinnamon-sugar.
- Arrange the stuffed cookies 2 inches apart on the prepared sheets and bake at 350°F (175°C) for 12–14 minutes, or until the edges are set and the tops crack slightly and spring back when pressed lightly.
- Cool the cookies on the baking sheet 10 minutes, then transfer to a wire rack to cool completely before serving so the filling sets and the pockets keep their shape.
Pro Tip: Make the cream cheese filling and cookie dough up to 48 hours ahead; store dough wrapped in the refrigerator and keep filling in an airtight container. Rewarm cookies briefly in a low oven before serving if you prefer them warm.
7. Mini Apple Blossom Tarts
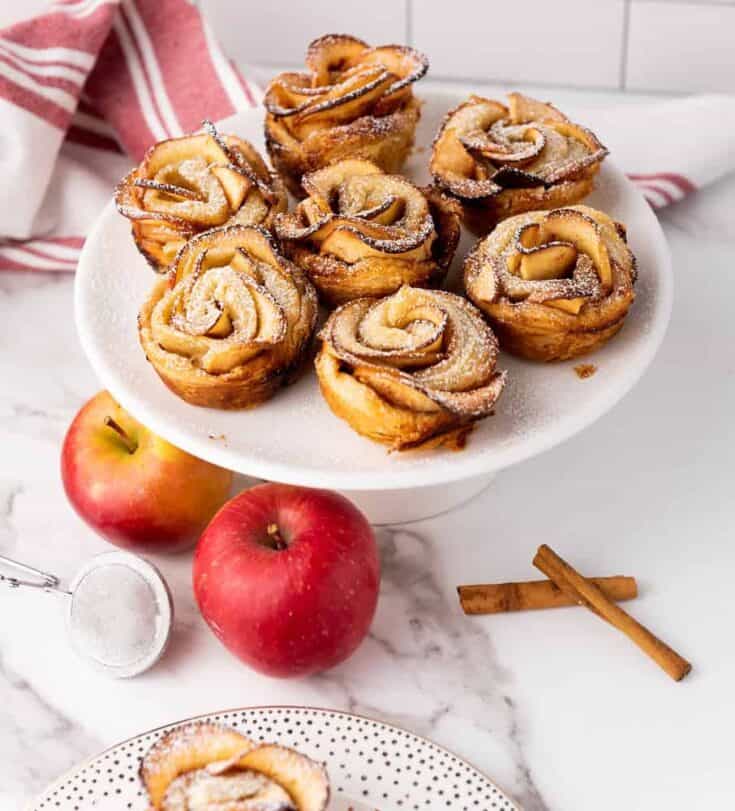
These Mini Apple Blossom Tarts turn crisp apple slices and store-bought puff pastry into delicate, kid-friendly roses that are ideal for Thanksgiving snack stations. The steps are simple enough for small hands: soften thin apple slices, wrap them in buttered pastry strips, and bake until puffed and golden. The warm apricot glaze gives a shiny finish kids love. They’re playful, portable, and perfect for little helpers.
Yield: Makes 12 tarts Total time: 50 minutes
Ingredients
- 1 sheet frozen puff pastry, thawed according to package directions
- 2 medium apples (Honeycrisp or Fuji), cored and very thinly sliced
- 3 tablespoons fresh lemon juice
- 3 tablespoons brown sugar, divided
- 1 teaspoon ground cinnamon
- 2 tablespoons unsalted butter, melted
- 1 large egg, beaten (for egg wash)
- 1/4 cup apricot jam
- 1 tablespoon water
- 1 tablespoon granulated sugar (for sprinkling)
Instructions
- Preheat the oven to 400°F (200°C) and line a muffin tin with 12 paper liners or lightly grease the cups.
- Combine the apple slices, lemon juice, 2 tablespoons brown sugar, and cinnamon in a small saucepan; cook over medium heat for 3–4 minutes, stirring, until slices are just pliable but not mushy, then remove and let cool slightly.
- Roll the puff pastry on a lightly floured surface into a 12×10-inch rectangle and cut into twelve 1-inch-wide strips; brush each strip lightly with melted butter and sprinkle with the remaining 1 tablespoon brown sugar and the granulated sugar.
- Arrange overlapping apple slices along the top half of each pastry strip with the peel side facing out, fold the bottom of the strip up over the apple bases, and tightly roll from one end to form a rose; place each rose into a muffin cup.
- Brush the exposed pastry with beaten egg and bake at 400°F (200°C) for 22–25 minutes, until the pastry is fully puffed and deep golden brown; remove from oven and cool in the tin 5 minutes before transferring to a rack.
- Glaze the warm roses by heating the apricot jam with 1 tablespoon water until loose, straining if desired, and brushing lightly over each tart; let cool another 5–10 minutes before serving.
Pro Tip: Make ahead by assembling roses and refrigerating in the muffin tin covered for up to 24 hours, then bake before serving; store leftovers in an airtight container at room temperature up to 2 days and rewarm 5–7 minutes at 350°F (175°C).
8. Little Turkey Chocolate Clusters
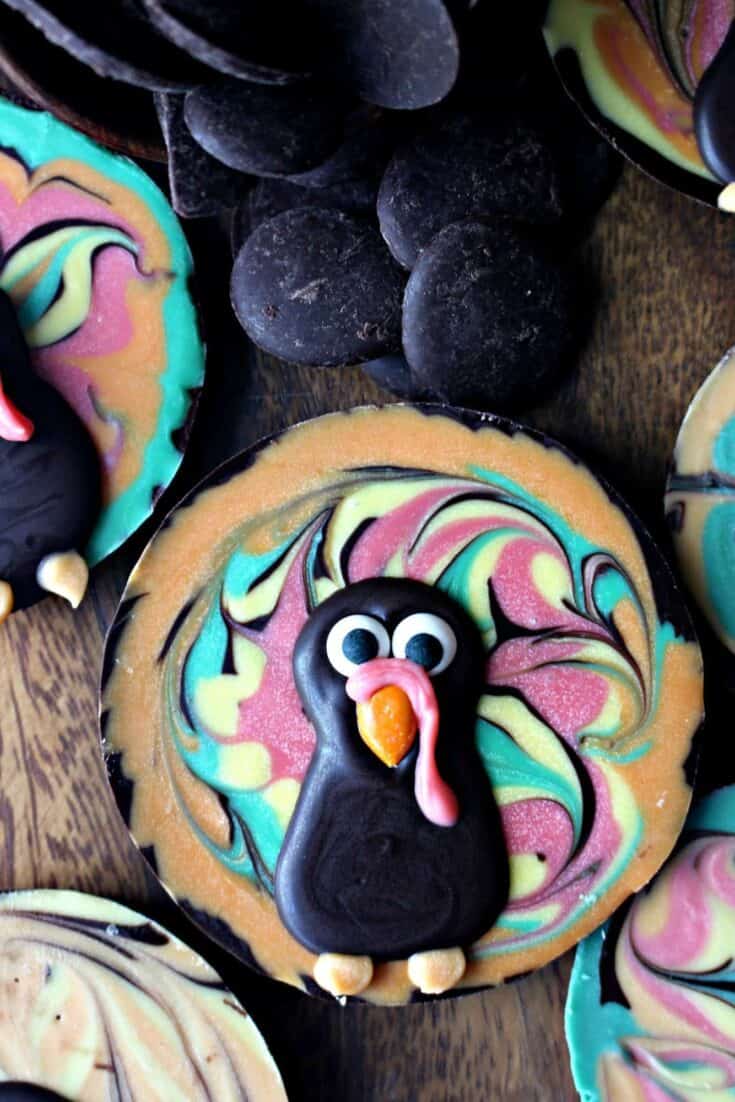
These playful, no-bake turkey clusters turn simple chocolate bark into a kid-friendly Thanksgiving activity. Smooth chocolate disks become “plumes” for colorful candy feathers, a mini peanut-butter cup forms the body, pretzel twists make the feet, and candy eyes bring each bird to life. Adults handle the melting; kids arrange candies and press pieces into place. Quick to assemble and perfect for a classroom or family craft table.
Yield: Makes 12 turkey treats (Serves 8–12) Total time: 1 hour (includes 30 minutes chilling)
Ingredients
- 8 oz semisweet chocolate, chopped or chips
- 4 oz white chocolate, chopped or chips
- 12 mini peanut-butter cups, unwrapped
- 36 candy-coated chocolate pieces (about 3 per turkey) in assorted colors
- 12 small round pretzel twists for feet
- 12 candy eyes
- 2 tbsp milk or cream (optional, to loosen chocolate)
- 1 tbsp vegetable shortening or coconut oil (optional, for shine)
- 1/2 tsp vanilla extract
- 1 large sheet parchment paper
Instructions
- Line a baking sheet with the parchment paper and set out the peanut-butter cups, candy pieces, pretzels and eyes so kids can pick colors and arrange birds.
- Melt the semisweet chocolate with the milk and shortening in a microwave-safe bowl in 20–30 second bursts, stirring between bursts until smooth; alternatively, melt over a double boiler.
- Spoon 12 rounded tablespoons of melted semisweet chocolate onto the parchment about 2 inches apart and flatten each into a 2-inch disk, then press one peanut-butter cup into the center of each disk to create the turkey body.
- Arrange three candy-coated chocolates in a fan behind each peanut-butter cup to form feathers, press two pretzel twists gently at the front base for feet, and add a candy eye on each peanut-butter cup.
- Use the melted white chocolate warmed briefly in the microwave and transferred to a small zip-top bag with a tiny corner snipped to pipe a small orange/yellow beak and highlights; wipe the tip between birds and reheat briefly if it thickens.
- Chill the baking sheet in the refrigerator for 25–35 minutes until the chocolate is fully set, then transfer the turkeys in a single layer to an airtight container for serving.
Pro Tip: Make up to 3 days ahead and keep in an airtight container layered between parchment sheets; bring to room temperature 15–20 minutes before serving for best texture.
9. Autumn Pillow Cheesecake Cookies
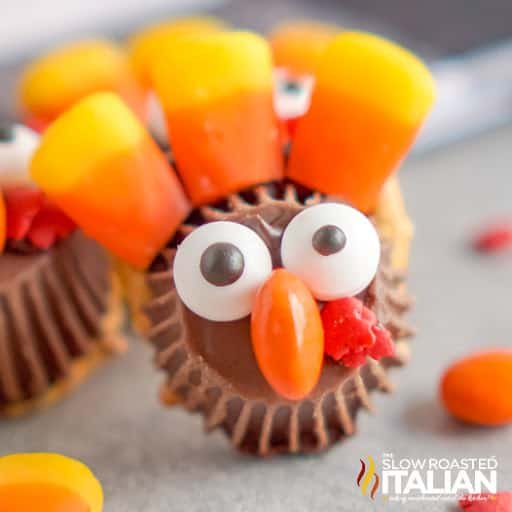
These cozy little treats pair tender spiced cookies with a tangy, no-bake pumpkin cheesecake center—perfect for helping kids assemble a Thanksgiving dessert. The cookie shells are sturdy enough for small hands and the filling is simple to whisk together ahead of time. They’re colorful, portable, and quick to finish after baking, making them a cheerful addition to holiday plates or lunchbox surprises.
Yield: Makes 24 cookies Total time: 1 hour 30 minutes
Ingredients
- 1 cup unsalted butter, softened
- 3/4 cup packed light brown sugar
- 1/4 cup granulated sugar
- 1 large egg
- 1 teaspoon vanilla extract
- 2 1/2 cups all-purpose flour
- 1 teaspoon baking powder
- 1/2 teaspoon fine sea salt
- 1 teaspoon ground cinnamon
- 8 ounces cream cheese, softened
- 1/2 cup canned pumpkin puree
- 1/2 cup powdered sugar, sifted
Instructions
- Preheat the oven to 350°F (175°C) and line two baking sheets with parchment paper.
- Whisk the filling: beat the cream cheese until smooth, add pumpkin, half the powdered sugar and half the cinnamon, then beat until creamy; chill the filling 20 minutes to firm.
- Mix the cookie dough: cream the butter with both sugars until light, beat in the egg and vanilla, then stir in flour, baking powder, salt and the remaining cinnamon to form a soft dough; chill the dough 30 minutes.
- Shape the cookies: portion dough into 1 1/2 tablespoon balls and place 2 inches apart on the prepared sheets; flatten each slightly before baking.
- Bake the cookies 12–14 minutes until the edges are set and tops are no longer glossy, then immediately press the center of each cookie with the back of a spoon to create a shallow well and cool on a rack until completely room temperature.
- Fill and set: spoon or pipe chilled pumpkin cheesecake into each well and chill the assembled cookies at least 30 minutes so the filling firms before serving.
Pro Tip: Make ahead by baking the cookies up to 3 days in advance and storing them unfilled in an airtight container at room temperature; fill and chill just before serving (or freeze baked, unfilled cookies for up to 1 month).
10. Turkey Donut Buddies
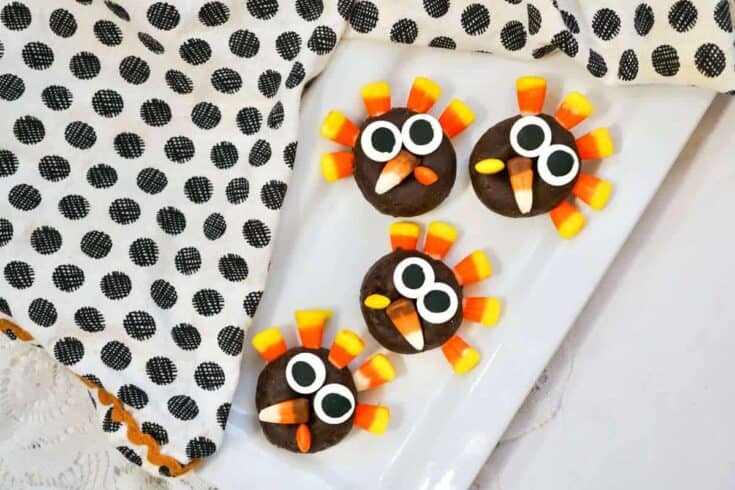
Tiny, playful treats that assemble in minutes, these Turkey Donut Buddies turn mini plain donuts into whimsical Thanksgiving characters kids can help make. With a chocolate-dipped top, candy-corn feather fan, pretzel feet and a candy beak, they’re hands-on, low-mess, and fridge-set — no baking required. Simple melting and pressing steps keep younger helpers engaged while adults handle the warm chocolate.
Yield: Serves 6-8 (makes 12 turkey donuts) Total time: 30 minutes
Ingredients
- 12 mini plain cake donuts
- 8 oz (225 g) semisweet chocolate chips
- 2 tbsp vegetable oil
- 24 candy eyes
- 36 candy corn pieces
- 24 mini pretzel sticks
- 12 orange candy-coated chocolates
- 2 tbsp vanilla frosting
- 1 sheet parchment paper
Instructions
- Line a baking sheet with the parchment paper and arrange the 12 mini donuts spaced so decorations won’t touch.
- Melt the semisweet chocolate chips with the vegetable oil in a microwave-safe bowl in 20–30 second bursts, stirring between bursts until smooth; adults should handle the hot bowl and allow the chocolate to cool slightly before kids help.
- Dip the top half of each donut into the melted chocolate, lift and let excess drip back into the bowl, then place the dipped donut back onto the parchment.
- Press three candy corn pieces into the chocolate on the back edge for tail feathers, insert two mini pretzel sticks in the bottom for feet, place one orange candy-coated piece for the beak, and attach two candy eyes using a small dab of vanilla frosting as glue.
- Chill the sheet in the refrigerator for 15–20 minutes, or until the chocolate is firm and no longer tacky to the touch, then confirm the chocolate has fully set before moving the donuts.
- Serve immediately or transfer the turkey donuts to an airtight container and keep refrigerated until ready to present; allow them to sit at room temperature 10 minutes before serving if desired.
Pro Tip: Make-ahead tip: Assemble up to 24 hours in advance and store a single layer in an airtight container in the refrigerator; bring to room temperature about 10 minutes before serving for the best texture.
11. Mini Maple Caramel Pretzel Purses
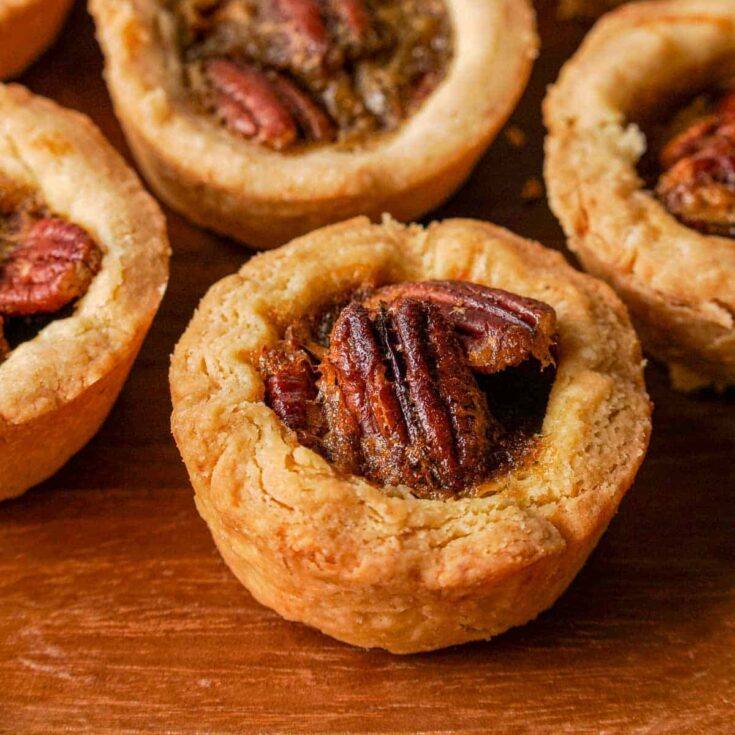
These Mini Maple Caramel Pretzel Purses capture the sweet, gooey spirit of classic Canadian butter tarts in a no-bake, kid-friendly bite. Tiny pretzel cups are filled with a glossy butterscotch-maple filling studded with raisins or chopped pecans — no oven needed and simple enough for little helpers. They’re sweet, salty, and portable, perfect for Thanksgiving snack tables or classroom parties where hands-on fun matters.
Yield: Makes about 24 purses (serves 8–10) Total time: 45 minutes (10 minutes prep + 30 minutes chilling + 5 minutes assembly)
Ingredients
- 24 small pretzel twists
- 1 cup butterscotch chips
- 2 tablespoons unsalted butter
- 1/3 cup packed light brown sugar
- 1/4 cup heavy cream
- 1 tablespoon pure maple syrup
- 4 ounces cream cheese, softened
- 1/2 teaspoon vanilla extract
- 1/3 cup raisins (or 1/3 cup finely chopped toasted pecans), optional
- 1/4 teaspoon coarse sea salt, plus extra for sprinkling
Instructions
- Line a baking sheet with parchment paper and arrange pretzel twists in pairs, pressing two together to form 24 shallow cups; set aside.
- Combine butterscotch chips, unsalted butter, packed brown sugar, heavy cream, and maple syrup in a microwave-safe bowl.
- Microwave the mixture in 20-second bursts, stirring thoroughly between each burst, until smooth and glossy (about 60–90 seconds total); allow to cool slightly.
- Beat in softened cream cheese and vanilla until fully incorporated and silky, then fold in raisins or chopped pecans if using.
- Spoon about 1 teaspoon of filling into each pretzel cup, let the filled sheet rest 10 minutes at room temperature to settle, then chill in the refrigerator for 30 minutes to firm.
- Sprinkle each purse with a pinch of coarse sea salt before serving and keep refrigerated until ready to enjoy.
Pro Tip: Make the filling up to three days ahead and store in an airtight container in the fridge; fill pretzels just before serving to keep them crisp.
12. Tiny Caramel Apple Cheesecake Bites
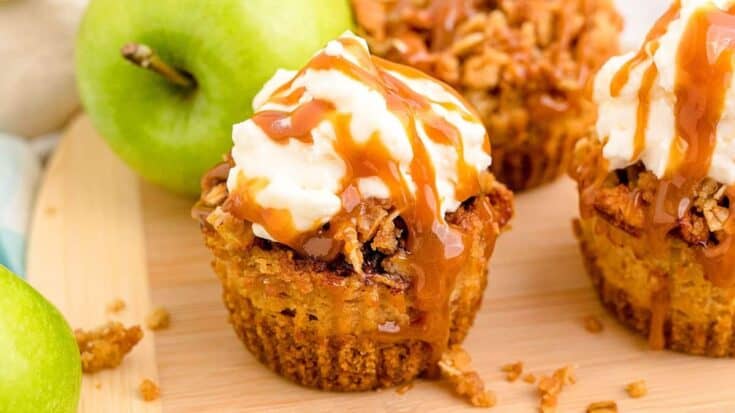
These bite-size caramel-apple cheesecakes are ideal for Thanksgiving when kids want to help. A crisp graham crust, silky cinnamon-kissed cheesecake with tiny apple pieces, a sticky caramel dollop, and a crunchy oat streusel make assembly fun and fast. Kids can press crusts, sprinkle streusel, and drizzle caramel. The mini format keeps portions tidy and perfect for a dessert table or lunchbox treats.
Yield: Serves 10-12 (makes 12 mini cheesecakes) Total time: 3 hours 5 minutes (about 25 minutes active, includes 2 hours chilling)
Ingredients
- 1 1/4 cups graham cracker crumbs
- 3 tablespoons unsalted butter, melted
- 12 ounces cream cheese, room temperature
- 1/3 cup granulated sugar
- 1 large egg
- 1 teaspoon vanilla extract
- 1 small tart apple (about 6 ounces), peeled and finely diced
- 1 tablespoon lemon juice
- 1/3 cup caramel sauce (plus extra for serving)
- 1/4 cup old-fashioned oats
- 3 tablespoons brown sugar
- 3 tablespoons cold unsalted butter, cubed
Instructions
- Preheat the oven to 325°F (163°C) and line a 12-cup muffin tin with paper liners or silicone cups.
- Combine the graham cracker crumbs and melted butter in a bowl; press about 1 tablespoon of the mixture firmly into the bottom of each liner to form an even crust.
- Beat the cream cheese and granulated sugar at medium speed until smooth, then beat in the egg and vanilla until just combined; fold in the diced apple that has been tossed with the lemon juice.
- Divide the filling evenly among the crusts. Prepare the streusel by rubbing together the oats, brown sugar and cold cubed butter with your fingertips until coarse crumbs form; sprinkle a small mound of streusel on each cheesecake and top each with a scant 1/2 teaspoon caramel sauce.
- Bake 18–22 minutes until the edges are set and the centers have a slight jiggle when the pan is gently shaken — this slight jiggle is the doneness check. Cool the tin on a rack for 20 minutes, then transfer to the refrigerator and chill at least 2 hours to fully set.
- Remove the minis from the tin and paper liners, drizzle with additional caramel if desired, and serve chilled or brought to room temperature for 15 minutes before serving.
Pro Tip: Make ahead by baking and chilling the cheesecakes up to 48 hours; keep them airtight in the refrigerator and add extra caramel just before serving.
13. Maple-Style Cinnamon Swirl Cupcakes
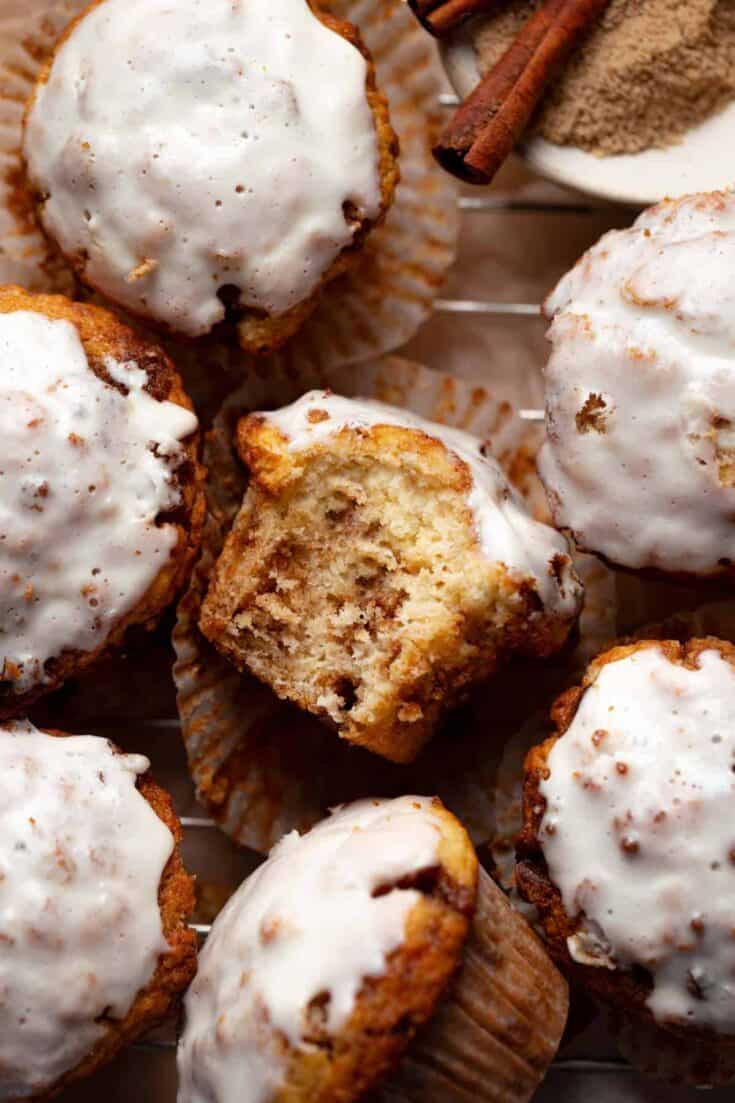
These portable, swirled breakfast bites combine soft muffin crumb with a gooey cinnamon-sugar ribbon—perfect for little hands and holiday brunch tables. The batter is mixed quickly in one bowl while kids help stir the cinnamon filling, then you layer and twist for an instant swirl effect. They bake golden in under half an hour and keep well for easy make-ahead mornings during Thanksgiving weekend.
Yield: Makes 10–12 muffins Total time: 40 minutes
Ingredients
- 1 3/4 cups all-purpose flour
- 1/3 cup granulated sugar
- 2 tsp baking powder
- 1/2 tsp salt
- 3/4 cup milk (whole or 2%)
- 1 large egg
- 1/4 cup melted unsalted butter, cooled
- 1 tsp vanilla extract
- 1/3 cup packed brown sugar
- 2 tsp ground cinnamon
Instructions
- Preheat the oven to 375°F (190°C) and line a 12-cup muffin tin with paper liners or lightly grease the cups.
- Whisk together the flour, granulated sugar, baking powder, and salt in a large bowl until evenly combined.
- Combine the milk, egg, melted butter, and vanilla in a separate bowl and whisk until smooth.
- Mix the wet ingredients into the dry just until incorporated; avoid overmixing. In a small bowl, stir the brown sugar with the cinnamon to make the swirl filling.
- Spoon a tablespoon of batter into each cup, add about 1 teaspoon of the cinnamon-brown sugar mixture, then top with more batter so cups are two-thirds full; use a knife to gently swirl the filling into the batter. Bake for 18–22 minutes at 375°F (190°C) until tops are golden and a toothpick inserted into the center comes out with a few moist crumbs or the internal temperature reads about 205°F (96°C).
- Cool the muffins in the pan for 5 minutes, then transfer to a wire rack to cool slightly before serving.
Pro Tip: Make ahead: bake up to 24 hours before serving and store cooled muffins in an airtight container at room temperature for up to 2 days, or freeze tight in a zip bag for up to 1 month; warm briefly before serving.
14. Harvest Candy Stripe Peanut Butter Squares
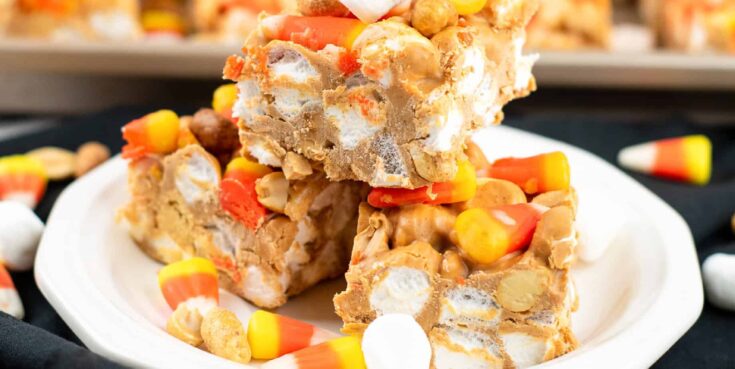
These Harvest Candy Stripe Peanut Butter Squares are a playful, no-bake treat perfect for Thanksgiving crafts with kids. A crunchy graham base supports a sweet peanut-buttery center, topped with bright yellow, orange and white candy layers that mimic candy-corn colors. The recipe needs minimal equipment, simple stirring and a few chilled set times—great for little hands to help swirl colors and press layers while you supervise.
Yield: Serves 10-12 Total time: 2 hours
Ingredients
- 1 1/2 cups graham cracker crumbs
- 1/3 cup unsalted butter, melted
- 1/4 teaspoon fine sea salt
- 3/4 cup creamy peanut butter
- 1/3 cup honey
- 1 cup powdered sugar, sifted
- 1/2 cup yellow candy melts
- 1/2 cup orange candy melts
- 1 cup white candy melts
- 2 tablespoons neutral oil (vegetable or canola)
Instructions
- Line an 8×8-inch baking pan with parchment, leaving a 1-inch overhang for easy removal.
- Combine graham cracker crumbs, melted butter and salt in a bowl; press the mixture firmly and evenly into the bottom of the prepared pan. Chill 10 minutes to set.
- Whisk together 3/4 cup peanut butter, honey and powdered sugar until smooth; spread the peanut-butter filling over the chilled crust and smooth the top. Chill 20 minutes.
- Melt the yellow candy melts with 1 teaspoon oil in a microwave-safe bowl in 15–20 second bursts, stirring until smooth; pour a thin even layer over the peanut filling and chill 15 minutes.
- Melt the orange candy melts with 1 teaspoon oil, pour a thin layer over the yellow, and chill 15 minutes. Then melt the white candy melts with the remaining oil, spread as the final layer, and chill until completely firm, about 30 minutes.
- Lift the set slab from the pan using the parchment overhang and place on a cutting board; slice into squares with a sharp knife warmed briefly under hot water and dried between cuts for clean edges.
Pro Tip: Make ahead by assembling up to 2 days in advance and refrigerating in an airtight container; bring to room temperature for 10 minutes before serving to soften slightly for easier biting.
15. Autumn Spice Pumpkin Chip Squares
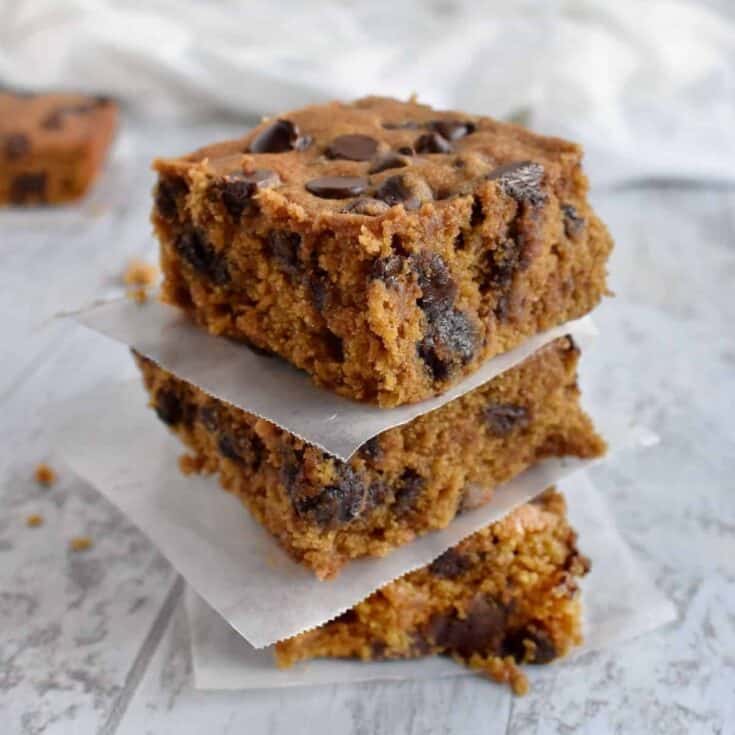
These cozy pumpkin-chocolate chip squares are a kid-friendly bake that combines autumn spice with gooey chocolate in a soft, buttery bar. The batter is simple enough for little helpers to stir, press, and sprinkle chocolate chips, making them perfect for a Thanksgiving afternoon activity. Finished bars are tender, slightly caramelized at the edges, and portable for lunchboxes or dessert platters.
Yield: Serves 10–12 Total time: 1 hour 15 minutes
Ingredients
- 1 1/2 cups all-purpose flour
- 1 tsp baking powder
- 1/2 tsp ground cinnamon
- 1/4 tsp ground ginger
- 1/2 tsp fine salt
- 10 tbsp unsalted butter, melted
- 3/4 cup packed light brown sugar
- 1/2 cup pumpkin purée
- 1 large egg, room temperature
- 1 tsp pure vanilla extract
- 3/4 cup semisweet chocolate chips
Instructions
- Preheat oven to 350°F (175°C) and line an 8×8-inch baking pan with parchment, leaving an overhang for easy removal.
- Whisk together the flour, baking powder, cinnamon, ginger, and salt in a medium bowl until evenly blended.
- Stir the melted butter and brown sugar in a large bowl until smooth, then whisk in the pumpkin purée, egg, and vanilla until glossy.
- Fold the dry ingredients into the wet mixture until just combined, then gently fold in the chocolate chips without overmixing.
- Press the batter evenly into the prepared pan and bake 25–30 minutes, or until the top is set and a toothpick inserted in the center comes out with a few moist crumbs.
- Cool the pan on a wire rack at least 30 minutes, then lift the squares out using the parchment overhang and slice into 16 pieces.
Pro Tip: Make ahead by storing fully cooled squares in an airtight container at room temperature for up to 3 days, or freeze individually wrapped for up to 2 months and thaw before serving.
16. Maple-Sour Cutout Cookies
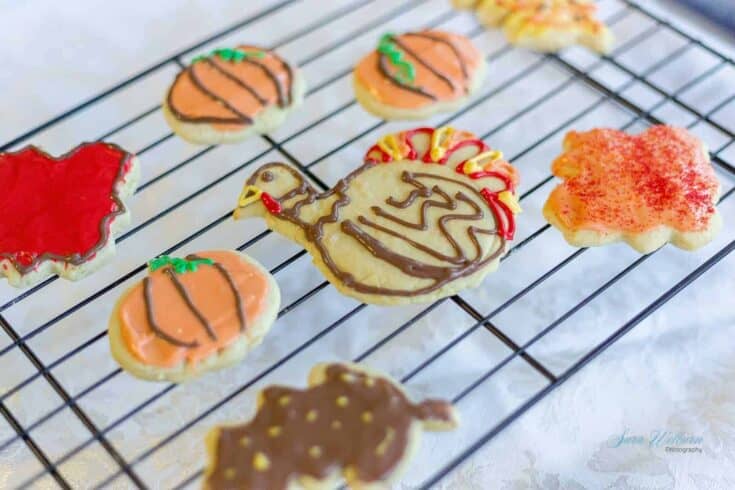
These tender, slightly tangy sugar cookies use sour cream for a soft, melt-in-your-mouth crumb perfect for Thanksgiving cookie decorating with kids. A touch of maple and warm spices gives autumn flavor while a simple powdered-sugar glaze makes decorating easy and mess-friendly. The dough is chillable for little hands to press out leaf and turkey shapes, then bake quickly for a family-friendly holiday project.
Yield: Serves 8–10 (about 24 cookies) Total time: 1 hour 50 minutes
Ingredients
- 1 cup unsalted butter, softened
- 3/4 cup granulated sugar
- 1/4 cup sour cream
- 1 large egg
- 1 teaspoon vanilla extract
- 2 1/2 cups all-purpose flour
- 1 teaspoon baking powder
- 1/2 teaspoon fine salt
- 1/2 teaspoon ground cinnamon
- 1 1/4 cups powdered sugar
- 1 tablespoon maple syrup
- 1–2 teaspoons milk or water
Instructions
- Preheat oven to 350°F (175°C) and line two baking sheets with parchment paper.
- Cream butter and granulated sugar with an electric mixer until pale and fluffy, then beat in sour cream, egg and vanilla until smooth.
- Whisk together flour, baking powder, salt and cinnamon in a separate bowl, then add to the wet mixture and mix on low speed until just combined.
- Chill the dough wrapped in plastic in the refrigerator for 45 minutes to firm up for easier rolling.
- Roll the chilled dough to about 1/4 inch thickness on a lightly floured surface, cut into shapes and transfer spaced 1 inch apart to the prepared baking sheets.
- Bake in the preheated oven 10–12 minutes until the edges are set and the bottoms are lightly golden; cool on a wire rack at least 20 minutes, then whisk powdered sugar, maple syrup and 1–2 teaspoons milk into a smooth glaze, spread or drizzle onto cooled cookies and let set 15–20 minutes.
Pro Tip: Make the dough up to 48 hours ahead, wrapped tightly in plastic and refrigerated; bake and glaze the day you serve and store finished cookies in an airtight container at room temperature for up to 4 days.
17. Maple-Acorn No-Bake Crunch Cookies
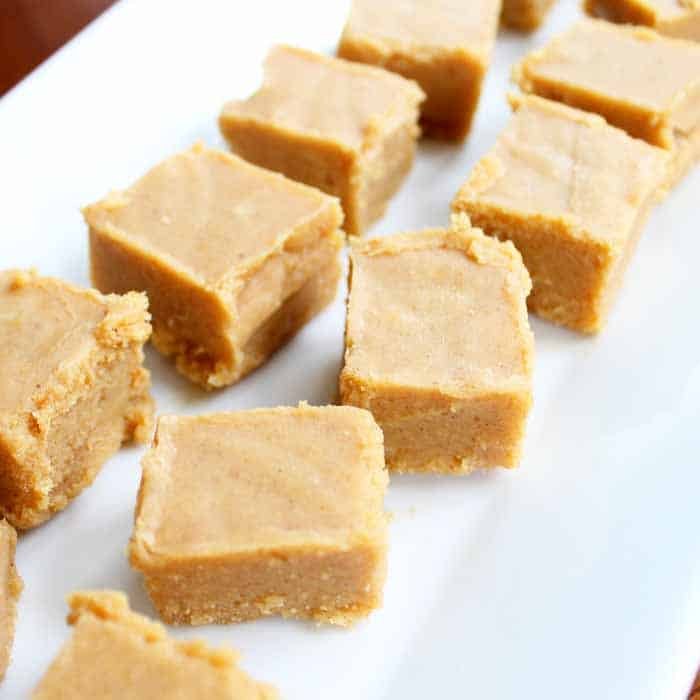
These kid-friendly no-bake treats mimic acorns with a crunchy oat base and a nutty cap. Sweetened with maple and held together by peanut butter and a touch of coconut oil, they come together quickly and require no oven time—great for little hands to roll and decorate. The mini chocolate chips add texture and a hint of chocolate, while hazelnut halves create the classic acorn look.
Yield: Makes 24 cookies (Serves 8–12) Total time: 1 hour 15 minutes
Ingredients
- 1 1/2 cups old-fashioned rolled oats
- 3/4 cup creamy peanut butter
- 1/3 cup pure maple syrup
- 2 tablespoons unsweetened cocoa powder
- 2 tablespoons coconut oil, melted
- 1/4 teaspoon fine salt
- 1 teaspoon vanilla extract
- 1/3 cup mini chocolate chips
- 24 hazelnut halves
Instructions
- Line a baking sheet with parchment and set aside so finished cookies have a cold surface to set on.
- Stir together peanut butter, maple syrup, melted coconut oil, cocoa powder, salt, and vanilla in a medium bowl until smooth.
- Fold in the rolled oats and mini chocolate chips until evenly coated and the mixture holds together — chill the bowl 10–15 minutes if it feels too soft.
- Scoop rounded tablespoonfuls and shape each into a teardrop (wider at the bottom, tapered at the top) to resemble an acorn; place on the prepared sheet.
- Press a hazelnut half gently into the tapered top of each drop to form the acorn cap and, if desired, press a few extra chips into the base for texture.
- Chill the tray in the refrigerator until firm, about 1 hour; serve chilled or at room temperature within 2 hours of removing from fridge.
Pro Tip: Make ahead: store in a single layer in an airtight container in the fridge for up to 5 days, or freeze in a sealed bag for up to 1 month and thaw in the fridge before serving.
18. Mini Maple-Spiced Pumpkin Pockets

These flaky little pumpkin pockets are an easy, kid-friendly Thanksgiving bake. Store-bought puff pastry keeps prep simple while a warm, spiced pumpkin filling gets a touch of real maple syrup for mellow sweetness. Children can help spoon filling, press edges, and sprinkle coarse sugar. They bake quickly into portable treats that are lovely warm or served at room temperature for a dessert table or school party.
Yield: Serves 6-8 Total time: 45 minutes
Ingredients
- 1 sheet frozen puff pastry, thawed according to package directions
- 3/4 cup canned pumpkin puree (not pumpkin pie filling)
- 2 tablespoons pure maple syrup
- 2 tablespoons light brown sugar, packed
- 1 teaspoon ground cinnamon
- 1/4 teaspoon ground nutmeg
- 1/2 teaspoon fine sea salt
- 1 tablespoon cornstarch
- 1 large egg, beaten (for egg wash)
- 1 tablespoon turbinado or coarse sugar, for sprinkling
Instructions
- Preheat the oven to 400°F (204°C) and line a baking sheet with parchment paper.
- Whisk the pumpkin, maple syrup, brown sugar, cinnamon, nutmeg, salt, and cornstarch in a bowl until smooth and slightly thickened.
- Unfold the thawed puff pastry on a lightly floured surface and cut into eight equal squares (about 3.5–4 inches each).
- Spoon about 1½ tablespoons of the pumpkin filling into the center of each square, fold into a triangle or rectangle, and press the edges together to seal; crimp with a fork.
- Brush each pocket with beaten egg and sprinkle with turbinado sugar, then transfer to the prepared sheet, spacing them about 1 inch apart.
- Bake for 18–22 minutes, rotating the pan once if needed, until the pastry is puffed and deep golden brown and the filling shows a little bubbling at the seams; cool on a rack for 10 minutes before serving.
Pro Tip: Make ahead by assembling turnovers on a tray, freeze until firm, then store in a freezer bag; bake from frozen adding about 4–6 minutes to the bake time, or keep cooled leftovers in an airtight container up to 2 days and rewarm in a 325°F oven for 5–8 minutes.
19. Autumn Cinnamon Pumpkin Snaps
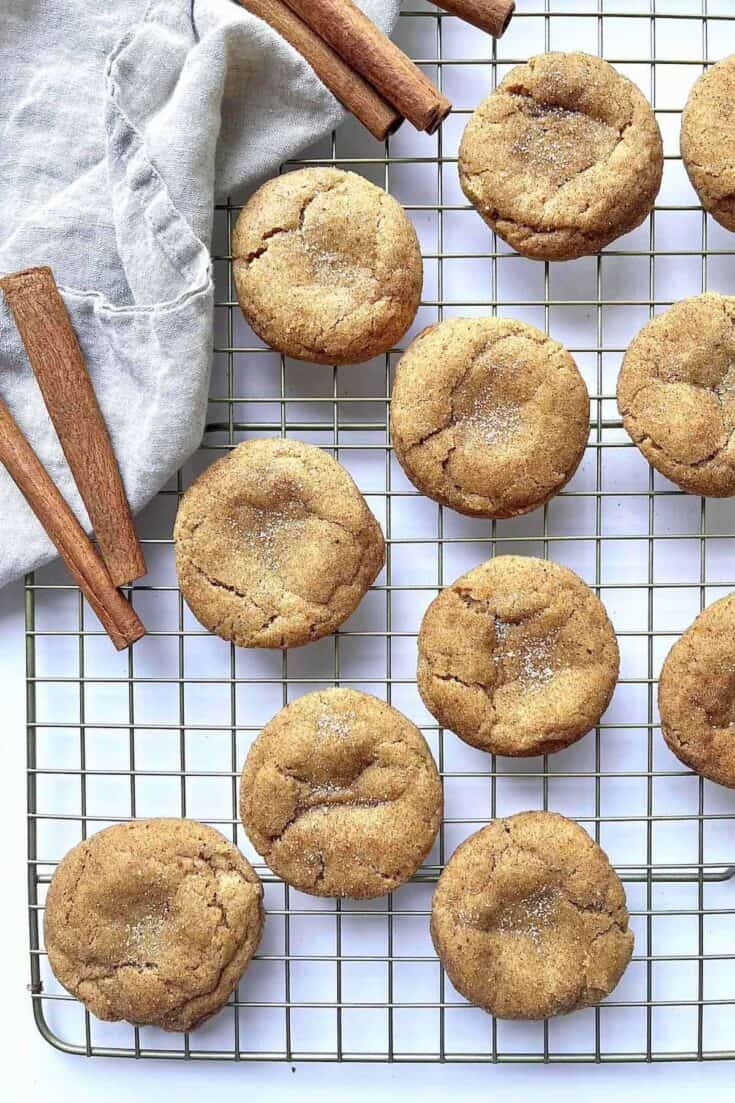
These soft, chewy cookies mix the tangy lift of classic snickerdoodles with mellow pumpkin and autumn spices. Kids can help roll each dough ball in a sparkling cinnamon-sugar coating before baking, making this an easy, hands-on Thanksgiving activity. The cookies bake to puffed, cracked tops and caramelized edges—perfect for holiday plates, lunchboxes, or a classroom treat at harvest-time celebrations.
Yield: Makes 24 cookies (Serves 8–12) Total time: 1 hour (includes 30 minutes chilling)
Ingredients
- 1/2 cup (1 stick) unsalted butter, softened
- 1/2 cup granulated sugar
- 1/2 cup packed light brown sugar
- 1/2 cup pumpkin purée (not pumpkin pie filling)
- 1 large egg
- 1 tsp vanilla extract
- 2 1/4 cups all-purpose flour
- 2 tsp cream of tartar
- 1 tsp baking soda and 1/4 tsp fine sea salt (combined)
- 2 tsp ground cinnamon (plus 2 tbsp granulated sugar for rolling)
Instructions
- Preheat the oven to 375°F (190°C) and line two baking sheets with parchment paper or silicone mats.
- Cream the softened butter with the granulated and brown sugars until light; beat in the pumpkin purée, egg, and vanilla until smooth and uniform.
- Whisk together the flour, cream of tartar, baking soda, salt, and the measured 2 tsp cinnamon; gradually fold the dry mix into the wet ingredients until a soft dough forms, scraping the bowl as needed.
- Chill the dough in the refrigerator for 30 minutes to firm slightly. Meanwhile, stir 2 tbsp granulated sugar with 1 tsp cinnamon in a shallow bowl for rolling.
- Scoop rounded tablespoons (about 1 1/2 tbsp) of dough, roll each into the cinnamon-sugar, and arrange 2 inches apart on the prepared baking sheets; bake for 10–12 minutes, rotating sheets halfway through, until edges are set and tops show cracks.
- Cool the cookies on the sheets for 5 minutes, then transfer to a wire rack to cool completely, about 20 minutes, before serving. Allow to cool fully so centers finish setting.
Pro Tip: Make ahead: shape and roll the dough balls, then freeze on a tray until firm and transfer to a bag for up to 2 months; bake from frozen adding 1–2 minutes to the time. Store baked cookies in an airtight container at room temperature for up to 4 days.
20. Autumn Pumpkin Parfait Shots
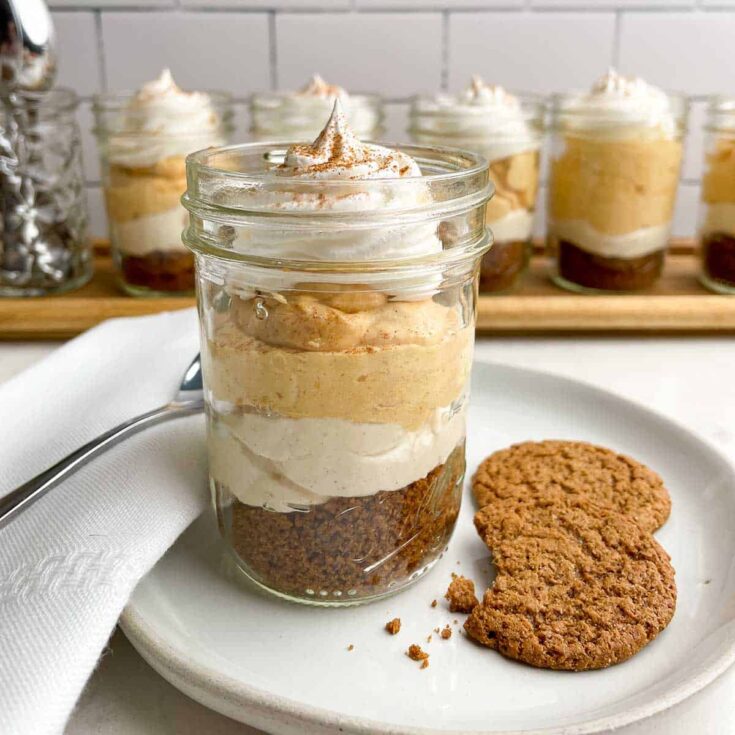
Tiny, no-fuss Pumpkin Parfait Cups transform classic pie flavors into kid-friendly, spoonable treats that are perfect for a Thanksgiving snack table. Crushed spiced cookies form a crisp base, topped with a lightly sweetened pumpkin-cream filling and a cloud of whipped cream. These handheld cups are safe and simple for little helpers to assemble, require no baking, and can be customized with toppings like nuts, chocolate, or extra spice.
Yield: Serves 10 (4-oz cups) Total time: 1 hour 20 minutes
Ingredients
- 1 1/2 cups crushed gingersnap cookies
- 1/4 cup unsalted butter, melted
- 8 oz cream cheese, softened
- 3/4 cup pumpkin puree (not pumpkin pie filling)
- 1/3 cup packed brown sugar
- 1 tsp ground cinnamon
- 1/4 tsp ground ginger
- 1/8 tsp ground nutmeg
- 1 cup whipped cream, divided
- 10 small 4-oz cups or ramekins
Instructions
- Mix the crushed gingersnaps and melted butter in a bowl until evenly moistened, then press about 2 tablespoons of the crumb mix into the bottom of each cup to form a crust.
- Beat the cream cheese until smooth, then add pumpkin puree, brown sugar, cinnamon, ginger, and nutmeg; beat again until the mixture is silky and uniform.
- Fold 3/4 cup of the whipped cream into the pumpkin-cream mixture with a rubber spatula until light and airy, leaving a little whipped cream aside for topping.
- Spoon or pipe the pumpkin filling over the cookie crust in each cup, stopping about 1/4 inch from the rim to leave room for whipped cream.
- Chill the assembled cups in the refrigerator for at least 1 hour to set, or up to 3 hours for a firmer texture before final garnishing.
- Top each chilled cup with a dollop of the reserved whipped cream and sprinkle with a pinch of crushed gingersnap or a dusting of cinnamon just before serving.
Pro Tip: Make-ahead: Assemble through step 4, cover, and refrigerate up to 24 hours. Add whipped cream and garnish just before serving. Store leftovers covered in the fridge for up to 3 days.
21. Pumpkin-Pecan Toffee Clusters
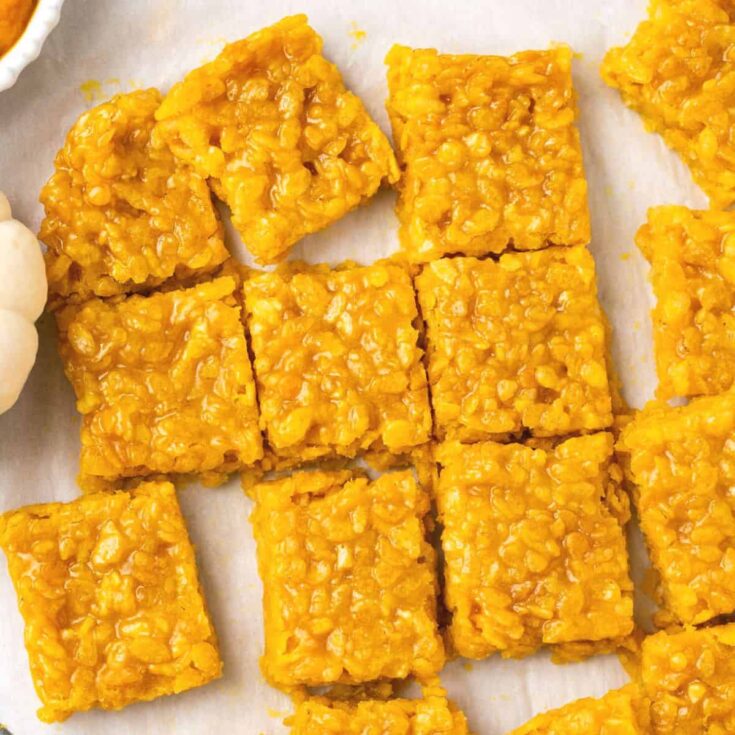
These Pumpkin-Pecan Toffee Clusters are a playful, no-bake Thanksgiving treat that combine crunchy toffee bits, toasted pecans, and warm pumpkin spice in spoonable clusters kids can help assemble. Melting chocolate binds the mix while a white chocolate drizzle and a hint of maple add shine. Quick to make and easy to customize, they bring seasonal flavor to cookie trays, snack mixes, or lunchbox surprises.
Yield: Makes about 24 clusters (Serves 8–12) Total time: 1 hour 20 minutes
Ingredients
- 1 1/2 cups toffee bits
- 1 cup pecans, toasted and roughly chopped
- 1 cup crushed gingersnap cookies (about 12 cookies)
- 1 1/2 cups semisweet chocolate chips
- 2 Tbsp unsalted butter
- 2 tsp maple syrup
- 1 1/2 tsp pumpkin pie spice
- 1/2 tsp flaky sea salt
- 1/3 cup white chocolate chips
- 1 tsp vanilla extract
Instructions
- Preheat oven to 350°F and spread whole pecans on a rimmed baking sheet; toast 6–8 minutes until fragrant, then cool and chop.
- Combine crushed gingersnaps, toffee bits, chopped toasted pecans, pumpkin pie spice, and sea salt in a large bowl.
- Melt semisweet chocolate chips, butter, and maple syrup in a microwave-safe bowl in 20-second bursts, stirring between each; alternatively melt gently in a double boiler, then stir in vanilla.
- Fold the melted chocolate into the dry mixture until all pieces are evenly coated and glossy.
- Drop tablespoon-sized mounds onto a parchment-lined baking sheet, then melt white chocolate chips and drizzle over the clusters with a spoon or fork for a decorative finish.
- Chill the tray in the refrigerator until fully set, at least 45–60 minutes; let clusters sit 5 minutes at room temperature before serving.
Pro Tip: Store clusters in an airtight container in the refrigerator for up to 2 weeks or freeze up to 3 months; thaw in the fridge before serving.
22. Autumn Pumpkin Truffle Bites

These bite-sized pumpkin truffles are an easy, kid-friendly Thanksgiving treat that need no oven and take simple pantry staples to festive bites. Spiced cookie crumbs and pumpkin join cream cheese to make a soft filling that’s dipped in sweet chocolate and finished with crunchy pecans or sprinkles. They’re ideal for little hands to help shape, and are quick to chill while you prep other desserts.
Yield: Makes about 24 truffle bites (Serves 8–12) Total time: 1 hour 15 minutes
Ingredients
- 1 1/2 cups finely crushed gingersnap cookies
- 1/2 cup canned pumpkin puree (not pie filling)
- 4 oz cream cheese, room temperature
- 1/3 cup powdered sugar, sifted
- 1 tsp ground cinnamon
- 1/4 tsp ground ginger
- 1/8 tsp ground nutmeg
- 1 cup white chocolate chips or melting wafers
- 1 tbsp coconut oil or vegetable shortening
- 2 tbsp finely chopped toasted pecans or festive sprinkles for garnish
Instructions
- Mix the crushed gingersnaps, cinnamon, ginger, and nutmeg in a large bowl until evenly combined.
- Beat the cream cheese, pumpkin puree, and powdered sugar in a separate bowl until smooth and homogenous.
- Fold the dry cookie mixture into the pumpkin-cream cheese mixture until fully incorporated; cover and chill in the refrigerator for 20 minutes to firm slightly.
- Roll the chilled mixture into 1-inch balls using lightly greased hands, place on a parchment-lined baking sheet, and chill for 15 minutes to set.
- Melt the white chocolate chips with the coconut oil in the microwave in 20-second bursts, stirring between bursts (or melt in a double boiler) until smooth; let sit 1 minute to cool slightly.
- Dip each chilled ball into the melted chocolate using a fork, tap off excess, return to the parchment, sprinkle with chopped pecans or sprinkles, and chill at least 20 minutes until the coating is firm before serving.
Pro Tip: Make ahead: store in a single layer in an airtight container in the refrigerator for up to 4 days or freeze in a sealed container for up to 1 month; thaw in the fridge before serving.
23. Autumn Spice Pumpkin Fudge Squares
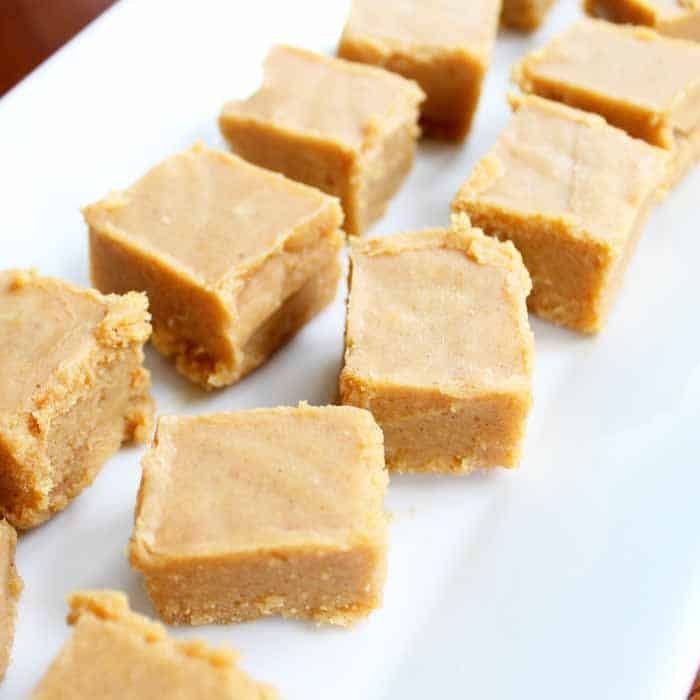
Bright, creamy, and kid-friendly, these pumpkin spice fudge squares capture Thanksgiving flavor with minimal fuss. Sweet white chocolate melds with real pumpkin puree and warm spices to make a silky no-bake treat that’s perfect for little hands to help press and sprinkle. Chill until firm, then cut into small squares for a festive platter that vanishes at holiday gatherings.
Yield: Makes about 36 bite-sized squares (Serves 12–18) Total time: 2 hours 20 minutes
Ingredients
- 12 oz white chocolate chips or wafers
- 14 oz sweetened condensed milk (about 1 1/4 cups)
- 1/2 cup pure pumpkin puree
- 2 tablespoons unsalted butter
- 1 teaspoon vanilla extract
- 1 1/2 teaspoons pumpkin pie spice
- 1/4 teaspoon fine sea salt
- 1/2 cup toasted pecans, chopped
- 2 tablespoons crushed gingersnap cookies (for topping)
- 1 sheet parchment paper (approx. 9×9-inch)
Instructions
- Line an 8-inch square pan with the parchment paper, leaving a 1-inch overhang for easy lifting and lightly spray the paper with nonstick spray.
- Combine the white chocolate chips, sweetened condensed milk, and butter in a microwave-safe bowl; heat in 20–30 second bursts, stirring thoroughly between intervals until smooth (about 1–2 minutes total) and take care—the bowl will be hot.
- Whisk in the pumpkin puree, vanilla extract, pumpkin pie spice, and sea salt until the mixture is uniform and glossy.
- Fold in half of the chopped pecans, then pour the mixture into the prepared pan and smooth the top; sprinkle the remaining pecans and crushed gingersnap cookies over the surface, pressing lightly so they adhere.
- Chill in the refrigerator until fully set, at least 2 hours and up to 4 hours for a firmer texture.
- Cut the chilled block into about 36 bite-sized squares using a sharp knife (wipe the blade clean between cuts for neat edges) and arrange in a single layer for serving.
Pro Tip: Make ahead: store in an airtight container in the refrigerator for up to 7 days, or freeze in a single layer on a tray then transfer to a freezer bag for up to 3 months; thaw in the fridge before serving.
24. Autumn Patch Sugar Drops
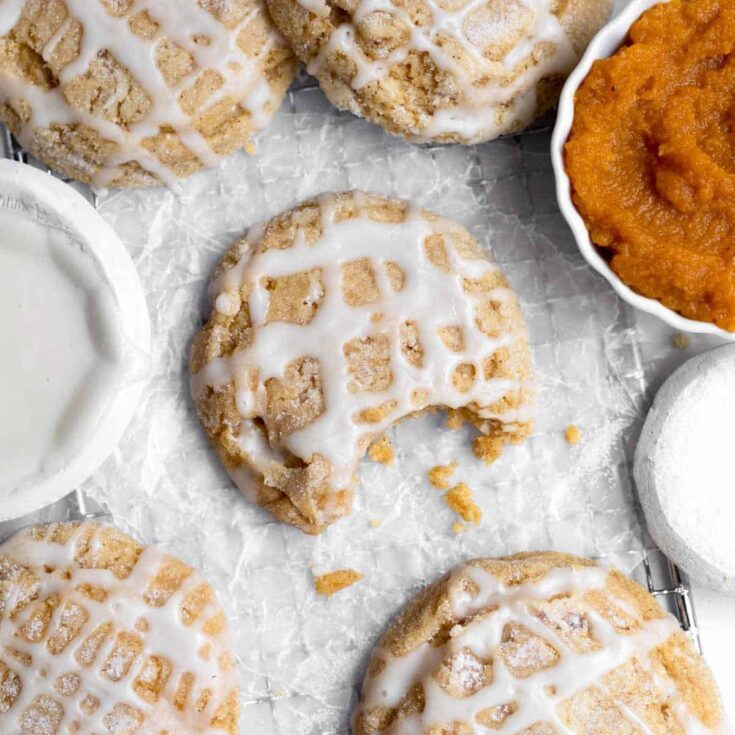
These soft, lightly spiced pumpkin-sugar cookies are a kid-friendly Thanksgiving project that blends pumpkin puree into a classic roll-in-sugar cookie. Little bakers can help measure, scoop, and roll dough balls, while adults handle the oven. The cookies bake to tender, cake-like centers with sugary, slightly crackled exteriors — perfect for decorating with sprinkles or a simple glaze for a festive table.
Yield: Makes about 24 cookies (Serves 8–10) Total time: 1 hour 10 minutes
Ingredients
- 1 3/4 cups all-purpose flour
- 1 tsp baking powder
- 1/2 tsp salt
- 1 1/2 tsp pumpkin pie spice
- 1/2 cup unsalted butter, softened
- 3/4 cup granulated sugar
- 1/3 cup pumpkin puree (not pumpkin pie filling)
- 1 large egg
- 1 tsp vanilla extract
- 1/2 cup granulated sugar (for rolling)
Instructions
- Preheat the oven to 350°F (177°C) and line two baking sheets with parchment paper or silicone mats.
- Cream the butter and 3/4 cup granulated sugar together in a bowl until fluffy, then beat in the egg, pumpkin puree, and vanilla until smooth.
- Stir the flour, baking powder, salt, and pumpkin pie spice together; fold the dry mix into the wet ingredients until just combined, then chill the dough in the refrigerator for 30 minutes to firm up.
- Scoop the chilled dough into level 1-tablespoon portions and roll each between your palms into a smooth ball, then roll each ball in the 1/2 cup granulated sugar to coat; arrange balls about 2 inches apart on prepared sheets.
- Bake the cookies for 10–12 minutes, rotating sheets halfway through, until the edges are set and the tops show light cracks; allow cookies to rest on the baking sheet 5 minutes, then transfer to a wire rack and cool for 15 minutes.
- Decorate or serve plain once cool — add sprinkles, a drizzle of simple powdered-sugar glaze, or a dusting of cinnamon sugar as desired.
Pro Tip: Make-ahead/storage tip: Roll the dough into sugar-coated balls, freeze them in a single layer until solid, then store in an airtight container for up to 1 month; bake from frozen, adding 1–2 minutes to the baking time.
25. Gobble-Friendly Chocolate Cookie Truffles
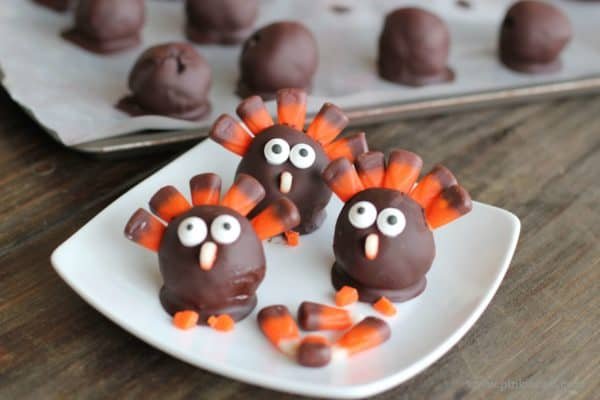
Turn classic cookie truffles into Thanksgiving characters the kids can help assemble. These chocolate-coated cookie bites get a fan of candy-corn tail feathers, tiny pretzel legs, candy eyes and a candy-bead beak. The process is mostly hands-on, no baking required, and easy to scale for a classroom or family party. Chill time helps the coating set so little hands can decorate without a mess.
Yield: Makes 24 turkey truffles (Serves 8–12) Total time: 1 hour 15 minutes
Ingredients
- 24 chocolate sandwich cookies (about 13–15 oz)
- 4 oz (1/2 cup) cream cheese, softened
- 8 oz (1 cup) semisweet chocolate or coating wafers
- 4 oz (3/4 cup) orange candy melts or colored coating
- 72 candy corn pieces (for tail feathers)
- 48 thin pretzel sticks (for legs)
- 24 small candy eyes
- 24 small orange candy pearls or orange mini candies (for beaks)
- 1/4 tsp fine sea salt
- 1 tbsp neutral oil (optional, to thin chocolate)
Instructions
- Pulse the cookies and salt in a food processor until they become fine crumbs; transfer to a bowl.
- Combine the crumbs with the softened cream cheese and mix until a uniform, sticky dough forms; form the mixture into 24 evenly sized balls and arrange on a parchment-lined tray.
- Chill the balls for 20 minutes in the refrigerator so they firm up and are easier to dip.
- Melt the semisweet chocolate and oil (if using) in a microwave-safe bowl in 20-second bursts, stirring between bursts until smooth and glossy; dip each chilled ball into the melted chocolate, tap off excess, and return to the parchment.
- Melt the orange candy coating in short bursts until pourable; press the upper back of each coated truffle briefly into the orange coating, immediately arrange 3 candy corn pieces in a fan for tail feathers, and insert two pretzel sticks into the bottom for legs while the orange coating is still tacky.
- Press a candy eye on each side of the front and place an orange candy bead for a beak; chill the decorated truffles for 15–30 minutes more until fully set before serving.
Pro Tip: Make these up to 3 days ahead and store in a single layer in an airtight container in the refrigerator; bring to room temperature for 10–15 minutes before serving for best flavor and texture.
26. Little Turkey Truffle Pops
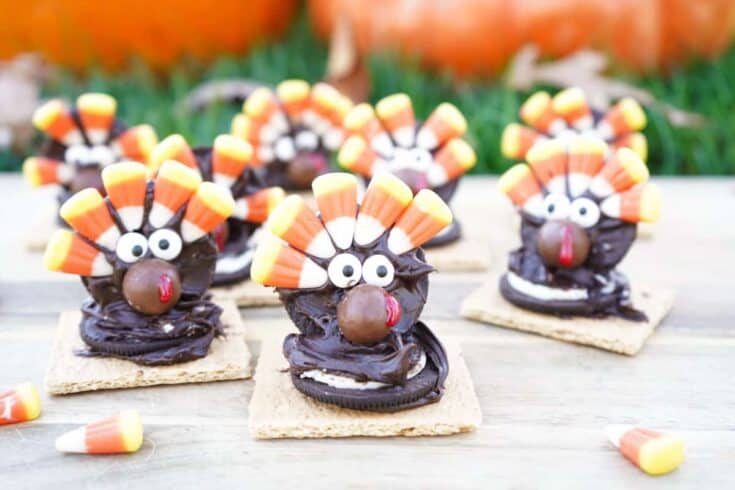
Mini Turkey Truffle Pops turn everyday sandwich cookies into playful Thanksgiving nibbles. Children can help crush cookies, press a soft filling into bird shapes, and decorate with candy eyes and triangular beaks. There’s no baking—just stirring, chilling, dipping, and arranging candy ‘feathers’—which makes this a fun, low-mess activity for a holiday gathering or classroom party. These bite-sized treats also look festive on a dessert platter.
Yield: Makes 24 pieces (Serves 8–12) Total time: 1 hour 15 minutes
Ingredients
- 24 chocolate sandwich cookies (about 1 standard package)
- 4 oz (115 g) cream cheese, softened
- 1/2 cup (60 g) powdered sugar, sifted
- 8 oz (225 g) semi-sweet chocolate chips or chopped chocolate
- 1 tbsp vegetable oil (optional, to thin melted chocolate)
- 24 candy corn pieces (for tail feathers)
- 24 mini candy eyes
- 24 small orange candy pieces (for beaks; mini M&Ms or candy-coated chocolate)
- 12 mini twist pretzels, halved (for feet)
- 2 tbsp dark chocolate or cocoa powder (for accents)
- 1 sheet parchment paper (or 24 small paper liners)
Instructions
- Crush cookies in a food processor or sealed bag until fine crumbs form; transfer to a bowl and add the softened cream cheese and powdered sugar, then mix until a uniform, moldable paste forms.
- Chill the cookie-cream mixture for 30 minutes to firm slightly, then roll into 24 balls about 1 inch in diameter and press one side of each ball flat to form a stable base and a gentle slope for the back.
- Shape each ball by pinching a small crease at the back where candy corn tails will sit; place shaped pieces on parchment and chill 15 minutes to set shape.
- Melt the semi-sweet chocolate with the vegetable oil in a microwave-safe bowl in 20–30 second bursts, stirring between each until smooth (or melt in a double boiler).
- Dip each chilled truffle into the melted chocolate to coat, let excess drip off, and place back on parchment; press 3–4 candy corn pieces into the still-wet chocolate at the rear to form the tail, add a small orange candy for the beak, and place mini eyes near the front.
- Pipe or drizzle dark chocolate or dust cocoa powder for tiny accents and press pretzel halves into the bottom for feet using a dab of melted chocolate as glue; chill assembled truffles until fully set, about 30 minutes, before serving.
Pro Tip: Make-ahead: Store finished truffles in an airtight container in the refrigerator for up to 5 days; bring to room temperature for 10–15 minutes before serving for the best texture.
27. Crunchy Pretzel Turkey Bites
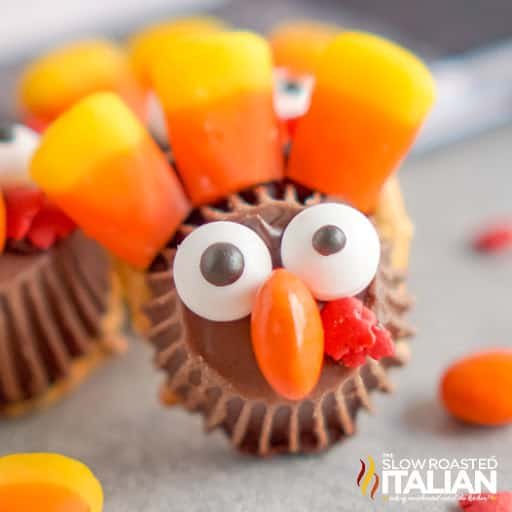
Make Thanksgiving snack time playful with these crunchy, chocolate-coated pretzel turkeys kids can assemble. Sweet peanut-butter bodies sit between pretzel tails, candy-corn feathers and tiny butterscotch beaks for a festive, hands-on treat. No baking required: adults melt chocolate, children press and decorate. The recipe yields about two dozen bite-sized turkeys—perfect for classroom parties, dessert trays, or an after-dinner nibble that’s quick, sticky-fun, and easy to adapt.
Yield: Serves 10-12 (about 24 turkey bites) Total time: 45 minutes (includes 30 minutes chilling and 10 minutes final setting)
Ingredients
- 24 mini pretzel twists (about 1 cup)
- 1/2 cup smooth peanut butter
- 1/3 cup powdered sugar
- 1 cup semisweet chocolate chips
- 1 tbsp coconut oil
- 24 candy corn pieces
- 24 edible candy eyes
- 24 butterscotch chips
- 1/4 cup crushed pretzels
- 1 tbsp rainbow sprinkles (optional)
Instructions
- Arrange a parchment-lined baking sheet and position pretzels in pairs with the rounded sides overlapping to form each turkey tail (24 pairs).
- Combine peanut butter and powdered sugar in a medium bowl and stir until thick and scoopable; roll into 24 small balls (about 1/2 teaspoon each).
- Melt semisweet chocolate chips with coconut oil in a microwave-safe bowl in 20–30 second bursts, stirring between bursts until completely smooth and glossy.
- Dip the bottom of each peanut-butter ball into the melted chocolate and press onto the center of a pretzel pair to form the body; use a small dab of melted chocolate to attach a candy corn behind the body for the tail, a candy eye on the front, and a butterscotch chip for the beak.
- Chill the assembled bites on the baking sheet in the refrigerator for 30 minutes to set the chocolate and firm the peanut-butter centers.
- Drizzle any remaining melted chocolate over the turkeys, sprinkle with crushed pretzel or rainbow sprinkles if using, allow an additional 10 minutes at room temperature to set, then transfer to a platter to serve.
Pro Tip: Make ahead: assemble and chill in a single layer for up to 24 hours; store in an airtight container in the refrigerator for up to 3 days and bring to room temperature 10–15 minutes before serving.
28. Mini Maple-Pecan Puff Clusters
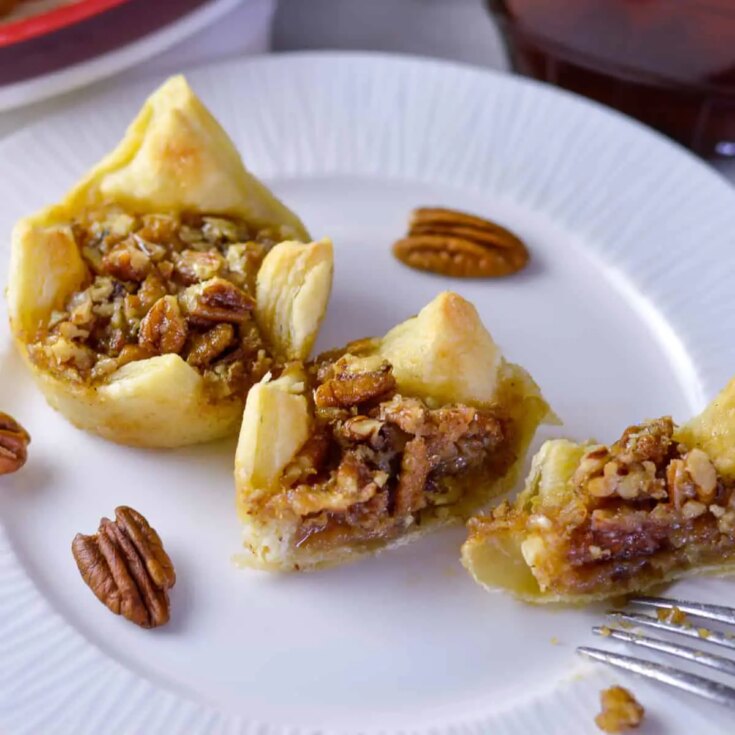
These tiny, no-bake clusters capture pecan pie flavors in a kid-friendly, make-with-kids format. Puffed cereal and toasted pecans get a sticky maple-brown-sugar glaze with a hint of bourbon (or bourbon extract), then chill into hand-sized bites. They’re simple, quick, and delightfully crunchy — a great Thanksgiving snack that tastes like pie without the fuss of a full dessert.
Yield: Makes about 20–24 clusters (Serves 8–10) Total time: 45 minutes
Ingredients
- 1 cup pecans, toasted and roughly chopped
- 2 cups corn puffs cereal (or puffed rice)
- 3/4 cup pure maple syrup
- 2 tbsp unsalted butter
- 1/4 cup packed light brown sugar
- 1 tsp vanilla extract
- 1 tsp bourbon or 1/2 tsp bourbon extract (optional for kids)
- 1/2 tsp kosher salt
- 1/4 tsp ground cinnamon
- 1/2 cup powdered sugar for light dusting (optional)
Instructions
- Toast the pecans in a dry skillet over medium heat, stirring, until fragrant (3–4 minutes), then cool and roughly chop.
- Combine the maple syrup, butter, and brown sugar in a small saucepan and heat over medium, stirring until the sugar dissolves and the mixture comes to a gentle simmer, about 2–3 minutes—watch carefully to avoid splattering.
- Remove the saucepan from heat and stir in the vanilla, bourbon or bourbon extract, salt, and cinnamon; allow the glaze to cool for 1–2 minutes to reduce sizzling.
- Fold the cereal and chopped pecans into the warm glaze in a large bowl, tossing gently until evenly coated but not crushed.
- Spoon heaping tablespoons of the mixture onto a parchment-lined baking sheet, shaping into clusters with damp fingers if needed; sprinkle lightly with powdered sugar if using.
- Chill the clusters in the refrigerator until set, at least 30 minutes, then serve. Store in an airtight container at room temperature for up to 3 days or refrigerate for up to 1 week.
Pro Tip: Make ahead by forming clusters and chilling them in a single layer, then store in the fridge; bring to room temperature 15 minutes before serving for softer texture.
29. Maple-Pecan Acorn Bites
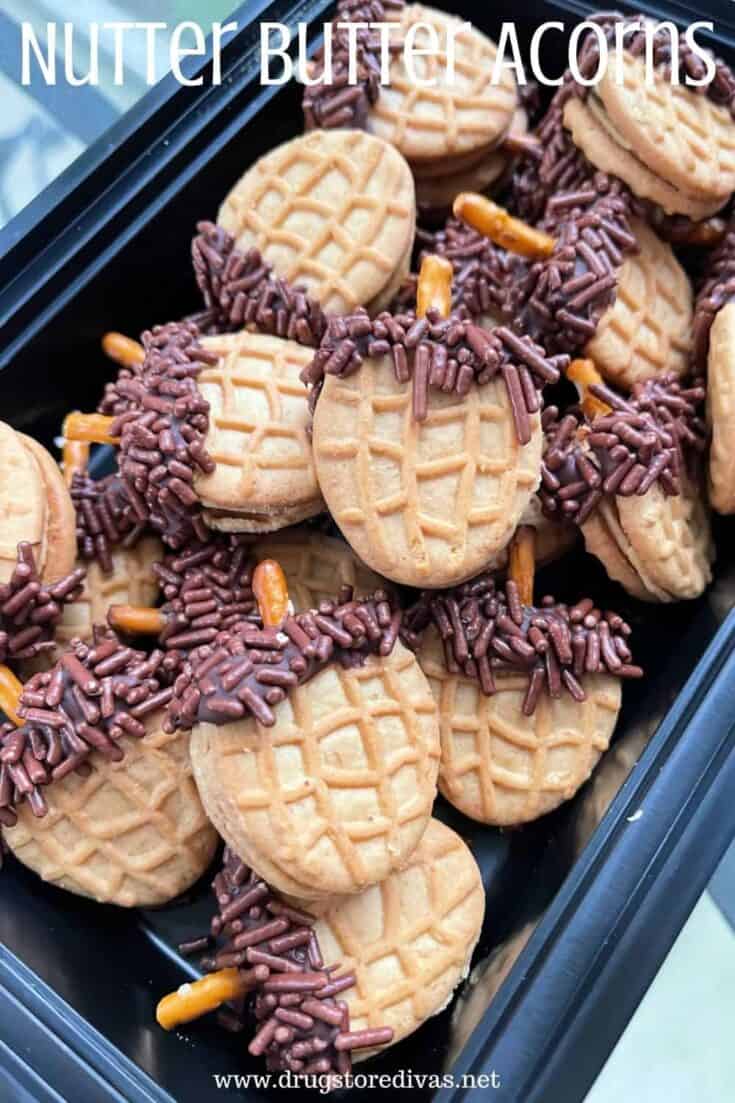
These bite-size maple-pecan acorn treats are a kid-friendly, no-bake twist on Thanksgiving cookies. Rolled oats and chopped pecans form a chewy, nutty base sweetened with maple and peanut butter, then dipped in chocolate and crowned with a tiny pretzel stem and chocolate cap. They’re quick to shape, fun to assemble with children, and hold their shape after chilling for easy serving or lunchbox treats.
Yield: Makes about 24 cookies (serves 8–12) Total time: 1 hour 20 minutes
Ingredients
- 1 1/2 cups rolled oats
- 3/4 cup finely chopped pecans
- 1/2 cup creamy peanut butter
- 1/4 cup pure maple syrup
- 2 tablespoons unsalted butter, melted
- 1 teaspoon pure vanilla extract
- 1/4 teaspoon fine sea salt
- 1/2 cup powdered sugar
- 8 ounces semisweet chocolate chips
- 24 mini pretzel twists (for stems)
- 24 small milk chocolate kisses or mini chocolate discs (for caps)
Instructions
- Combine the rolled oats, chopped pecans, powdered sugar, and salt in a large bowl and stir to mix evenly.
- Warm the peanut butter, maple syrup, melted butter, and vanilla in a microwave-safe bowl for 20–30 seconds, then whisk until smooth.
- Pour the warm peanut-butter mixture over the dry ingredients and stir until a sticky, uniform dough forms; chill the bowl in the refrigerator for 30 minutes to firm up.
- Shape level tablespoons of dough into 24 small tapered balls (slightly pointed at one end to suggest an acorn) and arrange them on a parchment-lined baking sheet.
- Melt the semisweet chocolate chips in a heatproof bowl in 20–30 second bursts in the microwave, stirring between bursts until fully smooth and glossy.
- Dip each dough ball about two-thirds into the melted chocolate, set back on the parchment, press a mini pretzel into the top as a stem, cap with a small chocolate kiss, then chill the sheet in the refrigerator until the chocolate is set, about 30 minutes.
Pro Tip: Make ahead: shape the dough balls, freeze on a tray until solid, then transfer to a bag for up to 1 month; dip and assemble directly from frozen and store finished cookies in an airtight container in the refrigerator for up to 5 days.
30. Gobble Gobble Peanut Butter Cups
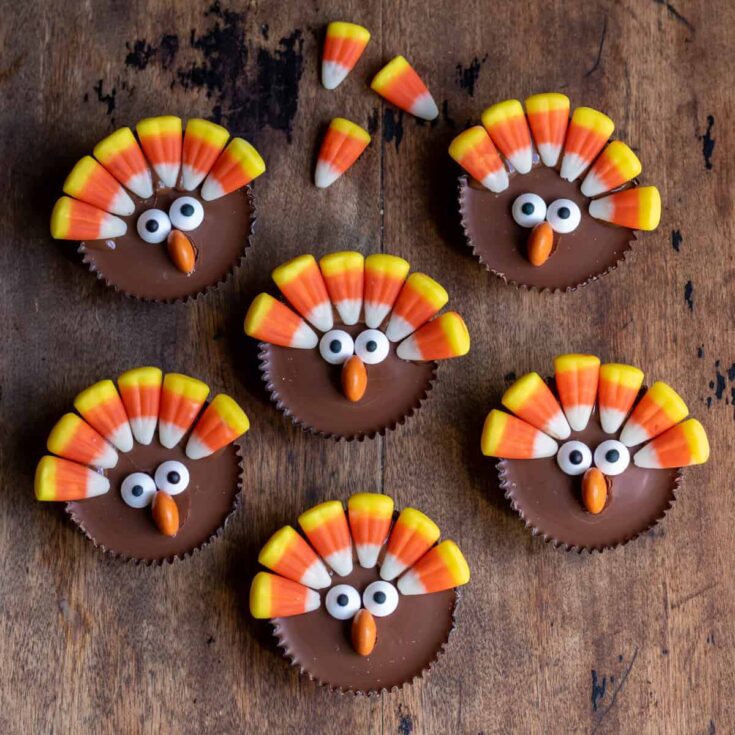
These playful peanut butter cups celebrate Thanksgiving with a no-bake, kid-friendly twist: chocolate shells filled with a sweet peanut butter center and decorated as tiny turkeys using pretzel wings, candy eyes, and candy-corn tail feathers. Simple steps let children help with spooning and sticking on decorations, while chilling does the heavy lifting. They’re forgiving, portable, and perfect for a holiday party or after-dinner treat.
Yield: Makes 24 turkey cups (serves 8–12) Total time: 1 hour 10 minutes
Ingredients
- 1 1/2 cups semisweet chocolate chips
- 1/2 cup creamy peanut butter
- 1/4 cup powdered sugar
- 2 tablespoons unsalted butter
- 1 teaspoon vanilla extract
- 24 paper mini cupcake liners
- 24 candy eyes
- 12 mini pretzel twists, halved (24 pieces)
- 48 candy corn pieces
- 1 tablespoon honey
Instructions
- Line a mini muffin tin with 24 paper liners and place the tin on a baking sheet for easy transfer to the fridge or freezer.
- Melt the semisweet chocolate chips and butter together in a microwave-safe bowl in 20-second bursts, stirring between each burst until smooth and shiny; be careful not to overheat.
- Whisk the peanut butter, powdered sugar, honey, and vanilla in a small bowl until smooth and scoopable.
- Spoon about 1 teaspoon of melted chocolate into each liner, tilting the tin to spread a thin, even base; freeze the tray for 8 minutes to firm the bases.
- Top each firm base with about 1 teaspoon of the peanut butter mixture, then cover with another teaspoon of melted chocolate to seal; immediately press two pretzel halves as wings, add one candy eye, and fan three candy corn pieces behind each cup as tail feathers while the top layer is still soft.
- Chill the finished cups in the refrigerator for 45 minutes (or in the freezer for 20 minutes) until chocolate is fully set and firm to the touch before serving.
Pro Tip: Make ahead by refrigerating in a single layer for up to 5 days or freeze in an airtight container for up to 2 months; bring to fridge temperature for 10–15 minutes before serving for best texture.
31. Autumn Patchwork Pumpkin Layer Squares
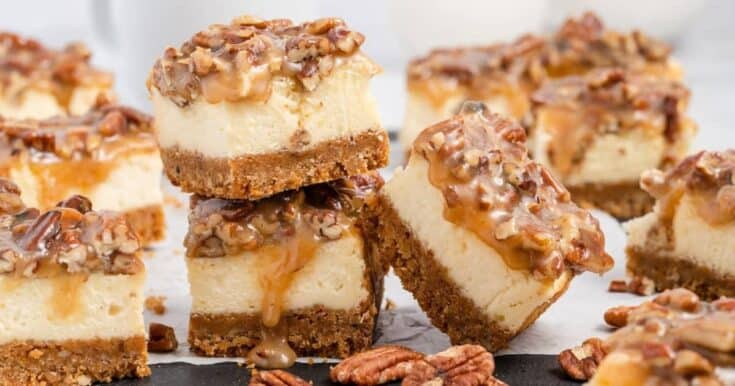
These no-bake Autumn Patchwork Pumpkin Layer Squares are a kid-friendly twist on seasonal flavors: a crunchy graham-nut base, spiced pumpkin cheesecake layer, and a swirled maple-chocolate topping. Quick to assemble, they set in the fridge and are sturdy enough for little hands to help press and drizzle. Bright spices and a soft, creamy middle make them festive for Thanksgiving snack tables or classroom treats.
Yield: Serves 10-12 Total time: 2 hrs 30 mins
Ingredients
- 2 cups graham cracker crumbs (about 12 full sheets)
- 1 1/2 cups finely chopped toasted pecans
- 1/2 cup unsalted butter, melted
- 1/4 tsp fine salt
- 8 oz cream cheese, softened
- 1/2 cup canned pumpkin purée (not pumpkin pie filling)
- 1/3 cup powdered sugar
- 1 1/2 tsp pumpkin pie spice
- 1/2 tsp vanilla extract
- 4 oz dark chocolate, chopped
- 2 tbsp pure maple syrup
Instructions
- Line an 8×8-inch pan with parchment paper leaving an overhang and lightly grease the paper if desired.
- Combine graham crumbs, chopped pecans, melted butter, and salt in a bowl and stir until the mixture holds together when pinched.
- Press the crust firmly and evenly into the bottom of the prepared pan; chill for 10 minutes to help it set.
- Beat cream cheese, pumpkin purée, powdered sugar, pumpkin pie spice, and vanilla until smooth and spreadable, then scrape and smooth this filling over the chilled crust.
- Melt dark chocolate with maple syrup using 20-second microwave bursts, stirring between each burst until glossy (adult supervision recommended); spoon or drizzle the chocolate over the pumpkin layer and use a skewer to swirl it into a marbled pattern.
- Refrigerate the bars uncovered for at least 2 hours or until layers are firmly set; lift out using the parchment overhang and slice into 12 squares before serving.
Pro Tip: Make ahead up to 3 days refrigerated or freeze individual squares for up to 1 month; thaw in the refrigerator before serving.
Conclusion
Grab a few bowls, set out colorful toppings, and let the little chefs lead the way—these treats are about more than sugar; they’re about the giggles, the mess, and the memories that make Thanksgiving feel extra special. Happy baking and happy holidays!