IVAR cabinets are a hacker’s dream: sturdy, affordable, and endlessly adaptable. Whether you’re craving a coastal vibe, a midcentury twist, or a built-in storage wall, these 20 fresh makeovers demonstrate how a few tools, paint colors, and hardware swaps turn plain pine into bespoke furniture that fits any style or budget.
This collection walks you through practical steps, material lists, and finishing tips so you can replicate each idea at home. From floating entry shelves to a retro sideboard, you’ll find approachable projects for beginners and scaled-up builds for committed DIYers.
1. Sixties-Inspired Retro Sideboard
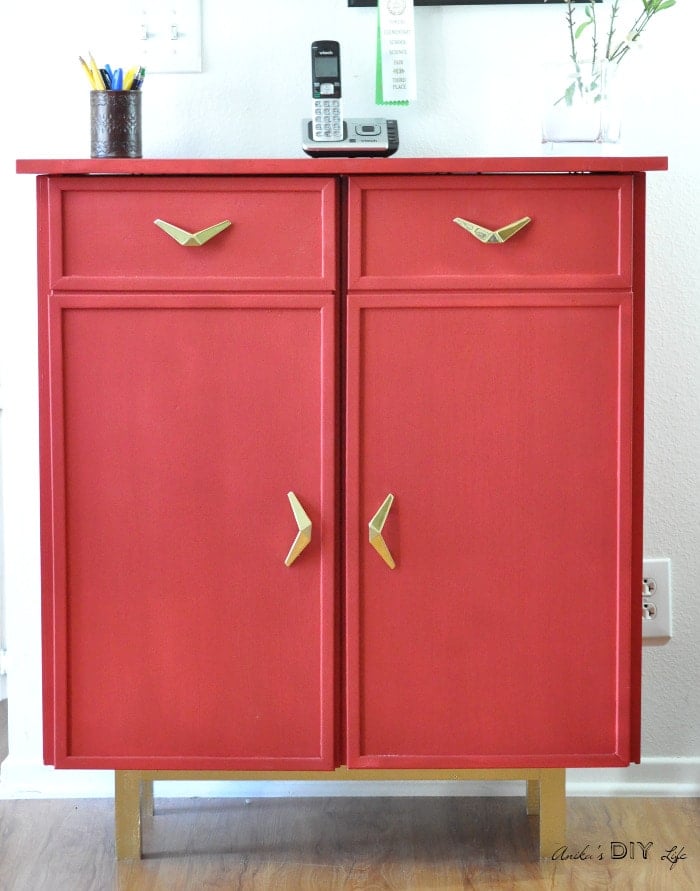
Transform an IVAR cabinet into a retro sideboard by adding narrow doorstop trim to each cabinet front, sanding and priming the pine, then applying two coats of rich red chalk paint. Assemble the cabinets, attach retro-style brass handles and tapered wooden legs painted gold, and lightly distress corners for character. Finish with a water-based clear coat to protect the paint, and install soft-close hinges if you want a modern convenience with vintage looks.
Key Design Elements
- Use doorstop trim for authentic raised-panel detail.
- Seal chalk paint with a clear matte topcoat.
Pro Tip: Dry-fit trims and hardware before glueing or screwing to ensure perfect alignment across doors.
2. Blush-and-Gold Minimalist Cabinet
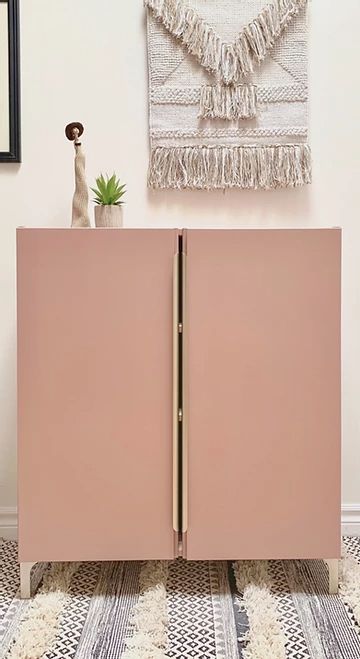
Create a feminine yet modern cabinet by painting IVAR doors and frame in a muted millennial pink, sanding between coats for a silky finish. Swap out stock hardware for slim brushed-gold pulls and mount gold-plated legs or a slim base. For cohesion, tone the interior with a neutral shellac or a pale ivory. The result reads luxe without being fussy, and the straightforward paint-and-hardware swap makes this a fast, high-impact refresh.
Key Design Elements
- Choose eggshell paint for a soft, durable finish.
- Gold pulls elevate the look instantly.
Pro Tip: Apply two light coats of spray primer on raw pine to prevent tannin bleed through the blush color.
3. Standalone Art Deco Hall Cabinet
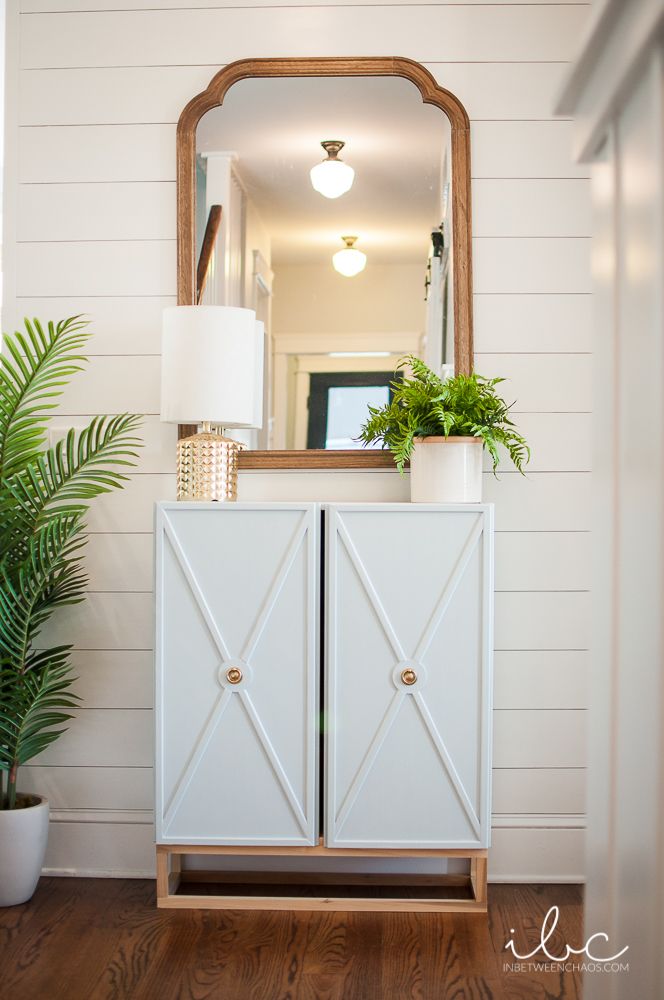
Build a freestanding IVAR cabinet perfect for hallways by painting the frame white, adding natural rattan or woven panels for texture, and mounting brass fixtures and geometric hardware to hint at art deco. Install adjustable interior shelves to maximize storage and affix felt pads under the base to protect floors. The contrasting materials — crisp paint, warm wicker, and metallic accents — bring a refined but welcoming entryway piece that feels custom-made.
Key Design Elements
- Wicker panels add instant coastal warmth.
- Gold fixtures provide an art-deco touch.
Pro Tip: Pre-fit woven panels and trim excess after the glue is dry for the cleanest edges.
4. Stacked IVAR Standing Desk
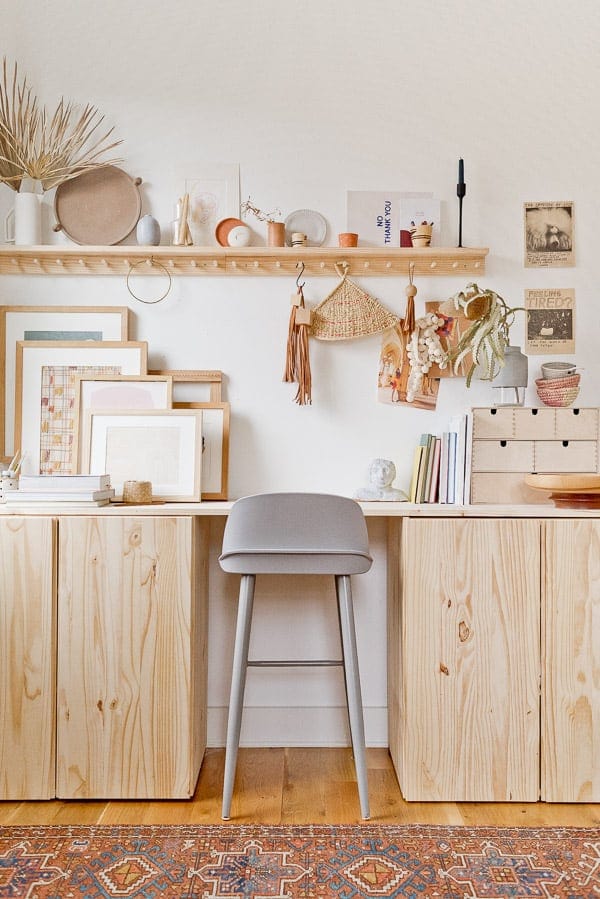
Build a standing desk by stacking two or three IVAR cabinets and topping them with a thick plank in a contrasting stain or matching paint. Secure cabinets to each other and the wall with L-brackets for safety, cut an access hole in the top cabinet for cable management, and add a keyboard tray if desired. Finish edges with wood filler and sand smooth, then varnish the top plank for a durable work surface that supports long days on your feet.
Key Design Elements
- Fasten stacks together to prevent tipping.
- Add cable cutouts for tidy electronics.
Pro Tip: Use a butcher-block or plywood top sealed with polyurethane to resist scratches and spills.
5. Playful Painted Patterns for Kids’ Rooms
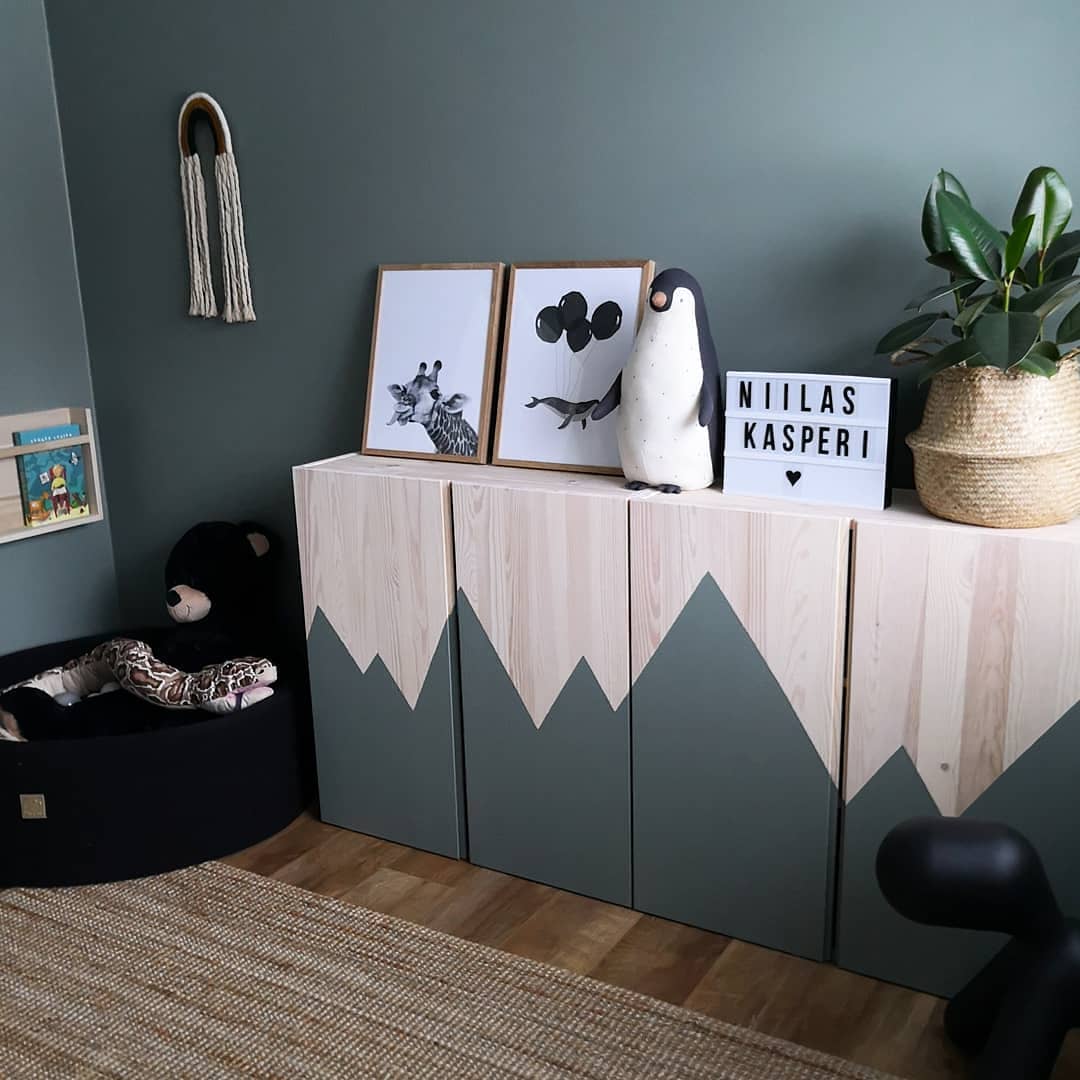
Refresh a child’s room with graphic shapes painted across multiple IVAR cabinets: sketch your design using painter’s tape, prime the surfaces, then fill negative spaces with enamel paint in your chosen palette. Consider mountains, geometric blocks, or art-deco arches that align from cabinet to cabinet. Finish with non-toxic clear coat and soft-close hinges for safety. This approach turns storage into a feature wall while teaching kids about color and pattern in a practical, washable format.
Key Design Elements
- Use painter’s tape for crisp geometric edges.
- Choose washable enamel for easy cleaning.
Pro Tip: Create a paper template of your pattern to test scale and alignment before taping the cabinets.
6. Wicker-Front Coastal Cabinet
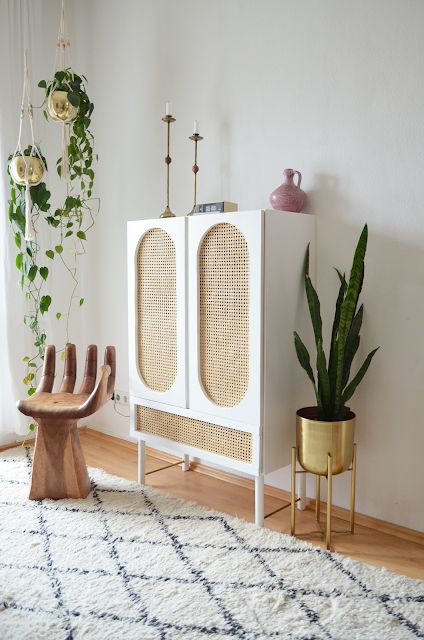
Give an IVAR a breezy beach-house makeover by replacing door faces with hand-cut wicker panels stapled onto thin backer boards. Sand and paint the cabinet frame in a sun-bleached white or soft teal, then attach the wicker fronts with decorative trim to conceal staples. Add brass or aged-iron knobs for contrast and a cement-based sealer to protect the wicker from humidity. This approachable build brings tactile interest and a relaxed coastal vibe to any room.
Key Design Elements
- Staple wicker to thin panel backing for stability.
- Seal wicker to resist moisture in coastal homes.
Pro Tip: Clamp the wicker while the adhesive sets to prevent puckering or gaps in the weave.
7. Floor-to-Ceiling Storage Block
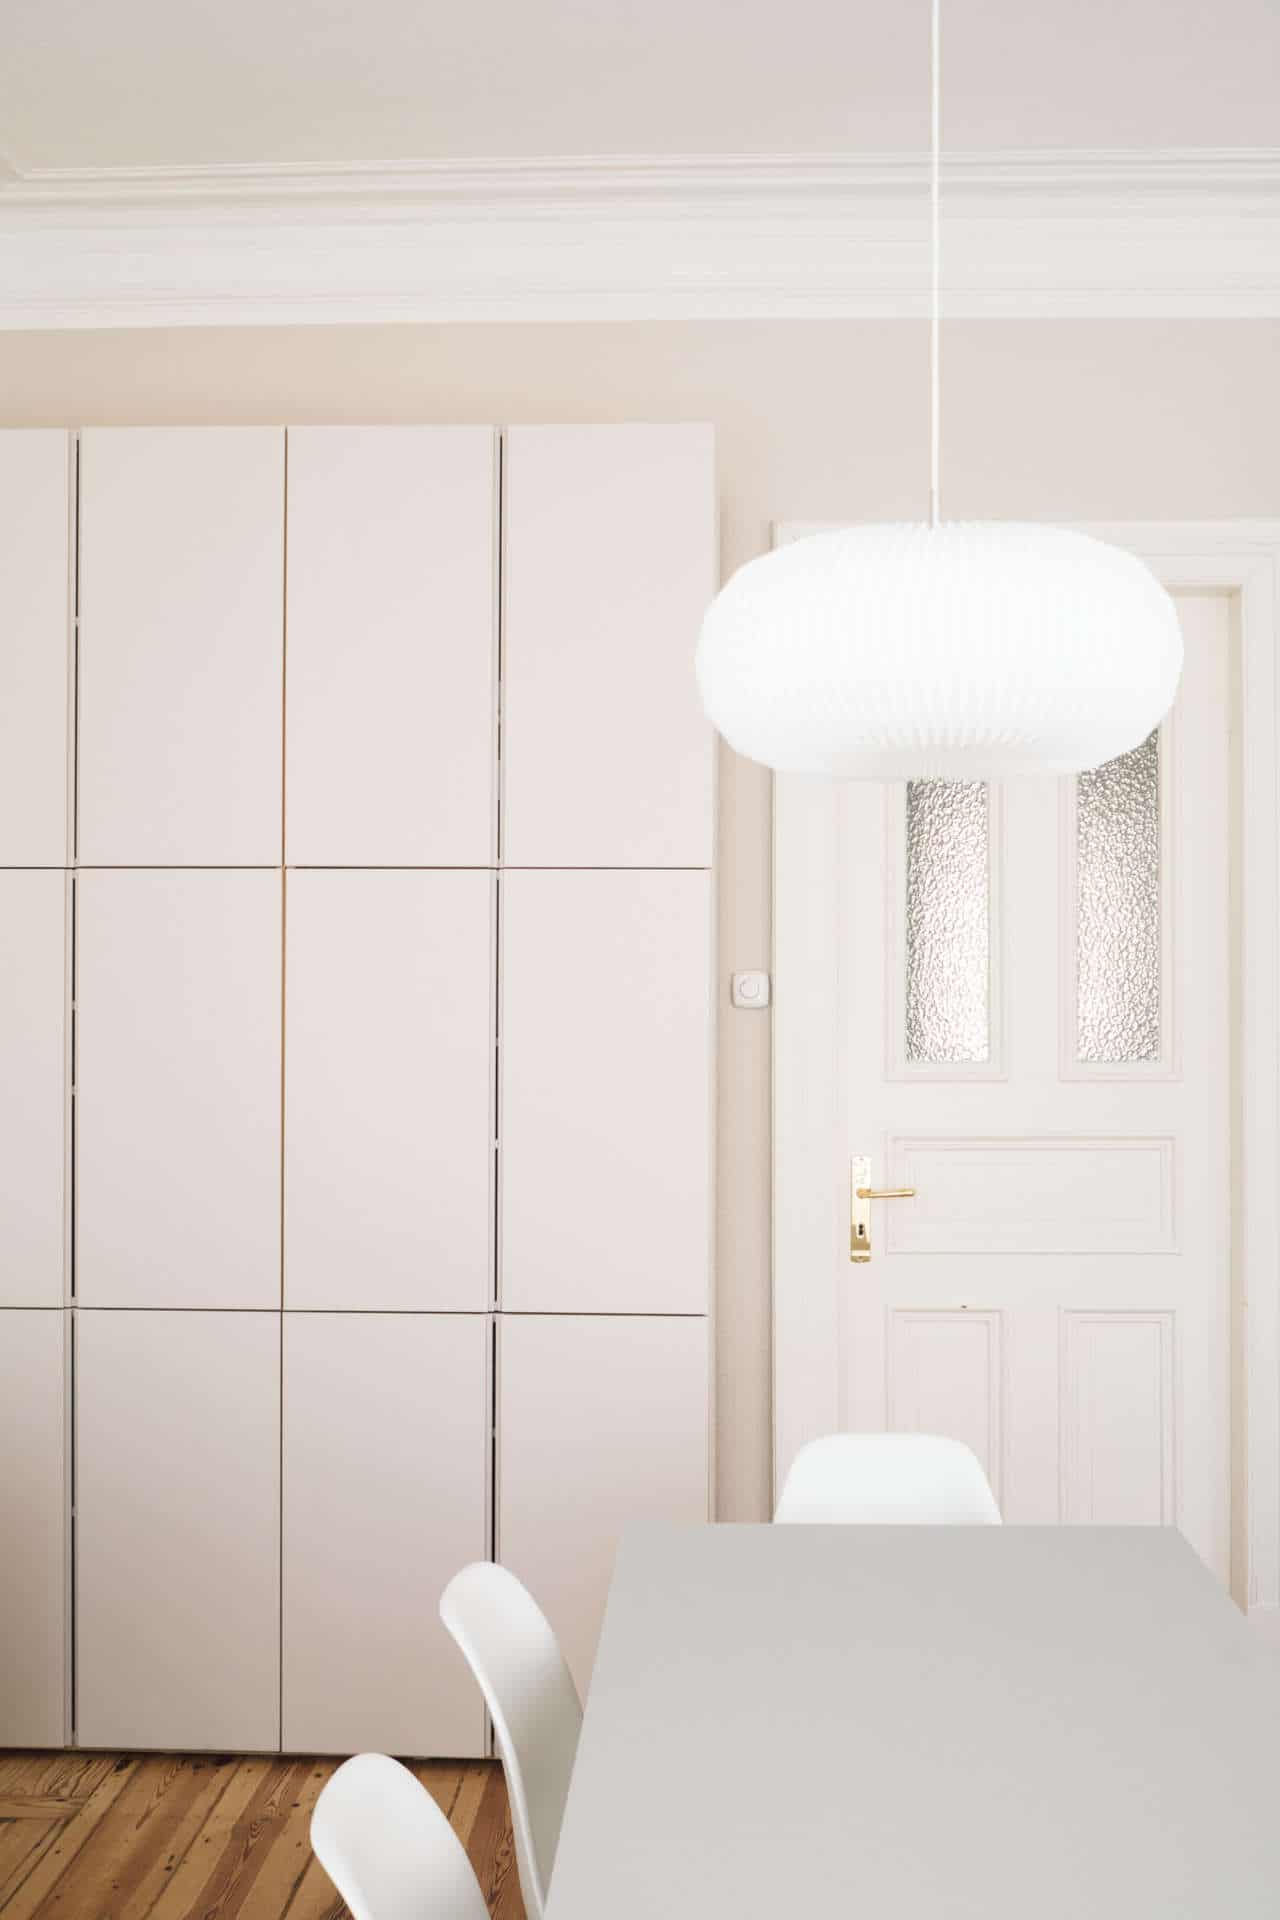
Maximize vertical space by stacking multiple IVAR cabinets to create a continuous storage block from floor to ceiling. Start with a level base, anchor each unit to the wall studs, and use long screws to fasten units together internally for a monolithic look. Paint the entire assembly a single color for cohesion, and add cabinetry lighting and labeled baskets inside for organization. This heavy-duty installation is ideal for craft rooms, pantries, or garage workspaces needing serious storage.
Key Design Elements
- Anchor to studs for safety and rigidity.
- Use a unified paint color for a built-in effect.
Pro Tip: Install a toe-kick or base molding to hide the bottom seam and create a built-in appearance.
8. Elegant Art Deco Nightstand
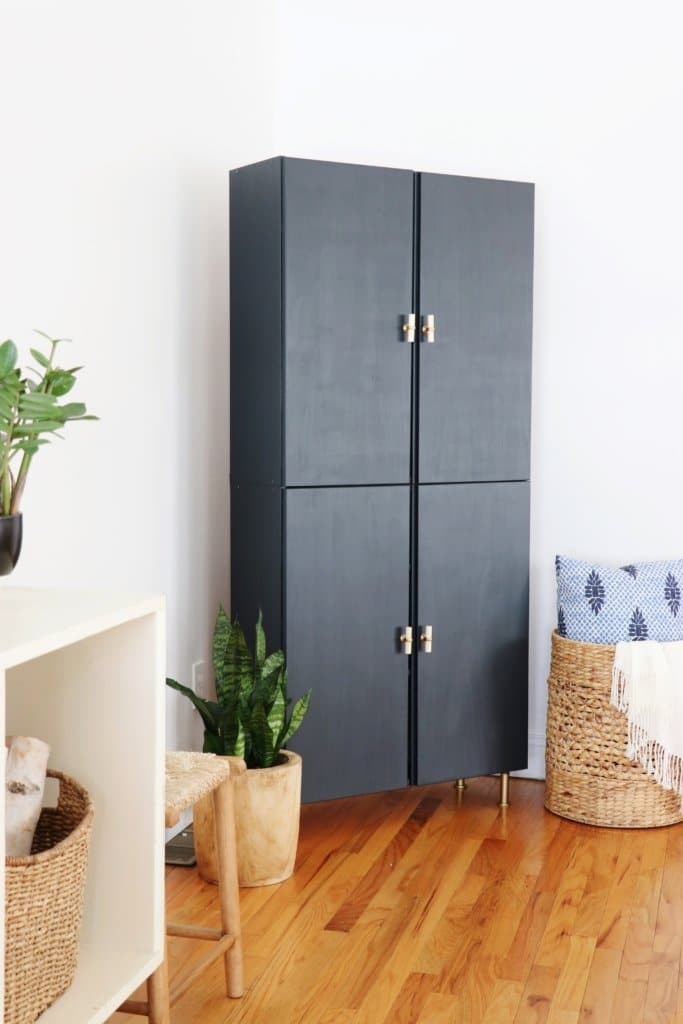
Elevate IVAR cabinets into an art-deco inspired bedside unit by painting them in a deep, luminous hue and adding gold legs and matching pulls. Accent the door fronts with subtle geometric trim or a hand-painted fan motif, then lacquer the hardware for longevity. Inside, add a small cord pass and a shelf tailored to bedside essentials. The mix of moody paint and bright metal delivers a high-end, cohesive look without custom joinery.
Key Design Elements
- Gold legs lift and luxe-up the profile.
- Deep paint tones create a dramatic bedside anchor.
Pro Tip: Use artist’s tape and a ruler to lay out precise geometric accents before painting.
9. Grey Minimalist Ribbed Shelving
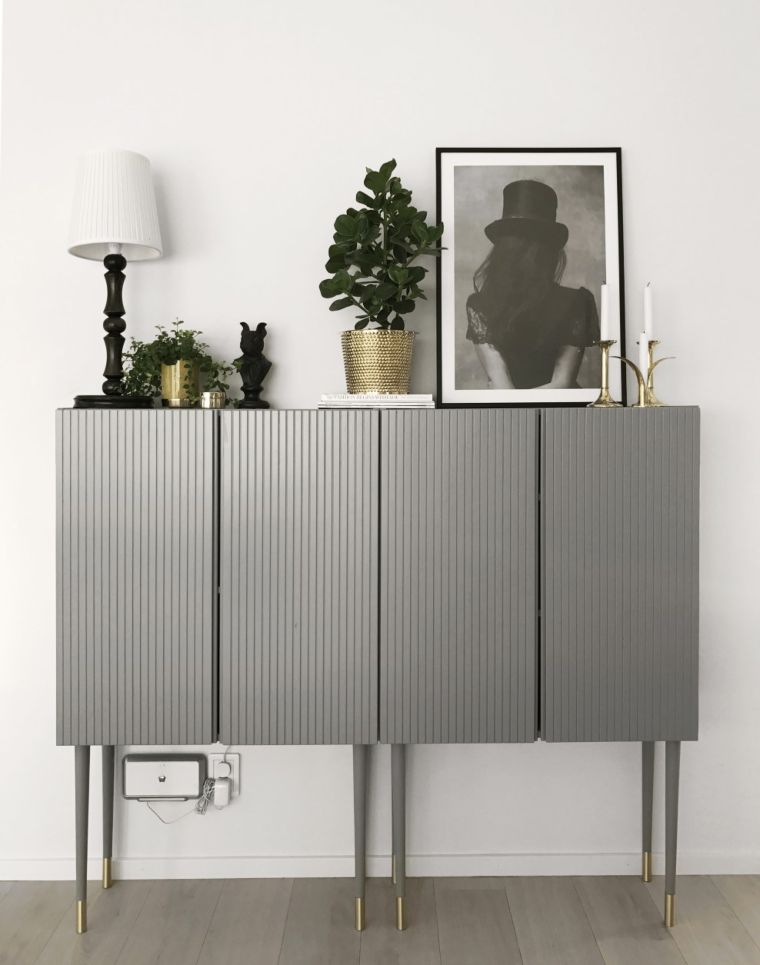
Create a calm, contemporary cabinet with a ribbed wood profile on the doors. Either mill slim battens to cover the door face or purchase pre-fluted panels, glue and nail them in place, then sand and paint the finished surface a soft grey. Replace original handles with recessed or minimalist pulls to keep the silhouette clean. The textured front adds subtle interest while maintaining a neutral palette suitable for modern living rooms or entryways.
Key Design Elements
- Fluted panels add texture with restrained style.
- Minimal pulls keep the focus on the ribbed detail.
Pro Tip: Glue battens starting from the center and work outward to prevent warping on thinner door panels.
10. Vintage Library-Style Cabinet
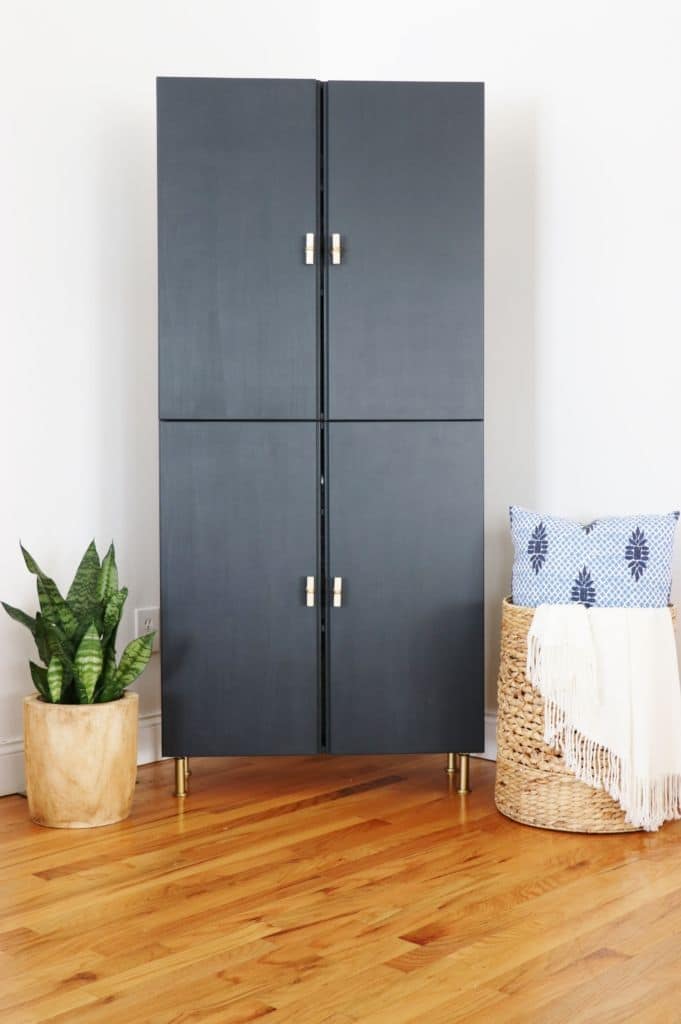
Turn IVAR cabinetry into a library-inspired statement by painting the units in dark grey or leather-brown tones, fitting them with crown molding and antique brass hardware, and installing decorative ladder rails if you have multiple units. Add internal lighting and glass-front doors for the upper sections to display books, while closed lower storage keeps clutter hidden. The combination of deep paint, classic moldings, and aged metal hardware brings an atmospheric, collector-worthy presence to a study or reading nook.
Key Design Elements
- Crown molding gives a custom, built-in look.
- Glass fronts showcase treasured book collections.
Pro Tip: Use magnetic catches on glass doors to keep them quietly closed without visible hardware.
11. Color-Blocked Hanging Study Nook
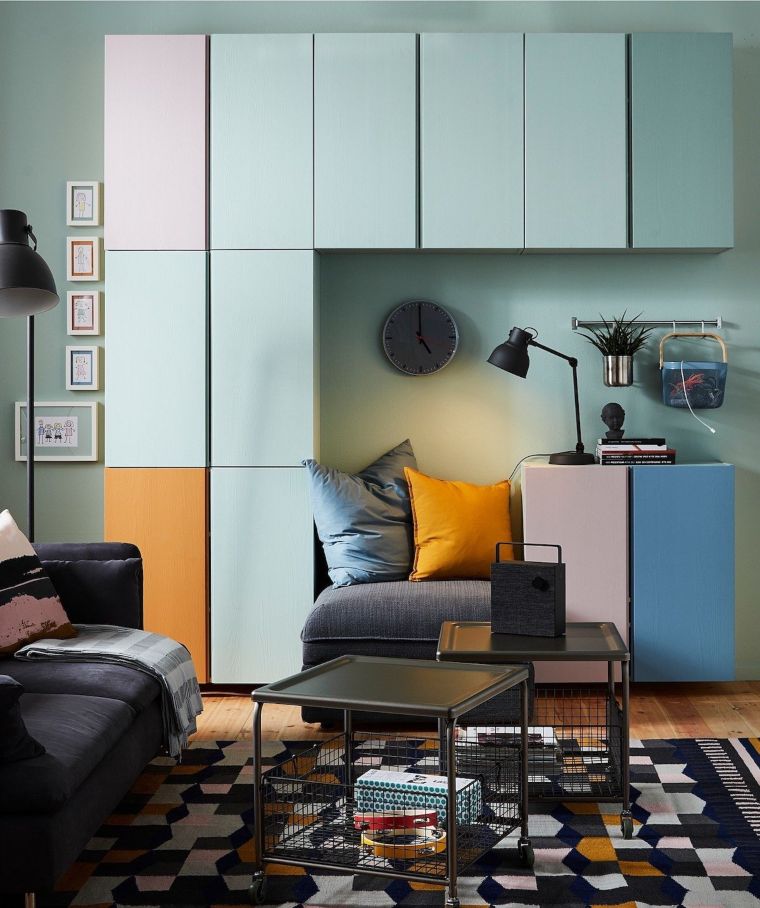
Create a suspended study alcove by mounting six IVAR cabinets to the wall at different heights and painting each a unique but complementary shade. Arrange the units to form a compact room-within-a-room, include an integrated cushioned daybed below a lower cabinet, and add concealed lighting in the upper compartments. This playful, color-forward installation gives a cozy, personalized work or reading zone without sacrificing floor space, and works especially well in small apartments or kids’ rooms.
Key Design Elements
- Vary colors but keep them within one palette.
- Secure heavy units to studs for safety.
Pro Tip: Mark stud locations and use a ledger board when aligning multiple hanging units for level installation.
12. Eclectic Decoupage Sideboard
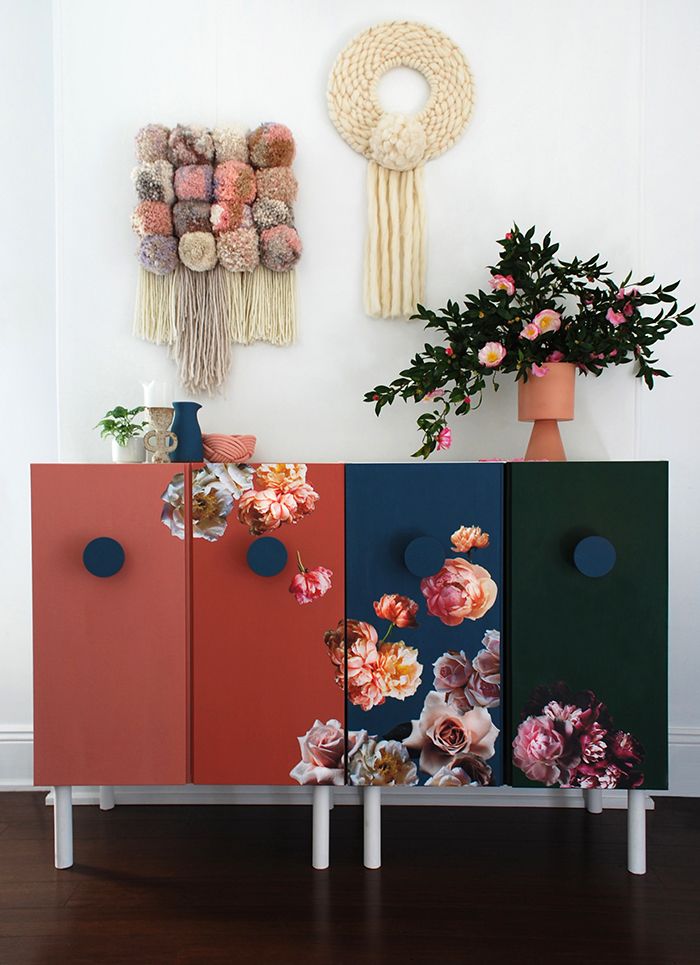
Give IVAR a modern decoupage makeover by covering door panels with patterned paper or fabric, layering Mod Podge or a clear polyurethane over the surface for durability. Paint the cabinet frame in a complementary solid color that ties the collage together, then add mismatched vintage knobs for a collected look. Arrange colors to graduate across the unit from light to dark to create visual flow, and add protective felt feet to keep floors scratch-free.
Key Design Elements
- Seal paper with several clear coats for durability.
- Graduated hues create a cohesive, eye-catching effect.
Pro Tip: Use spray adhesive for an even initial bond before applying sealant to prevent bubbling under the paper.
13. Understated Minimal Entry Storage
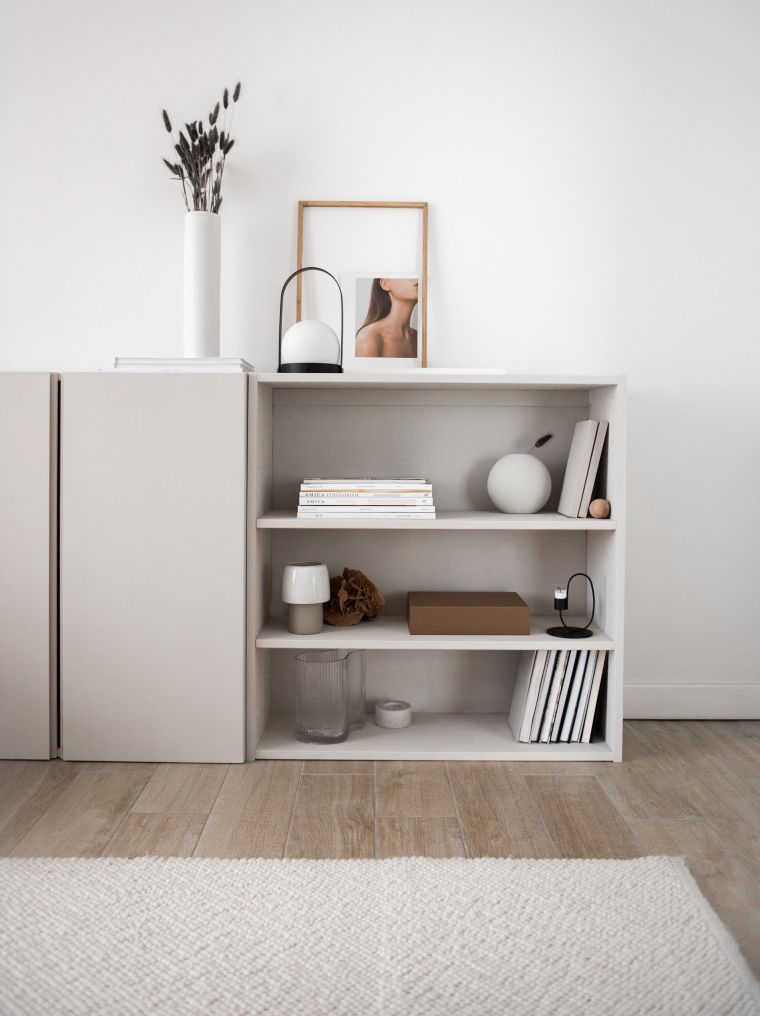
Keep a hallway tidy with a pared-back IVAR unit: disassemble the cabinet, sand and paint each panel in soft whites or greys, then reassemble with recessed hardware for an unobtrusive profile. Add a slim bench-top cushion that aligns with the cabinet depth and install wall hooks above for quick drop spots. The minimal approach emphasizes clean lines and maximum function, allowing the storage to blend into the architecture while providing everyday convenience.
Key Design Elements
- Recessed hardware keeps the profile seamless.
- A neutral palette integrates with any hallway.
Pro Tip: Label interior shelves discreetly to keep incoming items organized without sacrificing style.
14. Floating Built-In Cabinets
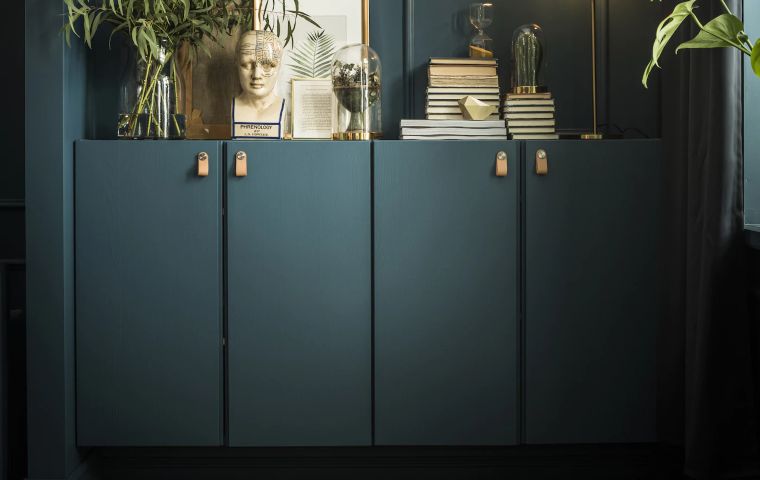
Mount IVAR cabinets on vertical wall brackets so they appear to float, then paint them the exact shade of your wall for a built-in look. Use multiple units to create long, low storage runs beneath windows or televisions. Reinforce each cabinet with heavy-duty brackets and anchor into studs or a plywood backer board secured to multiple studs. This method reduces floor clutter and visually expands the room while maintaining generous storage capacity.
Key Design Elements
- Paint cabinets to match walls for seamless integration.
- Use heavy-duty brackets and stud anchors for safety.
Pro Tip: Attach a plywood cleat to the wall first to spread load over multiple studs for long floating runs.
15. Sustainably Fluted Cabinet Makeover
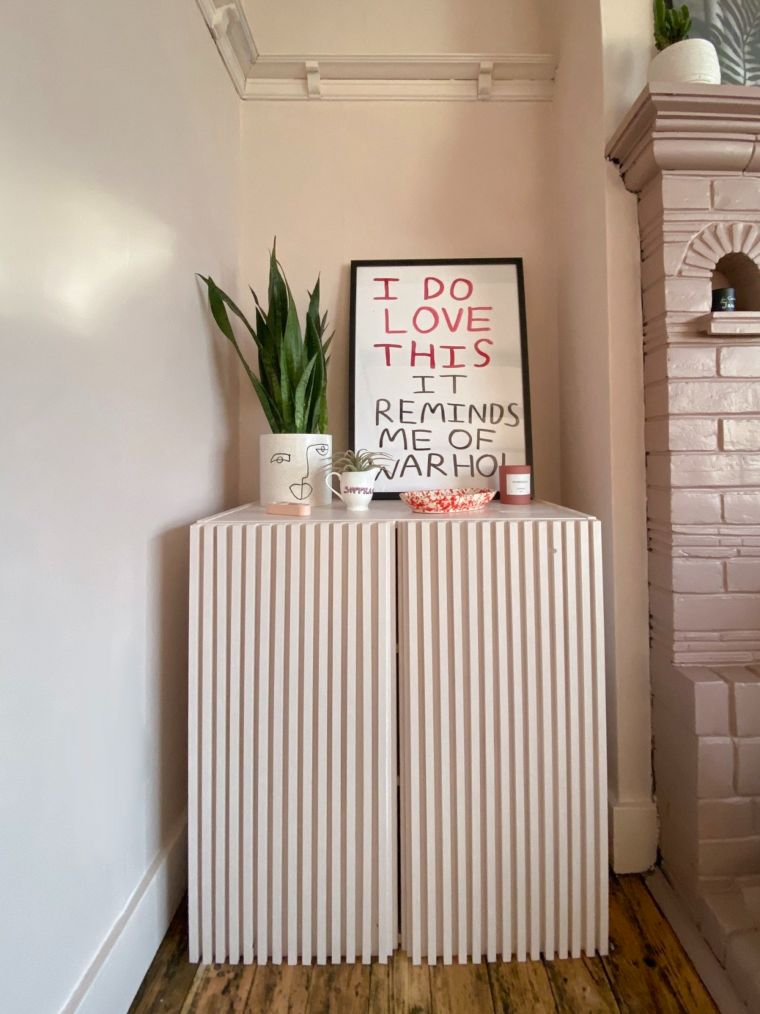
Refresh an aging IVAR with a fluted front using salvaged lumber strips. Cut recycled wood into narrow battens, glue and nail them vertically to the door faces, then sand and finish with a water-based stain for a slightly weathered look. The reclaimed material keeps the build sustainable, and the fluted texture adds depth without expensive moldings. Seal with a matte poly for protection and replace hardware with leather or wooden pulls for an organic finishing touch.
Key Design Elements
- Use reclaimed wood for eco-friendly texture.
- Vertical battens emphasize height and refinement.
Pro Tip: Thickness-match battens to the door stock to avoid binding on hinges or adjacent doors.
16. Built-In Blocked Closet for Small Rooms
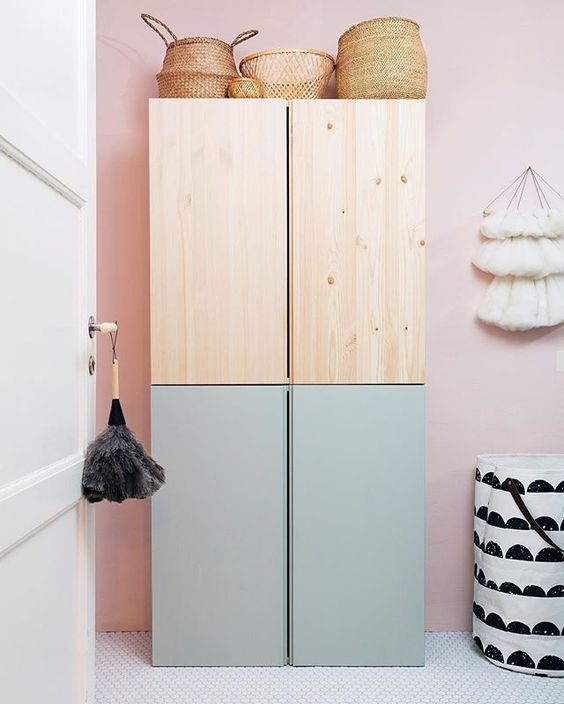
Create a compact closet by combining two IVAR cabinets side-by-side, painting them to match the wall, and mounting them on a shared base with a continuous top shelf. Install closet rods between sections, add shoe cubbies below, and use magnetic catches on the doors for easy access. This quick build gives bedrooms or kid’s rooms a polished closet solution without major construction, and it can be uninstalled or relocated when needs change.
Key Design Elements
- Combine units for a custom closet footprint.
- Magnetic catches keep doors tidy and accessible.
Pro Tip: Install a continuous top shelf spanning both cabinets to stabilize the assembly and hide mounting screws.
17. Art Deco Drinks Cabinet
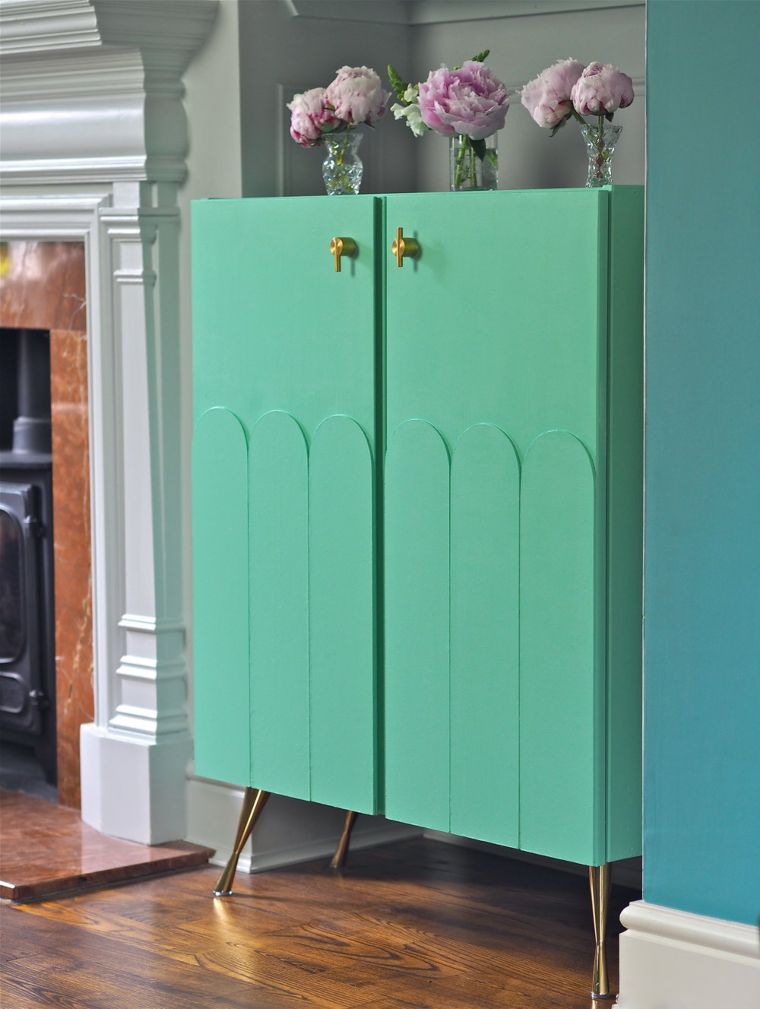
Craft an elegant drinks cabinet by painting the IVAR in a soft teal, adding rounded door scallops with thin trim, and installing a slim wine-glass rack and stemware shelf inside. Accent the exterior with polished gold hardware and add a mirrored interior back to bounce light and showcase bottles. Include a shallow drawer for bar tools and line shelves with non-slip mats. The result is a compact, glamorous bar that stores and styles cocktail essentials.
Key Design Elements
- Mirrored backs visually expand the cabinet interior.
- Built-in racks keep glassware organized and secure.
Pro Tip: Pre-fit the wine-glass rack layout to ensure stem clearance before screwing into place.
18. Masculine Modern Industrial IVAR
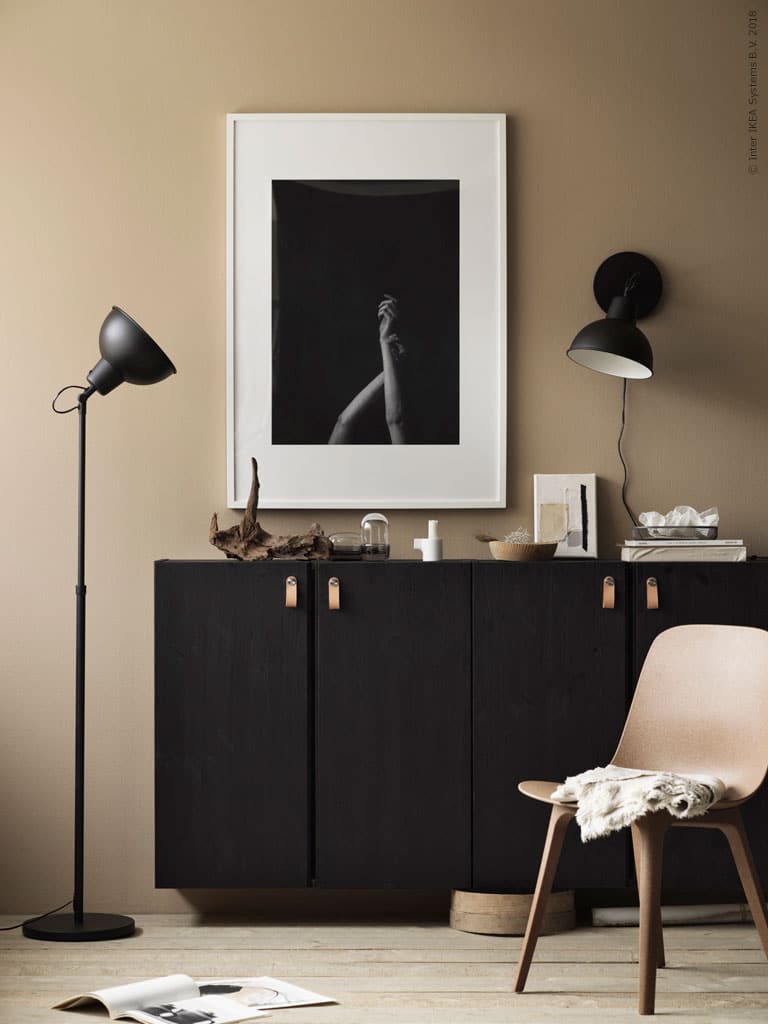
Give an IVAR a clean industrial makeover with semi-matte carpentry paint in charcoal or black and warm leather pulls for contrast. Replace or conceal visible screws and opt for exposed metal legs or a steel base for a workshop-chic vibe. Lightly distress edges for authenticity and finish interiors in a warm stain to balance the dark exterior. This approach produces a grounded, versatile piece that pairs especially well with metal and raw-wood accents.
Key Design Elements
- Leather pulls soften the industrial palette.
- Semi-matte paint reads modern and durable.
Pro Tip: Condition leather pulls with mink oil before installation to prevent stains and add suppleness.
19. Floating Entry Catch-All Cabinet
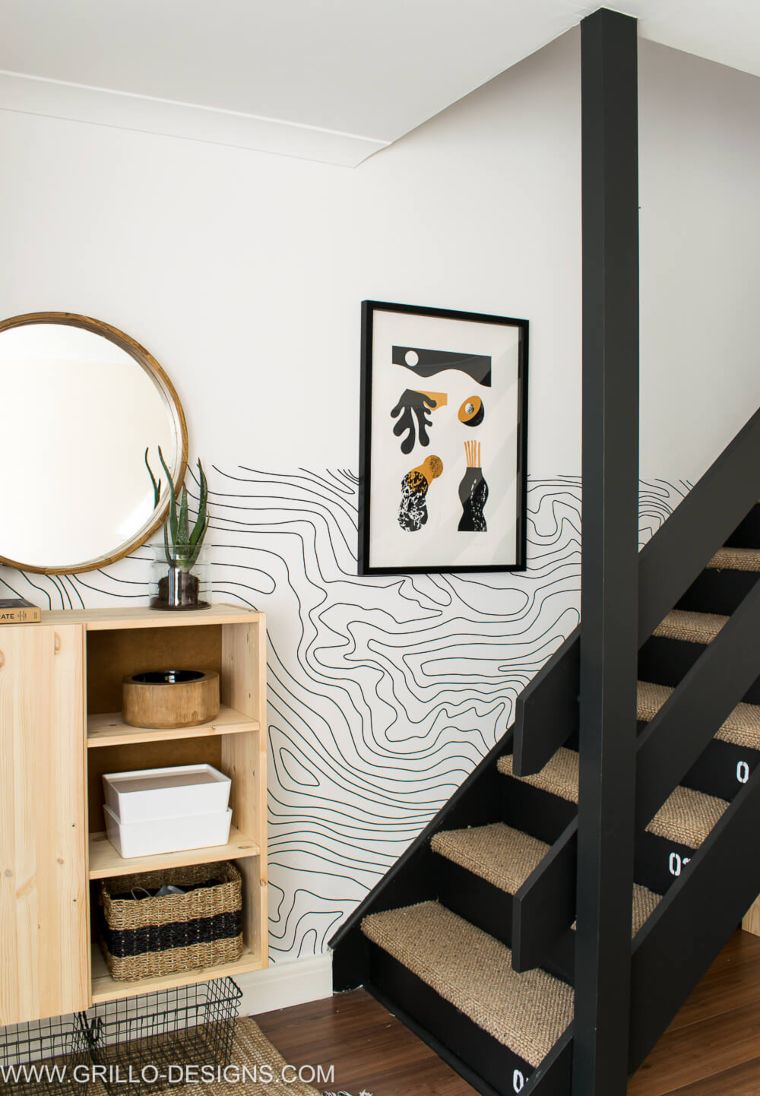
Convert an IVAR into a floating entryway station by removing one door, painting the unit to match your wall, and mounting it at a comfortable drop height for keys and mail. Inside, add hooks and small baskets for gloves and scarves, and install a slim shelf above for sunglasses. The floating configuration keeps floors clear and creates a purposeful landing zone for everyday carry while maintaining a sleek, modern appearance.
Key Design Elements
- Remove a door for quick-open everyday access.
- Install hooks and baskets for organized drop zones.
Pro Tip: Mount at elbow height for the most comfortable reach and immediate usability.
20. Turn-of-the-Century Classic IVAR Facelift
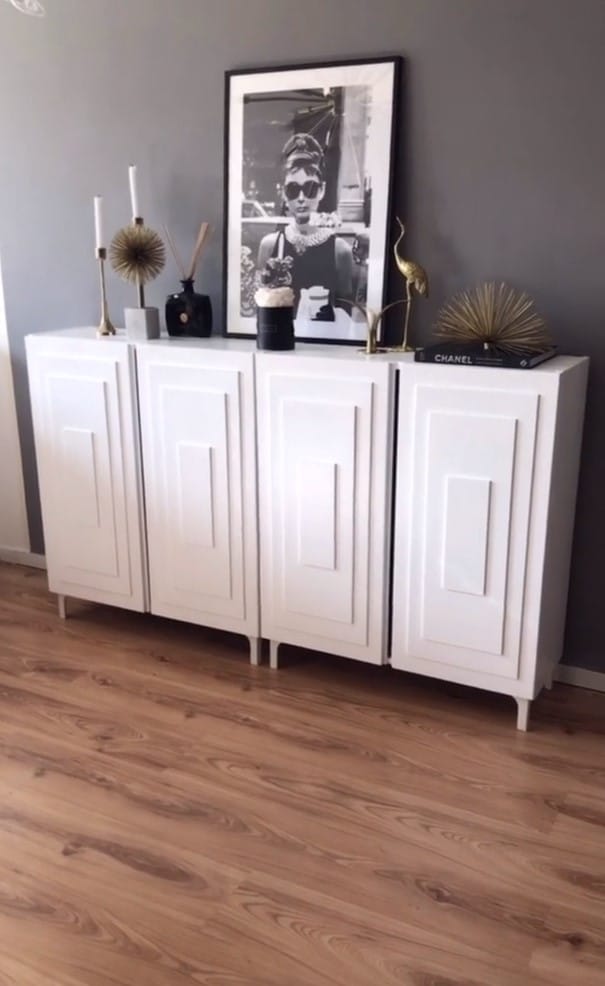
Give IVAR a traditional makeover with applied MDF moldings to create raised panels and pilasters, then paint in a crisp antique white. Use wood filler to smooth joins, sand between coats, and apply a satin finish for a period-appropriate sheen. Install ornate brass or ceramic knobs and add a plinth base to mimic built-in cabinetry. This relatively low-cost transformation gives modest IVAR units a stately, timeless presence suitable for classic interiors.
Key Design Elements
- MDF trim creates authentic raised-panel details.
- Satin finish keeps the classic look durable and gentle.
Pro Tip: Caulk seams between moldings before painting to achieve museum-quality joins.
Conclusion
IVAR cabinets are one of the most adaptable pieces of flat-pack furniture in circulation, and with a few materials and a plan you can convert them into everything from floating hallway storage to dramatic art-deco sideboards. Each makeover above balances approachable techniques with design-forward details so you can pick a project that matches your skill level and aesthetic.
Select one idea, gather your tools, and treat the build as both a functional upgrade and a creative exercise — the results are highly satisfying and uniquely yours.