61 Friendsgiving Potluck Dishes That Travel Well and Delight the Table

Friendsgiving is the cozy, chaotic holiday where the best part is everyone bringing a favorite to share. Whether you’re the person who shows up with an unexpected winner or the one coordinating the serving table, travel-friendly recipes take the pressure off and let you focus on company instead of logistics. This selection of 61 complete recipes spans appetizers, sides, mains and desserts, each chosen for flavor, resilience and ease of transport so your dish arrives as beautiful as it tastes.

You’ll find make-ahead small bites that handle a short trip, mains that reheat or rest beautifully, and desserts that keep their shape without special equipment. Expect crowd-pleasing starters, vegetable-forward sides, hearty casseroles and portable sweets — plus practical notes on packaging, serving and timing to help your contribution shine on the buffet. Mix and match these recipes to suit your group, scale up for a large table, or adapt flavors to whatever will make your Friendsgiving feel most like home.

1. Spiced Pumpkin Chocolate Ribbon Cake
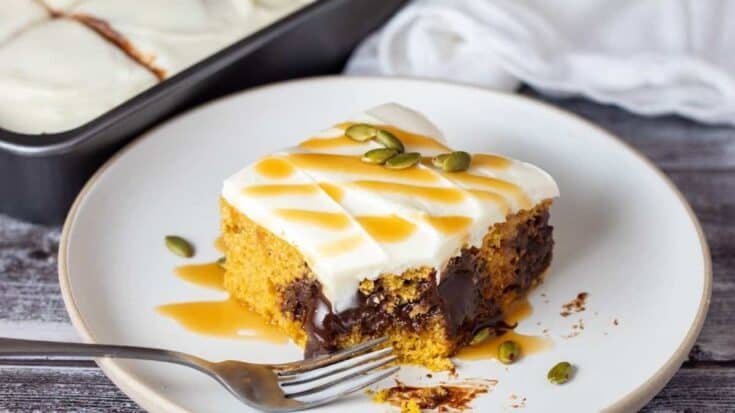
Spiced Pumpkin Chocolate Ribbon Cake

Serves 12 · Total time: 3 hr 15 min

This autumn-friendly poke cake layers moist spiced pumpkin cake with glossy chocolate fudge that seeps into poked holes, creating chocolate ribbons through every slice. It’s sturdy enough to slice chilled for easy potluck transport and simple to assemble in a disposable pan. Make it ahead so the fudge sets and flavors meld—an unfussy, crowd-pleasing dessert that keeps well between fridge and table at Friendsgiving.

Ingredients

  • 2 cups all-purpose flour
  • 1 1/4 cups granulated sugar
  • 2 teaspoons baking powder
  • 1 1/2 teaspoons pumpkin pie spice
  • 1/2 teaspoon fine salt
  • 1 cup pumpkin puree (not pumpkin pie filling)
  • 3/4 cup vegetable oil
  • 2 large eggs
  • 3/4 cup whole milk
  • 12 ounces semisweet chocolate chips
  • 1/2 cup heavy cream

Instructions

  1. Preheat the oven to 350°F and grease a 9×13-inch baking pan; whisk together the flour, sugar, baking powder, pumpkin pie spice, and salt in a large bowl.
  2. Whisk the pumpkin puree, oil, eggs, and milk in a separate bowl until smooth, then fold the wet ingredients into the dry with a few strokes until just combined into a thick batter.
  3. Spoon the batter into the prepared pan, smooth the top, and bake at 350°F for 30–35 minutes, or until a toothpick inserted into the center comes out clean or with a few moist crumbs; cool 10 minutes.
  4. Poke evenly spaced holes across the warm cake using the end of a wooden spoon handle or a chopstick, pressing about 1/2 inch deep.
  5. Heat the heavy cream in a small saucepan until steaming (do not boil), pour it over the chocolate chips in a heatproof bowl, let sit 1 minute, then stir until fully glossy; pour the warm fudge evenly over the cake so it seeps into the holes.
  6. Chill the cake uncovered until the fudge is set, at least 2 hours; slice chilled into squares for clean portions and transport in a covered container.

Pro Tip: Make this a day ahead: chill overnight for easier slicing and better flavor meld. Store covered in the refrigerator up to 4 days or freeze individual slices wrapped tightly for up to 1 month; thaw in the fridge before serving.

2. Caramelized Garlic Red-Skin Mash
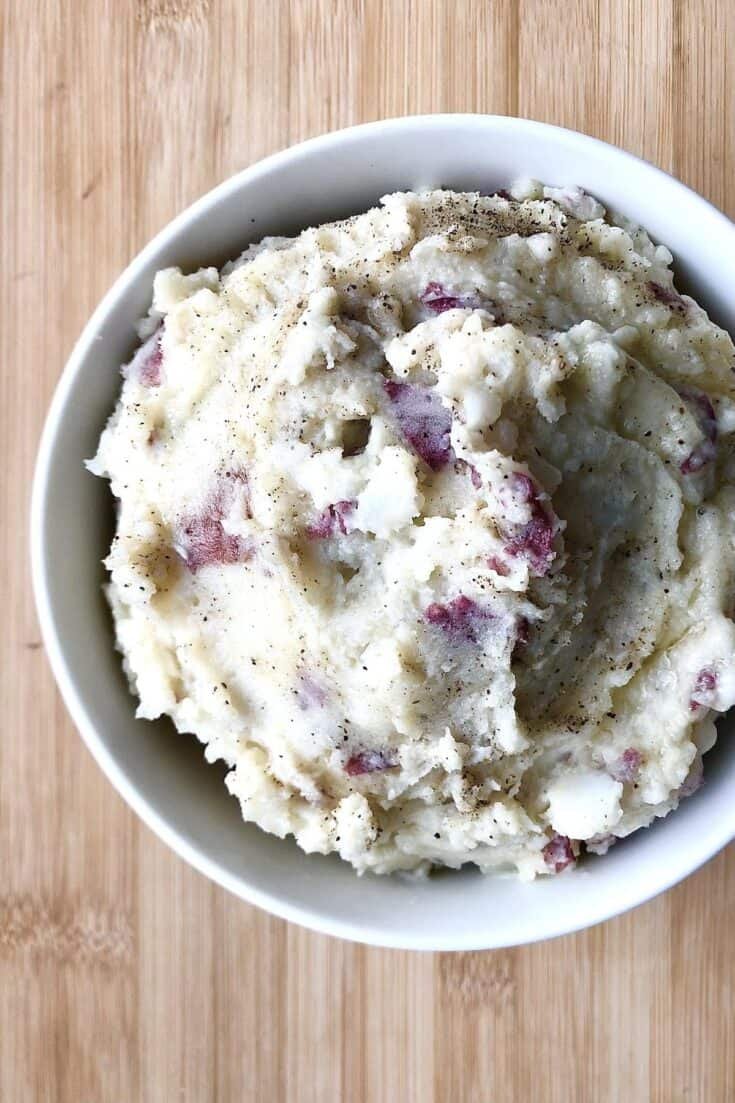
Caramelized Garlic Red-Skin Mash

Serves 8-10 · Total time: 1 hour 10 minutes

A creamy, crowd-friendly side where tender red-skinned potatoes keep their rosy flecks and a head of caramelized garlic adds mellow, savory depth. The mash balances butter and warm milk with a dollop of sour cream for silkiness, while Parmesan and chives brighten the finish. It reheats well for potlucks and holds texture on a buffet—ideal for Friendsgiving transport and make-ahead prep.

Ingredients

  • 3 lb red-skinned potatoes, scrubbed and cut into 1½-inch pieces
  • 1 large head garlic
  • 3 tbsp olive oil, divided
  • 6 tbsp unsalted butter, cut into pieces
  • 1/2 cup whole milk, warmed
  • 1/2 cup sour cream, room temperature
  • 1 tsp kosher salt, plus more to taste
  • 1/2 tsp freshly ground black pepper
  • 2 tbsp chopped fresh chives
  • 1/3 cup finely grated Parmesan cheese (optional)

Instructions

  1. Preheat the oven to 400°F (200°C). Slice the top off the garlic head, drizzle with 1 tbsp olive oil, wrap in foil and roast until cloves are soft and golden, about 35–40 minutes.
  2. Bring a large pot of salted water to a boil, add the potato pieces, and simmer until easily pierced with a fork, 15–20 minutes.
  3. Drain the potatoes well and return them to the hot pot; let them sit, uncovered, for 1–2 minutes to allow excess steam to escape.
  4. Squeeze the roasted garlic cloves into the potatoes, add butter, warmed milk, sour cream, 1 tsp salt and 1/2 tsp pepper; mash with a potato masher or pass through a ricer to reach your desired texture.
  5. Taste and adjust seasoning with additional salt and pepper as needed; fold in Parmesan and chives, then transfer to an ovenproof dish and smooth the surface.
  6. Keep the mash warm for transport by covering tightly; reheat covered at 350°F (175°C) for 20–25 minutes upon arrival, or chill completely and refrigerate for up to 3 days before reheating.

Pro Tip: Make ahead by roasting the garlic and boiling the potatoes up to 48 hours before serving; store separately in the refrigerator and mash/reheat as directed. Leftovers keep 3 days refrigerated and rewarm covered in a 325°F oven until piping hot.

3. Maple‑Sage Sweet Potato Tot Gratin
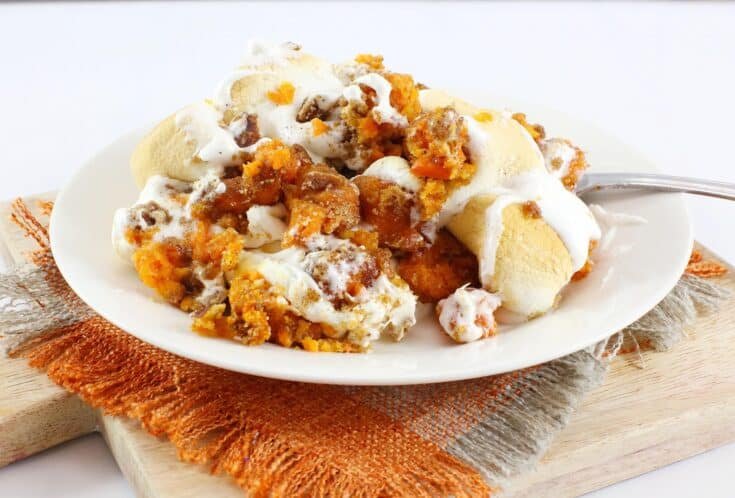
Maple‑Sage Sweet Potato Tot Gratin

Serves 8–10 · Total time: 1 hour 15 minutes

This cozy Maple-Sage Sweet Potato Tot Gratin riffs on nostalgic tater‑tot casseroles with bright sweet potato, melty cheddar, and a crisp breadcrumb crown. Easy to assemble and sturdy enough for carrying to a Friendsgiving, it balances savory herbs and a touch of maple for autumn warmth. The tots on top get crisp in the oven while the mash below stays creamy—comforting, sharable, and crowd-pleasing.

Ingredients

  • 1 1/2 lb sweet potatoes, peeled and cut into 1-inch cubes
  • 2 tbsp olive oil, divided
  • 1 tsp kosher salt
  • 1/2 tsp black pepper
  • 1 tbsp chopped fresh sage (or 1 tsp dried)
  • 1 1/2 cups shredded sharp cheddar, divided
  • 3 green onions, thinly sliced, divided
  • 3/4 cup panko breadcrumbs
  • 2 tbsp butter, melted
  • 1 1/2 tbsp pure maple syrup

Instructions

  1. Preheat the oven to 400°F (200°C) and lightly oil a 9×13-inch baking dish.
  2. Boil the sweet potatoes in a large pot of salted water until fork-tender, 12–15 minutes; drain thoroughly and return them to the pot.
  3. Mash the potatoes coarsely with 1 tbsp olive oil, maple syrup, chopped sage, 1 cup of the cheddar, 2 sliced green onions, salt, and pepper; reserve about 1 cup of the mash for forming tots.
  4. Spread the remaining mash evenly in the prepared dish, then shape the reserved mash into 1-inch 'tots' and arrange them in rows on top; brush the tots with the remaining 1 tbsp olive oil, sprinkle with the remaining 1/2 cup cheddar, and scatter the panko mixed with melted butter over the surface.
  5. Bake at 400°F (200°C) until the edges bubble and the topping is golden brown, about 25–30 minutes—check that the center is hot and the topping is crisp and browned.
  6. Rest the gratin for 10 minutes before garnishing with the remaining sliced green onion and serving warm.

Pro Tip: Make ahead: Assemble through step 4, cover and refrigerate up to 24 hours; when ready, bake from cold for 30–35 minutes until heated through and the topping is golden.

4. Skillet-Style Cornbread Bake with Cheddar & Bacon
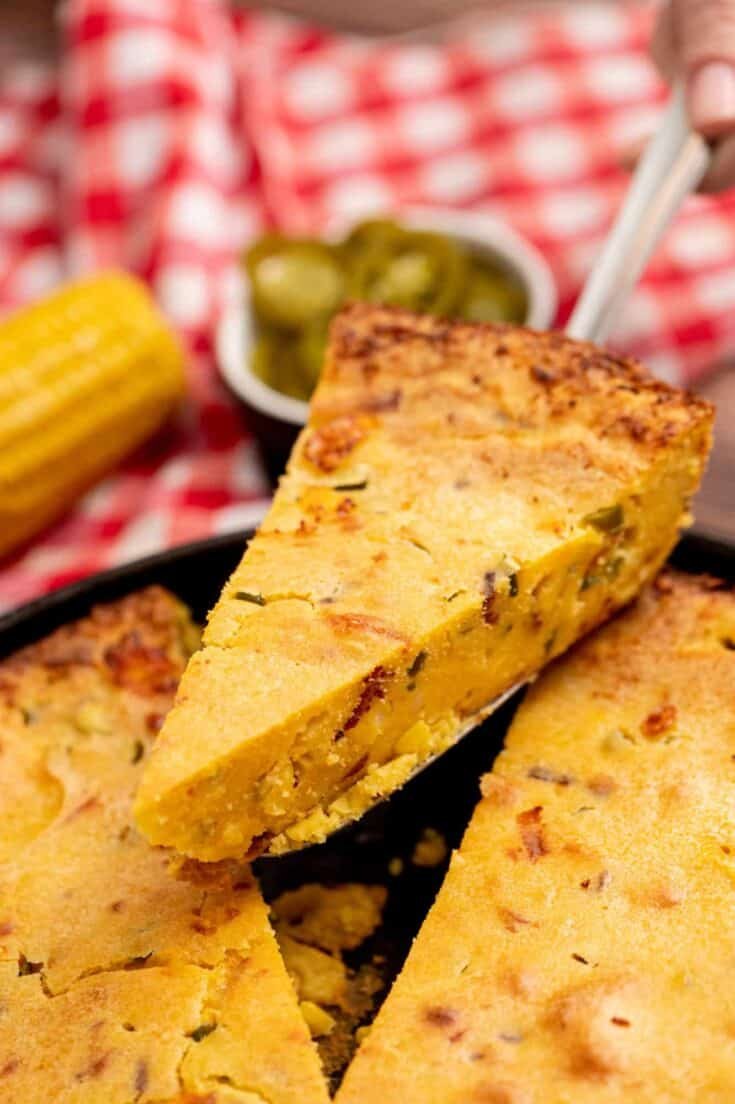
Skillet-Style Cornbread Bake with Cheddar & Bacon

Serves 8–10 · Total time: 50 minutes

This skillet-style cornbread is studded with sweet corn, sharp cheddar, scallions and crisped bacon for a crowd-pleasing, easy-transport side. It bakes in a single pan and slices cleanly for sharing at a Friendsgiving or potluck. Serve warm alongside roasted turkey or let vegetarians enjoy without bacon added. The texture is moist but holds up on a plate, making it simple to bring, slice, and serve.

Ingredients

  • 1 cup yellow cornmeal
  • 1 cup all-purpose flour
  • 1 tbsp baking powder
  • 1 tsp kosher salt
  • 2 large eggs
  • 1 cup buttermilk
  • 1/3 cup melted butter
  • 1 cup corn kernels (fresh or frozen, thawed)
  • 1 cup shredded sharp cheddar
  • 6 slices bacon, raw
  • 2 scallions, thinly sliced

Instructions

  1. Preheat oven to 400°F (200°C) and grease a 9×9-inch baking pan or line it with parchment.
  2. Cook bacon in a medium skillet over medium heat until crisp and edges are browned; verify doneness by ensuring the bacon reaches 145°F (63°C) or is crisp to your liking, then transfer to paper towels and chop.
  3. Whisk together cornmeal, flour, baking powder, and salt in a large bowl.
  4. Whisk eggs, buttermilk, and melted butter in a separate bowl; pour into dry ingredients and stir until just combined, then fold in corn, cheddar, scallions, and most of the chopped bacon, reserving a little for topping.
  5. Pour batter into the prepared pan, smooth the top, scatter the reserved bacon and a few extra scallion slices on top, and bake at 400°F (200°C) for 22–28 minutes until golden and a toothpick inserted in the center comes out clean.
  6. Rest the cornbread in the pan for 10 minutes, then slice and serve warm or at room temperature.

Pro Tip: Make ahead by baking and cooling completely, then wrap tightly and refrigerate up to 3 days; rewarm in a 350°F oven for 10–12 minutes to crisp before serving.

5. Maple-Pecan Sweet Potato Bake with Oat Streusel
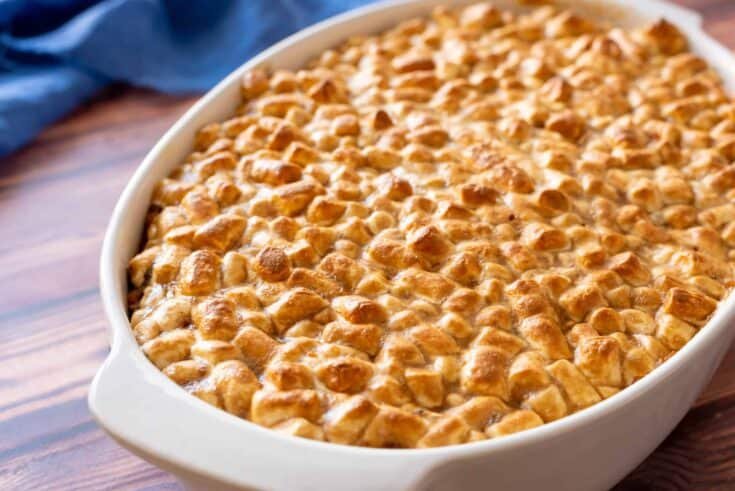
Maple-Pecan Sweet Potato Bake with Oat Streusel

Serves 8-10 · Total time: 1 hour 10 minutes

Maple and warm spices lift tender mashed sweet potatoes in this transport-friendly casserole built for Friendsgiving. A crunchy pecan–oat crumble tops a silky, lightly sweet filling so the dish reheats and travels without falling apart. The approach is simple: simmer the potatoes, fold in butter, brown sugar and vanilla, scatter the streusel, bake until bubbling and golden, then rest briefly before packing for the road.

Ingredients

  • 3 lb sweet potatoes, peeled and cut into 1-inch cubes
  • 6 tbsp unsalted butter, divided
  • 1/2 cup packed dark brown sugar, divided
  • 1/4 cup pure maple syrup
  • 1 tsp ground cinnamon
  • 1/2 tsp ground ginger
  • 1 tsp kosher salt
  • 1 tsp vanilla extract
  • 1 cup chopped toasted pecans
  • 3/4 cup old-fashioned rolled oats

Instructions

  1. Preheat the oven to 375°F (190°C) and butter a 9×13-inch baking dish.
  2. Boil the sweet potatoes in a large pot of salted water until a fork slides in easily, about 12–15 minutes; drain well.
  3. Mash the drained potatoes with 4 tbsp of the butter, 1/4 cup of the brown sugar, the maple syrup, cinnamon, ginger, salt, and vanilla until smooth; taste and adjust seasoning.
  4. Spread the mashed sweet potatoes into the prepared baking dish and smooth the surface.
  5. Combine the remaining 2 tbsp cold butter (cut into small pieces), the remaining 1/4 cup brown sugar, rolled oats, and chopped pecans; rub with your fingers or a pastry cutter until the mixture resembles coarse crumbs, then sprinkle evenly over the sweet potatoes.
  6. Bake at 375°F (190°C) for 25–30 minutes, until the streusel is golden and the edges are bubbling; remove from the oven and let rest 10 minutes before serving or covering for transport.

Pro Tip: Make ahead by completing through step 5, cover tightly and refrigerate up to 24 hours; bake directly from chilled for 30–35 minutes (add 5–10 minutes if not bubbling). Store leftovers in an airtight container in the fridge for up to 4 days and reheat in a 350°F oven until warmed through.

6. Brown-Butter Maple Pecan Squares
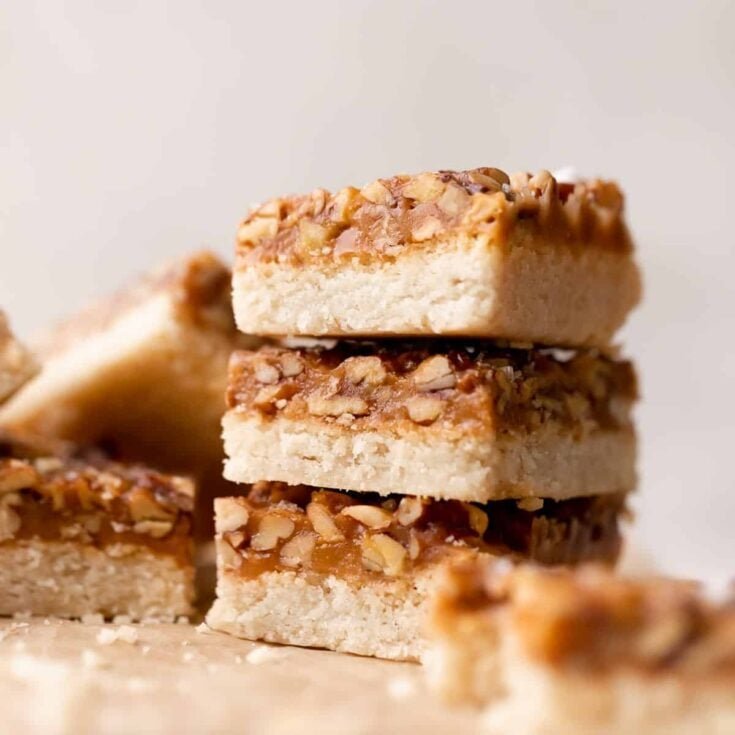
Brown-Butter Maple Pecan Squares

Serves 12–16 · Total time: 2 hours 30 minutes

These brown-butter shortbread squares are layered with a glossy maple-caramel and studded with toasted pecans. A finishing sprinkle of flaky salt brightens each bite and keeps the sweetness balanced. They hold their shape for easy slicing and transport, so they’re ideal for a Friendsgiving potluck—make them a day ahead and relax while everyone else jams the oven.

Ingredients

  • 1 1/4 cups all-purpose flour
  • 1/2 cup powdered sugar
  • 1/4 teaspoon fine salt
  • 1/2 cup unsalted butter, browned and cooled (for crust)
  • 1/2 cup packed light brown sugar
  • 1/4 cup pure maple syrup
  • 1/4 cup heavy cream
  • 2 tablespoons unsalted butter (for caramel)
  • 1 1/2 cups pecan halves, toasted and roughly chopped
  • 1 teaspoon flaky sea salt, plus extra for sprinkling

Instructions

  1. Preheat the oven to 350°F (175°C). Brown 1/2 cup unsalted butter in a light skillet over medium heat, stirring until the solids are amber and fragrant; remove from heat and let cool slightly.
  2. Combine the flour, powdered sugar, and 1/4 teaspoon fine salt in a bowl. Cut the cooled brown butter into the dry ingredients until the mixture holds when pressed; press evenly into an 8×8-inch pan lined with parchment and bake 18–20 minutes until the edges are lightly golden.
  3. Toast the pecans on a baking sheet for 6–8 minutes in the same oven until fragrant; chop roughly and set aside.
  4. Make the caramel by whisking the brown sugar, maple syrup, heavy cream, and 2 tablespoons unsalted butter in a saucepan over medium heat; bring to a gentle boil and simmer 3–4 minutes until slightly thickened and glossy.
  5. Pour the hot caramel over the warm crust, scatter the toasted pecans evenly, sprinkle 1 teaspoon flaky sea salt across the top, then return the pan to the 350°F oven and bake 10–12 minutes until the caramel is bubbling at the edges.
  6. Chill the pan on a wire rack to room temperature, then refrigerate uncovered for at least 90 minutes to set; lift the bars from the pan using the parchment overhang and cut into 16 squares with a warm knife.

Pro Tip: Make up to 3 days ahead: store airtight in the refrigerator for up to 5 days or freeze individual squares wrapped in parchment for up to 1 month; bring to room temperature 20–30 minutes before serving.

7. Potluck Cauliflower au Gratin

Potluck Cauliflower au Gratin

Serves 8 · Total time: 55 minutes

This creamy cauliflower gratin turns humble florets into a crowd-friendly, transportable dish that holds up well at potlucks. A silky white sauce with sharp cheese and a crispy breadcrumb top adds contrast, while gentle roasting concentrates cauliflower flavor before baking. It travels and reheats cleanly, making it ideal for Friendsgiving. Serve straight from a baking dish or portion into a tight-lidded casserole for easy pickup and sharing.

Ingredients

  • 1 large head cauliflower, trimmed and cut into 1–1.5 inch florets
  • 4 tablespoons unsalted butter, divided
  • 2 cloves garlic, minced
  • 2 tablespoons all-purpose flour
  • 1 1/2 cups whole milk
  • 1/2 cup heavy cream
  • 3/4 cup grated Gruyère or Emmental
  • 1/2 cup grated sharp cheddar
  • 1/2 cup panko breadcrumbs
  • 1 teaspoon Dijon mustard, 1/4 teaspoon ground nutmeg, 1/2 teaspoon kosher salt, and 1/4 teaspoon black pepper

Instructions

  1. Preheat the oven to 400°F (200°C) and toss the cauliflower with 1 tablespoon of the butter, 1/4 teaspoon salt and a few grinds of pepper; roast on a rimmed baking sheet for 12–15 minutes until edges are lightly browned and a fork slides in easily.
  2. Make the sauce by melting 2 tablespoons butter in a medium saucepan over medium heat, add the garlic and cook 30 seconds, sprinkle in the flour and whisk for 1 minute, then slowly whisk in the milk and cream and simmer 3–4 minutes until the sauce thickly coats a spoon.
  3. Whisk in the Gruyère and cheddar a little at a time until smooth, then stir in the Dijon, nutmeg and the remaining 1/4 teaspoon salt and pepper; adjust seasoning to taste.
  4. Combine the roasted cauliflower and the cheese sauce in a 9×13-inch or similarly shallow baking dish, spreading the florets into an even layer.
  5. Top the gratin by tossing the panko with the remaining 1 tablespoon melted butter and sprinkling it evenly over the casserole, then bake at 400°F (200°C) for 20–25 minutes until the sauce is bubbling and the top is golden; let rest 10 minutes before serving so it sets.

Pro Tip: Assemble through step 4, cover and refrigerate up to 24 hours; add the breadcrumb topping just before baking and bake from chilled for 25–30 minutes until bubbling.

8. Herbed Pull-Apart Garlic Knots

Herbed Pull-Apart Garlic Knots

Serves 10-12 · Total time: 2 hours 20 minutes

These soft pull-apart knots blend a tender, enriched dough with a bright garlic-herb butter that stays tucked into each twist—perfect for traveling to a Friendsgiving. They stack well in a casserole dish, reheat easily, and develop a golden, fragrant crust in the oven. Make them warm or room temperature to pair with mains or appetizers; guests love twisting them off the pan and sharing.

Ingredients

  • 2 1/4 teaspoons active dry yeast
  • 1 cup warm whole milk (about 110°F / 43°C)
  • 3 tablespoons granulated sugar
  • 3 1/2 cups all-purpose flour, plus extra for dusting
  • 1 teaspoon fine sea salt
  • 3 tablespoons unsalted butter, melted
  • 1 large egg, room temperature
  • 6 tablespoons unsalted butter, softened (for garlic butter)
  • 4 cloves garlic, finely minced
  • 2 tablespoons chopped fresh parsley

Instructions

  1. Combine the yeast, warm milk, and sugar in a large bowl; let sit 5–10 minutes until foamy.
  2. Add the flour, salt, melted butter, and egg to the yeast mixture and stir until a shaggy dough forms.
  3. Knead the dough on a lightly floured surface 6–8 minutes until smooth and elastic, then place in a lightly greased bowl, cover, and let rise about 60 minutes until doubled.
  4. Mix the softened butter with the minced garlic and half the parsley; punch down the dough, divide into 12 equal pieces, roll each into a 10-inch rope, spread a thin layer of garlic butter, twist into knots, and arrange them snugly in a greased 9×13-inch pan.
  5. Let the shaped knots rise, covered, 30–40 minutes until puffy while preheating the oven to 375°F (190°C).
  6. Brush the tops with any remaining garlic butter and bake at 375°F (190°C) for 18–22 minutes until deeply golden; remove from oven, brush with any reserved butter, sprinkle with the remaining parsley, and cool 10 minutes before serving.

Pro Tip: Make ahead: complete through the first rise, refrigerate the dough overnight, then bring to room temperature, shape, allow the second rise, and bake; store leftovers in an airtight container up to 3 days and reheat 10–12 minutes at 350°F (175°C).

9. Party-Ready Cheese Bites with Two Coatings

Party-Ready Cheese Bites with Two Coatings

Serves 10-12 (about 30 mini balls) · Total time: 2 hours

These bite-sized savory rounds are perfect for Friendsgiving carriage to a potluck: creamy, tangy cheese centers that get a crunchy exterior from two simple coatings. They travel well, assemble quickly, and can be made entirely ahead of time so you arrive with something ready to set out. Mildly sharp cheddar, Parmesan, and fresh herbs keep the flavor lively without being fussy, and each ball is a neat, single-bite appetizer.

Ingredients

  • 8 oz cream cheese, softened
  • 1 cup shredded sharp cheddar
  • 1/3 cup grated Parmesan
  • 2 tbsp finely chopped chives
  • 1 tbsp Dijon mustard
  • 1/2 tsp finely grated lemon zest
  • 1/4 tsp freshly ground black pepper
  • 1/2 cup finely chopped toasted pecans
  • 1/2 cup plain panko crumbs, toasted and stirred with 1/2 tsp smoked paprika
  • 2 tbsp finely chopped fresh parsley (optional, for coating and garnish)

Instructions

  1. Combine cream cheese, shredded cheddar, Parmesan, chives, Dijon mustard, lemon zest, and black pepper in a medium bowl; beat with a spatula or handheld mixer until uniformly smooth, about 1–2 minutes.
  2. Chill the mixture, covered, in the refrigerator until firm, about 1 hour.
  3. Scoop level teaspoons of the chilled mixture and roll them between your palms to create 1-inch balls; you should get about 30.
  4. Roll half the balls in the chopped toasted pecans and the other half in the spiced panko so each is evenly coated, pressing gently to adhere.
  5. Chill the coated balls on a baking sheet, covered, for at least 30 minutes to set before transporting.
  6. Serve on a platter with crackers, sliced baguette, or skewers, and keep refrigerated until ready to eat.

Pro Tip: Make these up to 3 days ahead and store in an airtight container in the refrigerator; separate layers with parchment to prevent sticking.

10. Harvest Vegetable Lasagna with Silky Bechamel

Harvest Vegetable Lasagna with Silky Bechamel

Serves 8–10 · Total time: 1 hour 40 minutes

This layered vegetable lasagna blends autumn produce with a velvety béchamel for a creamy, crowd-pleasing main that travels well. No-boil sheets keep assembly quick and the white sauce locks in moisture so slices hold shape for potluck serving. The recipe is easy to reheat or serve at room temperature, making it ideal for Friendsgiving where you want something comforting, make-ahead friendly, and reliably delicious.

Ingredients

  • 2 tbsp olive oil
  • 1 large yellow onion, finely chopped
  • 3 cloves garlic, minced
  • 8 oz cremini mushrooms, sliced
  • 2 medium zucchini, thinly sliced
  • 5 oz baby spinach, packed
  • 8 no-boil lasagna sheets
  • 1 cup ricotta cheese
  • 1 cup shredded mozzarella
  • 1/2 cup grated Parmesan
  • 3 tbsp unsalted butter and 2 tbsp all-purpose flour
  • 3 cups whole milk, warmed

Instructions

  1. Preheat the oven to 375°F (190°C) and lightly oil a 9×13-inch baking dish.
  2. Sauté the onion in olive oil over medium heat until translucent, about 5–7 minutes; add garlic, mushrooms and zucchini and cook until softened and most liquid has evaporated, then stir in spinach until wilted and season with salt and pepper.
  3. Make the béchamel by melting butter over medium heat, whisking in the flour for 1 minute, then slowly whisking in warmed milk until smooth and simmering until thickened, 4–6 minutes; stir in half the Parmesan and season with salt, pepper and a pinch of nutmeg.
  4. Assemble the lasagna by spreading a thin layer of béchamel on the dish, placing 2 lasagna sheets, dolloping half the ricotta across the sheets, spreading half the sautéed vegetables, and sprinkling a third of the mozzarella; repeat once and top with the remaining sheets, béchamel and remaining mozzarella and Parmesan.
  5. Bake the lasagna covered tightly with foil at 375°F (190°C) for 25 minutes, then remove foil and bake uncovered for an additional 15 minutes until cheese is melted, edges are bubbling and the top is lightly golden.
  6. Let the lasagna rest at least 15 minutes before slicing so layers set; serve warm or at room temperature and garnish with extra Parmesan or chopped parsley if desired.
  7. Store any leftovers covered in the refrigerator and reheat gently in a 350°F (175°C) oven until warmed through or bring to room temperature for potluck service.

Pro Tip: Make ahead by assembling the lasagna, covering tightly, and refrigerating up to 24 hours; bake straight from the fridge adding 5–10 minutes to the covered baking time, then allow the recommended 15-minute rest before slicing for neat transport.

11. Autumn Harvest Crunch Salad

Autumn Harvest Crunch Salad

Serves 8-10 · Total time: 45 minutes

Bright, travel-ready greens highlight crisp apples, crunchy celery and toasted walnuts in a creamy maple-yogurt dressing. This salad balances sweet grapes and a touch of apple-cider tang, making it a friendly companion for a Friendsgiving spread that needs to travel. It holds texture well if chilled and dressed shortly before serving, and scales easily for a larger potluck crowd.

Ingredients

  • 4 cups apples, cored and chopped (about 3 medium)
  • 2 cups celery, thinly sliced (about 4 stalks)
  • 1 cup seedless red grapes, halved
  • 1 cup walnuts, toasted and coarsely chopped
  • 4 cups baby arugula or mixed greens
  • 1/2 cup plain Greek yogurt
  • 1/4 cup mayonnaise
  • 2 tablespoons pure maple syrup
  • 2 tablespoons apple cider vinegar
  • 1 tablespoon lemon juice
  • 1/2 teaspoon kosher salt and 1/4 teaspoon freshly ground black pepper

Instructions

  1. Toast the walnuts on a rimmed baking sheet at 350°F for 6–8 minutes, stirring once, until fragrant and lightly browned; let cool.
  2. Whisk together the Greek yogurt, mayonnaise, maple syrup, apple cider vinegar, kosher salt and pepper in a small bowl until smooth and glossy.
  3. Toss the chopped apples with the lemon juice in a large mixing bowl to slow browning, then add the sliced celery, halved grapes and cooled toasted walnuts.
  4. Fold about two-thirds of the dressing into the apple mixture until pieces are evenly coated; reserve the remaining dressing for guests who prefer a lighter finish.
  5. Add the baby arugula or mixed greens and gently toss to combine, then cover and chill the salad in the refrigerator for 30 minutes to let flavors meld and textures settle.
  6. Pack the chilled salad in an airtight container for transport, or transfer to a serving bowl and drizzle reserved dressing at the table just before serving.

Pro Tip: Make ahead by toasting the walnuts and chopping apples up to one day before; store apples submerged in a little lemon-water to prevent browning, keep dressing refrigerated separately, and combine within an hour of serving for best texture.

12. Maple-Browned Brussels with Smoky Bacon

Maple-Browned Brussels with Smoky Bacon

Serves 8-10 · Total time: 55 minutes

A sticky-sweet skillet of caramelized Brussels sprouts and smoky bacon turns a humble vegetable into a transportable Friendsgiving favorite. The brown sugar glaze balances savory bacon and bright vinegar, while roasting gives crisp outer leaves ready for reheating at the host’s house. This recipe travels well in an insulated pan and reheats quickly under a broiler or in a hot oven for a freshly crisp finish.

Ingredients

  • 1 lb Brussels sprouts, trimmed and halved
  • 8 oz thick-cut bacon, diced
  • 2 tbsp olive oil
  • 3 tbsp packed brown sugar
  • 1 tbsp apple cider vinegar
  • 1 tsp Dijon mustard
  • 1 small shallot, minced (about 2 tbsp)
  • 1/4 tsp red pepper flakes
  • 1/2 tsp kosher salt
  • 1/4 tsp freshly ground black pepper

Instructions

  1. Preheat the oven to 425°F (220°C) and arrange a rack in the center; line a rimmed baking sheet with foil for easy cleanup.
  2. Cook the diced bacon in a cold large skillet over medium heat, stirring until the fat renders and the pieces are brown and crisp, about 8–12 minutes; confirm bacon is done when edges are crisp and an instant-read thermometer reads 145°F (63°C), then drain on paper towels while reserving 2 tablespoons of the bacon fat.
  3. Toss the halved Brussels sprouts with olive oil, brown sugar, apple cider vinegar, Dijon, minced shallot, red pepper flakes, kosher salt, black pepper, and the reserved bacon fat in a large bowl until evenly coated; fold in half the cooked bacon.
  4. Arrange the sprouts cut-side down in a single layer on the prepared baking sheet and roast for 22–26 minutes, stirring once halfway through, until outer leaves are browned and a fork pierces the base easily.
  5. Return the remaining bacon to the hot sprouts, sprinkle an extra teaspoon of brown sugar over the pan if you like more glaze, toss to coat, then broil on high for 1–2 minutes to caramelize—watch closely to prevent burning.
  6. Allow the pan to rest 8–10 minutes so the glaze sets, taste and adjust seasoning, then transfer to a serving dish and serve warm.

Pro Tip: Make-ahead: Roast the sprouts and cook the bacon separately up to 48 hours ahead; cool, store in airtight containers, then reheat in a 375°F (190°C) oven for 10–12 minutes, toss with any reserved glaze, and briefly broil 1–2 minutes for crispness before serving.

13. Bloody Mary Brunch Deviled Eggs

Bloody Mary Brunch Deviled Eggs

Serves 8–10 (makes 24 deviled halves) · Total time: 55 minutes

Think classic deviled eggs with a savory, briny Bloody Mary twist—bright tomato, horseradish heat, Worcestershire depth, and a celery-salty finish. These party-ready halves travel well for potlucks: the filling holds up in transit, while pickles and chives add crunch and color. Assemble ahead or pipe the filling on site for the crispiest presentation, and offer skewered olives or celery leaves for guests to customize.

Ingredients

  • 12 large eggs
  • 1/2 cup mayonnaise
  • 1/4 cup tomato ketchup
  • 1 tbsp prepared horseradish
  • 1 tsp Worcestershire sauce
  • 1 tsp hot sauce (such as Tabasco)
  • 2 tsp fresh lemon juice
  • 1/2 tsp celery salt
  • 1/4 cup finely diced dill pickle
  • 2 tbsp minced chives
  • 1 tsp smoked paprika (plus extra for dusting)

Instructions

  1. Place eggs in a single layer in a saucepan and cover with cold water by 1 inch; bring to a gentle boil, then reduce heat to maintain a simmer and cook 10–12 minutes until yolks are fully set (no runny center) — if using an instant-read thermometer, yolk center should reach about 160°F.
  2. Drain the hot water and immediately transfer eggs to an ice bath; chill at least 10 minutes to stop cooking, then peel and halve eggs lengthwise, placing yolks in a medium bowl and arranging whites on a platter.
  3. Mash the yolks with a fork and add mayonnaise, ketchup, horseradish, Worcestershire, hot sauce, lemon juice, celery salt, diced pickle, chives, and smoked paprika; season with salt and pepper and adjust acidity or heat to taste.
  4. Spoon or pipe the filling into the egg white cavities, mounding slightly for an attractive presentation and wiping any spills from the rims of the whites.
  5. Chill the assembled eggs, covered, for at least 30 minutes to meld flavors and firm the filling before transport or serving.
  6. Sprinkle with extra smoked paprika and additional chopped chives just before serving; offer optional skewered olives or celery leaves for guests to add as garnish.

Pro Tip: Make ahead: prepare and store the yolk filling in an airtight container up to 24 hours and hard-cooked whites up to 48 hours. Assemble within a few hours of serving and keep refrigerated; finished deviled eggs will keep safely in the fridge up to 3 days.

14. Maple-Cranberry Turkey Mini Buns

Maple-Cranberry Turkey Mini Buns

Makes 12 sliders (serves 6–8) · Total time: 50 minutes

Bright, bite-sized sandwiches combine seasoned ground turkey patties with a quick maple-cranberry relish for an easy Friendsgiving crowd-pleaser. These mini buns travel well and are sturdy enough for a potluck platter; the turkey stays juicy thanks to a brief sear and finish in the oven, while the tangy-sweet relish keeps everything festive. Assemble right before serving or transport stacked and covered.

Ingredients

  • 1 lb ground turkey
  • 1/2 cup finely chopped yellow onion
  • 1 large egg
  • 3/4 cup panko breadcrumbs
  • 1 tablespoon Dijon mustard
  • 1 teaspoon kosher salt
  • 1/2 teaspoon freshly ground black pepper
  • 3 tablespoons maple syrup, divided
  • 1 cup fresh cranberries
  • 12 mini slider buns (about 2 inches each)
  • 2 tablespoons olive oil

Instructions

  1. Preheat the oven to 375°F (190°C) and line a baking sheet with parchment paper.
  2. Mix the ground turkey, chopped onion, egg, panko, Dijon, 1 tablespoon maple syrup, salt, and pepper in a bowl until just combined — avoid overworking the meat.
  3. Form the mixture into 12 even patties (about 2 inches each) and place them on a plate; chill in the fridge 10 minutes to help them hold shape.
  4. Sear the patties in olive oil in a skillet over medium-high heat, 1–2 minutes per side until browned, then transfer to the prepared baking sheet and bake 10–12 minutes at 375°F. Check doneness with an instant-read thermometer — the internal temperature must reach 165°F (74°C) and there should be no pink in the center. Let patties rest 3 minutes.
  5. Simmer the fresh cranberries with the remaining 2 tablespoons maple syrup and 2 tablespoons water in a small saucepan over medium heat, stirring, until berries burst and the mixture thickens, about 8–10 minutes; remove from heat and cool slightly.
  6. Assemble sliders by spreading a spoonful of the warm cranberry-maple relish on the bottom halves of buns, topping with turkey patties, and capping with the tops. Keep warm under foil for short transport or arrange on a platter and serve.

Pro Tip: Make ahead: Prepare and bake patties up to 24 hours in advance, store refrigerated, and rewarm in a 325°F oven for 8–10 minutes. Keep the relish separately; assemble just before serving for the freshest texture. Store leftovers covered in the fridge for up to 3 days.

15. Thyme-Mushroom Green Bean Bake with Panko-Parmesan Crunch

Thyme-Mushroom Green Bean Bake with Panko-Parmesan Crunch

Serves 8–10 · Total time: 55 minutes

A fresh take on a potluck classic, this mushroom-creamy green bean bake keeps the spirit of the old favorite but uses scratch sauce and a golden panko-Parmesan topping that travels and reheats well. Bright blanched beans keep their snap while the mushroom-thyme sauce adds savory depth. It’s forgiving to scale and easy to finish at your host’s house—ideal for Friendsgiving sides that get compliments.

Ingredients

  • 1 lb (450 g) fresh green beans, trimmed and halved
  • 3 tbsp unsalted butter
  • 8 oz (225 g) cremini or button mushrooms, sliced
  • 1 small yellow onion, finely chopped
  • 2 cloves garlic, minced
  • 3 tbsp all-purpose flour
  • 1 1/4 cups low-sodium vegetable broth
  • 3/4 cup half-and-half
  • 2 tsp fresh thyme leaves, chopped
  • 1/2 tsp kosher salt and 1/4 tsp freshly ground black pepper
  • 1 cup panko breadcrumbs
  • 1/3 cup grated Parmesan cheese

Instructions

  1. Preheat the oven to 375°F (190°C) and bring a large pot of salted water to a rolling boil.
  2. Blanch the green beans for 3 minutes until bright green and just tender, then plunge into an ice bath; drain and pat dry.
  3. Sauté the onion and mushrooms in 2 tbsp unsalted butter over medium heat about 6–8 minutes until browned, then add garlic and thyme and cook 30 seconds more.
  4. Whisk the flour into the pan and cook 1 minute, then slowly add the vegetable broth and half-and-half, simmering 3–5 minutes until the sauce thickens; season with the salt and pepper.
  5. Toss the drained green beans with the mushroom-cream sauce in a 9×13-inch baking dish; melt the remaining 1 tbsp butter and mix with panko and Parmesan, then sprinkle the mixture evenly over the top.
  6. Bake 20–25 minutes until the filling bubbles at the edges and the topping is golden brown; let rest 10 minutes before serving.

Pro Tip: Make ahead: assemble through step 5, cover and refrigerate up to 24 hours; bake from chilled, adding 5–8 minutes, or bring to room temperature 30 minutes before baking for more even reheating. Store leftovers refrigerated up to 4 days and reheat covered in a 350°F oven until warmed through.

16. Gruyère & Caramelized Onion Bread Bake

Gruyère & Caramelized Onion Bread Bake

Serves 8–10 · Total time: 1 hour 35 minutes

This gooey bread bake channels the deep, sweet layers of caramelized onions and nutty Gruyère into a portable side that travels well to potlucks. Cubed day‑old bread soaks up a splash of white wine and rich beef stock while fresh thyme and a golden, crisp top keep textures interesting. Serve warm or at room temperature—this dish holds its shape and flavor, perfect for a crowd.

Ingredients

  • 1 lb day-old crusty bread, cut into 1-inch cubes
  • 6 tbsp unsalted butter
  • 2 tbsp olive oil
  • 2 large yellow onions, thinly sliced
  • 1 tsp granulated sugar
  • 3 cloves garlic, minced
  • 1 1/2 cups low-sodium beef broth
  • 3/4 cup dry white wine (optional)
  • 1 cup grated Gruyère (about 4 oz)
  • 2 tbsp chopped fresh thyme leaves, plus extra for garnish
  • 1 tsp kosher salt
  • 1/2 tsp freshly ground black pepper

Instructions

  1. Preheat oven to 350°F (175°C) and spread the bread cubes on a baking sheet; toast until lightly golden, about 10 minutes, then remove and set aside.
  2. Melt the butter with the olive oil in a large skillet over medium heat; add the sliced onions and sugar and cook, stirring occasionally, until deeply browned and caramelized, 35–40 minutes.
  3. Stir in the minced garlic and cook 1 minute, then deglaze the skillet with the white wine, scraping up browned bits and simmering until mostly evaporated, about 2 minutes.
  4. Combine the toasted bread, caramelized onions, Gruyère, thyme, salt, and pepper in a large bowl; pour the beef broth over and toss gently so the mixture is moist but not soupy.
  5. Transfer the mixture to a buttered 9×13-inch baking dish, press down lightly, sprinkle a little extra Gruyère on top, and bake at 350°F (175°C) until the top is golden and the center is heated through, 30–35 minutes.
  6. Let rest 10 minutes before serving so the texture sets; garnish with extra thyme and serve warm or at room temperature.

Pro Tip: Make ahead: assemble through step 4, cover and refrigerate up to 24 hours, then bake as directed; store leftovers refrigerated for up to 4 days and reheat covered at 350°F (175°C) for 15–20 minutes.

17. Gathering Chocolate-Peanut Butter Squares

Gathering Chocolate-Peanut Butter Squares

Serves 12 · Total time: 2 hours

These no-bake chocolate-peanut butter squares bring the familiar buckeye flavor to a bar that travels well. A crunchy crumb base, a buttery peanut butter center, and a glossy chocolate-dipped top make them sturdy for transport and easy to slice for a crowd. They need only simple pantry ingredients and refrigerator time, so you can prep ahead and arrive at Friendsgiving with a grab-and-go dessert.

Ingredients

  • 1 1/2 cups graham cracker crumbs or crushed vanilla wafers
  • 1/3 cup granulated sugar
  • 6 tablespoons unsalted butter, melted
  • 1 cup creamy peanut butter, room temperature
  • 1/2 cup powdered sugar, sifted
  • 1 teaspoon vanilla extract
  • 1/8 teaspoon fine sea salt
  • 8 ounces semisweet chocolate, chopped
  • 2 tablespoons coconut oil or neutral oil
  • 2 tablespoons chopped roasted peanuts, for sprinkling (optional)

Instructions

  1. Line an 8×8-inch pan with parchment, leaving an overhang to lift the bars out later.
  2. Combine graham crumbs, granulated sugar, and melted butter in a bowl until the mixture resembles damp sand.
  3. Press the crumb mixture firmly into the prepared pan to form an even base; spread the peanut butter, powdered sugar, vanilla, and salt in a separate bowl until smooth, then dollop and spread that mixture over the crust.
  4. Chill the layered pan, uncovered, until the filling is firm, about 45 minutes.
  5. Melt the chopped chocolate and oil gently in a heatproof bowl over simmering water or in 20-second bursts in the microwave, stirring between bursts until smooth; pour and spread a thin chocolate layer over the chilled bars.
  6. Dip a thin knife into hot water and score or cut the set chocolate into 12 squares; chill until the chocolate is fully set, about 30–45 minutes, then lift the bars from the pan and sprinkle with chopped peanuts if using.

Pro Tip: Make these up to 48 hours in advance and store in a single layer in an airtight container in the fridge; separate layers with parchment. For longer storage, freeze individual squares in a freezer-safe bag for up to 1 month and thaw in the refrigerator before serving.

18. Autumn Harvest Brussels & Apple Bowl

Autumn Harvest Brussels & Apple Bowl

Serves 8-10 · Total time: 1 hr 15 min

Bright, crunchy, and travel-ready, this autumn Brussels sprout and apple bowl combines roasted sprouts, crisp bacon, toasted pecans, and tangy goat cheese with a maple-Dijon dressing. It holds up well in transit and improves after a short chill, making it ideal for Friendsgiving. The salad can be served chilled or at room temperature and is easy to scale for a crowd without losing texture or flavor.

Ingredients

  • 1 lb Brussels sprouts, trimmed and halved
  • 6 slices bacon, chopped
  • 2 medium apples (about 12 oz), cored and thinly sliced
  • 3/4 cup toasted pecans, roughly chopped
  • 1/2 cup pomegranate seeds
  • 4 oz goat cheese, crumbled
  • 3 tbsp olive oil
  • 2 tbsp pure maple syrup
  • 1 tbsp Dijon mustard
  • 2 tbsp lemon juice (about 1 small lemon)
  • 1 tsp flaky sea salt and 1/2 tsp freshly ground black pepper

Instructions

  1. Preheat the oven to 425°F and toss the halved Brussels sprouts with 1 tbsp olive oil, 1/2 tsp salt and 1/4 tsp pepper; spread on a rimmed baking sheet and roast 18–22 minutes until edges are browned and centers are tender.
  2. Cook the chopped bacon in a medium skillet over medium heat, stirring occasionally, until the pieces are crisp and no pink remains; drain on paper towels and blot excess fat.
  3. Whisk together the remaining 2 tbsp olive oil, maple syrup, Dijon mustard, lemon juice, and the remaining salt and pepper in a small bowl to make the dressing.
  4. Toss the roasted sprouts, crisp bacon, sliced apples, toasted pecans, pomegranate seeds, and crumbled goat cheese in a large bowl; drizzle the dressing over and toss gently to combine.
  5. Chill the assembled salad, covered, for 30 minutes in the refrigerator to let flavors meld and to allow it to travel well to a potluck.
  6. Serve the salad chilled or at room temperature; adjust seasoning if needed and sprinkle a few extra pomegranate arils on top for color.

Pro Tip: Make ahead: Roast the sprouts and toast the pecans up to 24 hours in advance and keep the dressing chilled separately; assemble and chill up to 4 hours before serving for easiest transport and best texture.

19. Cranberry-Bacon Green Bean Warm Salad

Cranberry-Bacon Green Bean Warm Salad

Serves 8–10 · Total time: 45 minutes

This bright, portable green-bean salad balances crisp-tender beans with sweet-tart dried cranberries, smoky bacon, and tangy goat cheese. Toasted walnuts add crunch while a quick balsamic-honey pan sauce coats everything for glossy flavor. The dish travels well—serve warm or at room temperature—making it ideal for potluck gatherings like Friendsgiving. It’s simple to scale and assembles in under an hour with mostly hands-off roasting.

Ingredients

  • 1 lb (450 g) fresh green beans, trimmed
  • 6 slices bacon (about 8 oz / 225 g), cut into 1/2-inch pieces
  • 3/4 cup dried cranberries
  • 3 oz (85 g) goat cheese, crumbled
  • 1/3 cup toasted walnuts, chopped
  • 1 small shallot, thinly sliced (about 2 tbsp)
  • 2 tbsp olive oil
  • 1 tbsp balsamic vinegar
  • 1 tsp honey
  • 1/2 tsp kosher salt
  • 1/4 tsp freshly ground black pepper

Instructions

  1. Preheat the oven to 425°F (220°C) and line a rimmed baking sheet with foil or parchment; toss the trimmed green beans with 1 tbsp olive oil, 1/4 tsp salt, and 1/8 tsp pepper and spread in a single layer.
  2. Cook the bacon in a large skillet over medium heat until crisp and browned, stirring occasionally; confirm doneness by ensuring pieces are crisp and have reached an internal temperature of 145°F (63°C) with an instant-read thermometer, then transfer to paper towels to drain and reserve 1 tbsp bacon fat in the pan.
  3. Roast the green beans for 12–15 minutes, stirring once, until tender with light charring; remove from oven and let cool 4–5 minutes.
  4. Sauté the shallot in the reserved bacon fat over medium heat for 1–2 minutes until softened, then add the balsamic vinegar, honey, and dried cranberries; simmer 1–2 minutes until cranberries plump and the mixture reduces to a glossy glaze.
  5. Toss the roasted beans with the bacon pieces, cranberry glaze, remaining 1 tbsp olive oil, walnuts, remaining 1/4 tsp salt, and remaining 1/8 tsp pepper in a large bowl until evenly coated.
  6. Serve the salad warm or at room temperature on a platter and scatter the crumbled goat cheese over the top just before serving.

Pro Tip: Make ahead: Roast the beans and cook the bacon up to 48 hours in advance; store each separately in airtight containers in the refrigerator. Rewarm the beans briefly in a 350°F oven for 8–10 minutes or bring to room temperature, then toss with warmed cranberry-balsamic glaze and bacon before adding goat cheese to serve.

20. Fig & Onion Warm Brie Wheel

Fig & Onion Warm Brie Wheel

Serves 8–10 · Total time: 55 minutes

This crowd-pleasing wheel combines sticky fig jam and deeply sweet caramelized onions with warm, gooey brie—perfect for a Friendsgiving appetizer that travels. The components bake into a glossy, spreadable centerpiece that pairs beautifully with crisp baguette rounds and crunchy walnuts. It’s easy to assemble ahead, then pop into the oven at your host’s house for a fresh, irresistible starter everyone will gather around.

Ingredients

  • 1 (8–10 oz) wheel brie, rind intact
  • 2 tbsp unsalted butter
  • 1 large yellow onion, thinly sliced
  • 1 tbsp olive oil
  • 2 tbsp brown sugar, packed
  • 1 tbsp balsamic vinegar
  • 1/3 cup fig jam
  • 1/4 cup toasted walnuts, roughly chopped
  • 1 tsp fresh thyme leaves, plus extra for garnish
  • 1 baguette, sliced into 1/2-inch rounds

Instructions

  1. Caramelize the onions: Melt butter with olive oil in a large skillet over medium heat, add the sliced onion and a pinch of salt, and cook, stirring occasionally, until deeply golden and sweet, about 20–25 minutes; stir in brown sugar and balsamic for the last 2 minutes, then remove from heat.
  2. Preheat the oven to 375°F (190°C) and line a small baking sheet with parchment or use a shallow ovenproof dish.
  3. Place the brie on the prepared sheet and use a sharp knife to cut a 1/2-inch circle from the top rind (or score a shallow crosshatch) to help the cheese soften evenly.
  4. Spread the fig jam over the exposed cheese, spoon the caramelized onions on top, then scatter the toasted walnuts and thyme leaves; finish with a light sprinkle of flaky sea salt.
  5. Bake until the edges are bubbling and the center is soft and spreadable, 12–15 minutes—watch closely so the cheese softens without collapsing into a puddle.
  6. Transfer the warm wheel to a serving platter, garnish with extra thyme, let rest 5 minutes, and serve with baguette slices for dipping and spreading.

Pro Tip: Make the caramelized onions up to 3 days ahead and refrigerate; assemble the wheel cold for transport and bake at 375°F for 12–15 minutes at your host’s home, or store leftovers in the fridge up to 3 days and rewarm at 350°F for 8–10 minutes.

21. Golden Cornmeal Casserole with Cheddar Crust

Golden Cornmeal Casserole with Cheddar Crust

Serves 10 · Total time: 1 hour 10 minutes

Bright, slightly sweet and satisfyingly textured, this skillet-style corn bake updates the old-school potluck favorite for today's road trip to Friendsgiving. Creamy corn and sharp cheddar are held together with a tender cornmeal custard, then finished with a crackly golden cornmeal crust. It slices neatly for transport, tolerates reheating, and balances familiar comfort with a little crunch—perfect to bring and share.

Ingredients

  • 1 cup yellow cornmeal
  • 1 cup all-purpose flour
  • 1 tablespoon baking powder
  • 1 teaspoon kosher salt
  • 1/2 teaspoon freshly ground black pepper
  • 3 large eggs
  • 1 1/2 cups buttermilk
  • 1/2 cup sour cream
  • 1 cup grated sharp cheddar cheese
  • 15 ounces canned sweet corn, drained

Instructions

  1. Preheat oven to 375°F (190°C) and generously butter a 9×13-inch baking dish or a large ovenproof skillet.
  2. Whisk together cornmeal, flour, baking powder, salt, and pepper in a large mixing bowl until evenly combined.
  3. Beat eggs with buttermilk and sour cream in a second bowl, then pour the wet mixture into the dry ingredients and stir until smooth; fold in the drained corn and half of the grated cheddar.
  4. Pour the batter into the prepared dish, scatter the remaining cheddar over the top, and lightly dust with a teaspoon of extra cornmeal; bake uncovered for 35–45 minutes at 375°F until the center is set—check doneness by inserting a knife (it should come out mostly clean) or confirming the internal temperature reaches 160°F.
  5. Cool the casserole in the dish for 10–15 minutes to firm up, then slice into squares for serving or transport.
  6. Rewarm gently if needed by covering and baking at 325°F for 15–20 minutes, or serve at room temperature; keep covered while transporting to maintain moisture.

Pro Tip: Make ahead by assembling the bake and refrigerating (covered) up to 24 hours before baking; store leftovers covered in the refrigerator for up to 4 days and reheat uncovered at 325°F for 15–20 minutes.

22. Golden Winter Veg Bake

Golden Winter Veg Bake

Serves 8-10 · Total time: 1 hour 20 minutes

Bright, melty, and easy to transport, this Golden Winter Veg Bake turns seasonal vegetables into a shareable potluck winner. Roasting concentrates flavor, a creamy cheese sauce binds the mix, and a crisp Parmesan-panko top keeps the dish from getting soggy during travel. It reheats well and slices cleanly for serving family-style, making it a practical, crowd-pleasing side for Friendsgiving or any communal table.

Ingredients

  • 1 1/2 pounds mixed vegetables (broccoli florets, cauliflower, carrots), cut into 1-inch pieces
  • 1 large yellow onion, thinly sliced
  • 3 cloves garlic, minced
  • 2 tablespoons olive oil
  • 3 tablespoons unsalted butter
  • 1/4 cup all-purpose flour
  • 2 1/2 cups milk (whole or 2%), plus 1 teaspoon kosher salt and 1/4 teaspoon black pepper
  • 2 cups shredded sharp cheddar cheese
  • 1 cup grated Gruyère (or Swiss)
  • 1 cup panko breadcrumbs mixed with 2 tablespoons grated Parmesan and 1 teaspoon Dijon mustard

Instructions

  1. Preheat the oven to 400°F (200°C) and lightly grease a 9×13-inch baking dish; line a rimmed baking sheet with foil for easy cleanup.
  2. Toss the mixed vegetables and sliced onion with the olive oil and a pinch of salt and black pepper, spread in one layer on the baking sheet, and roast for 18–22 minutes until edges begin to brown and a fork slides into the pieces.
  3. Sauté the minced garlic in the butter in a medium saucepan over medium heat until fragrant (about 30–45 seconds), then sprinkle in the flour and cook, stirring, for 1 minute to form a roux.
  4. Whisk in the milk gradually, bringing the mixture to a gentle simmer; cook and whisk for 3–5 minutes until the sauce thickens, then remove from heat and stir in the cheddar and Gruyère until smooth and combined.
  5. Stir the roasted vegetables and onions into the cheese sauce, transfer to the prepared baking dish, sprinkle the panko-Parmesan-Dijon mixture evenly over the top, and bake at 400°F (200°C) for 20–25 minutes until bubbly and the topping is golden.
  6. Let the casserole rest for 10 minutes before slicing and serving so the sauce sets slightly and the dish travels more cleanly.

Pro Tip: Make ahead: Roast the vegetables and prepare the cheese sauce up to 48 hours in advance—store separately in airtight containers in the refrigerator. Assemble and bake within 24 hours of serving. Refrigerate leftovers for up to 4 days; reheat covered at 350°F until warmed through.

23. Slow-Cooked Sweet Potato Purée with Maple-Orange Butter

Slow-Cooked Sweet Potato Purée with Maple-Orange Butter

Serves 10-12 · Total time: 4 hours 15 minutes

This easy slow-cooker sweet potato purée brings cozy brown-sugar sweetness and buttered richness to your Friendsgiving table. Cubing the potatoes shortens hands-off time, while maple syrup and bright orange zest keep the flavor lively. Toasted pecans add crunch if you like. The crockpot holds everything warm for serving, so it’s dependable for potlucks and travels well in an insulated carrier.

Ingredients

  • 4 lb sweet potatoes, peeled and cut into 1-inch cubes
  • 4 tbsp unsalted butter, cut into pieces
  • 1/2 cup packed dark brown sugar
  • 2 tbsp pure maple syrup
  • 1 tsp ground cinnamon
  • 1/2 tsp freshly grated nutmeg
  • 1 tsp kosher salt
  • 1/4 tsp freshly ground black pepper
  • 1/2 cup whole milk or heavy cream, warmed
  • 2 tsp orange zest (from about 1 orange)
  • 1/3 cup toasted chopped pecans (optional)

Instructions

  1. Place the sweet potato cubes in a 6‑quart slow cooker; scatter the butter pieces among them and sprinkle the brown sugar, cinnamon, nutmeg, and the salt and pepper over the top.
  2. Cover and cook on Low for 3 to 4 hours (or on High for 1½ to 2 hours), until the potatoes are easily pierced with a fork.
  3. Drain any excess liquid, then mash the potatoes in the crockpot with a potato masher until mostly smooth, leaving a little texture for bite.
  4. Stir in the warm milk or cream, maple syrup, and orange zest until glossy; taste and adjust seasoning with more salt or pepper as needed.
  5. Transfer the purée to an ovenproof baking dish, scatter pecans over the top if using, and finish under a preheated broiler (High) for 2–4 minutes to toast the nuts and develop a light crust—watch constantly to prevent burning.
  6. Serve warm straight from the dish or keep the slow cooker on Warm for up to 2 hours before bringing to the table.

Pro Tip: Make-ahead tip: Prepare the mash up to 24 hours ahead—cool to room temperature, refrigerate in an airtight container, then reheat in a 6‑quart slow cooker on Low for 1–1½ hours or in a 350°F oven (covered) for 30–40 minutes until hot throughout.

24. Crowd-Ready Cheesy Potatoes au Gratín

Crowd-Ready Cheesy Potatoes au Gratín

Serves 10–12 · Total time: 1 hr 45 min

These gooey, crowd-pleasing potatoes turn scalloped comfort into a potluck superstar: thin slices of Yukon Gold bake in a silky, mustard-laced cheese sauce with sweet onions and crisp bacon. The casserole travels covered, reheats evenly, and slices neatly for serving. Assemble ahead if needed, or bake at your host’s house for hot, bubbly layers that keep everyone coming back for seconds.

Ingredients

  • 3 lb Yukon Gold potatoes, peeled and sliced 1/8-inch thick
  • 1 medium yellow onion, thinly sliced
  • 4 cloves garlic, minced
  • 6 slices bacon, diced
  • 2 cups shredded sharp cheddar cheese
  • 1 cup shredded Gruyère cheese
  • 2 cups whole milk
  • 1 cup heavy cream
  • 3 tbsp unsalted butter
  • 2 tbsp all-purpose flour
  • 1 tsp Dijon mustard
  • 1 tsp kosher salt and 1/2 tsp freshly ground black pepper

Instructions

  1. Preheat the oven to 375°F (190°C) and butter a 9×13-inch baking dish; set aside.
  2. Cook the diced bacon in a large skillet over medium heat until browned and crisp, about 6–8 minutes; drain on paper towels and reserve 1 tablespoon bacon fat. Ensure bacon pieces are firm and browned—if using an instant-read thermometer they should reach at least 145°F.
  3. Make the cheese sauce in the same skillet: melt the butter in the reserved bacon fat over medium heat, whisk in the flour and cook 1–2 minutes, then slowly whisk in milk and cream until smooth and slightly thickened. Stir in Dijon, half the cheddar and half the Gruyère until melted, and season with 3/4 tsp of the salt and 1/4 tsp of the pepper.
  4. Toss the potato slices, sliced onion and minced garlic in a large bowl with the warm cheese sauce and half the cooked bacon. Transfer the mixture to the prepared baking dish and smooth the top, then sprinkle the remaining cheeses and bacon evenly over the surface.
  5. Cover the dish tightly with foil and bake 50–60 minutes, then remove the foil and bake an additional 10 minutes if you want a golden top. Check doneness by piercing several potato slices with a fork—potatoes should be fork-tender and the casserole should be bubbling at the edges.
  6. Rest the casserole 10–15 minutes before slicing to allow it to set, then serve warm.

Pro Tip: Make ahead: assemble the casserole up to 24 hours in advance, refrigerate covered, then bake straight from the fridge (add about 10–15 minutes to the covered bake time); store leftovers covered in the refrigerator up to 4 days and reheat in a 350°F oven until warmed through.

25. Maple-Pecan Sweet Potato Bake

Maple-Pecan Sweet Potato Bake

Serves 8-10 · Total time: 55 minutes

This cozy dish layers creamy mashed sweet potatoes with a crisp, nutty streusel for a balance of sweet, citrusy, and toasty flavors that travel well. It holds up on reheating, slices cleanly for buffet service, and keeps a pleasing texture without becoming gluey. Ideal for Friendsgiving, it pairs with savory mains and bright salads while requiring minimal last‑minute fuss.

Ingredients

  • 3 lb sweet potatoes (about 4 medium), peeled and cut into 1-inch cubes
  • 1/3 cup pure maple syrup
  • 4 tbsp unsalted butter, divided, softened
  • 1/4 cup plain Greek yogurt or sour cream
  • 2 tsp vanilla extract
  • 1/2 tsp ground cinnamon
  • 1/2 tsp fine sea salt
  • 1/4 cup cornstarch
  • 1 cup rolled oats
  • 3/4 cup chopped pecans
  • 1/3 cup packed light brown sugar

Instructions

  1. Preheat the oven to 375°F and lightly grease a 9×13-inch baking dish.
  2. Boil the sweet potato cubes in a large pot of salted water until fork-tender, about 12–15 minutes; drain thoroughly and return to the pot off the heat.
  3. Mash the drained sweet potatoes with maple syrup, 3 tbsp softened butter, Greek yogurt, vanilla, cinnamon, salt, and cornstarch until mostly smooth with a little texture remaining; adjust seasoning to taste.
  4. Mix the oats, chopped pecans, brown sugar, and remaining 1 tbsp melted butter in a bowl until the topping is crumbly and holds together when pressed.
  5. Transfer the sweet potato mash to the prepared dish, smooth the surface, then scatter the oat-pecan topping evenly over the filling.
  6. Bake at 375°F for 25–30 minutes, or until the topping is golden brown and the filling is bubbling at the edges; let rest 10 minutes before serving to set for cleaner slices.

Pro Tip: Make ahead by preparing the filling and topping separately up to 24 hours in advance—cover and refrigerate; assemble and bake 25–30 minutes at 375°F when ready to serve.

26. Garlic-Herb Cheddar Ranch Potatoes

Garlic-Herb Cheddar Ranch Potatoes

Serves 8-10 · Total time: 1 hour 20 minutes

Friend-friendly and easy to transport, this creamy potato gratin blends the bright, herby notes of ranch with melted cheddar and tender roasted potatoes. It holds up well at room temperature and slices cleanly for serving at a buffet or potluck. Simple prep, roast-then-bake method concentrates flavor and keeps the topping crisp without turning soggy, making it a reliably satisfying side that pairs with everything on a holiday table.

Ingredients

  • 2 pounds Yukon Gold potatoes, peeled and cut into 1/2-inch cubes
  • 2 tbsp olive oil
  • 1 tsp kosher salt
  • 1/2 tsp freshly ground black pepper
  • 1 cup sour cream
  • 4 oz cream cheese, softened
  • 2 tbsp ranch seasoning mix
  • 2 cups shredded sharp cheddar cheese, divided
  • 3 green onions, thinly sliced
  • 2 tbsp chopped fresh parsley

Instructions

  1. Preheat oven to 375°F and toss the potato cubes with olive oil, 1/2 teaspoon salt, and 1/4 teaspoon pepper; spread in a single layer on a parchment-lined baking sheet and roast 20–25 minutes until fork-tender.
  2. Combine sour cream, cream cheese, ranch seasoning, and 1 cup of the shredded cheddar in a large bowl; whisk until smooth and season to taste with the remaining 1/2 teaspoon salt and 1/4 teaspoon pepper.
  3. Fold the roasted potatoes and half the sliced green onions into the cheese-ranch mixture, transferring everything to a greased 9×13-inch baking dish and smoothing the top.
  4. Bake at 375°F for 20–25 minutes until the sauce is bubbly and the cheese is melted; check doneness by ensuring the potatoes are fork-tender (a fork should slide in easily) and the center registers around 205°F if using an instant-read thermometer.
  5. Broil 2–3 minutes, watching constantly, to brown the cheese surface if desired and remove once golden and bubbling to avoid burning.
  6. Garnish with the remaining green onions and chopped parsley, then let the casserole rest 10 minutes to set before slicing and serving.

Pro Tip: Make-ahead: Roast and mix the potatoes with the sauce up to a day ahead, store covered in the refrigerator, then top with remaining cheese and bake just before serving; refrigerate leftovers up to 4 days in an airtight container.

27. Garlic-Herb Spiral Cheese Bites

Garlic-Herb Spiral Cheese Bites

Serves 10-12 · Total time: 1 hour 5 minutes

These creamy spinach-and-artichoke–inspired spirals turn classic dip flavors into portable party bites. Flaky puff pastry encases a tangy, garlicky cheese blend brightened with lemon and red pepper flakes for a little zip. They assemble quickly, chill to firm for neat slicing, and bake to a golden crisp that travels well for Friendsgiving sharing or easy reheating at the host's house.

Ingredients

  • 1 sheet (about 8 oz) refrigerated puff pastry, thawed
  • 8 oz cream cheese, softened
  • 1 cup frozen spinach, squeezed dry and finely chopped
  • 1 cup canned artichoke hearts, drained and chopped
  • 1/2 cup grated Parmesan cheese
  • 2 cloves garlic, minced
  • 1 teaspoon lemon zest
  • 1/4 teaspoon red pepper flakes
  • 1/2 teaspoon kosher salt
  • 1 large egg, beaten (for egg wash)

Instructions

  1. Preheat oven to 400°F (200°C) and line a baking sheet with parchment paper.
  2. Sauté garlic briefly in a small nonstick skillet over medium heat, adding 1 teaspoon water if it begins to stick; stir until fragrant, then transfer to a bowl and combine with cream cheese, spinach, artichokes, Parmesan, lemon zest, red pepper flakes, and salt until smooth and spreadable.
  3. Roll out the puff pastry on a lightly floured surface to a roughly 10 x 12-inch rectangle and pat edges to seal any seams.
  4. Roll the pastry tightly from the long edge into a log, pinch the seam to seal, wrap the log in plastic, and chill in the refrigerator for 30 minutes to firm for clean slices.
  5. Brush the chilled log with the beaten egg, slice into 20–24 rounds about 1/2-inch thick, arrange cut-side up on the prepared baking sheet, and bake 18–22 minutes until puffed and golden.
  6. Cool the pinwheels on the baking sheet for 5 minutes before transferring to a wire rack; serve warm or at room temperature.

Pro Tip: Make ahead by assembling and chilling the rolled log up to 24 hours; slice and bake at the party, and store any cooled leftovers in an airtight container in the refrigerator for up to 3 days — reheat in a 350°F oven for 8–10 minutes.

28. Crisp-Topped Bacon Cheddar Casserole

Crisp-Topped Bacon Cheddar Casserole

Serves 10-12 · Total time: 1 hour 10 minutes

This creamy, travel-friendly casserole balances rich cheddar sauce with smoky bacon and a crunchy browned topping—ideal for a Friendsgiving potluck. It stays stable during transport, reheats well, and slices cleanly for a buffet. The recipe layers al dente pasta in a velvety roux-based cheese sauce, folds in crisped bacon, then bakes until bubbling and golden. Bring a hot pan or warm in the oven on arrival.

Ingredients

  • 1 lb elbow macaroni
  • 8 oz thick-cut bacon
  • 4 tbsp unsalted butter
  • 1/4 cup all-purpose flour
  • 3 cups whole milk
  • 1 cup sharp cheddar, shredded
  • 1 cup Gruyère, shredded
  • 1 tsp Dijon mustard
  • 1/2 tsp smoked paprika
  • 1 tsp kosher salt and 1/2 tsp freshly ground black pepper
  • 1 cup panko breadcrumbs tossed with 2 tbsp melted butter

Instructions

  1. Preheat the oven to 375°F (190°C) and butter a 9×13-inch baking dish.
  2. Cook the bacon in a large skillet over medium heat until edges are crisp and the internal temperature reaches 145°F (63°C); drain on paper towels, chop, and reserve 2 tablespoons of the chopped bacon plus about 1/4 cup rendered fat.
  3. Boil the pasta in generously salted water until just shy of al dente (about 1 minute under package directions); drain and set aside.
  4. Melt 4 tablespoons butter in a saucepan over medium heat, whisk in the flour and cook 1–2 minutes, then gradually whisk in the milk and simmer until the sauce thickens; stir in both cheeses, Dijon mustard, smoked paprika, salt, and pepper until smooth.
  5. Fold the drained pasta and most of the chopped bacon into the cheese sauce, transfer the mixture to the prepared baking dish, sprinkle the panko-butter mixture evenly over the top, and scatter the reserved bacon pieces.
  6. Bake until the edges are bubbling and the topping is golden, 20–25 minutes; broil 1–2 minutes if you want extra color. Let rest 10 minutes before serving so the casserole sets and slices cleanly.

Pro Tip: Make ahead: Assemble the casserole, cover tightly, and refrigerate up to 24 hours. Bake straight from the fridge, adding about 10–15 minutes to the baking time, or store leftovers in an airtight container for up to 4 days and reheat covered in a 350°F oven until warmed through.

29. Herb-Mustard Roasted Turkey Tenderloin

Herb-Mustard Roasted Turkey Tenderloin

Serves 6–8 · Total time: 50 minutes

This juicy, herb-browned turkey tenderloin is a compact main ideal for a Friendsgiving potluck. It roasts quickly, slices neatly for passing, and develops a glossy pan sauce that travels well in a sealed container. Bright mustard and honey lift the savory notes without overpowering the bird. The result is an elegant, flavorful centerpiece that’s easy to slice and serve warm or at room temperature.

Ingredients

  • 1 (about 2 lb) turkey tenderloin, trimmed of excess fat
  • 1 tbsp olive oil
  • 1 tbsp Dijon mustard
  • 1 tbsp honey
  • 2 cloves garlic, minced
  • 1 1/2 tsp kosher salt
  • 1 tsp freshly ground black pepper
  • 1 tbsp fresh rosemary, finely chopped
  • 1 tbsp fresh thyme leaves, chopped
  • 1/4 cup low-sodium chicken broth

Instructions

  1. Preheat the oven to 425°F (218°C) and position a rack in the center; pat the tenderloin dry with paper towels.
  2. Combine the olive oil, Dijon, honey, garlic, rosemary, thyme, salt, and pepper in a small bowl and brush the mixture all over the turkey.
  3. Sear the tenderloin in an ovenproof skillet over medium-high heat, 1–2 minutes per side, until the surface is golden brown.
  4. Roast the seared tenderloin in the preheated oven for 22–28 minutes, or until you expect it to approach safe doneness.
  5. Check the internal temperature at the thickest point with an instant-read thermometer; the turkey is done when it registers 165°F (74°C). Remove from oven and tent loosely with foil; rest for 10 minutes.
  6. Make a quick pan sauce while the meat rests: place the skillet over medium heat, pour in the chicken broth and scrape up browned bits, then simmer 3–4 minutes until slightly reduced. Slice the tenderloin and spoon the sauce over before serving.

Pro Tip: Make the herb-mustard mixture up to 24 hours ahead and refrigerate. Store sliced leftovers in an airtight container for up to 3 days; rewarm gently in a 300°F oven until just warmed through or serve slices at room temperature for easy potluck plating.

30. Festive Orange-Cranberry Cheesespread

Festive Orange-Cranberry Cheesespread

Serves 10–12 · Total time: 2 hours 45 minutes

This creamy, tangy spread blends whipped cream cheese with bright orange zest, gently roasted cranberries and a touch of honey for balanced sweetness. Toasted pecans add crunch while a whisper of cinnamon lifts the fall flavors. It holds up well during transport and slices easily onto crackers or baguette rounds. Prepare ahead and chill so the dip firms and the flavors deepen before Friendsgiving service.

Ingredients

  • 8 oz (225 g) cream cheese, room temperature
  • 1/2 cup (120 g) sour cream
  • 2 tbsp honey, plus extra for drizzling
  • 1 tbsp orange zest (from 1 medium orange)
  • 1 tbsp orange juice
  • 1 tsp vanilla extract
  • 1/4 tsp ground cinnamon
  • 1 cup fresh cranberries
  • 2 tbsp granulated sugar
  • 1/4 cup toasted chopped pecans, plus extra for topping

Instructions

  1. Preheat the oven to 400°F (200°C). Toss cranberries with the granulated sugar and orange juice on a small rimmed baking sheet; roast 12–15 minutes until the berries soften and begin to burst, then cool on the pan 15 minutes.
  2. Beat the cream cheese, sour cream, honey, orange zest, vanilla and cinnamon in a medium bowl with an electric mixer until smooth and slightly airy, about 1–2 minutes.
  3. Fold in two-thirds of the cooled roasted cranberries and half the chopped pecans, leaving the remaining cranberries and pecans for garnish; taste and adjust honey or zest if needed.
  4. Transfer the mixture to a shallow serving bowl and smooth the top with a spatula; scatter the reserved cranberries and pecans over the surface and drizzle with a little extra honey.
  5. Chill the dip, tightly covered, for at least 2 hours to firm and allow flavors to meld; remove from the fridge 15 minutes before serving to soften slightly.
  6. Serve with toasted baguette slices, crackers or apple wedges; transport chilled in a cooler to keep the spread firm for potluck service.

Pro Tip: Make the dip up to 2 days ahead—cover and refrigerate. Store any leftovers in an airtight container for up to 4 days and bring to room temperature 15–20 minutes before serving.

31. Warm Harvest Farro Salad with Maple‑Dijon Vinaigrette

Warm Harvest Farro Salad with Maple‑Dijon Vinaigrette

Serves 8-10 · Total time: 1 hour 10 minutes

This warm roasted-vegetable and farro salad is built to travel and shine at a Friendsgiving potluck. Earthy sweet potatoes and caramelized Brussels sprouts meet nutty farro, crunchy toasted walnuts and tangy goat cheese, all lifted by a maple‑Dijon dressing. Serve it warm or at room temperature; the flavors deepen as it rests, making it forgiving for reheating, assembling ahead, and sharing with a crowd.

Ingredients

  • 1 lb sweet potatoes, peeled and cut into 1-inch cubes
  • 1 lb Brussels sprouts, trimmed and halved
  • 1 large red onion, cut into wedges
  • 3 tbsp olive oil
  • 1 1/2 tsp kosher salt, divided
  • 3/4 tsp black pepper, divided
  • 2 cups cooked farro, warm or room temperature
  • 3/4 cup toasted walnuts, roughly chopped
  • 4 oz crumbled goat cheese
  • 2 tbsp maple syrup
  • 1 tbsp Dijon mustard
  • 2 tbsp apple cider vinegar

Instructions

  1. Preheat the oven to 425°F (220°C). In a large bowl, toss the sweet potatoes, Brussels sprouts, and red onion with 2 tbsp of the olive oil, 1 tsp of the salt and 1/2 tsp of the pepper; reserve 1 tbsp oil for the dressing. Spread the vegetables in a single layer on a rimmed baking sheet and roast for 30–35 minutes, turning once halfway, until edges are browned and vegetables are tender.
  2. Cook the farro if you don’t have it ready: simmer per package instructions (about 20–30 minutes) until plump and tender; drain and keep warm. If using pre-cooked farro, warm briefly or bring to room temperature.
  3. Whisk the maple syrup, Dijon mustard, apple cider vinegar, the reserved 1 tbsp olive oil, and the remaining 1/2 tsp salt and 1/4 tsp pepper in a small bowl until smooth; taste and adjust seasoning.
  4. Toss the warm farro, roasted vegetables and toasted walnuts together in a large mixing bowl. Drizzle with the maple‑Dijon dressing and toss gently to coat all components evenly.
  5. Allow the tossed salad to rest for about 10 minutes so the flavors meld and the goat cheese softens; then fold in the crumbled goat cheese so it warms slightly without fully melting.
  6. Transfer the salad to a shallow serving bowl or platter and serve warm or at room temperature. Refrigerate any leftovers within two hours.

Pro Tip: Make ahead: Roast the vegetables and toast the walnuts up to 48 hours in advance and refrigerate separately. Cook the farro the day before. Keep the dressing chilled in a jar and combine everything at the host’s kitchen—warm briefly if you prefer it hot or serve at room temperature for easier transport.

32. Herbed Pesto-Crusted Roasted Potatoes

Herbed Pesto-Crusted Roasted Potatoes

Serves 6-8 · Total time: 45 minutes

This bright, travel-friendly side dresses crispy roasted baby potatoes in a quick basil pesto that whips up in minutes. It’s designed for potlucks: potatoes roast ahead, pesto stirs on quickly, and the finished dish tastes great warm or at room temperature. Nut and cheese add richness; lemon keeps it lively. No fancy equipment beyond a blender and sheet pan — great for a Friendsgiving spread.

Ingredients

  • 1 1/2 lb small Yukon Gold or baby potatoes, halved
  • 2 tbsp extra-virgin olive oil, divided
  • 1 tsp kosher salt, plus more to taste
  • 1/2 tsp freshly ground black pepper
  • 3 cloves garlic, smashed
  • 3/4 cup fresh basil leaves, packed
  • 1/4 cup grated Parmesan cheese, plus extra for serving
  • 3 tbsp toasted pine nuts or chopped toasted walnuts
  • 2 tbsp lemon juice (about 1/2 lemon)
  • 2 tbsp cold water (to loosen pesto, as needed)

Instructions

  1. Preheat oven to 425°F (220°C). Toss halved potatoes with 1 tbsp olive oil, 1/2 tsp salt, 1/4 tsp pepper, and smashed garlic in a large bowl until evenly coated.
  2. Combine basil, Parmesan, pine nuts, lemon juice, and remaining 1 tbsp olive oil in a food processor; pulse until a chunky pesto forms, adding cold water 1 tbsp at a time to reach a spoonable consistency. Taste and adjust salt and pepper.
  3. Toss the coated potatoes again to redistribute seasoning, then arrange cut-side down on a rimmed baking sheet in a single layer.
  4. Roast potatoes in the preheated oven for 25–30 minutes, turning once halfway through, until skins are golden and a fork pierces potatoes easily.
  5. Transfer hot potatoes to a large bowl, remove and discard the garlic cloves, spoon pesto over the potatoes, and gently toss to coat. Let the pan of dressed potatoes rest 5–10 minutes so flavors meld.
  6. Serve warm or at room temperature, sprinkling extra Parmesan and toasted nuts over the top; to reheat for travel, spread in a shallow ovenproof dish and warm at 350°F (175°C) for 10–12 minutes until heated through.

Pro Tip: Make-ahead: Roast potatoes up to 24 hours ahead and refrigerate; store pesto separately in an airtight container for up to 3 days. Toss together just before serving or reheat briefly in a 350°F oven.

33. Maple-Sage Sweet Potato Drop Biscuits

Maple-Sage Sweet Potato Drop Biscuits

Serves 10–12 · Total time: 1 hour

These tender maple-sage drop biscuits use roasted sweet potato for moistness and cozy fall flavor, while keeping a flaky, buttery crumb that travels well. Bite-sized enough for a potluck but generous next to roasted vegetables or mains, they pair sharp cheddar and fresh sage with a touch of maple. Make them ahead and rewarm briefly at the host's house for best results.

Ingredients

  • 1 1/2 cups mashed cooked sweet potato (about 1 medium)
  • 2 1/4 cups all-purpose flour
  • 2 teaspoons baking powder
  • 1/2 teaspoon baking soda
  • 1 teaspoon fine salt
  • 2 tablespoons granulated sugar
  • 6 tablespoons unsalted butter, cold, cut into 1/4-inch cubes
  • 3/4 cup cold buttermilk
  • 1/2 cup grated sharp cheddar cheese
  • 2 tablespoons chopped fresh sage + extra for sprinkling

Instructions

  1. Preheat the oven to 425°F (220°C) and position a rack in the center; line a baking sheet with parchment. If your sweet potato is uncooked, roast it separately at 400°F (200°C) for 40–50 minutes or microwave on high for 6–8 minutes until tender, then mash and cool.
  2. Whisk the flour, baking powder, baking soda, salt and sugar in a large bowl until evenly blended.
  3. Cut the cold butter into the dry ingredients using a pastry cutter or your fingertips until the mixture resembles coarse crumbs with some pea-sized bits.
  4. Stir the mashed sweet potato, grated cheddar and chopped sage into the flour mixture, then pour in the cold buttermilk and fold gently until just combined—do not overmix.
  5. Spoon the dough onto the prepared baking sheet in generous mounds (about 2½ tablespoons each), leaving 1–2 inches between biscuits; chill the tray in the refrigerator for 20 minutes to firm the dough.
  6. Bake for 12–15 minutes until the tops are golden and a toothpick inserted into the center comes out clean; rotate the pan halfway through baking for even color.
  7. Cool the biscuits on a wire rack for 10 minutes; serve warm or at room temperature with an extra drizzle of maple if desired.

Pro Tip: Make ahead: Shape the dough mounds on the baking sheet and freeze solid, then transfer to a bag; bake from frozen adding 3–4 minutes. Store baked biscuits in an airtight container for up to 3 days and reheat in a 350°F oven for 8–10 minutes to refresh.

34. Maple-Dijon Chicken & Apple Skewers

Maple-Dijon Chicken & Apple Skewers

Serves 10–12 · Total time: 35 minutes

These bite-sized sausage skewers pair lean chicken-and-apple links with caramelized apple and a glossy maple-Dijon glaze—perfect for a Friendsgiving appetizer that survives travel and reheating. They’re easy to make on a sheet pan, arrive warm or at room temperature, and look festive piled on a platter. The sweet-tangy glaze highlights the sausages’ fruitiness while parsley adds a fresh finish.

Ingredients

  • 1 lb (450 g) chicken-and-apple sausage links, sliced into 1/2-inch rounds
  • 1 tbsp olive oil
  • 1 medium firm apple, cored and diced into small pieces
  • 1 small shallot, finely chopped
  • 2 tbsp Dijon mustard
  • 1/4 cup pure maple syrup
  • 1 tbsp apple cider vinegar
  • 1 tbsp unsalted butter, cut into small pieces
  • 1/4 tsp smoked paprika
  • 1/2 tsp kosher salt and 1/4 tsp freshly ground black pepper
  • 2 tbsp chopped fresh parsley
  • 30 wooden toothpicks

Instructions

  1. Preheat oven to 400°F (200°C) and line a rimmed baking sheet with parchment or foil.
  2. Toss the diced apple and shallot with the olive oil, smoked paprika, and the salt and pepper; spread them on one side of the prepared sheet and arrange the sausage rounds in a single layer on the other side.
  3. Roast until the apples begin to soften and the sausage rounds develop golden edges, about 10 minutes.
  4. Whisk the Dijon, maple syrup, apple cider vinegar, and the butter in a small bowl until smooth.
  5. Brush the sausage rounds with half the glaze, return the sheet to the oven, and bake until the glaze is sticky and an instant-read thermometer inserted into several sausage pieces reads 165°F (74°C) and juices run clear, about 4–6 minutes.
  6. Skewer each bite by threading a sausage round and a little roasted apple onto a toothpick, sprinkle with parsley, and transfer to a platter to serve warm or at room temperature.

Pro Tip: Make ahead by roasting the components and keeping the glaze refrigerated separately; rewarm sausage briefly in a 350°F (175°C) oven for 6–8 minutes, toss with warmed glaze, then skewer—store leftovers covered in the fridge for up to 3 days.

35. Herbed Cornbread & Sausage Pan Dressing

Herbed Cornbread & Sausage Pan Dressing

Serves 10–12 · Total time: 1 hour 15 minutes

This buttery cornbread and sausage dressing riff takes the spirit of a Southern classic and turns it into a potluck-friendly casserole. Crumbled day-old cornbread soaks up a savory mix of browned pork sausage, softened aromatics, and bright fresh herbs, then bakes until the center is set and the top is golden. It travels well, slices cleanly, and warms up easily on arrival.

Ingredients

  • 1 1/2 pounds mild pork sausage, casings removed
  • 2 tablespoons unsalted butter
  • 1 medium yellow onion, finely chopped (about 1 cup)
  • 2 celery stalks, diced (about 1/2 cup)
  • 1 medium red bell pepper, diced
  • 1 tablespoon fresh sage, finely chopped
  • 2 teaspoons fresh thyme leaves, chopped
  • 1 teaspoon kosher salt
  • 1/2 teaspoon freshly ground black pepper
  • 3 cups day-old cornbread, torn into 1-inch pieces (about one 9-inch pan)
  • 2 cups low-sodium chicken broth
  • 2 large eggs, lightly beaten

Instructions

  1. Preheat the oven to 350°F and grease a 9×13-inch baking dish with butter; heat a large skillet over medium heat and crumble in the sausage, cooking until no pink remains and it reaches 160°F internally, about 7–9 minutes, then transfer to a bowl and drain off excess fat, leaving a tablespoon for flavor.
  2. Melt the butter in the same skillet over medium heat and sauté the onion, celery, and red bell pepper until softened and translucent, about 6–8 minutes; stir in the sage, thyme, salt, and pepper and cook 1 minute to bloom the herbs.
  3. Combine the torn cornbread, cooked sausage, and sautéed vegetables in a large mixing bowl, tossing gently to distribute ingredients evenly.
  4. Whisk together the chicken broth and beaten eggs in a measuring cup; pour the liquid evenly over the cornbread mixture and fold gently until the bread is moistened throughout; let the mixture rest for 10 minutes so the cornbread absorbs the liquid.
  5. Transfer the mixture to the prepared baking dish, press lightly to level the top, cover with foil, and bake at 350°F for 30 minutes; remove the foil and continue baking uncovered 10–15 minutes more, until the top is golden and the center reaches 165°F or is set with no wet, jiggly spots.
  6. Let the dressing rest 15 minutes before slicing to finish firming up, then serve warm or transport cooled to room temperature for travel.

Pro Tip: Make ahead by assembling through Step 4, cover tightly and refrigerate up to 24 hours; bake covered, then finish uncovered when ready to serve. Store leftovers in an airtight container in the fridge for up to 4 days and reheat covered at 325°F until warm.

36. Flat-Roast Citrus-Herb Turkey Breast

Flat-Roast Citrus-Herb Turkey Breast

Serves 6-8 · Total time: 1 hour 45 minutes

This butter-brushed, flat-roast turkey breast is designed to travel: spatchcock-style to cook faster and carve easily, with a bright citrus-herb rub that complements white meat. High heat crisps the skin while a short rest keeps slices juicy for platters or sandwiches. The lean, flattened shape makes it ideal for potlucks—slice thin and pack with pan juices for simple transport and quick reheating at your Friendsgiving host's kitchen.

Ingredients

  • 4 to 5 lb bone-in turkey breast (skin-on), backbone removed for flattening
  • 2 tbsp kosher salt
  • 1 tbsp freshly ground black pepper
  • 2 tbsp unsalted butter, softened
  • 2 tbsp olive oil
  • 1 tbsp fresh thyme leaves, chopped
  • 1 tbsp fresh rosemary, minced
  • 1 tsp lemon zest (about 1 lemon)
  • 2 cloves garlic, minced
  • 1/2 cup low-sodium chicken broth or reserved pan juices

Instructions

  1. Preheat the oven to 425°F (220°C). Line a rimmed baking sheet with foil and set a wire rack on it.
  2. Pat the turkey breast dry. Using kitchen shears, remove the backbone if present, then turn the breast skin-side down and press firmly with the heel of your hand until it lies roughly 1/2 inch thick.
  3. Mix the salt, pepper, softened butter, olive oil, thyme, rosemary, lemon zest, and garlic into a paste; loosen the skin and rub some paste directly on the meat, then spread the rest evenly over the skin.
  4. Place the breast skin-side up on the prepared rack, tuck any thin edges under, and roast in the preheated oven until an instant-read thermometer inserted into the thickest part of the breast (not touching bone) reads 165°F (74°C), about 45–55 minutes depending on size.
  5. Remove the turkey from the oven and tent loosely with foil; rest for 15 minutes to allow juices to redistribute, and recheck the internal temperature to confirm it is at least 165°F (74°C).
  6. Slice thinly against the grain and transfer to a serving platter or insulated carrier for transport; drizzle with warmed reserved pan juices or chicken broth before serving.

Pro Tip: Make-ahead/storage tip: Roast up to 2 days ahead, cool completely, slice and store with a little reserved pan juice in an airtight container in the refrigerator for up to 3 days. Reheat covered in a 325°F (160°C) oven until warmed through to 165°F (74°C) or serve slices at room temperature for sandwiches.

37. Autumn Harvest Sweet Potato Dinner Buns

Autumn Harvest Sweet Potato Dinner Buns

Serves 10-12 · Total time: 2 hours 45 minutes

Swap the usual dinner-bread routine for rosy, slightly sweet rolls that highlight autumn’s favorite root: sweet potato. These tender, portable buns combine mashed sweet potato with an enriched yeast dough for soft crumb and golden crust. They travel well, pair with savory Thanksgiving mains or spiced butter, and are forgiving to make ahead—perfect for a communal feast where dishes must survive the car ride and tabletop shuffle.

Ingredients

  • 1 1/4 cups mashed cooked sweet potato (about 1 medium)
  • 2 1/4 teaspoons active dry yeast (1 packet)
  • 1/4 cup warm water (100–110°F)
  • 1/3 cup warm whole milk (about 105°F)
  • 3 tablespoons honey, divided
  • 1 large egg, room temperature
  • 3 tablespoons unsalted butter, melted and cooled
  • 1 teaspoon fine salt
  • 3 to 3 1/2 cups all-purpose flour
  • 1 tablespoon sesame seeds or rolled oats (optional)

Instructions

  1. Bloom the yeast: stir yeast into warm water with 1 teaspoon of the honey and let sit until foamy, about 8–10 minutes.
  2. Combine the sweet potato, warm milk, remaining honey, egg, and melted butter in a large bowl; whisk until smooth and slightly glossy.
  3. Add the salt and 2 cups of the flour to the wet mixture and stir with a wooden spoon until a shaggy dough forms, then add remaining flour a little at a time until the dough pulls away from the bowl.
  4. Knead the dough on a lightly floured surface until smooth and elastic, about 8–10 minutes; place the dough in a lightly oiled bowl, cover with a damp towel or plastic wrap, and let rise in a warm spot until doubled in size, 60–75 minutes.
  5. Punch down the dough, divide it into 12 equal pieces, shape each into a tight ball, and arrange them on a parchment-lined baking sheet about 1 inch apart; cover and let rise until puffy, 30–45 minutes, while preheating the oven to 375°F.
  6. Brush the tops with a little milk or beaten egg, sprinkle with sesame seeds or oats if using, and bake at 375°F for 18–22 minutes until the tops are golden brown and an instant-read thermometer inserted in the center of a roll reads about 190°F.
  7. Cool the rolls on a wire rack for at least 15 minutes before serving to finish setting the crumb; store cooled rolls in an airtight container for up to 3 days or freeze for longer storage.

Pro Tip: Make ahead: Bake and cool completely, then freeze rolls in a single layer in an airtight bag for up to 2 months; reheat at 300°F for 10–12 minutes or thaw overnight and warm briefly before serving.

38. Crockpot Maple-Pumpkin Party Dip

Crockpot Maple-Pumpkin Party Dip

Serves 10-12 · Total time: 4 hours

This slow-cooker pumpkin dip channels classic Thanksgiving spices into a hands-off, transport-friendly spread. Softened cream cheese and pumpkin puree slowly meld with maple and brown sugar into a velvety dip that firms in the fridge for easy packing. Bring it warmed or chilled to Friendsgiving—pair with sturdy crackers, apple wedges, or ginger snaps for a simple, sharable starter that reheats gently if needed.

Ingredients

  • 8 ounces cream cheese, softened
  • 1 cup pumpkin puree (canned or homemade)
  • 1/2 cup packed dark brown sugar
  • 2 tablespoons pure maple syrup
  • 1 teaspoon vanilla extract
  • 1 1/2 teaspoons ground cinnamon
  • 1/2 teaspoon ground ginger
  • 1/4 teaspoon ground allspice
  • 1 tablespoon cornstarch
  • 1/4 teaspoon fine salt
  • 1/2 cup toasted chopped pecans (optional)
  • 4 cups apple slices or sturdy crackers for serving

Instructions

  1. Beat the cream cheese in a medium bowl until smooth, then add the pumpkin, brown sugar, maple syrup, vanilla, cinnamon, ginger, allspice, and salt; mix until fully combined.
  2. Whisk the cornstarch with 2 tablespoons cold water until dissolved, then stir the slurry into the pumpkin-cream cheese mixture until evenly incorporated.
  3. Transfer the mixture into a 3- to 4-quart slow cooker coated with nonstick spray or lined with a removable insert and smooth the top.
  4. Cook on Low for 1 hour 30 minutes (or on High for 45 minutes), stirring once—about 45 minutes into Low or 20 minutes into High—to prevent hot spots; the edges should appear hot and slightly bubbling when done.
  5. Allow the dip to cool in the cooker for 15 minutes, then refrigerate uncovered until chilled and set, at least 2 hours (or up to overnight) before transporting to your potluck.
  6. Stir to reach the desired consistency, transfer to a serving bowl, sprinkle with toasted pecans if using, and serve chilled or gently warmed; reheat in a low oven at 300°F (150°C) for 10–15 minutes if you prefer it warm.

Pro Tip: Make ahead and refrigerate up to 48 hours; transport chilled in the slow cooker insert in an insulated bag, then reheat on Low or in a 300°F oven for 10–15 minutes at the host’s home and serve with apple slices or crackers.

39. Friendsgiving Cheddar-Bacon Mash Bake

Friendsgiving Cheddar-Bacon Mash Bake

Serves 10-12 · Total time: 1 hour 10 minutes

This creamy, travel-friendly casserole turns the comforts of classic loaded mashed potatoes into a communal Friendsgiving side. Velvety potatoes mingle with cream cheese and tangy sour cream, then get a crunchy, cheesy top for easy reheating and sharing. It arrives warm, slices beautifully, and keeps its texture on a buffet—ideal for potluck logistics and for guests to help themselves to generous, comforting portions.

Ingredients

  • 4 lb russet potatoes, peeled and cut into 1-inch cubes
  • 8 tbsp unsalted butter
  • 1 cup whole milk
  • 6 oz cream cheese, room temperature
  • 1 cup sour cream
  • 2 cups shredded sharp cheddar cheese, divided
  • 1/2 cup sliced green onions (scallions)
  • 8 slices bacon
  • 1 tsp kosher salt
  • 1/2 tsp freshly ground black pepper

Instructions

  1. Preheat the oven to 400°F and lightly grease a 9×13-inch baking dish.
  2. Cook the bacon in a skillet over medium heat until browned and crisp, about 8–12 minutes, flipping as needed; drain on paper towels and crumble (bacon should be browned and crisp).
  3. Cook the potatoes in a large pot of salted boiling water until fork-tender, about 15–18 minutes; drain well.
  4. Mash the hot potatoes with butter, milk, cream cheese, sour cream, salt, and pepper until smooth; fold in 1 1/2 cups of the cheddar, most of the crumbled bacon, and half the green onions.
  5. Transfer the mixture to the prepared baking dish, sprinkle the remaining 1/2 cup cheddar and reserved bacon over the top, and bake at 400°F until bubbly and edges are golden, 20–25 minutes.
  6. Garnish with the remaining green onions and let rest 5 minutes before serving so portions hold together for easy transport.

Pro Tip: Make ahead: assemble up to 24 hours in advance, cover and refrigerate, then bake covered at 350°F for 20–30 minutes and uncover to brown for 5–10 minutes before serving; store leftovers refrigerated for up to 4 days.

40. Mini Brie Parcels with Fig, Thyme & Toasted Walnuts

Mini Brie Parcels with Fig, Thyme & Toasted Walnuts

Makes about 24 bites (serves 8–10) · Total time: 50 minutes

These golden puff pastry parcels hold melty Brie, sticky fig jam, and crunchy toasted walnuts—perfect bite-sized treats for a Friendsgiving spread. They travel well, reheat beautifully, and assemble quickly with just a few pantry staples. Serve them warm with a honey drizzle and fresh thyme for a cozy sweet-salty contrast. They’re elegant enough for guests but simple enough to make in batches ahead of time.

Ingredients

  • 1 sheet (about 8.5 oz) frozen puff pastry, thawed
  • 8 oz Brie, rind removed and cut into 24 small pieces
  • 3 tablespoons fig jam
  • 1/2 cup toasted walnuts, roughly chopped
  • 1 tablespoon honey, plus extra for serving
  • 1 teaspoon fresh thyme leaves, plus sprigs for garnish
  • 1 teaspoon lemon zest
  • 1 large egg, beaten (for egg wash)
  • Pinch of flaky sea salt and freshly ground black pepper, to taste

Instructions

  1. Preheat oven to 400°F (200°C) and line a baking sheet with parchment paper.
  2. Unfold the puff pastry on a lightly floured surface, roll briefly to smooth, and cut into 24 equal 2-inch squares.
  3. Place a Brie piece in the center of each square, top with about 1/2 teaspoon fig jam, a few walnut pieces, a sprinkle of lemon zest and thyme, and season lightly with salt and pepper.
  4. Fold opposite corners toward the center to form open-top parcels or gently bring all corners to meet in the middle, pressing lightly to seal; brush each pastry lightly with the beaten egg.
  5. Chill the assembled bites on the prepared sheet for 15 minutes, then bake at 400°F (200°C) for 12–16 minutes until the pastry is puffed and deep golden and the Brie is soft.
  6. Cool the bites on the sheet for 3–5 minutes, transfer to a platter, drizzle with honey, garnish with thyme sprigs, and serve warm.

Pro Tip: Make ahead by assembling the bites up to 24 hours in advance and keeping them covered in the refrigerator; bake straight from chilled and store leftovers airtight in the fridge for up to 3 days.

41. Savory Cranberry-Chicken Crescent Pockets

Savory Cranberry-Chicken Crescent Pockets

Serves 8 · Total time: 35 minutes

These hand-held chicken crescent rolls are perfect for Friendsgiving — portable, shareable, and flavorful. A quick filling of shredded rotisserie chicken, tangy cranberry relish, cream cheese, sharp cheddar, and bright herbs is rolled into buttery crescent dough for golden, poppable bites. They travel well and can be served warm or at room temperature, making them ideal for potlucks where easy reheating or passing plates is the priority.

Ingredients

  • 1 (8 oz) package refrigerated crescent roll dough (8 triangles)
  • 2 cups cooked shredded chicken (rotisserie or poached)
  • 4 oz cream cheese, softened
  • 1/3 cup whole-berry cranberry relish or sauce
  • 1/2 cup shredded sharp cheddar cheese
  • 2 tablespoons chopped fresh parsley
  • 1 small shallot, minced (about 2 tablespoons)
  • 1 tablespoon Dijon mustard
  • 1 tablespoon lemon juice
  • 1 large egg, beaten with 1 tablespoon water (for egg wash)

Instructions

  1. Preheat oven to 375°F (190°C) and line a baking sheet with parchment paper or a silicone mat.
  2. Combine shredded chicken, cream cheese, cranberry relish, cheddar, parsley, shallot, Dijon, and lemon juice in a bowl; mash and mix until evenly distributed and season to taste with salt and pepper.
  3. Unroll crescent dough and separate into 8 triangles on a clean work surface, gently stretching each triangle slightly if needed.
  4. Spoon about 2 tablespoons of the chicken mixture onto the wide end of each triangle, then roll toward the point, tucking in ends and placing seam-side down on the prepared sheet.
  5. Bake at 375°F (190°C) for 15–18 minutes until crescent pockets are golden brown and an instant-read thermometer inserted into the center of a pocket reads 165°F (74°C) to ensure safe poultry doneness.
  6. Let the pockets rest 5 minutes before serving; serve warm or at room temperature with extra cranberry relish on the side.

Pro Tip: Make the filling up to 24 hours ahead and refrigerate; assemble and bake the day of the event. Store leftovers in an airtight container for up to 2 days and reheat at 325°F for 8–10 minutes.

42. Harvest Layered Turkey & Cornbread Bake

Harvest Layered Turkey & Cornbread Bake

Serves 8-10 · Total time: 1 hour 5 minutes

Bring leftover-season cheer to the potluck with a layered, handheld-friendly bake that combines cornbread's crumbly comfort with roasted turkey and sweet corn. This casserole travels well, reheats evenly, and squeezes bright notes of thyme and sharp cheddar into every bite. Designed for easy assembly and oven warming at a host's home, it holds shape for serving and pairs happily with cranberry or crisp greens.

Ingredients

  • 6 cups day-old cornbread, cubed
  • 2 tablespoons unsalted butter
  • 1 large yellow onion, diced
  • 3 stalks celery, diced
  • 3 cloves garlic, minced
  • 3 cups cooked shredded turkey (about 1 lb)
  • 1½ cups frozen corn, thawed
  • 1¼ cups low-sodium chicken broth
  • 1 cup shredded sharp cheddar
  • 2 teaspoons fresh thyme leaves, 1 teaspoon kosher salt, and ½ teaspoon black pepper

Instructions

  1. Preheat the oven to 375°F and grease a 9×13-inch baking dish with a little butter or nonstick spray.
  2. Sauté the onion and celery in the butter over medium heat until softened, about 6–8 minutes; add the garlic and cook 30–60 seconds until fragrant.
  3. Combine the cornbread cubes, sautéed vegetables, shredded turkey, corn, cheddar, thyme, chicken broth, salt, and pepper in a large bowl; toss gently until the cornbread is evenly moistened but not mashed.
  4. Transfer the mixture to the prepared baking dish, press lightly to compact, and sprinkle an extra handful of cheddar over the top if desired.
  5. Bake at 375°F for 25–30 minutes, until the edges are golden and the center registers 165°F with an instant-read thermometer to ensure reheated poultry safety.
  6. Rest the casserole 10 minutes before slicing so it firms up for easier serving.

Pro Tip: Assemble the casserole up to 24 hours ahead, cover and refrigerate; bake straight from the fridge, adding 8–10 minutes to the bake time, and store leftovers covered in the refrigerator up to 3 days—reheat to 165°F before serving.

43. Gouda Cream Skillet Corn

Gouda Cream Skillet Corn

Serves 8–10 · Total time: 50 minutes

This creamy, one-skillet side brings smoky Gouda and tangy cream cheese together with sweet corn for a travel-friendly Friendsgiving dish. It bakes in a single ovenproof skillet—minimal cleanup and easy reheating at the host’s home. The crunchy panko top adds lift while the interior stays velvety, so it pairs well with roasted turkey and herb sides. It travels well in an insulated carrier and can be reheated quickly.

Ingredients

  • 4 tablespoons unsalted butter
  • 1 small yellow onion, finely chopped
  • 2 cloves garlic, minced
  • 4 cups corn kernels (fresh or frozen, thawed)
  • 8 ounces cream cheese, softened
  • 1 1/2 cups (about 6 oz) shredded smoked Gouda
  • 1/2 cup heavy cream
  • 2 tablespoons all-purpose flour
  • 1 teaspoon kosher salt
  • 1/2 teaspoon freshly ground black pepper
  • 1/2 cup panko breadcrumbs

Instructions

  1. Preheat the oven to 375°F (190°C) and place a 10-inch ovenproof skillet over medium heat; melt the butter until foaming.
  2. Sauté the chopped onion in the melted butter until translucent, about 5–6 minutes, then add the minced garlic and cook until fragrant, about 30 seconds.
  3. Whisk the flour into the pan and cook for 1 minute, then gradually whisk in the heavy cream and stir in the cream cheese until a smooth sauce forms.
  4. Fold in the corn, 1 cup of the shredded Gouda, the salt, and the pepper; simmer gently until the mixture thickens and the corn is heated through, 2–3 minutes.
  5. Sprinkle the remaining Gouda and the panko breadcrumbs evenly across the top, and bake uncovered in the preheated oven until the center is bubbly and the top is golden, 18–22 minutes.
  6. Remove the skillet from the oven with oven mitts, let rest 5 minutes to set, then serve warm straight from the pan.

Pro Tip: Make ahead: assemble through step 4, cover and refrigerate up to 24 hours; before serving, top with Gouda and panko and bake as directed. Store leftovers in an airtight container for up to 4 days and reheat in a 350°F oven until warmed through.

44. Peppered Arugula & Honeyed Apple Salad with Slow-Roasted Garlic Dressing

Peppered Arugula & Honeyed Apple Salad with Slow-Roasted Garlic Dressing

Serves 8-10 · Total time: 1 hour 20 minutes

Bright, peppery arugula meets crisp apples and crunchy toasted walnuts in a salad built for sharing. A head of slow-roasted garlic is blended into a silky apple-cider vinaigrette sweetened with honey, providing mellow depth that travels well. Simple to assemble, it stays fresh for potlucks when components are packed separately and dressed just before serving.

Ingredients

  • 5 oz arugula (about 5 cups packed)
  • 2 medium crisp apples (Honeycrisp or Gala), cored and thinly sliced
  • 1 head garlic, top trimmed
  • 1/3 cup extra-virgin olive oil
  • 3 tbsp apple cider vinegar
  • 1 tsp Dijon mustard
  • 1 tbsp honey
  • 1/3 cup walnuts, roughly chopped
  • 1/4 cup shaved Parmesan
  • 1/2 tsp kosher salt and 1/4 tsp freshly ground black pepper

Instructions

  1. Preheat the oven to 400°F; place the trimmed garlic head on foil, drizzle with 1 tsp olive oil, wrap tightly and roast for 40 minutes until very soft and golden, then cool 10 minutes.
  2. Squeeze the cooled roasted garlic cloves into a blender or food processor; add apple cider vinegar, Dijon, honey and the remaining olive oil; blend until smooth and season with 1/2 tsp salt and 1/4 tsp pepper.
  3. Chill the vinaigrette in the refrigerator for at least 30 minutes to let flavors mellow and meld.
  4. Toast the walnuts in a dry skillet over medium heat, stirring frequently, 3–4 minutes until fragrant and lightly browned; cool before chopping coarsely.
  5. Toss the arugula and sliced apples with just enough vinaigrette to coat (about two-thirds of the dressing), then scatter the toasted walnuts and shaved Parmesan over the top.
  6. Transfer to a serving bowl or platter and, if transporting, refrigerate up to 1 hour; toss again briefly just before serving to redistribute dressing.

Pro Tip: Make the vinaigrette up to 3 days ahead and store in a sealed jar; keep walnuts and apples separate and dress the salad only minutes before serving to prevent sogginess.

45. Honey-Garlic Roasted Sweet Potato Rounds

Honey-Garlic Roasted Sweet Potato Rounds

Serves 10-12 · Total time: 1 hour

These honey-garlic roasted sweet potato rounds are a cozy, transport-friendly side that shines at potlucks. Thick slices roast until tender and lightly charred, then get brushed with a warm butter-honey glaze scented with garlic and a splash of apple-cider vinegar for brightness. They travel well either warm or at room temperature, pair with roasted mains or a fall salad, and require minimal hands-on time.

Ingredients

  • 2 1/2 pounds sweet potatoes (about 4 medium), scrubbed and sliced 1/4-inch thick
  • 2 tablespoons olive oil
  • 4 tablespoons unsalted butter
  • 3 cloves garlic, minced
  • 3 tablespoons honey
  • 1 tablespoon apple cider vinegar
  • 1 teaspoon smoked paprika
  • 1/2 teaspoon fine sea salt, plus more to taste
  • 1/4 teaspoon freshly ground black pepper
  • 2 tablespoons chopped fresh parsley (optional), for garnish

Instructions

  1. Preheat the oven to 425°F (220°C) and line two rimmed baking sheets with parchment paper or lightly oil them.
  2. Toss the sweet potato slices with the olive oil, smoked paprika, 1/2 teaspoon salt and black pepper in a large bowl until they are evenly coated.
  3. Arrange the slices in a single layer on the prepared sheets, leaving a little space between rounds; roast for 25–30 minutes, flipping once halfway through, until slices are tender and the edges are golden.
  4. Warm the butter in a small saucepan over medium heat; add the minced garlic and cook 30–60 seconds until fragrant, then stir in the honey and apple cider vinegar and simmer for 1 minute to meld flavors.
  5. Brush or spoon the garlic-honey butter over the hot roasted slices, return to the oven for 4–6 minutes to set the glaze and let edges caramelize.
  6. Transfer the glazed rounds to a platter, scatter chopped parsley, adjust seasoning to taste, and serve warm or at room temperature.

Pro Tip: Make ahead by roasting and storing the cooled rounds in an airtight container in the refrigerator for up to 3 days; reheat on a sheet pan at 350°F (175°C) for 8–10 minutes or serve at room temperature for easy transport.

46. Maple-Chive Corn Gratin

Maple-Chive Corn Gratin

Serves 8–10 · Total time: 1 hour 10 minutes

Bright, creamy, and easy to transport, this Maple-Chive Corn Gratin blends sweet corn, tangy sour cream, sharp cheddar and a whisper of maple for autumnal warmth. It bakes into a golden, slightly crisp-topped side that holds up well for reheating at a potluck. The texture sits between a pudding and a crusted bake—slice it straight from the pan for Friendsgiving crowds who want comforting, crowd-pleasing flavor.

Ingredients

  • 4 cups fresh or frozen corn kernels, thawed if frozen
  • 1 cup creamed corn
  • 2 large eggs, lightly beaten
  • 3/4 cup sour cream
  • 1/2 cup whole milk
  • 1 tablespoon pure maple syrup
  • 1 tablespoon chopped fresh chives
  • 1 teaspoon kosher salt
  • 1/2 teaspoon freshly ground black pepper
  • 1 1/2 cups shredded sharp cheddar cheese, divided

Instructions

  1. Preheat the oven to 375°F (190°C) and lightly butter a 9×13-inch baking dish.
  2. Whisk together the eggs, sour cream, whole milk, maple syrup, kosher salt and black pepper in a large bowl until smooth.
  3. Fold the creamed corn, corn kernels, chopped chives and 1 cup of the shredded cheddar into the egg mixture until evenly combined.
  4. Spread the mixture into the prepared baking dish and sprinkle the remaining 1/2 cup cheddar evenly over the top.
  5. Bake until the top is golden and the custard is set, 35–45 minutes; check doneness by inserting an instant-read thermometer into the center (it should read 160°F/71°C) or by noting that a shallow knife comes out mostly clean with only slight moistness.
  6. Let the gratin rest at least 10 minutes before slicing; cover tightly with foil to transport and reheat at 350°F (175°C) for 15–20 minutes, or until warmed through, when ready to serve.

Pro Tip: Make ahead: assemble and refrigerate (covered) up to 24 hours, then bake from chilled adding 5–10 minutes to the bake time. Store leftovers refrigerated up to 3 days and rewarm covered at 325°F until heated through.

47. Holiday Cranberry-Braised Brisket with Orange-Balsamic Glaze

Holiday Cranberry-Braised Brisket with Orange-Balsamic Glaze

Serves 10–12 · Total time: 4 hr 30 min

Bright-tart cranberries and warm, savory aromatics brighten this slow-roasted beef brisket for a holiday main that travels well. The brisket braises in a glossy orange-balsamic cranberry sauce until fork-tender, then rests and is sliced thin—easy to reheat at a potluck or serve room temperature. It pairs well with mashed potatoes or a hearty grain salad and holds its shape for slicing after refrigeration, making it potluck-friendly.

Ingredients

  • 4 lb beef brisket, trimmed of excess fat
  • 2 tsp kosher salt
  • 1 tsp freshly ground black pepper
  • 2 tbsp vegetable oil
  • 1 large yellow onion, thinly sliced
  • 3 cloves garlic, minced
  • 12 oz fresh cranberries (about 3 cups)
  • 3/4 cup fresh orange juice
  • 1/2 cup packed brown sugar
  • 1/4 cup balsamic vinegar
  • 2 cups low-sodium beef broth
  • 1 tbsp fresh thyme leaves (or 1 tsp dried)

Instructions

  1. Preheat the oven to 325°F (160°C) and pat the brisket dry, then rub both sides with the salt and pepper.
  2. Sear the brisket: heat the oil in a large Dutch oven over medium-high heat and brown the brisket 4–5 minutes per side until a deep crust forms; transfer the meat to a plate.
  3. Sauté the aromatics: add the onion to the pot and cook 5–7 minutes until translucent, add the garlic and cook 30 seconds, then stir in the cranberries, orange juice, brown sugar, balsamic, beef broth, and thyme and bring to a gentle simmer.
  4. Return the brisket to the pot fat-side up, spoon some sauce over the top, cover tightly with the lid (or foil), and braise in the oven for 3 to 3 1/2 hours until the meat is fork-tender and pulls apart easily (internal temp will typically reach 195–205°F when tender).
  5. Reduce and finish the sauce: remove the brisket to a cutting board and tent to rest 20 minutes; simmer the braising liquid on the stovetop 8–12 minutes to concentrate into a glossy glaze, skimming fat as needed.
  6. Slice and serve: slice the rested brisket thinly against the grain, arrange on a platter, spoon the cranberry-orange glaze over the slices, and serve warm or at room temperature for easy potluck transport.

Pro Tip: Make ahead: braise the brisket up to 2 days in advance, cool in its cooking liquid, refrigerate, then slice and reheat gently in the sauce. Store refrigerated up to 4 days or freeze up to 3 months; reheat covered at low temperature to keep meat moist.

48. Golden Cheddar Potluck Gratin

Golden Cheddar Potluck Gratin

Serves 10-12 · Total time: 1 hour 10 minutes

Comforting and uncomplicated, this golden potato bake transforms frozen shredded potatoes into a creamy, cheesy crowd-pleaser that's built for easy transport and reheating. A browned crunchy topping keeps edges crisp while a simple sauce holds together without fuss. It requires straightforward prep, bakes in one dish, and keeps its texture after a short rest—ideal for potlucks, Friendsgiving gatherings, or bringing to a shared meal.

Ingredients

  • 2 lb frozen shredded potatoes, thawed and pressed dry
  • 2 cups shredded sharp cheddar cheese, divided
  • 1 1/2 cups sour cream
  • 1/2 cup whole milk
  • 2 tbsp unsalted butter, melted (for sauce)
  • 1 medium yellow onion, finely chopped (about 1 cup)
  • 1 tsp kosher salt
  • 1/2 tsp freshly ground black pepper
  • 1 1/2 cups crushed cornflakes or crispy cereal
  • 3 tbsp unsalted butter, melted (for topping)

Instructions

  1. Preheat oven to 375°F and lightly butter a 9×13-inch baking dish.
  2. Combine sour cream, milk, 2 tablespoons melted butter, half the cheddar, chopped onion, salt, and pepper in a large bowl and stir until smooth.
  3. Fold in the thawed, squeezed potatoes until the mixture is evenly coated.
  4. Spread the potato mixture into the prepared dish and sprinkle the remaining cheddar evenly over the top.
  5. Mix the crushed cornflakes with 3 tablespoons melted butter, press the crumb topping over the casserole, and bake 45 minutes until the edges are bubbling and the topping is deep golden brown.
  6. Rest the casserole 10–15 minutes before slicing to let it set; serve warm or cool for transport.

Pro Tip: Assemble the dish up to 24 hours ahead, cover and refrigerate; add about 5–10 minutes to the bake time from chilled. Store leftovers covered in the refrigerator for up to 4 days and reheat in a 350°F oven until warmed through.

49. Silky Horseradish & Onion Whipped Potatoes

Silky Horseradish & Onion Whipped Potatoes

Serves 8–10 · Total time: 1 hour 10 minutes

Silky Horseradish & Onion Whipped Potatoes brighten classic mash with a gentle horseradish bite and deeply browned onions for sweetness. This creamy side travels well, reheats neatly, and complements rich mains or roasted vegetables at a Friendsgiving spread. The texture stays smooth whether served warm or at room temperature, and a final sprinkle of chives keeps each spoonful fresh and attractive for a potluck table.

Ingredients

  • 3 lb Yukon Gold potatoes, peeled and cut into 1-inch pieces
  • 2 tbsp unsalted butter
  • 1 tbsp olive oil
  • 1 large yellow onion, thinly sliced
  • 1 tsp kosher salt, plus more for boiling water
  • 1/4 cup prepared horseradish (or to taste)
  • 3/4 cup whole milk, warmed
  • 1/2 cup sour cream
  • 2 tbsp chopped fresh chives
  • 1/4 tsp freshly ground black pepper

Instructions

  1. Heat 1 tbsp olive oil and 1 tbsp butter in a wide skillet over medium-low heat; add the sliced onion and 1/4 tsp kosher salt and cook, stirring every few minutes, until deeply golden and sticky, about 25–30 minutes.
  2. Bring a large pot of water to a rolling boil, salt generously, add potatoes, and simmer until fork-tender, 12–18 minutes; check doneness by piercing the largest piece—it should offer little resistance.
  3. Drain the potatoes thoroughly, return them to the hot pot, and dry over low heat for 1–2 minutes to evaporate excess moisture.
  4. Mash the potatoes with the remaining 1 tbsp butter, warmed milk, sour cream, prepared horseradish, and 1/2 tsp kosher salt until smooth; thin with additional milk by tablespoonfuls if needed to reach a silky consistency.
  5. Fold in most of the caramelized onions and the chives, reserving a little of each for garnish; taste and adjust seasoning with black pepper and more horseradish if you prefer extra heat.
  6. Transfer the mash to a serving dish, top with the reserved onions and chives, and keep covered and warm for up to 30 minutes before serving, or cool to room temperature and refrigerate for up to 3 days.

Pro Tip: Make ahead: Finish through step 5, cool to room temperature, cover and refrigerate up to 3 days; rewarm gently on the stovetop with a splash of milk over low heat or in a 350°F (175°C) oven, covered, for 15–20 minutes until heated through.

50. Autumn Harvest Quinoa Bowl with Maple-Roasted Squash

Autumn Harvest Quinoa Bowl with Maple-Roasted Squash

Serves 8-10 · Total time: 1 hour 15 minutes

This vibrant autumn bowl pairs caramelized squash, nutty quinoa and bright citrus for a travel-friendly Friendsgiving side. Bite-sized roasted butternut tosses with tender quinoa, hearty kale, crunchy pecans and chewy cranberries, finished with a maple-lemon dressing and optional feta. It holds well at room temperature and can be served warm, cool, or chilled—easy to make ahead and transport to a potluck without losing texture or flavor.

Ingredients

  • 1 1/2 cups quinoa, rinsed
  • 1 medium butternut squash (about 2 lb), peeled and cut into 1/2-inch cubes
  • 4 tbsp olive oil, divided
  • 2 tbsp pure maple syrup, divided
  • 4 cups chopped kale, tough stems removed
  • 1/2 cup dried cranberries
  • 3/4 cup pecans, roughly chopped
  • 1/3 cup crumbled feta cheese (optional)
  • 2 tbsp lemon juice (about 1 lemon), divided
  • 1 tsp kosher salt and 1/2 tsp freshly ground black pepper

Instructions

  1. Preheat the oven to 425°F (220°C), toss the cubed squash with 2 tbsp olive oil, 1 tbsp maple syrup, 1/2 tsp salt and 1/4 tsp pepper, spread in a single layer on a rimmed baking sheet and roast 30–35 minutes until edges are caramelized and cubes are fork-tender.
  2. Cook the quinoa by bringing the rinsed quinoa and 3 cups water to a boil, reduce to a simmer, cover and cook 15 minutes until liquid is absorbed and the grain looks translucent with a visible germ ring; fluff with a fork and let rest 5 minutes.
  3. Massage the kale by placing it in a bowl with 1 tbsp olive oil, 1 tbsp lemon juice and a pinch of salt, rub the leaves between your hands for 1–2 minutes until they soften and darken.
  4. Toast the pecans in a dry skillet over medium heat 3–4 minutes, stirring often until fragrant and lightly browned; remove from heat and toss with the dried cranberries to warm them briefly.
  5. Combine the warm quinoa, roasted squash, massaged kale, pecans, cranberries and feta in a large bowl; whisk together the remaining 1 tbsp olive oil, remaining 1 tbsp maple syrup, remaining 1 tbsp lemon juice and remaining 1/2 tsp salt with 1/2 tsp pepper, then pour over the salad and toss to coat.
  6. Chill the salad at least 30 minutes before serving to let flavors meld, or serve at room temperature; taste and adjust seasoning with extra salt or lemon if needed.

Pro Tip: Make up to 24 hours ahead: keep chilled in an airtight container (dressing mixed in) for up to 3 days; if transporting, pack on ice and bring to room temperature for 20 minutes before serving.

51. Holiday Bite-Sized Stuffed Orbs

Holiday Bite-Sized Stuffed Orbs

Makes about 24 balls (Serves 10-12) · Total time: 1 hour 10 minutes

These Savory Holiday Orbs transform classic bread stuffing into bite-sized travelers perfect for a Friendsgiving potluck. Crisped on the outside and tender inside, they balance sage-scented pork sausage, sautéed aromatics, and Parmesan for a nostalgic, hands-off appetizer or side. They hold up well on a buffet, reheat easily, and pair with mustard or cranberry dip. Easy to form ahead and bake at the host's home.

Ingredients

  • 1 lb bulk pork sausage (mild or spicy, casings removed)
  • 6 cups cubed day-old crusty bread
  • 1 medium yellow onion, finely chopped
  • 2 stalks celery, finely chopped
  • 2 cloves garlic, minced
  • 1/2 cup chopped fresh parsley
  • 1 large egg, lightly beaten
  • 1 cup low-sodium chicken stock
  • 1/2 cup grated Parmesan cheese
  • 2 tbsp unsalted butter
  • 1 tsp dried sage, 1 tsp kosher salt, and 1/2 tsp freshly ground black pepper

Instructions

  1. Preheat the oven to 375°F and line a rimmed baking sheet with parchment paper or a silicone mat.
  2. Brown the sausage in a large skillet over medium heat, breaking it into small pieces; cook until the sausage reaches 160°F and there is no pink remaining, then drain off excess fat.
  3. Sauté the onion, celery, and garlic in the butter in the same skillet over medium heat until softened, about 5–7 minutes; stir them into a large bowl with the cooked sausage, bread cubes, parsley, Parmesan, dried sage, salt, and pepper.
  4. Combine the beaten egg and chicken stock in a measuring cup, pour over the bread mixture, and fold gently until evenly moistened; add a splash more stock if the mix seems dry so it holds together when pressed.
  5. Shape the mixture into 1 1/2-inch balls (about 24), arrange them on the prepared sheet, and chill in the refrigerator for 20 minutes to firm.
  6. Bake the chilled balls at 375°F for 22–26 minutes until golden brown and a probe thermometer inserted into the center of a ball registers 160°F; remove and let rest 5 minutes before serving.

Pro Tip: Make ahead by assembling and refrigerating the formed balls up to 24 hours before baking; store baked leftovers in an airtight container in the fridge for up to 3 days and reheat in a 350°F oven until warmed through.

52. Harvest Crock Sausage & Apple Dressing

Harvest Crock Sausage & Apple Dressing

Serves 8–10 · Total time: About 3 hr 45 min (plus 12–18 min if oven crisping)

Friendsgiving crowds love a hands-off side that still tastes homemade. This slow-cooker sausage-and-apple dressing balances sweet-tart fruit, crunchy celery and sage-scented crumbs, making it ideal for transport and reheating at the host’s house. A brief skillet sauté builds flavor, then the crock pot finishes the stuffing so it stays moist. Serve straight from the slow cooker or crisp the top in a hot oven for a golden finish.

Ingredients

  • 1 lb sweet Italian sausage, casings removed
  • 10 cups cubed day-old country-style bread (about 12 oz)
  • 2 cups low-sodium chicken broth, plus more if needed
  • 1 cup peeled and diced Granny Smith apple (about 1 medium)
  • 1 cup diced yellow onion (about 1 medium)
  • 3/4 cup sliced celery (about 2 stalks)
  • 1/4 cup unsalted butter
  • 2 tbsp chopped fresh sage (or 2 tsp dried)
  • 1 tbsp chopped fresh thyme (or 1 tsp dried)
  • 1 tsp kosher salt and 1/2 tsp freshly ground black pepper

Instructions

  1. Preheat the oven to 400°F (200°C) if you plan to finish the top with a crisp crust; otherwise skip this step.
  2. Brown the sausage and aromatics: melt butter with 1 tbsp oil in a large skillet over medium heat, add sausage and cook, breaking into pieces, until no pink remains and the sausage reaches 160°F (71°C) on an instant-read thermometer; stir in onion, celery and apple and sauté until softened, about 6–8 minutes.
  3. Combine the cubed bread, cooked sausage mixture, sage, thyme, salt and pepper in a large bowl; pour 2 cups chicken broth over and toss gently, adding additional broth 1/4 cup at a time until the mixture is evenly moistened but not soupy.
  4. Transfer the mixture to a lightly oiled 4–6 quart slow cooker, pressing the top lightly to level; set the slow cooker on Low for 3 to 3½ hours or on High for 1½ to 2 hours, cooking until the edges are set and the center reaches 165°F (74°C).
  5. Stir the stuffing gently to distribute juices and taste for seasoning; if you want a browned top, spoon the mixture into a buttered 9×13-inch baking dish and smooth the surface.
  6. Bake uncovered at 400°F (200°C) for 12–18 minutes until the surface is golden and slightly crisp, or serve directly from the slow cooker; let rest 10 minutes before serving.

Pro Tip: Make ahead: assemble the dressing, cover and refrigerate up to 24 hours; on the day, set straight into the slow cooker and follow cook times. Store leftovers in an airtight container up to 4 days and reheat in a 350°F oven for 20–25 minutes.

53. Autumn Squash & Zucchini Baked Penne

Autumn Squash & Zucchini Baked Penne

Serves 8–10 · Total time: 1 hour 10 minutes

Friendsgiving-ready, this cozy baked pasta layers smooth pumpkin, tender zucchini and creamy ricotta into a crowd-pleasing casserole that travels well. It balances autumn warmth with bright summer squash, and a crisp panko topping for texture. Assemble at home, bake on arrival, and serve warm: it holds temperature and flavor during pickup. The recipe scales easily for a potluck and keeps well for leftovers.

Ingredients

  • 1 lb (450 g) penne or rigatoni
  • 15 oz (425 g) canned pumpkin puree
  • 1 cup (240 g) whole-milk ricotta
  • 1 cup (115 g) shredded mozzarella, divided
  • 1/2 cup (50 g) grated Parmesan, divided
  • 1 medium (about 8 oz / 225 g) zucchini, thinly sliced
  • 1 medium yellow onion, finely chopped
  • 2 cloves garlic, minced
  • 1/2 cup (50 g) panko breadcrumbs
  • 2 tbsp (28 g) unsalted butter, melted
  • 1/2 cup (120 ml) milk (whole or 2%)
  • 1 tsp kosher salt, 1/2 tsp freshly ground black pepper, and 1/2 tsp dried sage

Instructions

  1. Preheat the oven to 375°F (190°C) and lightly grease a 9×13-inch baking dish.
  2. Cook the penne in a large pot of salted boiling water until just shy of al dente (about 1–2 minutes less than package directions); reserve 1/2 cup of the pasta water, then drain.
  3. Sauté the onion and garlic in olive oil over medium heat until softened, about 5 minutes; add the zucchini and cook until softened and lightly browned, about 4 minutes, then stir in the pumpkin puree, milk, ricotta and the salt/pepper/sage mixture and simmer 2–3 minutes to meld flavors, thinning with reserved pasta water if needed.
  4. Toss the drained pasta with the pumpkin–zucchini sauce and fold in half of the mozzarella and half of the Parmesan until evenly coated.
  5. Transfer the pasta to the prepared dish, sprinkle the remaining mozzarella and Parmesan over the top, combine the panko with the melted butter and scatter it evenly, then bake uncovered at 375°F (190°C) for 20–25 minutes until sauce bubbles at the edges and the topping is golden.
  6. Let the casserole rest for 10 minutes before serving to allow it to set and make it easier to transport.

Pro Tip: Make-ahead tip: assemble the casserole up to the point of baking, cover and refrigerate for up to 24 hours; bake straight from chilled (add 5–10 minutes) or store leftovers in the fridge for up to 4 days and reheat covered in a 350°F (175°C) oven until warmed through.

54. Maple-Gingersnap Pumpkin Cream Bars

Maple-Gingersnap Pumpkin Cream Bars

Serves 12 · Total time: 4 hours 45 minutes

These Maple-Gingersnap Pumpkin Cream Bars turn festive pumpkin and cream cheese into tidy, sliceable bars that travel and serve easily at a Friendsgiving. A crunchy gingersnap crust supports a smooth, maple-sweet pumpkin custard that firms in the fridge for neat squares. They’re sturdy enough for transport, simple to slice into portions, and pleasant at room temperature or chilled — a potluck-friendly dessert everyone can grab and go.

Ingredients

  • 1 3/4 cups gingersnap crumbs
  • 5 tablespoons unsalted butter, melted
  • 2 tablespoons dark brown sugar
  • 24 ounces cream cheese, softened
  • 1 cup pumpkin puree
  • 3/4 cup pure maple syrup
  • 2 large eggs, room temperature
  • 1/2 cup sour cream
  • 1 1/2 teaspoons ground cinnamon
  • 1/4 teaspoon ground ginger
  • 1 teaspoon vanilla extract
  • 1/2 teaspoon fine sea salt

Instructions

  1. Preheat oven to 325°F (163°C); line a 9×13-inch pan with parchment leaving an overhang, then combine gingersnap crumbs, melted butter, and brown sugar and press firmly into the bottom; bake 10 minutes and set crust aside to cool slightly.
  2. Beat the cream cheese in a large bowl until smooth, then add pumpkin puree, maple syrup, eggs one at a time, sour cream, vanilla, cinnamon, ginger, and salt and mix until just combined and silky.
  3. Spread the filling evenly over the warm crust and smooth the top with a spatula so bars bake uniformly.
  4. Bake at 325°F for 40–50 minutes until the edges are set and the center registers 160°F (71°C) on an instant-read thermometer and shows only a slight jiggle; turn off the oven, crack the door, and leave the pan inside for 30 minutes to cool gently.
  5. Cool the pan to room temperature on a wire rack, then refrigerate uncovered for at least 3 hours or preferably overnight until fully firm.
  6. Slice the chilled slab into 12 bars using a sharp knife warmed under hot water for clean edges, then lift from the pan with the parchment and serve chilled or at room temperature.

Pro Tip: Make up to 48 hours ahead; keep tightly covered in the refrigerator for up to 4 days and slice just before serving for the cleanest bars.

55. Garlic-Roasted Cauliflower Mash

Garlic-Roasted Cauliflower Mash

Serves 8–10 · Total time: 1 hour 10 minutes

Bright and buttery, this cauliflower mash channels the creamy comfort of mashed potatoes while staying easy to transport for potluck season. Roasted garlic deepens the flavor without adding fuss: heads are wrapped and baked until sweet and spreadable, then whipped together with cream, butter, and Parmesan for a silky, scoopable side. It holds and reheats well, making it perfect for Friendsgiving spreads where dishes must travel and finish warm.

Ingredients

  • 1 large head cauliflower (about 2 lb), trimmed and cut into florets
  • 1 whole head garlic
  • 2 tbsp olive oil, divided
  • 4 tbsp unsalted butter
  • 1/2 cup heavy cream
  • 2 oz cream cheese, softened
  • 1/3 cup grated Parmesan cheese
  • 1 tsp kosher salt, plus more to taste
  • 1/2 tsp freshly ground black pepper
  • 2 tbsp chopped fresh chives, for garnish

Instructions

  1. Preheat the oven to 400°F (200°C). Slice the top off the garlic head to expose the cloves, drizzle with 1 tbsp olive oil, wrap tightly in foil, and roast until deeply caramelized, 35–40 minutes; let cool 10 minutes before handling.
  2. While the garlic roasts, bring a large pot of salted water to a simmer and add the cauliflower florets; cook until very tender when pierced with a fork, 10–12 minutes, then drain thoroughly and return to the pot to steam-dry for 2–3 minutes.
  3. Mash the cooled roasted garlic into a smooth paste and combine it with the butter, remaining 1 tbsp olive oil, heavy cream, and cream cheese in a blender or food processor; pulse until combined and creamy.
  4. Transfer the cauliflower to the blender with the garlic-cream mixture, add Parmesan, salt, and pepper, and blend in short bursts until fluffy with a little texture; avoid overprocessing to keep some body.
  5. Taste and adjust seasoning, then transfer to an ovenproof serving dish and keep warm in a 325°F (160°C) oven for up to 30 minutes, or cover and refrigerate for later service.
  6. Serve topped with chopped chives; to reheat from chilled, bake uncovered at 350°F (175°C) for 20–25 minutes until heated through.

Pro Tip: Make up to 48 hours ahead: cool to room temperature, cover tightly, and refrigerate. Reheat in the oven as directed; store leftovers in an airtight container for up to 4 days.

56. Smoky Southern Gold Macaroni

Smoky Southern Gold Macaroni

Serves 10-12 · Total time: 1 hour 20 minutes

Think creamy, comforting macaroni elevated with smoky bacon and a crisp golden topping — ideal for Friendsgiving and easy to transport. This crowd-pleasing casserole combines a velvety three-cheese sauce with al dente pasta, smoky chopped bacon, and crunchy panko for contrast. Assemble at home, bake briefly at your host’s kitchen, or reheat gently onsite. It keeps well and slices cleanly for buffet-style serving.

Ingredients

  • 1 lb elbow macaroni
  • 6 slices thick-cut bacon, chopped
  • 4 tbsp unsalted butter
  • 1/3 cup all-purpose flour
  • 3 cups whole milk
  • 1 cup heavy cream
  • 3 cups sharp cheddar, shredded
  • 2 cups Gruyère, shredded
  • 1/2 cup grated Parmesan
  • 1 cup panko breadcrumbs
  • 1 tsp kosher salt and 1/2 tsp freshly ground black pepper

Instructions

  1. Preheat oven to 375°F (190°C) and butter a 9×13-inch (23×33 cm) baking dish.
  2. Cook the chopped bacon in a large skillet over medium heat until fat is rendered and edges are crisp, about 8–12 minutes; check slices reach 145°F (63°C) with an instant-read thermometer, then transfer to paper towels and reserve about 2 tablespoons drippings.
  3. Boil the macaroni in a large pot of generously salted water until just al dente per package directions, about 1–2 minutes shy of the stated time; drain and set aside.
  4. Whisk together butter and reserved drippings in a medium saucepan over medium heat; stir in flour and cook 1–2 minutes, then gradually whisk in milk and cream and simmer until sauce thickens, 3–5 minutes; remove from heat and stir in cheddar, Gruyère and half the Parmesan until melted, seasoning with salt and pepper.
  5. Combine the drained pasta, cheese sauce and half the cooked bacon in a large bowl, folding gently to coat; taste and adjust salt and pepper.
  6. Transfer the mixture to the prepared dish, sprinkle with remaining bacon, panko and remaining Parmesan, dot with a little butter if desired, and bake at 375°F (190°C) for 25–30 minutes until the sauce is bubbling and the top is golden brown.
  7. Rest the casserole for 10 minutes before slicing so the sauce sets; serve warm.

Pro Tip: Make-ahead tip: Assemble the casserole (unbaked), cover tightly and refrigerate up to 24 hours; bake straight from the fridge—adding about 10–15 minutes to the bake time—or refrigerate leftovers for up to 4 days and reheat covered at 350°F (175°C) until warmed through.

57. Orchard Harvest Sausage Dressing

Orchard Harvest Sausage Dressing

Serves 8-10 · Total time: 1 hour 15 minutes

This cozy, portable dressing balances sweet-tart cranberries and crisp apple with savory pork sausage and thyme-scented breadcrumbs. It travels well to potlucks because it bakes in a shallow pan, slices or scoops easily, and reheats without losing texture. Browned sausage and sautéed aromatics infuse the crumbs, while apple and toasted pecans add crunch. Serve warm alongside roast turkey or as a vegetarian swap with plant-based sausage.

Ingredients

  • 1 lb mild pork sausage (or plant-based sausage alternative)
  • 2 cups cubed day-old country bread (about 6 ounces)
  • 1 cup fresh or frozen tart cranberries
  • 1 medium apple, peeled, cored and diced
  • 1/2 cup chopped pecans
  • 1 medium yellow onion, finely chopped
  • 2 stalks celery, thinly sliced
  • 2 tbsp unsalted butter
  • 1 1/2 cups low-sodium chicken or vegetable stock
  • 1 tsp dried thyme (or 1 tbsp fresh, chopped)
  • 1 tsp kosher salt and 1/2 tsp freshly ground black pepper

Instructions

  1. Preheat the oven to 350°F (175°C); spread the bread cubes and pecans on a rimmed baking sheet and toast until lightly golden, 8–10 minutes, then remove and cool slightly.
  2. Brown the sausage in a large skillet over medium heat, breaking it into crumbles; cook until no longer pink and an instant-read thermometer reads 160°F (71°C), about 7–9 minutes, then transfer to a bowl and drain excess fat.
  3. Sauté the onion, celery, and apple in the butter in the same skillet over medium heat until softened, about 6 minutes; stir in the cranberries and thyme and cook 2 minutes more.
  4. Combine the toasted bread, sautéed vegetable-apple mixture, browned sausage, and pecans in a large bowl; add about 1 cup of the stock and toss gently, adding more stock as needed to achieve a moist but not soggy texture, then season with salt and pepper to taste.
  5. Transfer the mixture to a lightly buttered 9×13-inch baking dish, press to level, cover loosely with foil, and bake until heated through, 25–30 minutes.
  6. Remove the foil and bake an additional 8–10 minutes until the top is golden and a thermometer inserted into the center registers 165°F (74°C); let rest 10 minutes before serving.

Pro Tip: Make ahead: assemble through Step 4, cover and refrigerate up to 24 hours; bake as directed from Step 5 and store leftovers in an airtight container up to 4 days — reheat covered in a 350°F oven until an instant-read thermometer reads 165°F.

58. Maple-Butter Butternut Bake

Maple-Butter Butternut Bake

Serves 8-10 · Total time: 1 hour 25 minutes

This creamy, lightly browned casserole turns autumn squash into a transportable, shareable side that travels well to a potluck. Thinly sliced butternut bakes in a fragrant cream–thyme sauce, finishes with a crisp, cheesy breadcrumb topping, and holds its shape for easy reheating. It balances rich comfort with straightforward assembly so you can prep ahead and arrive ready to warm, slice, and serve with minimal fuss.

Ingredients

  • 2 1/2 pounds butternut squash (about 1 medium), peeled, seeded and cut into 1/4-inch slices
  • 2 tablespoons unsalted butter, divided
  • 1 small yellow onion, thinly sliced
  • 2 cloves garlic, minced
  • 1 teaspoon fresh thyme leaves, plus more for garnish
  • 1 cup heavy cream
  • 3/4 cup shredded Gruyère (about 3 ounces)
  • 1/2 cup grated Parmesan, divided
  • 1/2 cup panko breadcrumbs
  • 1 teaspoon kosher salt and 1/2 teaspoon freshly ground black pepper

Instructions

  1. Preheat the oven to 375°F (190°C) and butter a 9×13-inch baking dish.
  2. Sauté the aromatics: Melt 1 tablespoon butter in a skillet over medium heat, cook the onion until translucent (about 5–7 minutes), add garlic and thyme and cook 30–60 seconds more; stir in the heavy cream and bring just to a gentle simmer, then remove from heat.
  3. Arrange the squash slices snugly in overlapping rows in the prepared dish, season with half the salt and pepper, and pour the warm cream mixture evenly over the slices so the liquid reaches most layers.
  4. Combine the topping: Stir together the Gruyère, half of the Parmesan, and the panko breadcrumbs; sprinkle this mixture evenly over the squash and dust the remaining Parmesan on top.
  5. Cover loosely with foil and bake at 375°F (190°C) for 30 minutes, then remove the foil and bake an additional 15–20 minutes until the topping is golden, the cream is bubbling, and the squash is tender when pierced with a knife.
  6. Rest the dish for 10 minutes before garnishing with remaining thyme leaves and serving warm.

Pro Tip: Make ahead: Assemble the unbaked gratin up to 24 hours in advance, cover and refrigerate; bake from chilled, adding 10–15 minutes to the covered bake time, and store leftovers in an airtight container for up to 4 days.

59. Maple-Turkey Harvest Chopped Salad

Maple-Turkey Harvest Chopped Salad

Serves 8–10 · Total time: 1 hour 15 minutes

This vibrant Harvest Potluck Chopped Salad layers roasted turkey, caramelized sweet potato, and crisp Brussels sprouts with tangy goat cheese, toasted pecans, and tart cranberries. A maple-Dijon vinaigrette ties everything together for a portable, crowd-friendly dish that holds up on a buffet. It travels well chilled in a covered container and assembles easily for last-minute tossing at your Friendsgiving or holiday potluck.

Ingredients

  • 1 1/2 lb turkey tenderloins (about 2 pieces)
  • 1 lb Brussels sprouts, trimmed and halved
  • 1 medium sweet potato (about 12 oz), peeled and cut into 1/2-inch cubes
  • 6 cups mixed salad greens (arugula and baby spinach)
  • 1 cup toasted pecans, coarsely chopped
  • 3/4 cup dried cranberries
  • 4 oz goat cheese, crumbled (about 1/2 cup)
  • 3 tbsp olive oil, divided
  • 2 tbsp pure maple syrup
  • 3 tbsp apple cider vinegar
  • 1 tsp Dijon mustard
  • 1 tsp kosher salt and 1/2 tsp freshly ground black pepper

Instructions

  1. Preheat the oven to 425°F (218°C). Toss Brussels sprouts and sweet potato with 1 tbsp olive oil and 1/2 tsp of the kosher salt plus 1/4 tsp black pepper; spread on a rimmed baking sheet. Rub turkey tenderloins with 1 tbsp olive oil, 1 tbsp maple syrup, and the remaining 1/2 tsp salt and 1/4 tsp pepper; place on a separate sheet. Roast vegetables and turkey together 20–25 minutes, checking turkey at 18 minutes for doneness (internal temperature should read 165°F in the thickest part).
  2. Remove turkey when it reaches 165°F and transfer to a plate to rest 5 minutes, then slice or dice; continue roasting vegetables until tender and lightly browned, about 25 minutes total.
  3. Whisk the remaining 1 tbsp olive oil, remaining 1 tbsp maple syrup, apple cider vinegar, and Dijon mustard in a small bowl; season to taste with a pinch of salt and pepper.
  4. Combine mixed greens, roasted sweet potato and Brussels sprouts, toasted pecans, dried cranberries, crumbled goat cheese, and sliced turkey in a large bowl; pour dressing over and gently toss to coat.
  5. Chill the salad in the refrigerator for 20–30 minutes to let flavors meld and to make it easier to transport for a potluck; remove 10–15 minutes before serving to come slightly to room temperature if desired.
  6. Taste and adjust seasoning with extra salt or pepper if needed, then transfer to a serving platter and garnish with extra pecans or a light drizzle of maple syrup.

Pro Tip: Make ahead: roast the turkey and vegetables earlier in the day, refrigerate separately, and assemble the salad at the host site; store leftovers in an airtight container for up to 3 days.

60. Herb-Bright Olive Relish for Sharing

Herb-Bright Olive Relish for Sharing

Serves 8-10 · Total time: 1 hour 15 minutes

This tangy, herb-scented olive relish brightens any Friendsgiving spread and travels without drama. A mix of briny Kalamata and buttery green olives pairs with cornichons, roasted peppers and capers for a lively, no-cook condiment that doubles as a dip, sandwich topper or cheese-board companion. Minimal prep and a short chill let flavors marry—perfect for potlucks when you want bold flavor with little fuss.

Ingredients

  • 1 cup pitted Kalamata olives, halved
  • 1 cup pitted Castelvetrano olives, halved
  • 1/2 cup cornichons, finely chopped
  • 1/3 cup roasted red peppers, diced
  • 1/4 cup red onion, very finely diced
  • 2 tbsp capers, drained
  • 1/4 cup extra-virgin olive oil
  • 2 tbsp red wine vinegar
  • 1 tbsp fresh lemon juice
  • 1 tbsp chopped fresh parsley
  • 1 tsp chopped fresh oregano
  • 1/2 tsp kosher salt and 1/4 tsp freshly ground black pepper

Instructions

  1. Combine the halved olives, chopped cornichons, diced roasted peppers, red onion and capers in a large mixing bowl.
  2. Whisk together the olive oil, red wine vinegar, lemon juice, parsley, oregano, salt and pepper in a small bowl or jar until emulsified.
  3. Pour the dressing over the olive mixture and toss thoroughly to coat every piece.
  4. Stir the relish, press it into an airtight container, and refrigerate for at least 1 hour to allow the flavors to meld.
  5. Taste the relish and adjust seasoning as needed, then stir again before packing.
  6. Serve chilled or at room temperature alongside crusty bread, cheese or as a sandwich condiment; bring in a sealed container for easy transport.

Pro Tip: Make ahead up to 4 days: store refrigerated in an airtight container, give a brisk stir before serving, and keep chilled during transport in an insulated cooler.

61. Maple-Mustard Carrot Medley with Toasted Walnuts

Maple-Mustard Carrot Medley with Toasted Walnuts

Serves 8–10 · Total time: 45 minutes

Brightly caramelized and lightly spiced, these maple-mustard roasted baby carrots are an easy, travel-friendly side for Friendsgiving. Roasting concentrates sweetness while a touch of Dijon and lemon zest keeps the glaze lively, and toasted walnuts add a pleasing crunch. They hold up well at room temperature, pack neatly for potlucks, and can be served warm or cool—making them a low-fuss, show-stopping vegetable addition to any holiday spread.

Ingredients

  • 2 lb small carrots, peeled (halve lengthwise if large)
  • 2 tbsp olive oil
  • 3 tbsp pure maple syrup
  • 1 tbsp Dijon mustard
  • 2 tbsp unsalted butter, melted
  • 1 tsp sea salt
  • 1/2 tsp freshly ground black pepper
  • 1 tsp finely grated lemon zest
  • 1 tbsp chopped fresh thyme leaves
  • 1/2 cup toasted chopped walnuts

Instructions

  1. Preheat oven to 425°F (220°C) and position a rack in the center; line a rimmed baking sheet with parchment or foil.
  2. Toss carrots with olive oil, maple syrup, Dijon mustard, melted butter, sea salt, and black pepper in a large bowl until thoroughly coated.
  3. Spread carrots cut-side down in a single layer on the prepared sheet; roast for 25–30 minutes, stirring once halfway, until edges are deeply caramelized and a fork pierces the thickest pieces easily.
  4. Sprinkle walnuts over the carrots and roast an additional 3–5 minutes if you prefer the nuts more toasted; remove from oven and let rest 5 minutes.
  5. Stir in lemon zest and chopped thyme while the carrots are still warm to release their aromas.
  6. Serve warm or at room temperature; transfer to an airtight container for transport and reheat briefly in a 350°F (175°C) oven for 8–10 minutes if you want them hot at the potluck.

Pro Tip: Make ahead by roasting the carrots up to 24 hours in advance; cool completely, refrigerate in an airtight container, and reheat in a 350°F oven for 8–10 minutes or bring to room temperature before serving.

Bring one or more of these recipes and you’ll be offering both flavor and a little extra ease to the celebration. Pack smart, label dishes that need reheating, recruit a friend to help carry fragile items, and remember that the best dish is the one that brings people together. Above all, enjoy the meal, the memories and the company.

Leave a Reply

Your email address will not be published. Required fields are marked *