There’s something truly magical about fall—the crisp air, vibrant leaves, and cozy vibes that invite us to get creative with our home decor. If you’re looking for a charming and budget-friendly way to celebrate the season, pumpkin rock painting is where it’s at! This crafty trend blends the fun of painting with the festive spirit of pumpkins, giving you the perfect little accents to brighten up your porch, mantel, or garden.
Whether you’re a beginner or a seasoned DIY enthusiast, these 25 stunning pumpkin rock painting ideas will inspire you to add a pop of autumnal cheer to your space. From classic orange gourds to whimsical jack-o’-lanterns and elegant metallic finishes, there’s a style for every taste and skill level. So grab your paintbrushes, some smooth rocks, and let’s dive into a colorful world of fall creativity that’s sure to transform your decor with warmth and personality!
1. Painted Pumpkin Planters: Succulent Style
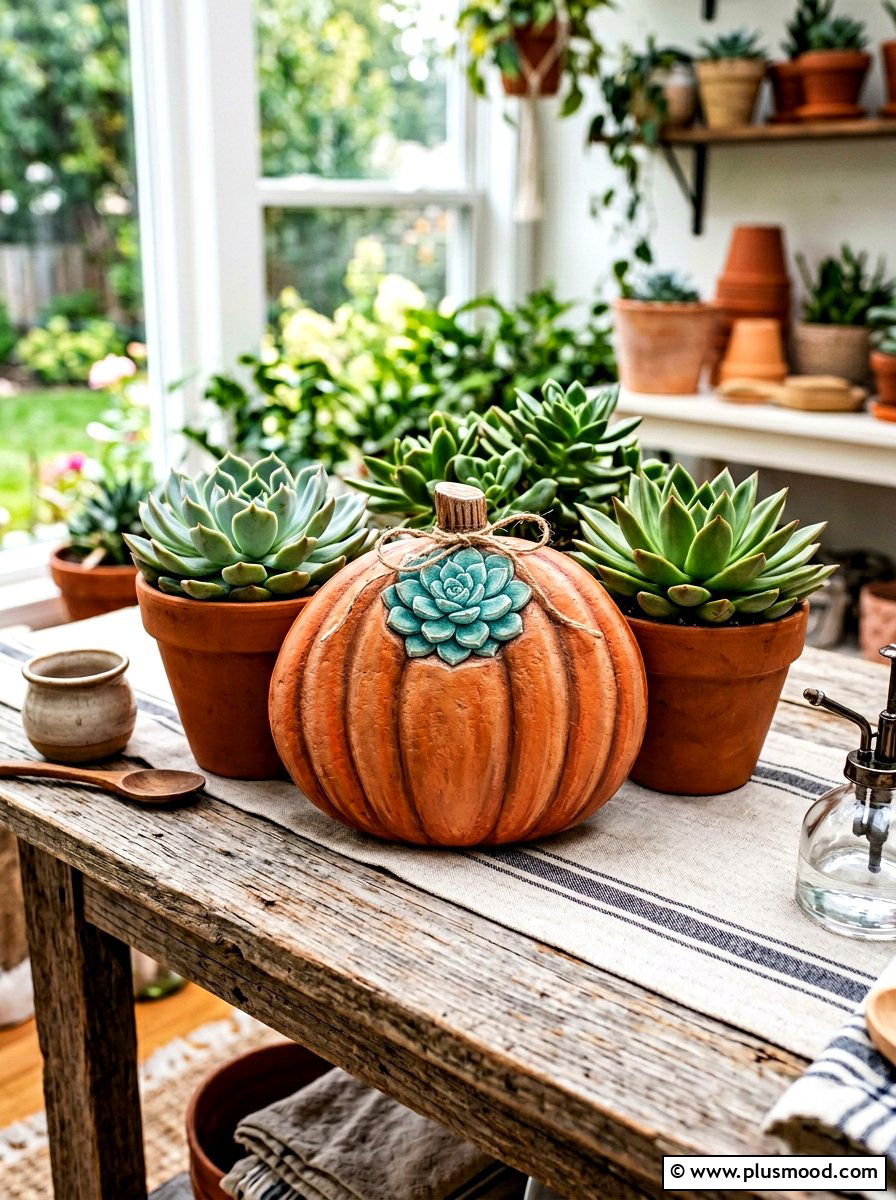
Give your painted rock pumpkins a fresh twist by transforming their tops into vibrant succulent displays. Using earthy hues like teal, jade, and deep burgundy, you can create lifelike succulent leaves that mimic a mini garden growing right out of your pumpkin. This botanical-inspired look adds a unique seasonal charm, especially perfect for bright spaces or green-loving homes.
Key Design Elements
- Layer different shades of green and purple to add depth and realism to succulent leaves.
- Use a fine brush to achieve detailed leaf shapes and subtle veining for authenticity.
- Seal your painted succulents with a matte finish to preserve the natural look and protect your art.
Pro Tip: To enhance dimensionality, lightly brush white highlights on the leaf edges after the base colors dry, creating a sun-kissed effect for your painted succulents.
2. Rustic Pumpkin Patch: Embracing Autumn’s Bounty
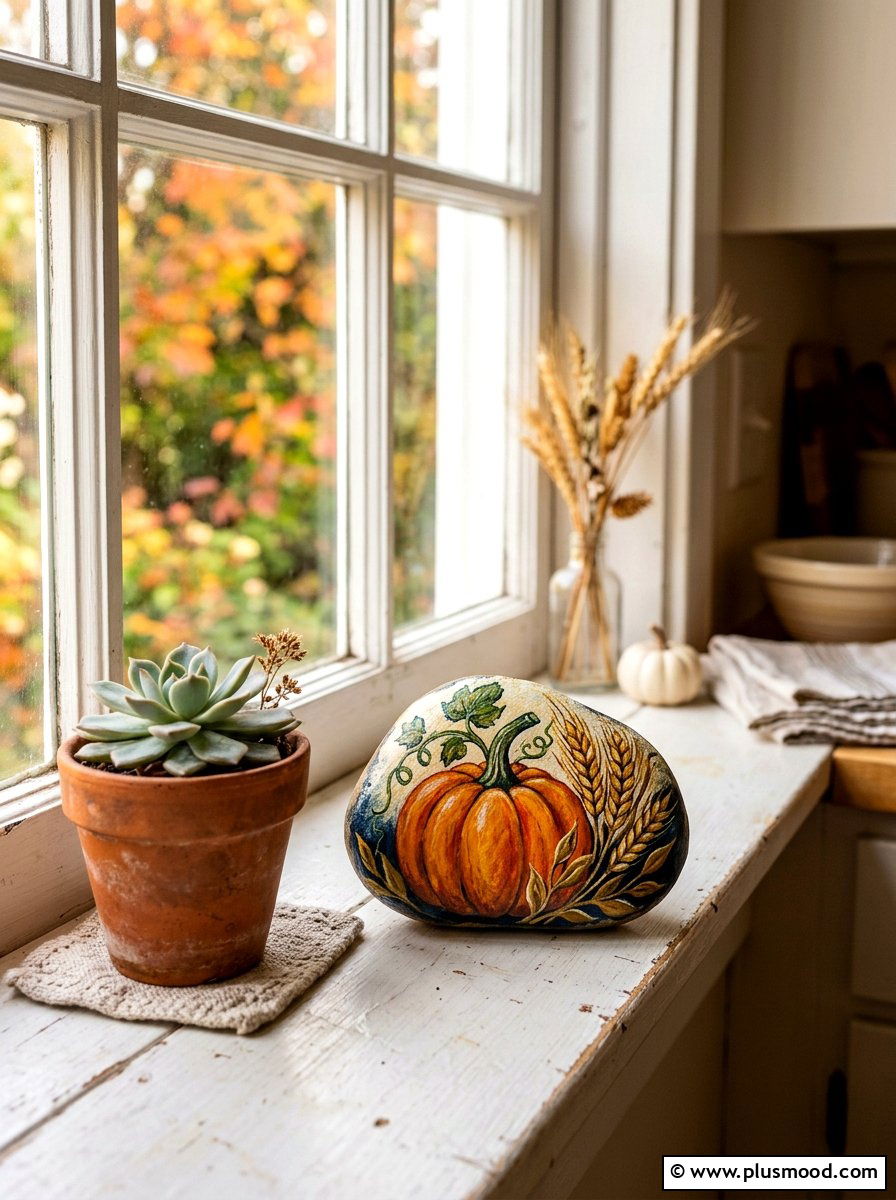
Capture the spirit of fall with a charming painted pumpkin rock adorned with elements like miniature wheat stalks and vibrant autumn foliage. Using warm tones of burnt orange, mustard yellow, and cozy browns creates a cozy, seasonal vignette that celebrates harvest time. These decorative stones bring a touch of rustic warmth to any space, perfect for adding seasonal cheer to your home’s welcoming spots.
Key Design Elements
- Start by painting the pumpkin with gradient shades to add depth and realism.
- Incorporate small details like wheat or leaves around the pumpkin to enhance the harvest vibe.
- Use matte finish sealant to preserve the rich autumn colors and protect your artwork.
Pro Tip: Apply a white base coat before painting to ensure the autumn colors appear vibrant and true to tone.
3. Eerie Expressions: Crafting the Spooky Pumpkin Rock
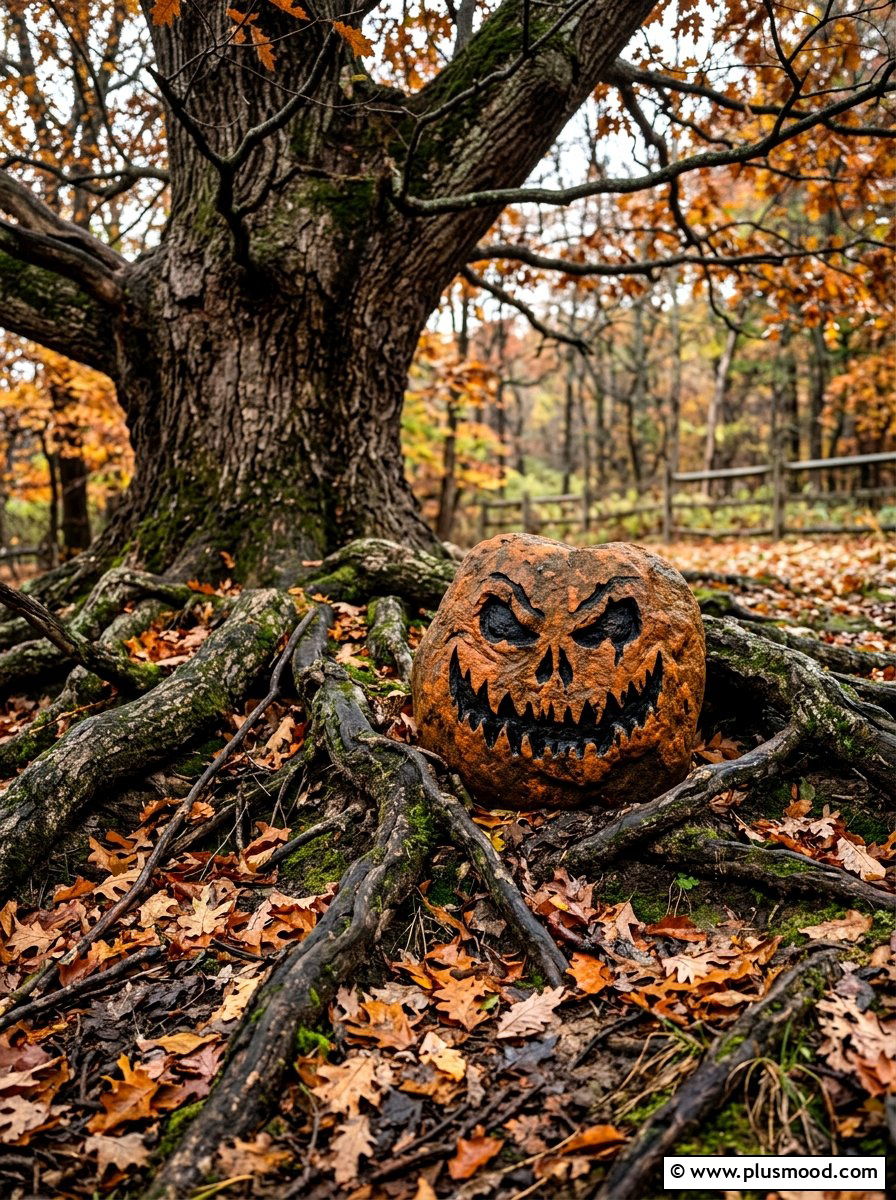
Embrace the haunting charm of Halloween with a spooky face pumpkin rock that channels a mysterious vibe. Featuring elongated eyes and sharp, jagged teeth highlighted with shadowy details, this design creates a dramatic and chilling effect. Using deep purples and dark greens as accent hues will enhance the eerie aura, making these rocks perfect for adding subtle spookiness to your outdoor spaces.
Key Design Elements
- Use fine brushes to carefully paint sharp, angular features to intensify the eerie expression.
- Incorporate shadow effects around the eyes and mouth with layered dark tones for depth.
- Place finished rocks in dimly lit areas like porch corners or near tree roots to maximize their spooky impact.
Pro Tip: Seal your painted rock with a matte finish spray to preserve the dark, moody colors and protect it from weathering.
4. Creating Elegant Ombre Pumpkin Rocks
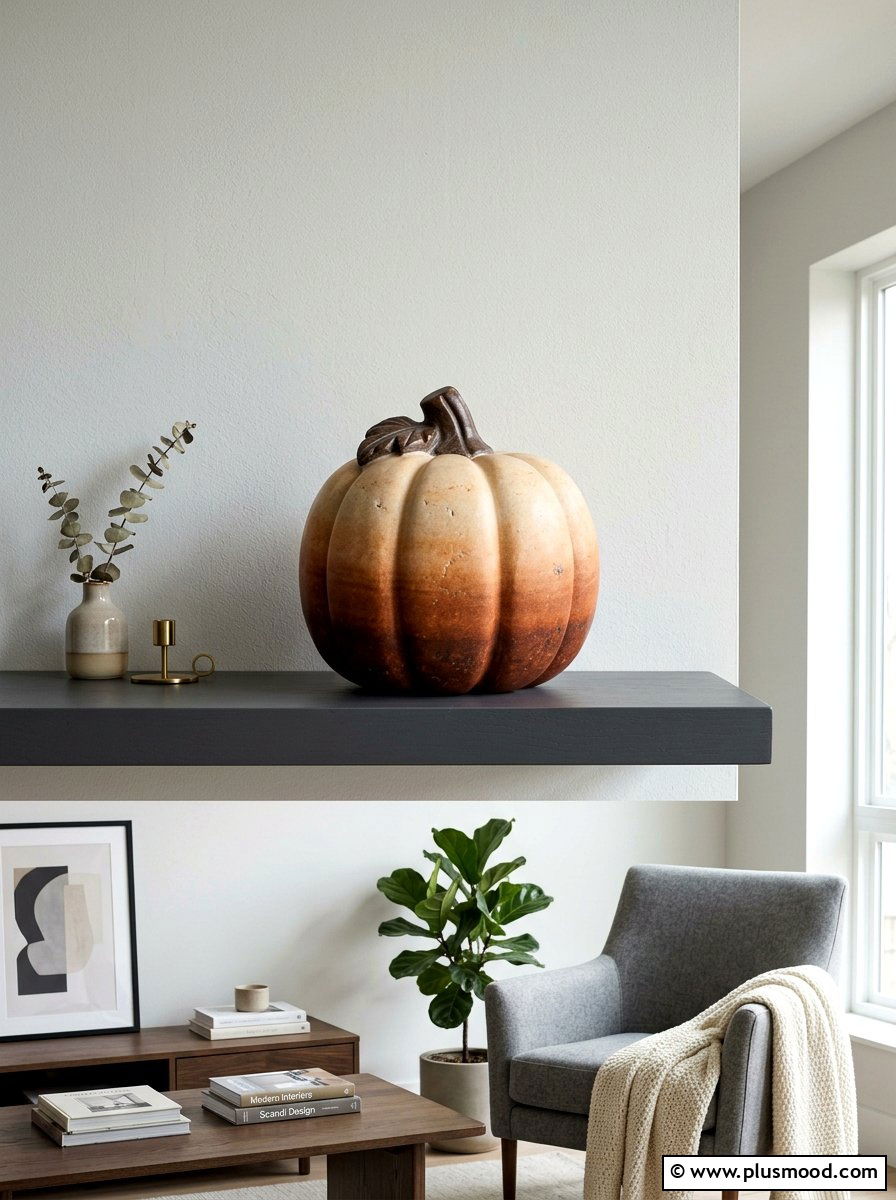
Mastering the ombre effect on your pumpkin rocks adds a sophisticated touch, blending rich, dark hues at the bottom that gently fade into soft, light tones at the top. This gradual color shift adds depth and a natural glow, making your pumpkins stand out beautifully in any modern or minimalist decor.
Key Design Elements
- Start with a saturated color at the base and slowly lighten your palette as you move upward.
- Work quickly to blend colors while the paint is still wet for a seamless gradient.
- Use a soft, dry brush to gently feather the transition between shades for a smooth look.
Pro Tip: Keep a damp sponge nearby to lightly dab and soften edges, helping achieve a flawless blend without harsh lines.
5. Charming Gingham Pumpkin Rock Design
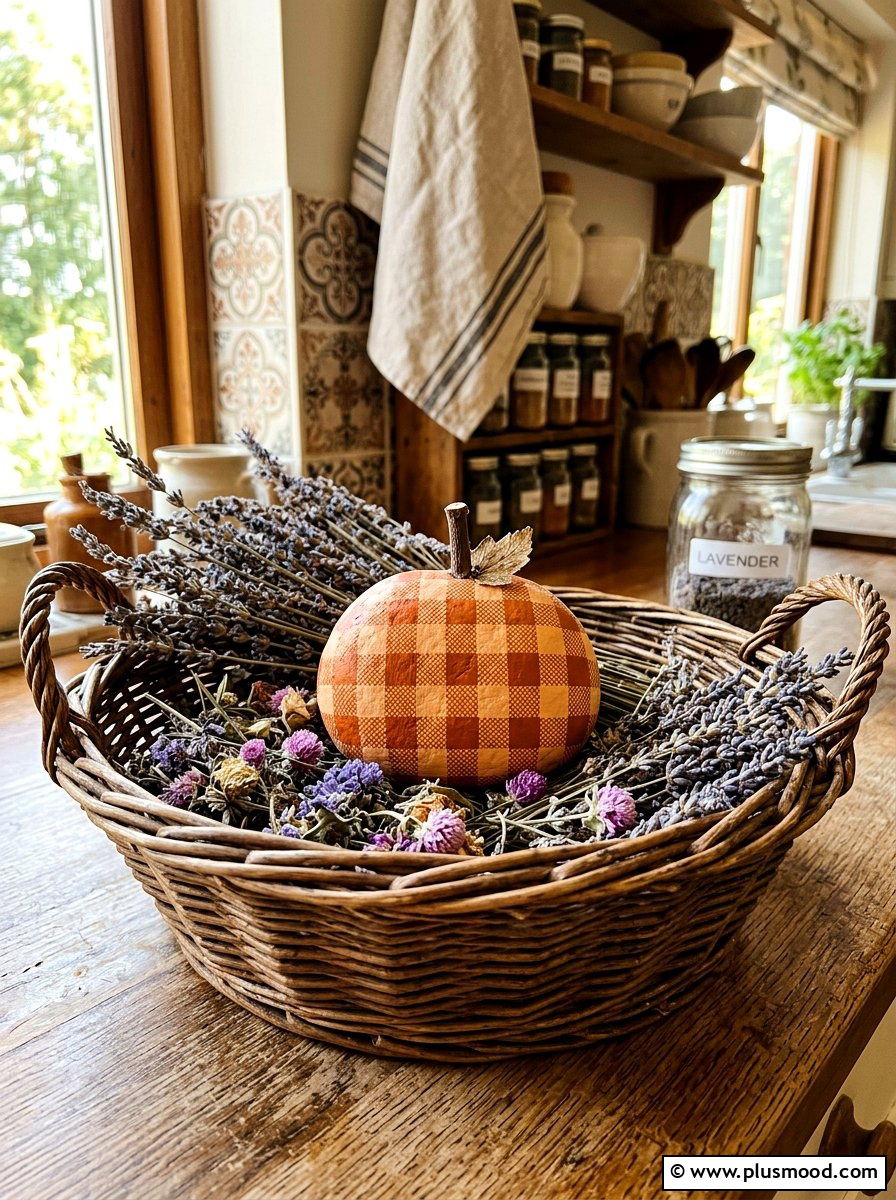
Embrace the warmth of autumn with a gingham pumpkin rock that evokes cozy countryside vibes. This pattern, crafted with alternating shades of a single color, adds a delicate, woven texture to the stone, transforming it into a rustic decoration full of charm. Perfectly suited for farmhouse-style spaces, these rocks bring a handcrafted touch to your fall decor.
Key Design Elements
- Use two contrasting shades of orange to mimic a classic gingham fabric on your rock.
- Apply a light base coat and layer the checkered pattern carefully for a crisp, clean look.
- Seal your design with a matte finish to enhance the soft, textile-inspired effect.
Pro Tip: Sketch your gingham grid lightly with a pencil before painting to ensure even spacing and alignment.
6. Charming Buffalo Plaid Pumpkin Rocks for Cozy Fall Vibes
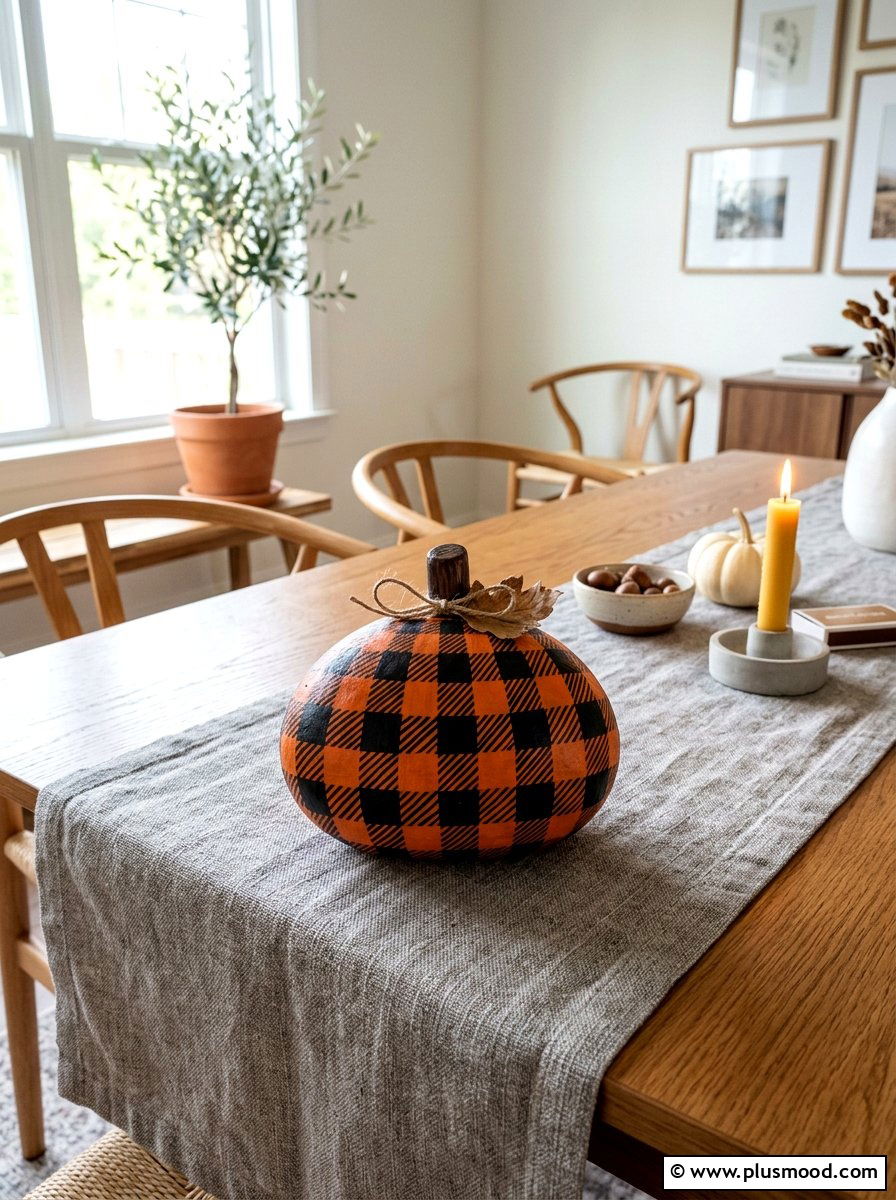
Capture the warmth of autumn with buffalo plaid pumpkin rocks, featuring a striking grid pattern that instantly brings a rustic, stylish charm to your decor. Swap traditional colors for autumnal shades like vibrant oranges paired with deep blacks to create a seasonal twist on this timeless look. Though detailed work is needed, the finished piece offers a boutique-quality accent perfect for any cozy space.
Key Design Elements
- Use painter’s tape to create even grid lines for a crisp buffalo plaid pattern.
- Choose matte paint finishes for a soft, cozy appearance reminiscent of flannel fabric.
- Seal your painted rock with a clear varnish to protect the design and enhance durability.
Pro Tip: Practice your grid layout on paper first to plan color placement and ensure symmetry before painting on the rock.
7. Charming Mini Pumpkin Rock Creations
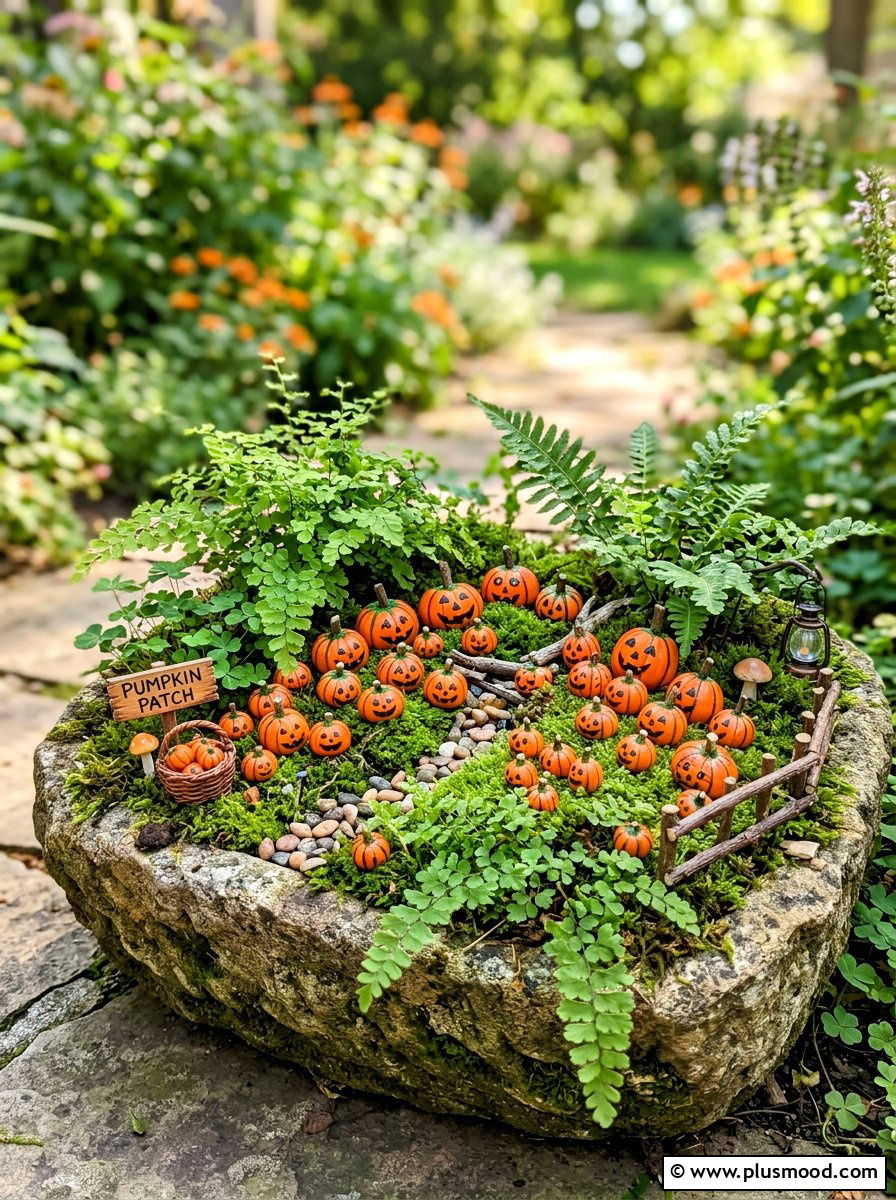
Create a delightful mini pumpkin patch by transforming tiny stones into colorful pumpkin gems. These petite painted rocks add a playful touch to your indoor plants or miniature garden displays, filling small spaces with autumnal cheer. Their varied hues and whimsical charm make them perfect for both decor and sharing with neighbors as sweet surprises.
Key Design Elements
- Select smooth, small pebbles to ensure easy and precise painting.
- Use acrylic paints in a mix of traditional pumpkin colors plus seasonal greens and creams for diversity.
- Seal your finished pumpkins with a clear varnish to protect them from wear and weather.
Pro Tip: Group several miniature pumpkins together in a cluster to create the illusion of a bustling, festive little patch that draws the eye.
8. Soft Hues: Pastel Pumpkin Rock Art for Chic Fall Decor
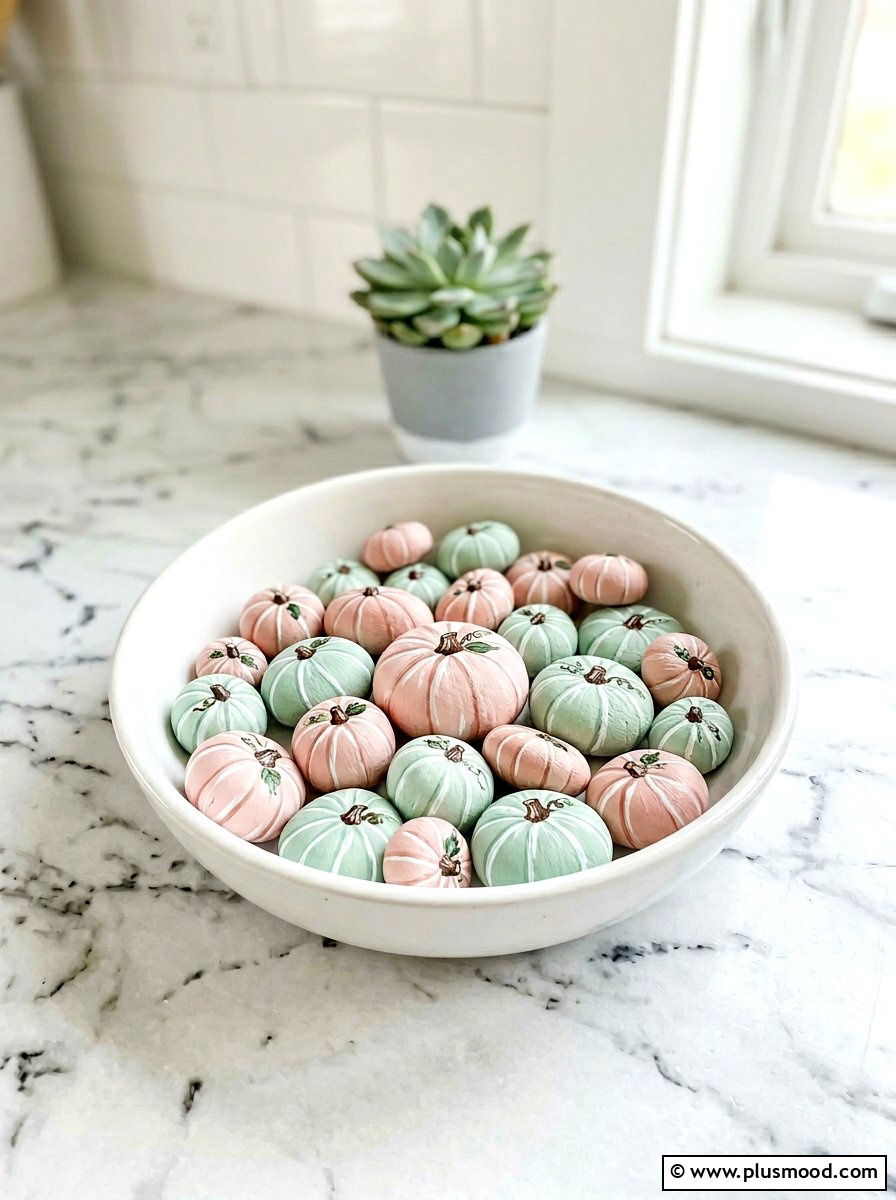
Embrace a delicate twist on autumn design with pastel-painted pumpkin rocks in shades like gentle mint, pale pink, and soft lavender. These subtle tones bring a refreshing lightness to your seasonal decor, perfect for enhancing bright spaces or cozy nurseries. Adding metallic accents to the stems elevates the look, creating an elegant, contemporary vibe.
Key Design Elements
- Choose smooth, rounded stones that resemble pumpkin shapes for easier painting.
- Use high-quality pastel acrylic paints for a vibrant yet soft finish.
- Enhance the stems with copper or silver metallic paint to add a stylish contrast.
Pro Tip: Seal your painted rocks with a clear matte spray to protect colors without adding shine, preserving the soft pastel effect.
9. Enchant Your Garden with Glow-in-the-Dark Pumpkin Rocks

Transform your outdoor decor by painting pumpkin rocks that come alive after sunset with an eerie glow. Using glow-in-the-dark paint on specific features or the entire rock creates a magical effect that captivates both kids and guests. These luminous pumpkins add a spooky yet charming ambiance to your Halloween display.
Key Design Elements
- Apply a base coat of light colors to help the glow paint shine brighter at night.
- Focus glow paint on facial features like eyes and mouth for a ghostly highlight.
- Charge your rocks in direct sunlight before dusk to maximize their glowing effect.
Pro Tip: Seal your glow paint with a clear weather-resistant spray to protect it from the elements and extend the nighttime glow.
10. Creating Timeless Charm with Vintage-Inspired Pumpkin Rocks

Vintage-inspired pumpkin rocks bring an inviting nostalgia to your autumn decor by mimicking the patina of well-loved antiques. Using soft, earthy hues and subtle aging methods, you can craft pumpkins that look like cherished heirlooms, perfect for cozy, rustic interiors. These artful pieces evoke the warmth of seasons past and add heartfelt character to your seasonal arrangements.
Key Design Elements
- Select muted colors such as olive green, burnt orange, and dusty yellow for a subdued vintage palette.
- Employ a dry brush with minimal paint to create gentle wear marks that simulate natural aging.
- Consider layering crackle medium between paint coats to produce authentic weathered textures.
Pro Tip: Lightly sanding edges after painting enhances the distressed effect, giving your pumpkin rocks a more convincing aged look.
11. Cheerful Polka Dot Pumpkin Rocks

Creating polka dot pumpkin rocks is a fun and simple craft that anyone can enjoy, especially beginners and kids. Start with a smooth, single-color pumpkin base, then add perfectly round dots using a tool like a brush handle or a dotting stick. The resulting design is playful and vibrant, perfect for adding a joyful touch to your fall decorations.
Key Design Elements
- Choose a bright base color like orange or white for maximum contrast with your dots.
- Use paint in contrasting shades to make the dots pop against the background.
- Experiment with different dot sizes and spacing to add visual interest and energy.
Pro Tip: Dip the end of a paintbrush in paint and practice on scrap paper to control dot size before applying to your pumpkin rock.
12. Custom Monogram Pumpkin Rocks for a Personalized Fall Welcome

Add a heartfelt touch to your seasonal decor with pumpkin rocks featuring your family’s initial. By painting a charming pumpkin and highlighting a monogram in elegant script, you create a unique piece that invites guests warmly to your porch. This craft also doubles as a meaningful gift to celebrate new homes during the cozy autumn months.
Key Design Elements
- Choose contrasting colors—like a dark initial on a light pumpkin—for clear visibility.
- Use fine-tipped brushes or paint pens to achieve smooth, calligraphic lettering.
- Seal your finished rock with a weatherproof coating to keep your design vibrant outdoors.
Pro Tip: Sketch your monogram lightly with a pencil before painting to ensure balanced placement and perfect letter proportions.
13. Elegant White Farmhouse Pumpkin Rocks for a Subtle Fall Vibe

Create a chic and understated autumn centerpiece with white farmhouse pumpkin rocks. Painting your pumpkins in soft whites enhances a modern, sleek look that harmonizes beautifully with neutral home accents. Highlight delicate shading and crisp lines to elevate their natural charm, perfect for a stylish seasonal arrangement.
Key Design Elements
- Start with a smooth, creamy white base to achieve a soft, inviting canvas
- Incorporate gentle gray shadows or fine black detailing to add depth
- Paint stems in muted browns like driftwood to introduce a rustic touch without overpowering
Pro Tip: Seal your finished rocks with a matte varnish to preserve the delicate paintwork and maintain the farmhouse aesthetic.
14. Ethereal Watercolor Pumpkin Rock Art

Create a delicate and dreamy pumpkin design by applying watercolor-inspired paints on your rocks. This method uses diluted acrylics or watercolor pens to achieve soft, flowing shades that blend seamlessly, capturing the gentle glow of a natural gourd. Perfect for close-up displays, these ethereal pumpkins bring an elegant and artistic vibe to any space.
Key Design Elements
- Thin acrylic paint with water to achieve smooth, translucent layers.
- Experiment with blending soft oranges, yellows, and subtle blues for depth.
- Allow each layer to dry slightly before adding the next to maintain control over color diffusion.
Pro Tip: Use a wet brush to lightly blend colors on the rock surface while still wet, creating a natural watercolor flow without overmixing.
15. Sleek Silhouettes: The Art of Minimalist Pumpkin Rocks

Embrace elegance with a minimalist line pumpkin rock design that highlights simplicity and form. Using delicate outlines instead of bold colors lets the stone’s natural texture shine, creating a chic and subtle seasonal decoration perfect for modern spaces.
Key Design Elements
- Choose a smooth, natural stone with a light tone for optimal contrast.
- Use a fine-tip black pen or marker to delicately sketch the pumpkin’s outline and segments.
- Keep your lines clean and unbroken to maintain a refined, architectural look.
Pro Tip: Before drawing, lightly sketch your design with pencil to ensure balanced proportions and erase gently if needed for a flawless finish.
16. Brighten Your Fall with a Spectrum Pumpkin Rock

Why stick to a single hue when you can transform your pumpkin rock into a vibrant rainbow masterpiece? Painting each segment in different rainbow colors creates a lively and uplifting decoration that celebrates diversity and joy. Perfect for sharing positive vibes in community gardens or adding a splash of color to your sunny porch year-round.
Key Design Elements
- Use fine brushes to carefully separate each color section for clean lines.
- Choose weather-resistant paints to keep colors vivid through outdoor exposure.
- Seal your design with a clear varnish to enhance durability and shine.
Pro Tip: Plan your color order by sketching light pencil lines first to ensure even spacing and balanced rainbow transitions.
17. Celebrate Inclusion with Teal Pumpkin Rock Art

Use your creative talents this Halloween to spread awareness and kindness by painting a teal pumpkin rock. This striking teal hue symbolizes a safe space for children with allergies, making your home a beacon of thoughtful generosity. It’s a simple yet powerful way to blend festive decoration with an important message.
Key Design Elements
- Start by applying a smooth teal paint layer to create a bold, eye-catching base.
- Add a metallic or glittery stem detail to give your pumpkin rock a festive shine.
- Place your finished teal pumpkin rocks prominently near entrances to signal your participation.
Pro Tip: Seal your painted rock with a clear weather-resistant coating to keep the colors vibrant and protect your message throughout the season.
18. Whiskered Pumpkin Cat Rock: A Charming Halloween Delight

Blend the charm of black cats with festive pumpkins by painting a sweet feline face directly onto your pumpkin-shaped rock. Adding pointed ears, bright eyes, and delicate whiskers transforms the piece into a whimsical pet-inspired decoration. Incorporate soft materials like felt for ears to add a tactile dimension, making it a perfect playful accent for kids’ spaces or areas where your furry friends gather.
Key Design Elements
- Start with a smooth pumpkin-shaped rock painted in warm orange tones for a vivid base.
- Use fine brushes or paint pens to carefully outline cat features such as ears, eyes, and whiskers.
- Attach tiny felt ears with craft glue to create a subtle 3D effect and enhance visual interest.
Pro Tip: Seal your painted rock with a clear matte finish to protect the design and maintain its vibrant colors through the festive season.
19. Timeless Charm: Painted Jack-O’-Lantern Rocks

Capture the spirit of Halloween with charming jack-o’-lantern painted rocks that bring a festive glow to any space. This craft lets you play with various expressions, from cheerful smiles to quirky grins, all set against a vibrant pumpkin-orange base. Adding subtle yellow highlights mimics the warm flicker of a candle, making these rocks a delightful and lasting decoration for your home or garden.
Key Design Elements
- Start with a smooth, rounded rock painted in a rich pumpkin-orange as your canvas.
- Use bold black paint to define classic jack-o’-lantern features like triangular eyes and a broad, toothy smile.
- Add small touches of yellow inside the eyes and mouth to create a glowing, candle-lit effect.
Pro Tip: Seal your finished design with a clear varnish to protect colors and ensure your jack-o’-lantern rocks shine year after year.
20. Vibrant Folk Art Pumpkin Rocks: Timeless Patterns and Colors

Embrace the charm of folk art with pumpkin rocks that showcase vivid hues and balanced, harmonious designs. This style thrives on repetitive motifs like hearts, swirls, and dots, creating a soothing, meditative painting experience. The finished piece radiates warmth and tradition, perfect for adding handcrafted elegance to any space.
Key Design Elements
- Use a fine-tipped brush to carefully create symmetrical patterns.
- Choose a bright color palette to highlight the folk art style’s boldness.
- Incorporate small decorative details such as dots or swirls to fill empty spaces and add texture.
Pro Tip: Plan your design lightly with a pencil before painting to maintain symmetry and precision throughout your pattern.
21. Elegant Floral Designs on Pumpkin Rocks

Bring a charming fusion of autumn and blossoming beauty to your painted pumpkin rocks by adorning them with soft floral patterns. Using gentle hues like sage or pastel tones, you can create an inviting seasonal accent that captures the essence of late summer’s blooms combined with fall’s cozy vibe. These delicate floral motifs turn each rock into a small masterpiece, perfect for adding warmth to your decor or gifting to lovers of detailed botanical art.
Key Design Elements
- Start with a smooth, light-colored base coat to make floral details stand out.
- Use fine brushes to paint intricate petals and leaves for a refined look.
- Incorporate muted and pastel shades to maintain a gentle, autumnal feel.
Pro Tip: Seal your finished floral pumpkin rock with a clear matte varnish to protect the delicate paintwork while preserving its soft, natural appearance.
22. Gleaming Gold Pumpkin Rocks for a Luxurious Holiday Look

Bring a chic sparkle to your Thanksgiving spread with metallic gold painted pumpkin rocks. By using rich gold tones and delicate accents, these stones become dazzling art pieces that elevate your festive décor. Positioned alongside deep-colored linens, they add a sophisticated shimmer that catches and reflects candlelight beautifully.
Key Design Elements
- Choose a high-quality metallic gold paint or foil for a smooth, luminous finish.
- Pair your gold pumpkins with dark blue or charcoal tablecloths to make the color pop.
- Add fine white lines along the pumpkin’s ridges to highlight its natural shape and add dimension.
Pro Tip: Seal the painted pumpkin rock with a glossy varnish to preserve the shine and protect your metallic finish from wear.
23. Enchanting Orange Pumpkin Painted Rocks

Start your fall craft collection with charming orange pumpkin rocks that bring warmth and nostalgia to any space. Select smooth, rounded stones that resemble the shape of real pumpkins, then layer shades of orange to create depth and realism. Finish with delicate green vines or a bold brown stem to add a touch of authentic autumn flair.
Key Design Elements
- Choose a smooth, oval-shaped stone to mimic the natural contour of a pumpkin.
- Use multiple shades of orange paint, blending from light to dark, to achieve a dimensional look.
- Add fine details like a curled green vine or a textured stem for added realism.
Pro Tip: Before painting, lightly sand the stone’s surface to help the paint adhere better and create a smoother finish.
24. Gleaming Glitter Pumpkin Rock for a Dazzling Fall Display

Give your garden a touch of sparkle that comes alive as the sun sets with a glitter-coated pumpkin rock. This vibrant project is perfect for those who enjoy adding bold, radiant accents to their outdoor decor. Start by painting your pumpkin rock in classic autumn hues, then layer on a generous coating of shimmering glitter and seal it to preserve its luminous glow.
Key Design Elements
- Choose a fine glitter in shades like orange, gold, or bronze for a rich, glowing effect.
- Apply paint in thin layers to create a smooth base before adding glitter.
- Use a high-gloss clear sealant to lock in glitter and protect your design from weather.
Pro Tip: Work in a well-ventilated space and apply the sealant in light, even coats to avoid dulling the sparkle while ensuring durability.
25. Cosmic Pumpkin Rock: A Stellar Twist on Fall Decor

Elevate your fall decorating with a galaxy-inspired pumpkin rock that dazzles with celestial hues. By blending rich purples, deep blues, and vibrant pinks, you can mimic the swirling beauty of a distant nebula. Finish with scattered white paint dots to mimic twinkling stars, creating an eye-catching piece that’s ideal for space lovers and adds a futuristic vibe to your autumn display.
Key Design Elements
- Use a sponge or blending brush to smoothly merge colors for a nebulous effect.
- Apply white paint with a toothbrush or stiff brush to flick tiny star-like speckles.
- Seal your finished rock with a glossy varnish to enhance the cosmic shine and protect your art.
Pro Tip: Allow each color layer to dry slightly before blending to prevent muddying and maintain vivid galaxy tones.
Conclusion
There’s something truly magical about bringing a little handmade charm into your fall decor, and painting pumpkin rocks is the perfect way to do just that. Whether you prefer classic orange hues or whimsical designs, each brushstroke is a chance to slow down, tap into your creativity, and celebrate the cozy spirit of the season. So grab your paints, gather some smooth rocks, and let your imagination run wild—your autumn home is about to get a whole lot more enchanting!
Don’t forget to share your pumpkin rock masterpieces with friends, family, or right here in the community! Seeing your unique creations not only inspires others but also spreads the warmth and joy that this simple craft brings. Happy painting, and may your fall be filled with colorful moments and heartfelt creativity!


